
1.Overview
1.1.App Features
The Automated coupons app includes the following features:
- Generate WooCommerce Targeted Coupons
- Personalize Coupon Format
- Control Coupon Usage with Redemption Limits
- Incentivize Coupons with Different Discount Types
- Automate WooCommerce Coupons Send-outs
- Include/Exclude Products, Categories and Brands in coupon redemption
- Create Coupon Properties in HubSpot
- Target Marketing Campaigns through HubSpot
- In-app Monitoring and through HubSpot Reporting & Analytics
2.Setup
- Install the Automated Coupons app from the HubSpot Marketplace, click on the install button and the app will be installed.
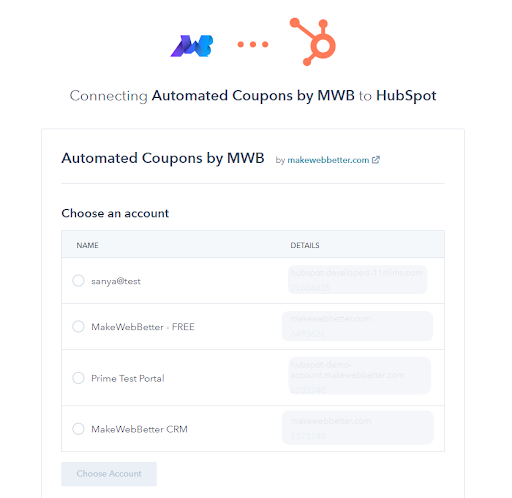
- Then, choose your HubSpot account.
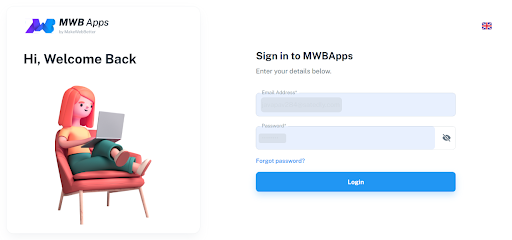
- On the next page, connect the Automated Coupons app with your desired HubSpot portal. Finally, click Login.
- On the next page, connect the Automated Coupons app with your desired HubSpot portal. Finally, click Login.
3.Apps
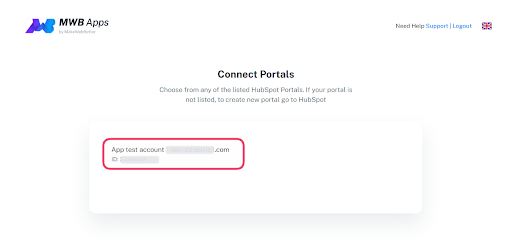
- After this, you will be redirected to the All Apps page. Here, you can choose to add another HubSpot portal. (Make sure to authorize your connected HubSpot account for portal usage).
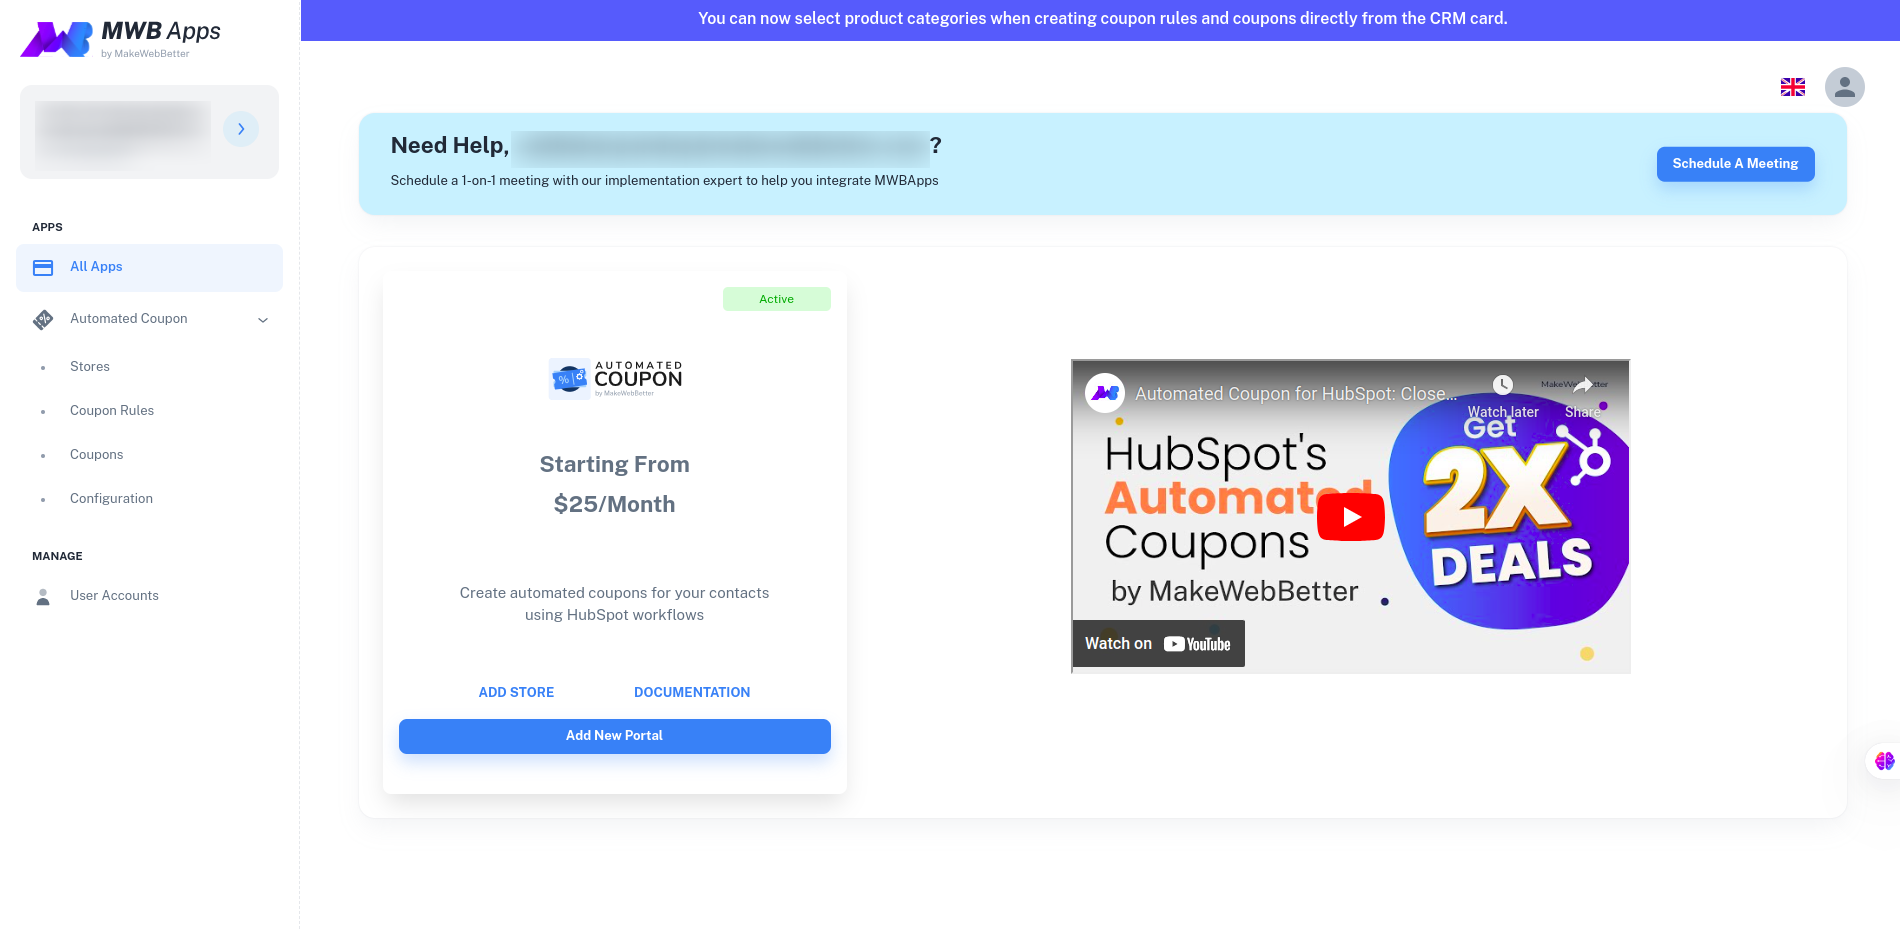
The next step is to connect your WooCommerce store and enjoy automated coupons for WooCommerce.
4.Automated Coupons
Under this section, you will have the complete suite of tools for WooCommerce automated coupons configuration and it includes 4 major tabs, namely—Stores, Coupon Rules, Coupons, and Configuration.
4.1.Stores
The first step is to connect a store. Click on the Stores button to start connecting the WooCommerce store with the Automated Coupon app.
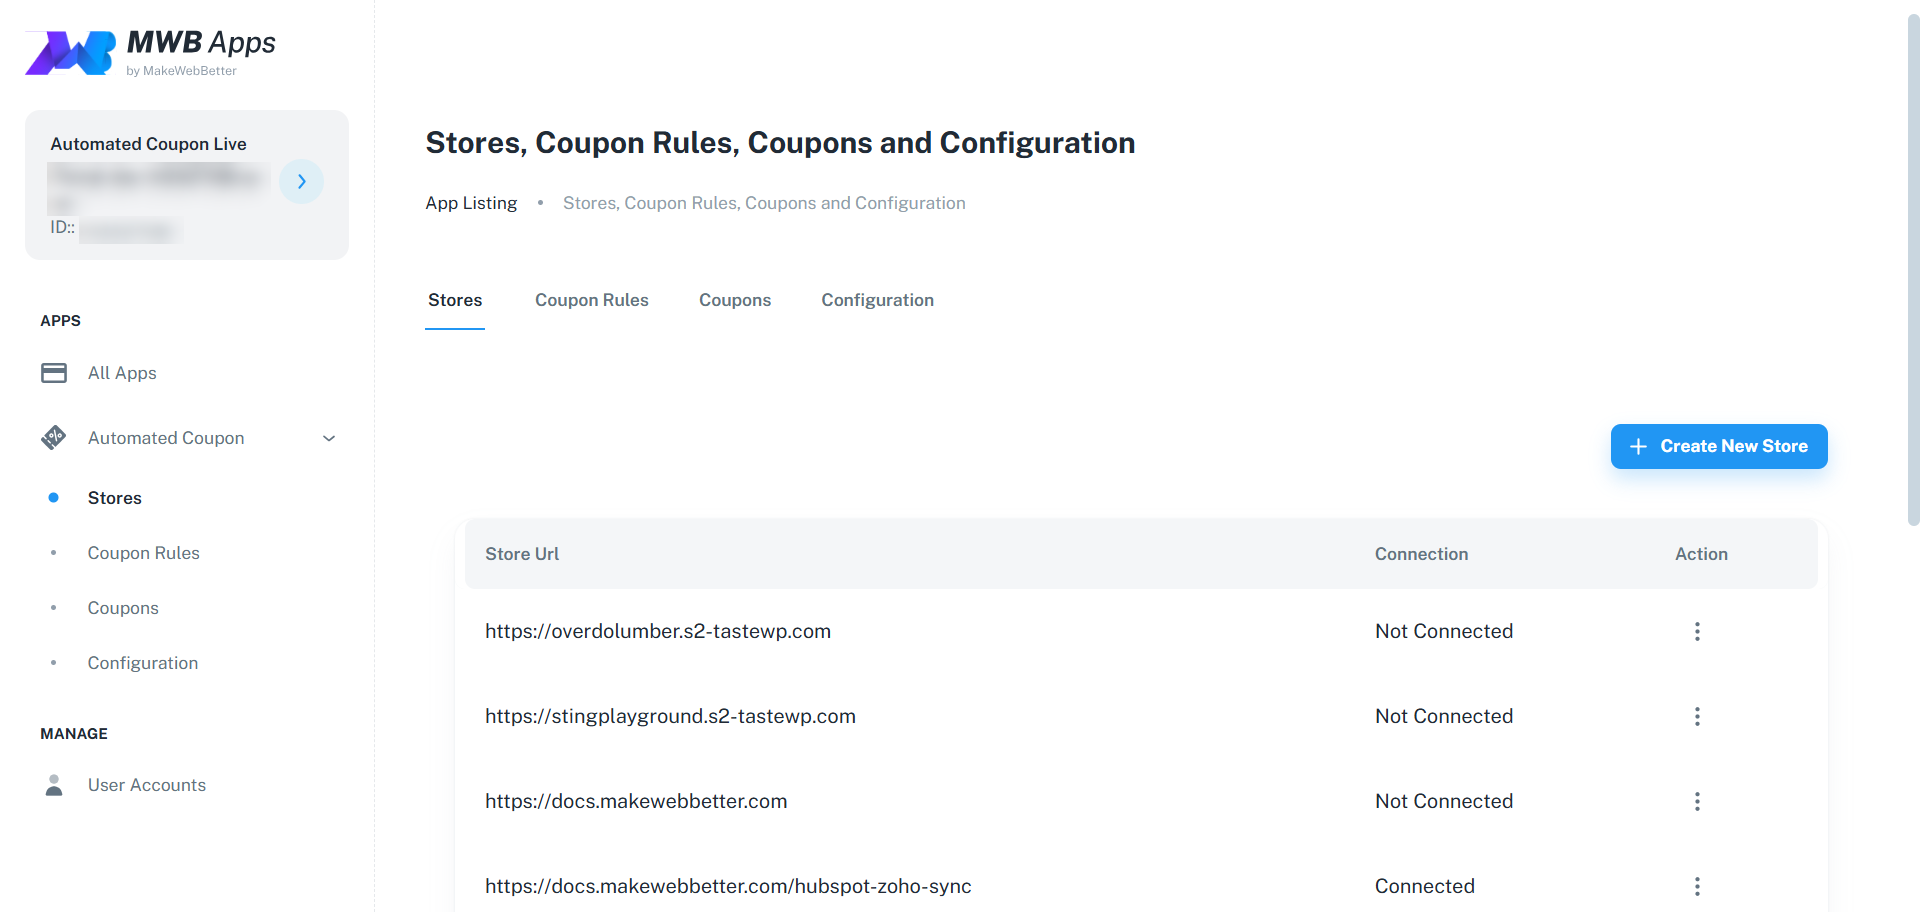
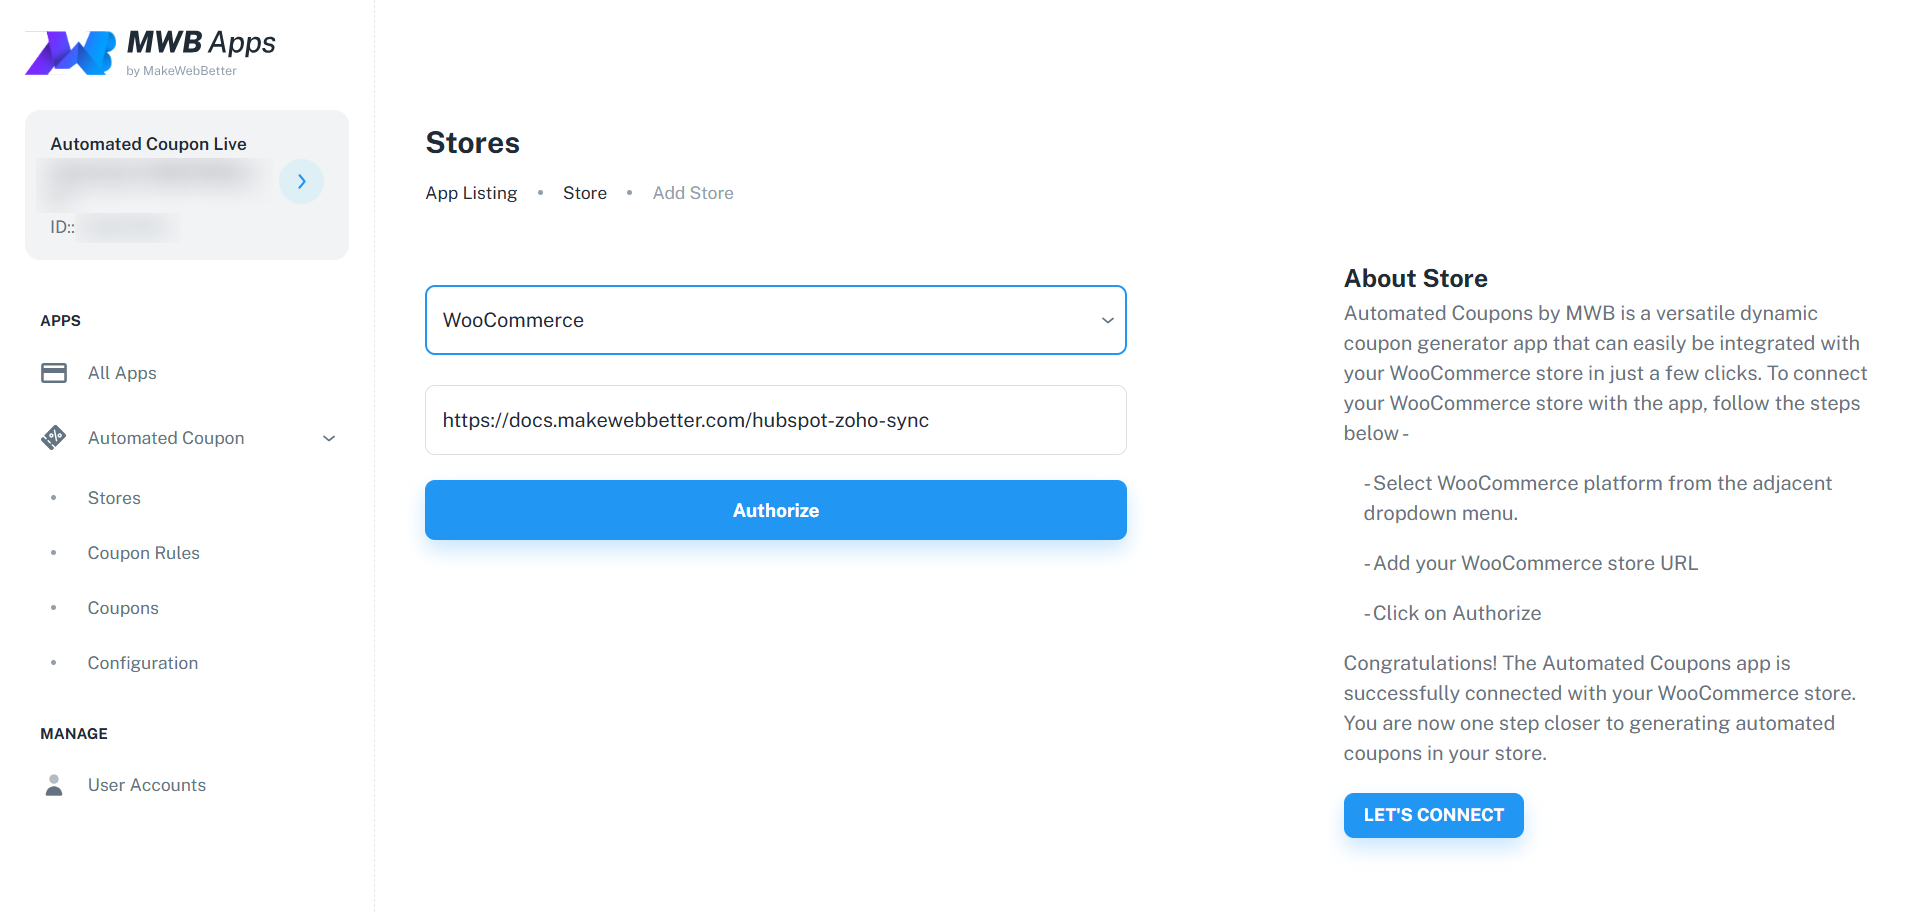
4.1.1. Create New Store
Herein, you have the option to add your WooCommerce store.
- Click on Create New Store.
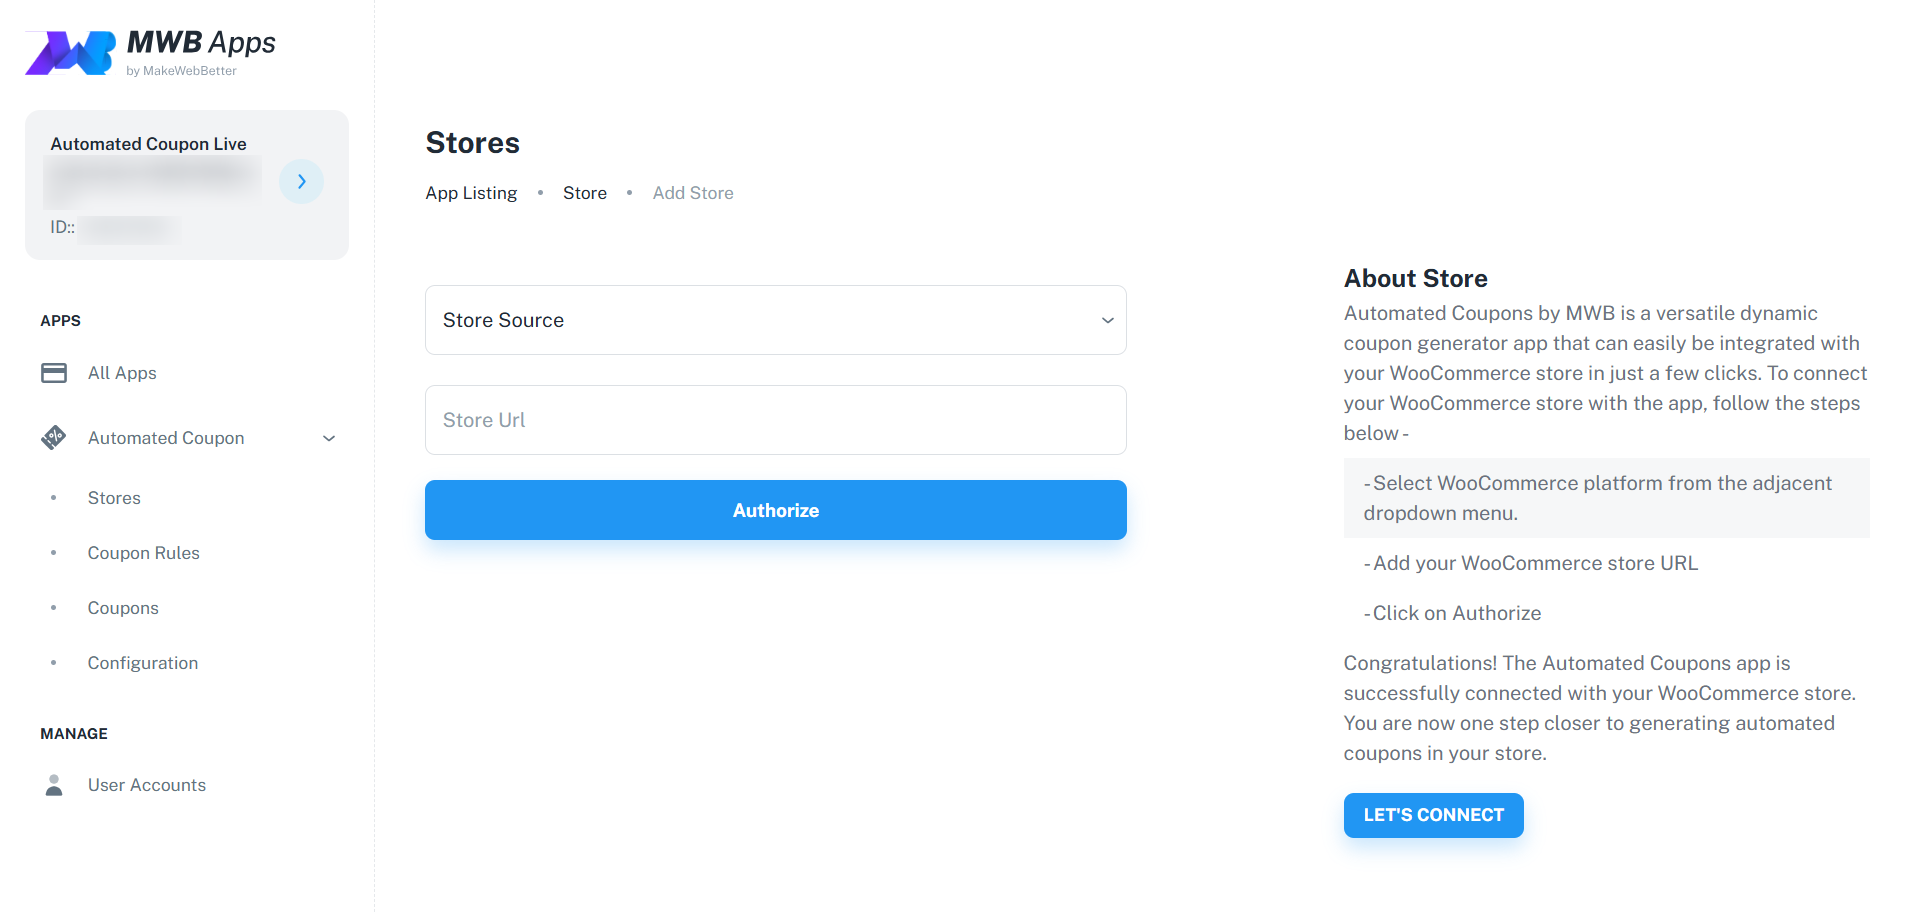
- Select WooCommerce from the drop-down. (Currently, you have the store integration option for WooCommerce automated coupons, but you can connect with us if you require a custom store integration with Automated Coupons.)
- Then, enter the store URL in the next field.
- Lastly, click Authorize and follow the process.
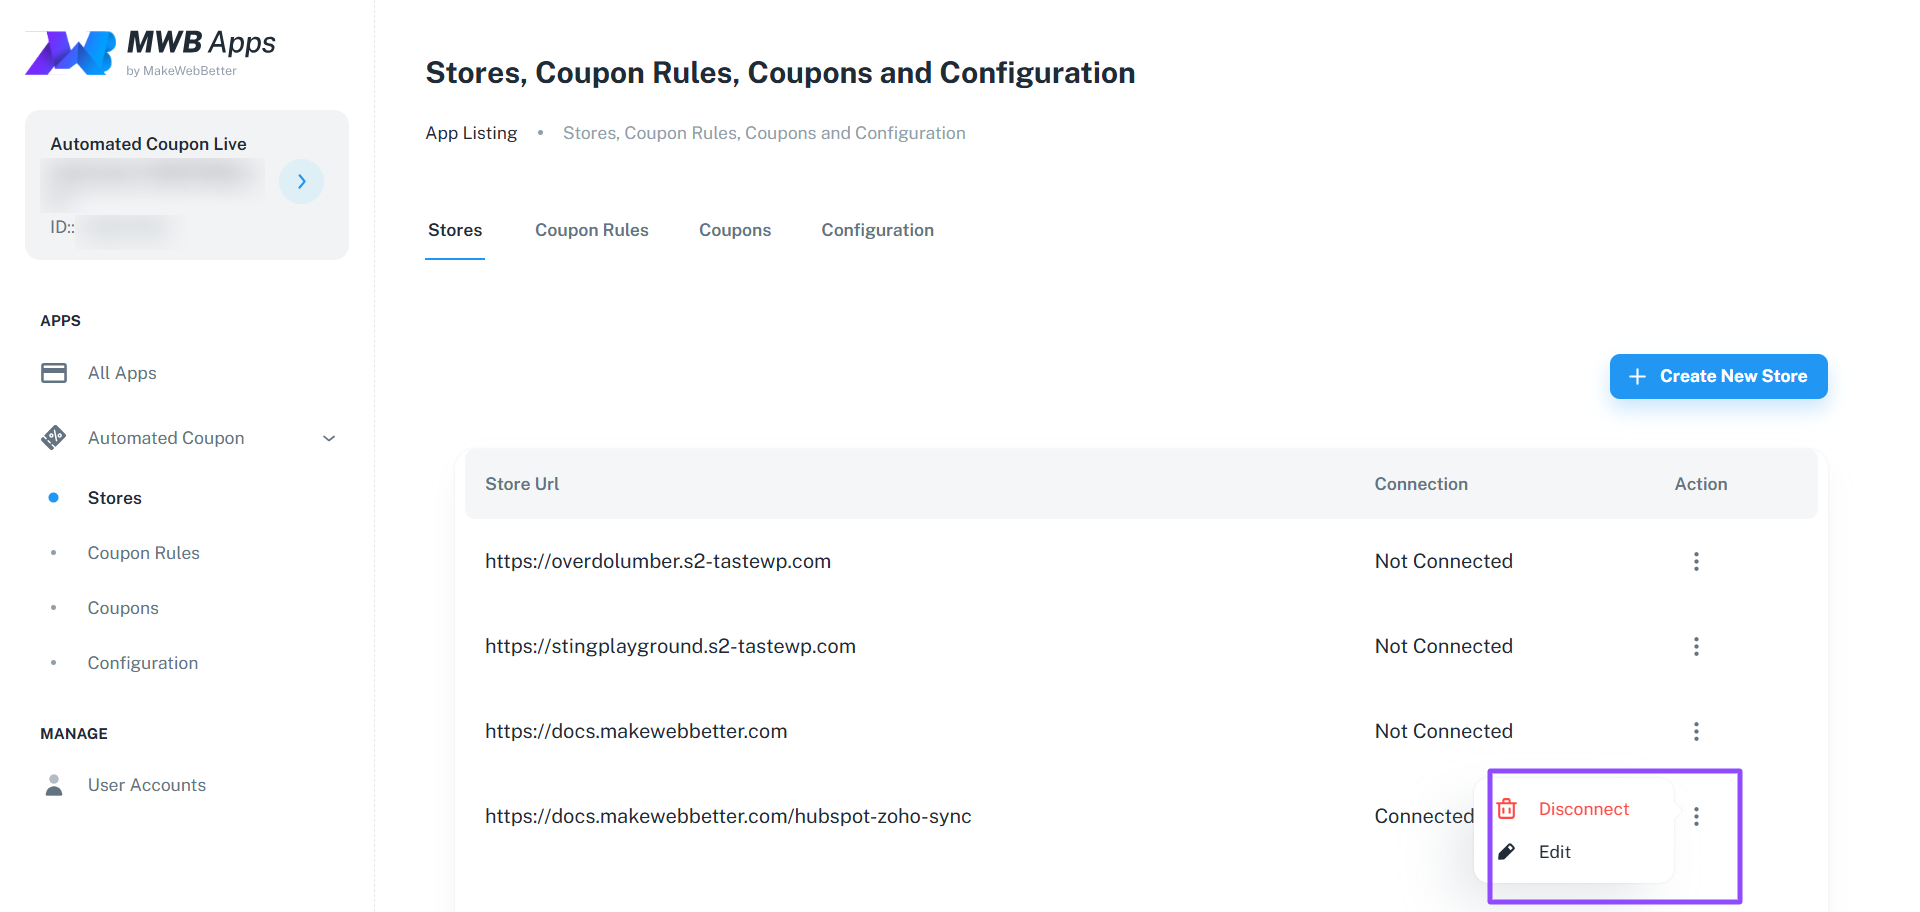
4.1.2.Edit Connected Store
With the Automated Coupons for WooCommerce app, you can also edit or disconnect the connected Woo store.
-
- Click on the ellipsis icon (three dots) next to the store listing. Click on the Edit option to make the changes or Disconnect to remove the connected store.
- Update the required changes and Authorize to proceed.
4.1.2.Coupon Rules
In this section, all the defined WooCommerce coupon rules are listed along with their descriptions and the option to edit or delete them.
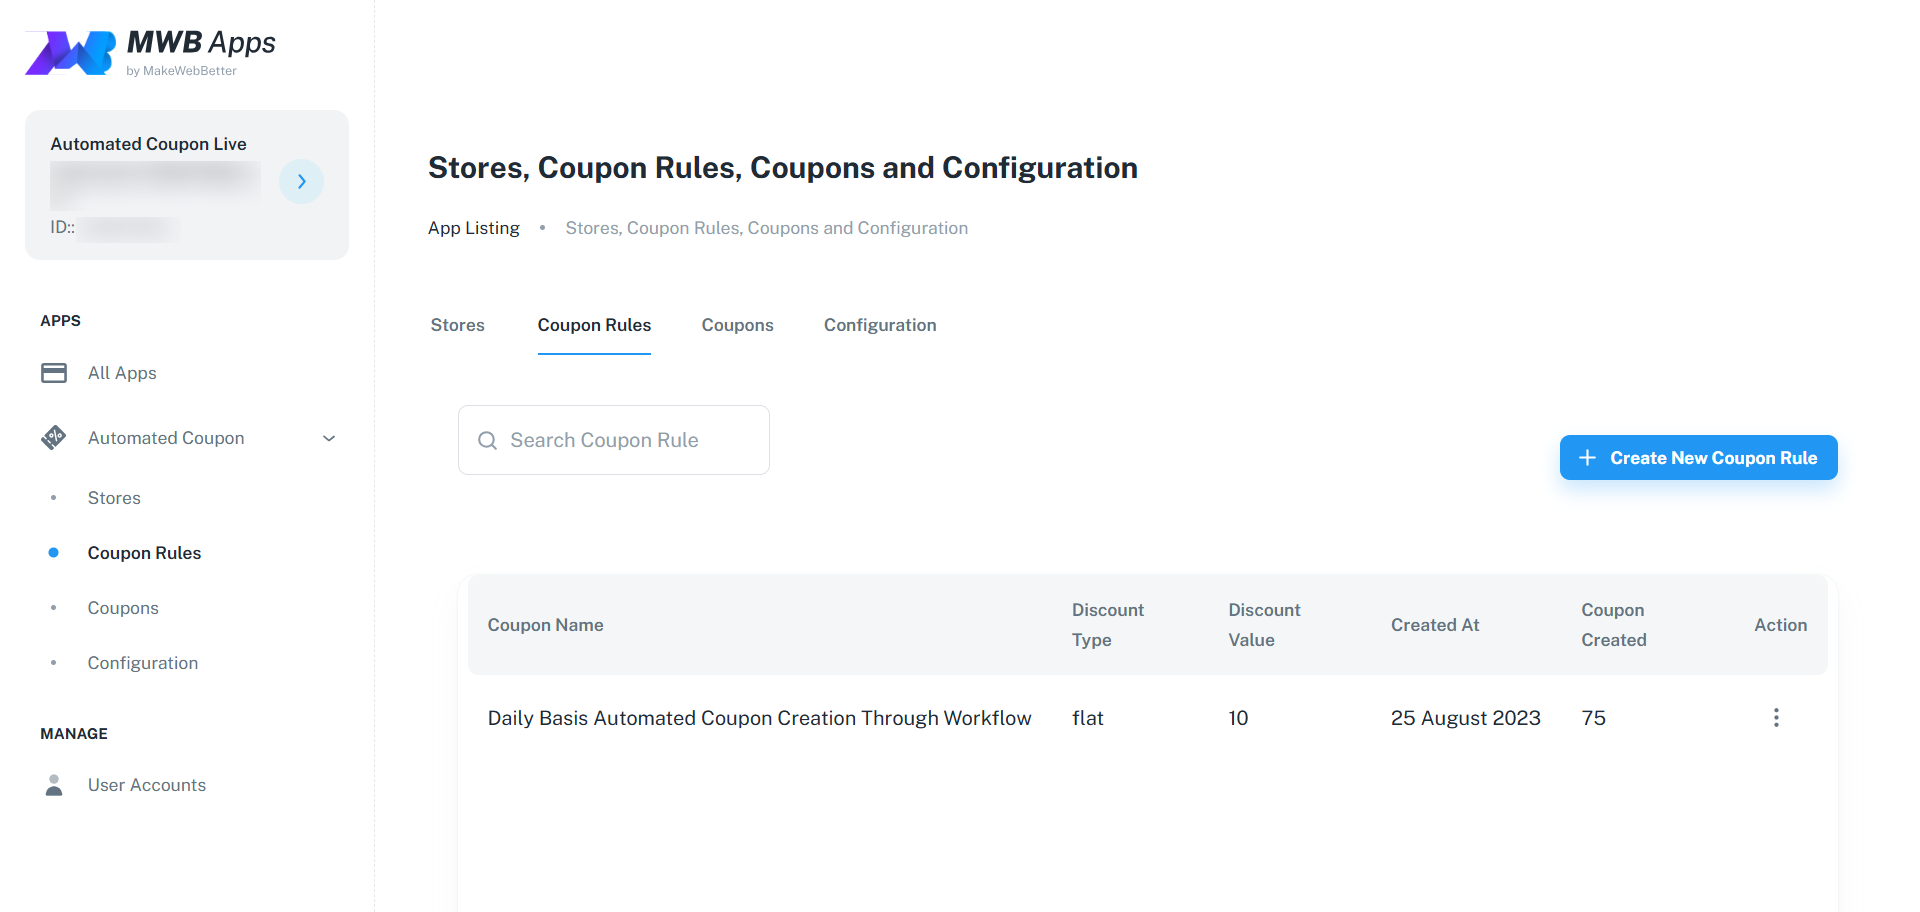
4.1.2.1.Create New Coupon Rule
You can create multiple WooCommerce coupon rules once you gain access to the Automated Coupons app. Create coupon rules acts as a WooCommerce coupon code generator.
To create a coupon rule, click on the Create New Coupon Rule button.
- Add coupon name and select the connected store.

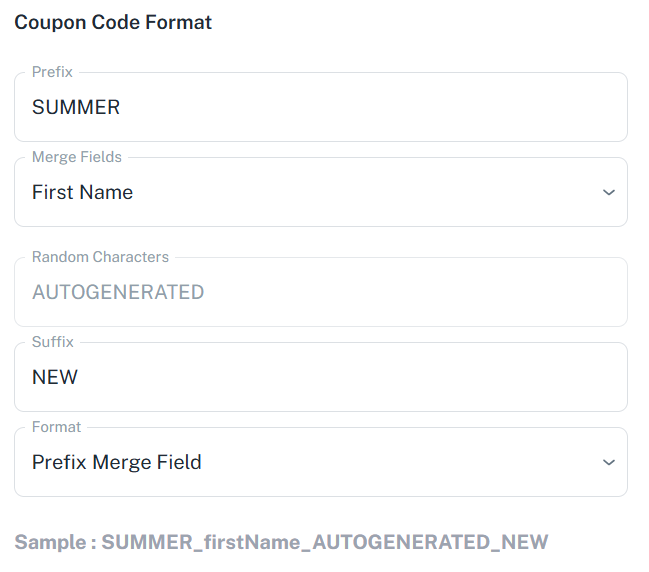
- Define coupon code format
- Prefix: Preset defined characters of the coupon.
- Merge Fields: You can merge User First Name, Last Name or Email to personalize the generated coupon.
- Random Characters: Autogenerated text for uniqueness.
- Suffix: Preset defined characters of the coupon.
- Format: Sequence of above four.
-
-
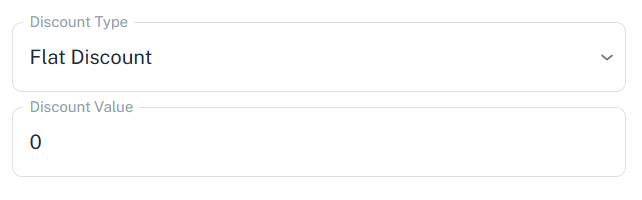
- Discount type
- Discount Type: Percentage or Flat.
- Discount Value: Numerical value.
- Discount type
-
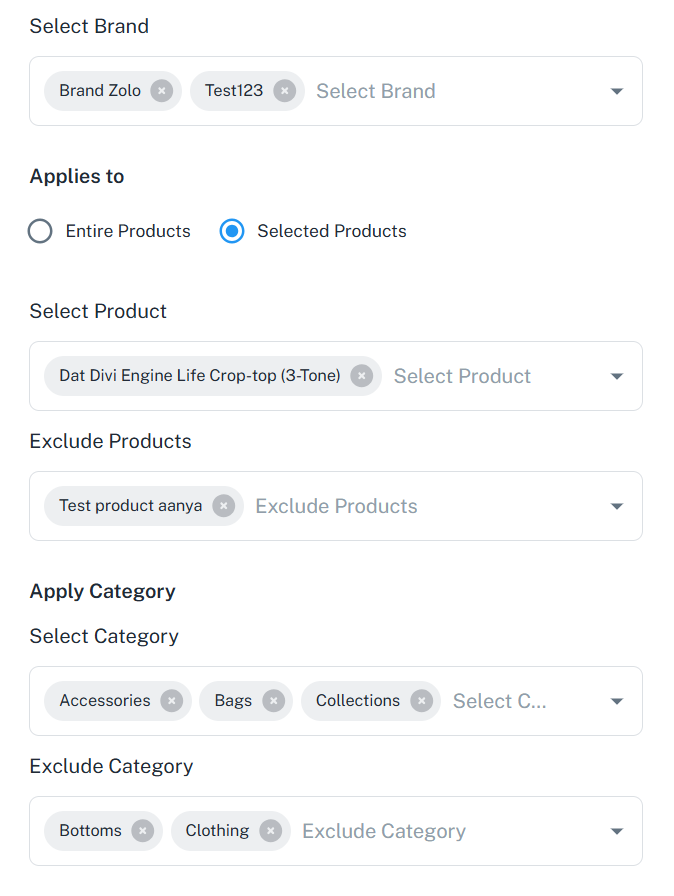
- Select product associations (brand, category or certain product) to which the coupon applies:
- Select Brand.
- Choose Entire Products (Sitewide) or Selected Products.
- Choose Select Products or Exclude Products from the drop-down.
- Apply Category.
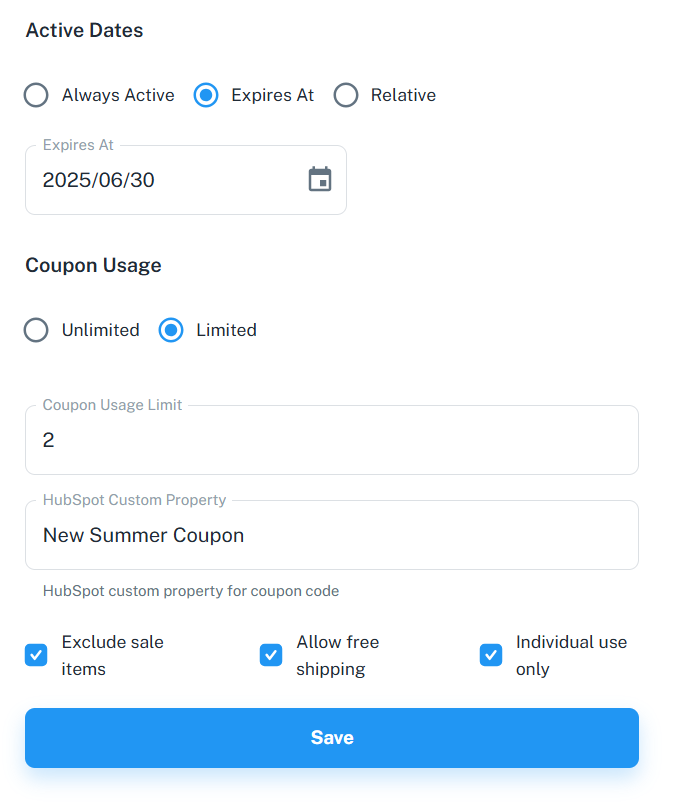
- Select Active Dates & Coupon Usage
- Always Active: until coupon rule is changed.
- Expires At: Select Date of Expiry.
- Relative: Enter number of days the coupon will expire.
- Coupon Usage: Number of times the coupon can be used (Unlimited or Limited).
You can also create a custom property for the coupon rule, which can be used for automation, email, campaigns, reporting, and more within HubSpot.
Next, choose to exclude sale items, allow free shipping, and restrict it to individual use only.
Once, you have filled all the fields. Click Save. You will be able to access this coupon rule in the respective Coupon Rules tab, where you can edit or delete the coupon rules. Now, the coupon rule will generate automated coupons for WooCommerce store.
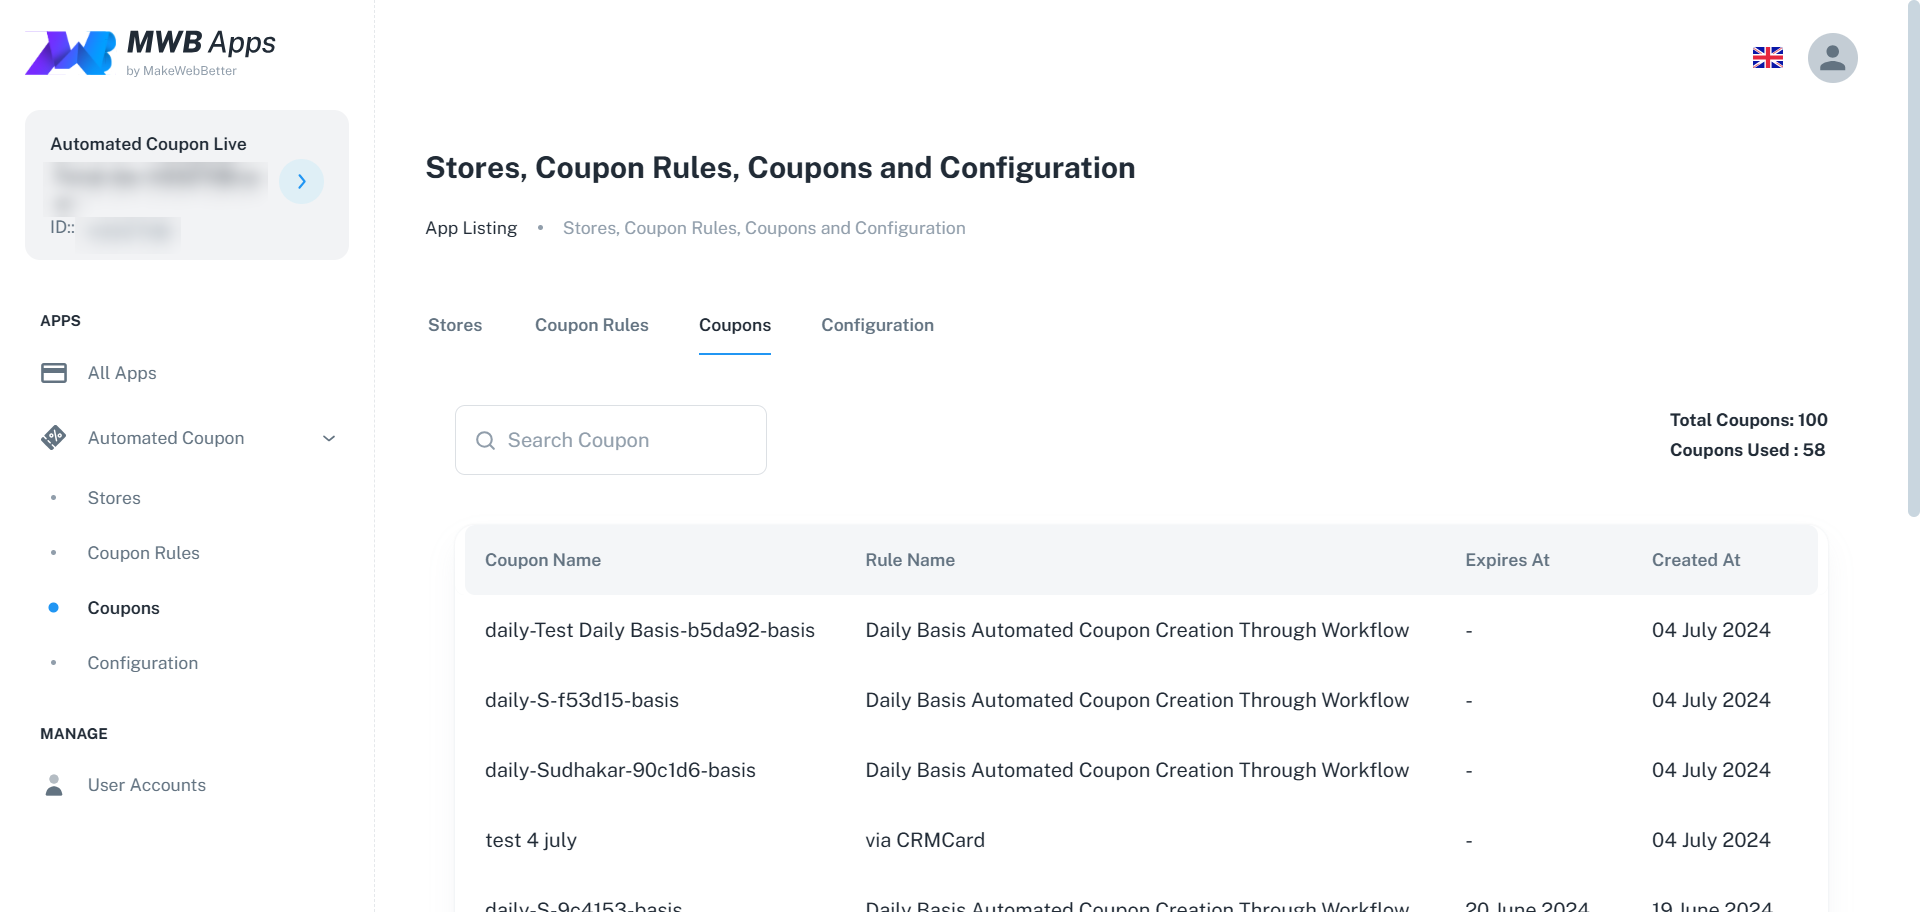
4.1.2.3.Coupons
This section lists all the coupons generated for your WooCommerce store based the coupon rules you created on the Automated Coupons app. The list details about number of total coupons offered in your subscribed package and the number of coupons used.
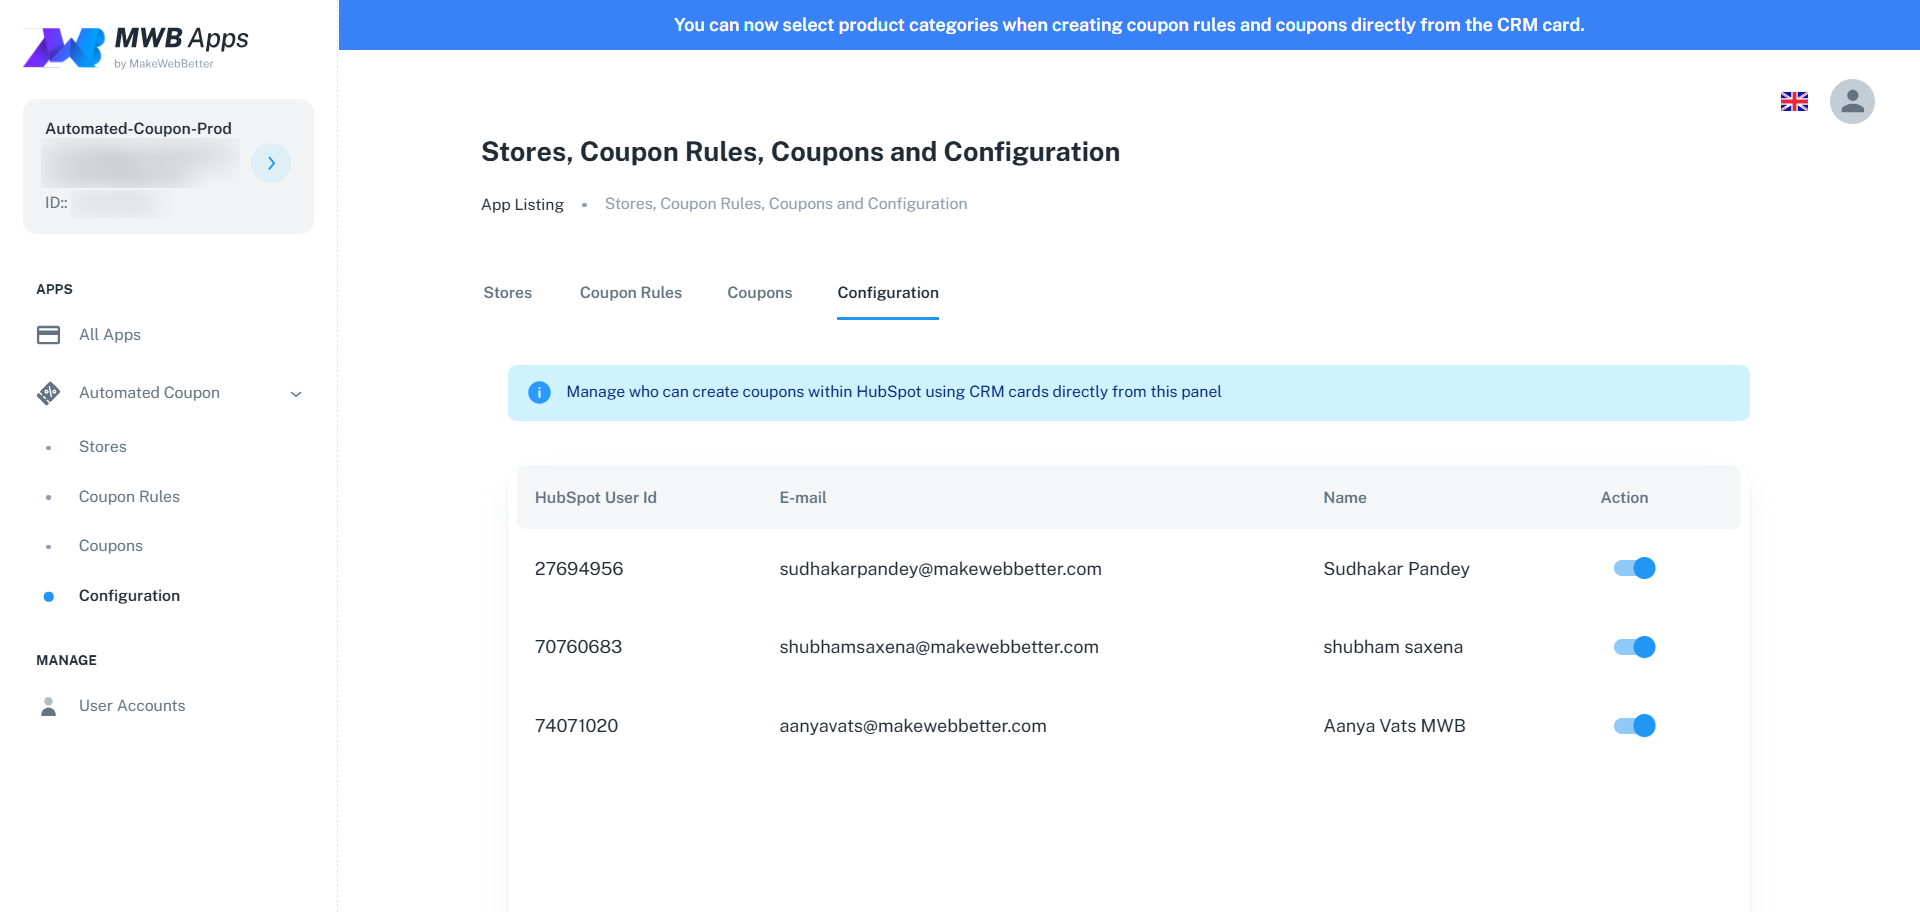
4.1.2.4.Configurations
The Configurations tab showcases all the accounts linked to the HubSpot account, using which you have signed up for the Automated Coupons app. Here, you can manage and authorize role-based access to create coupons for HubSpot contacts using the Automated Coupons app App Card.
The process to create a HubSpot coupon for contacts using an app card is thoroughly explained later in this documentation. Find the section “Generate Coupons using HubSpot App Card” below.
Note: The HubSpot contact owner will be able to create coupons using the Automated Coupons App Card without requiring any authorization.
5.Manage
5.1.User Accounts
5.1.1.General
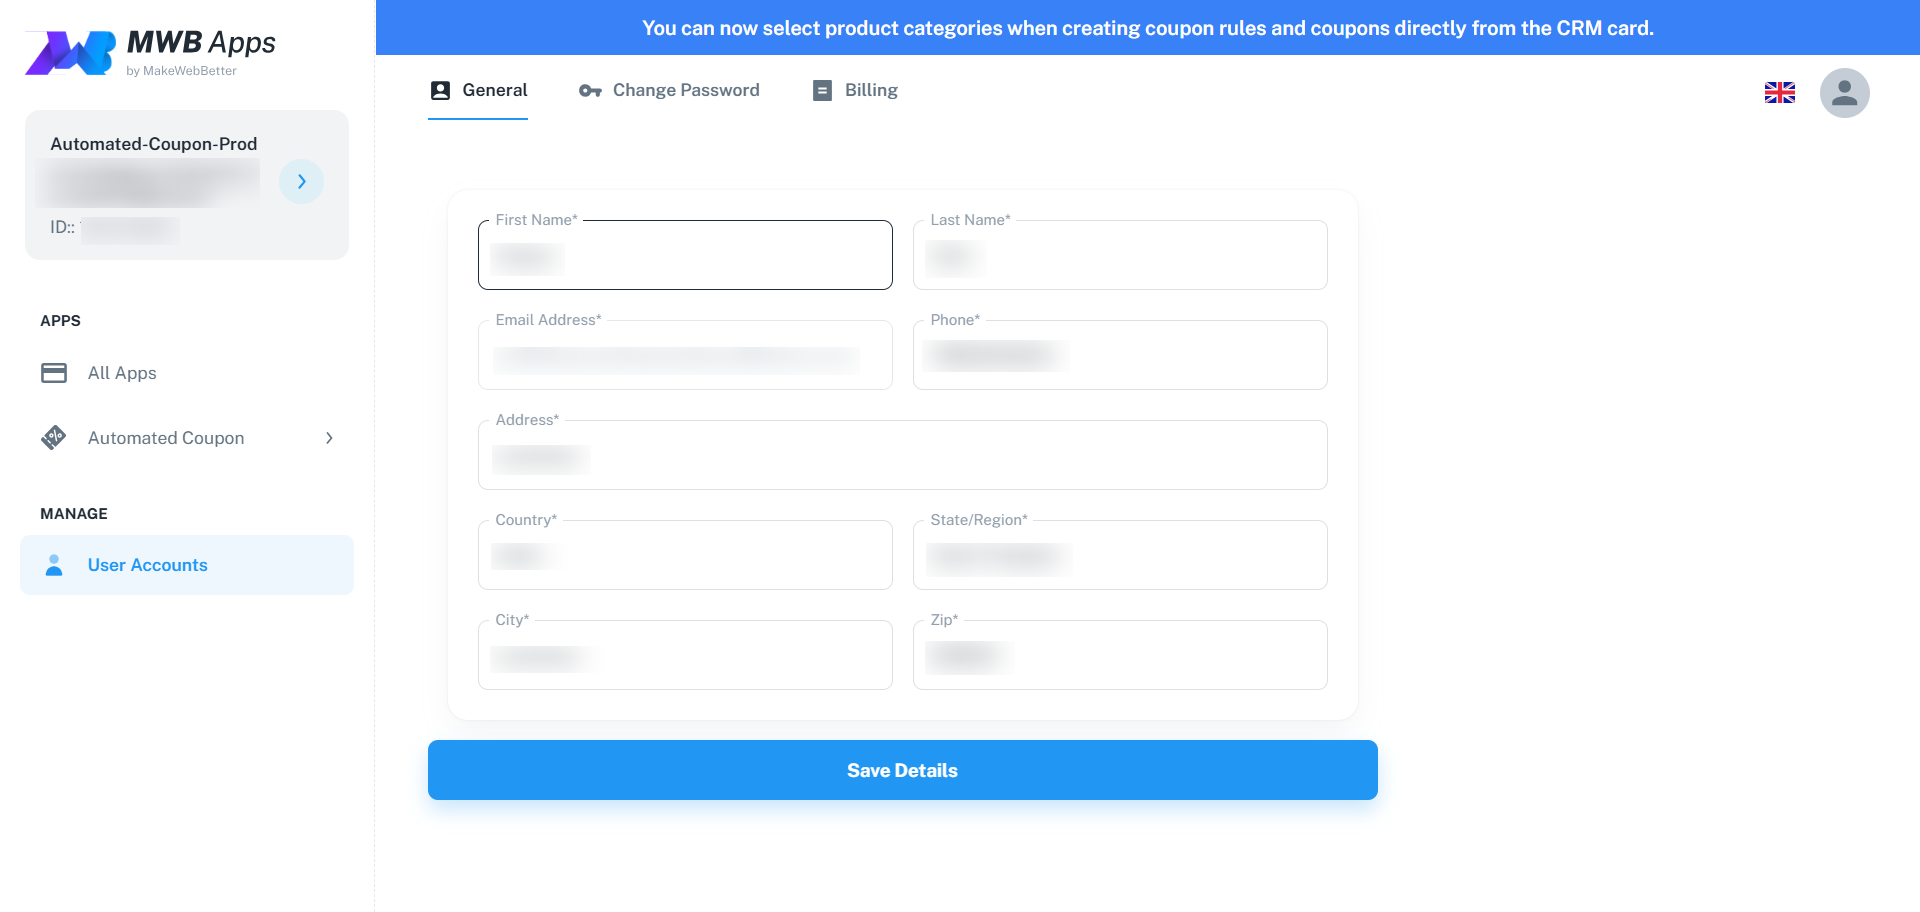
You can update or modify the basic details of your account from this section. The editable fields include –
- First Name
- Last Name
- Phone
- Address
- Country
- State/Region
- City
- Zip Code
Click on Save Details when done.
5.1.2.Change Password
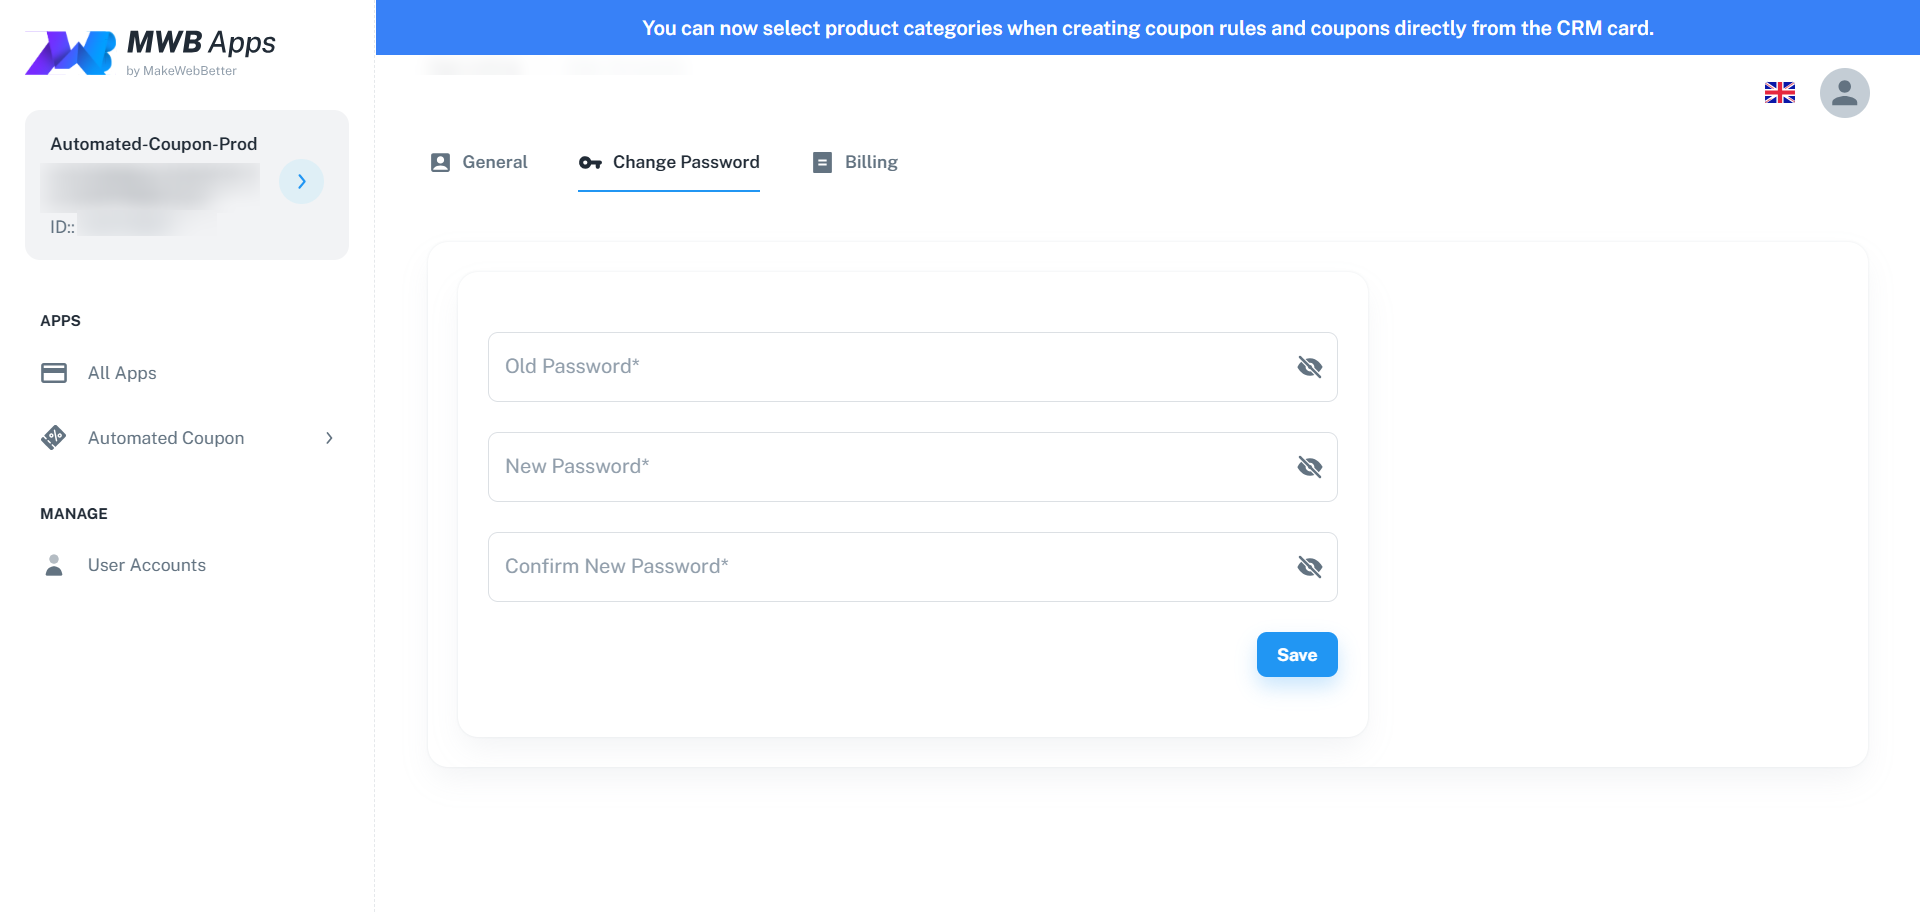
You can manage your account password here with the Automated Coupons for WooCommerce app. Go to User Account and switch to Change Password. Enter your existing (old) password and then create a new password, followed by a confirmation in the next field.
5.1.3.Billing
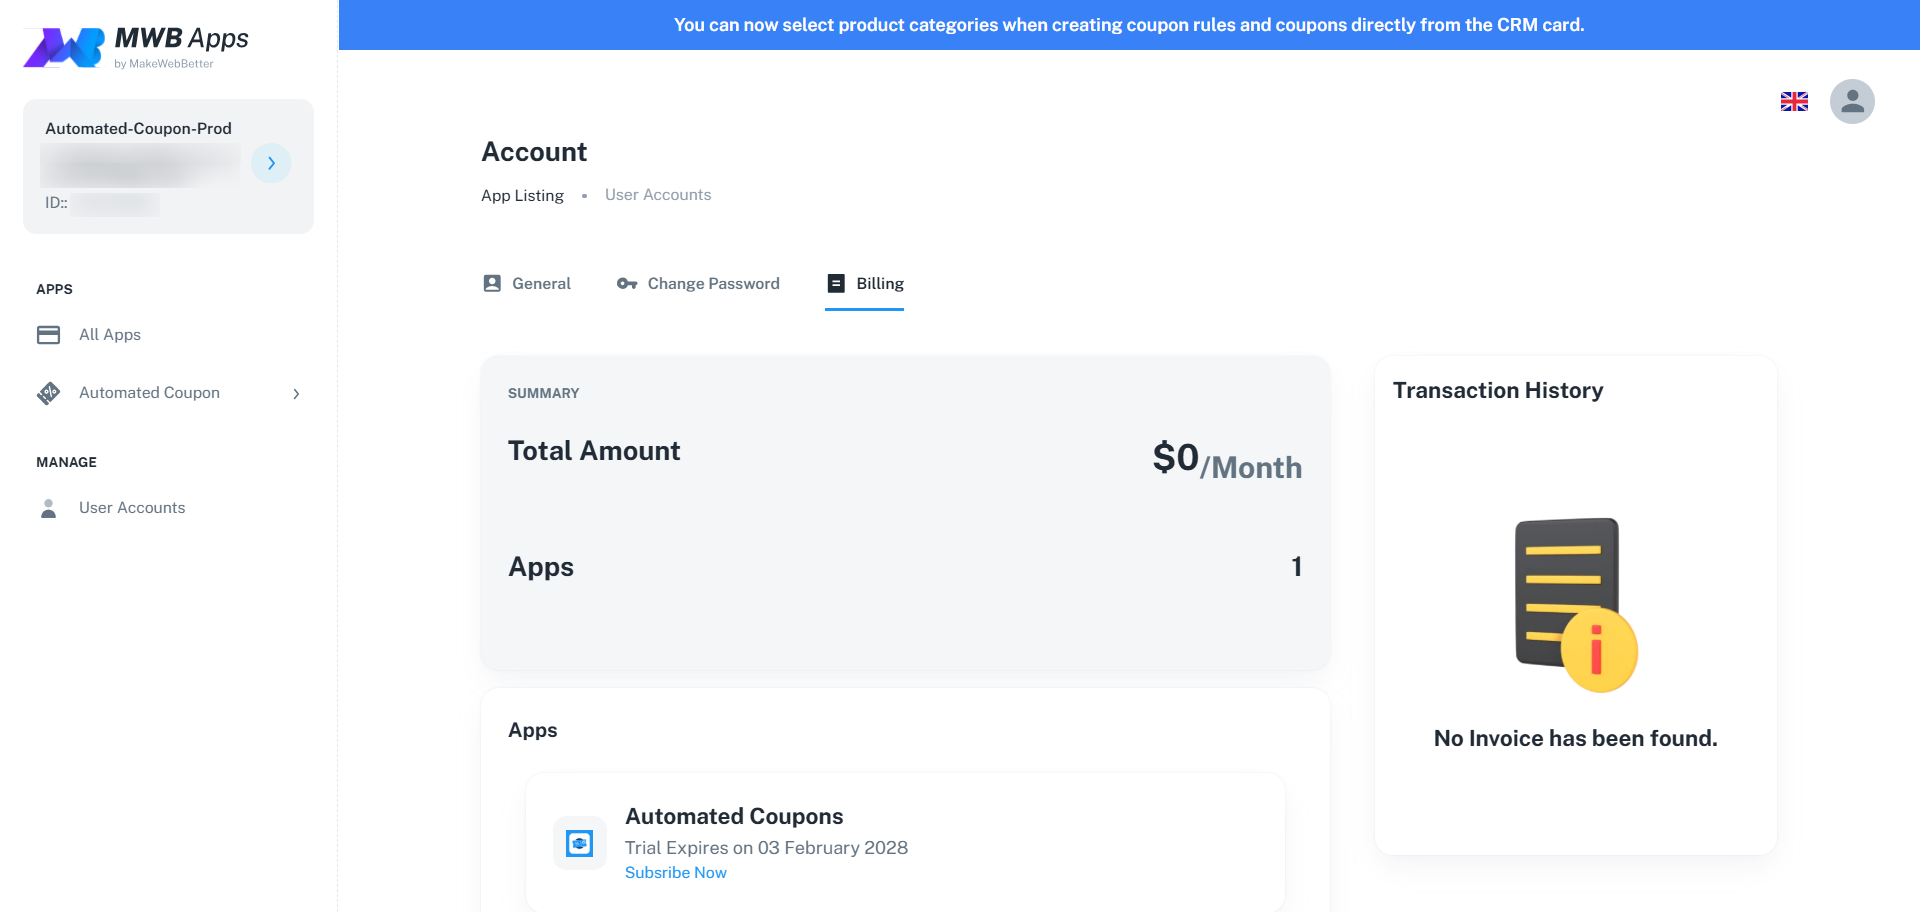
In the billing section, you can review your active plans along with your transaction history and the option to cancel or upgrade your subscription plan.
6. How to Generate & Automate Coupon Send-outs?
With Automated Coupons for WooCommerce by the MakeWebBetter app, you can generate unique and personalized discount coupon codes for your WooCommerce store in minutes.
6.1.Generate Automated Coupons with HubSpot Workflows
Once the app is connected with your WooCommerce store and HubSpot portal set up coupon rules. This system works as a WooCommerce coupon code generator. The next step is to create coupon sendout Workflows in HubSpot. For this,
- Go to your HubSpot portal > Workflows > Create Workflow > From Scratch.
- Proceed with Contact-based Workflow.
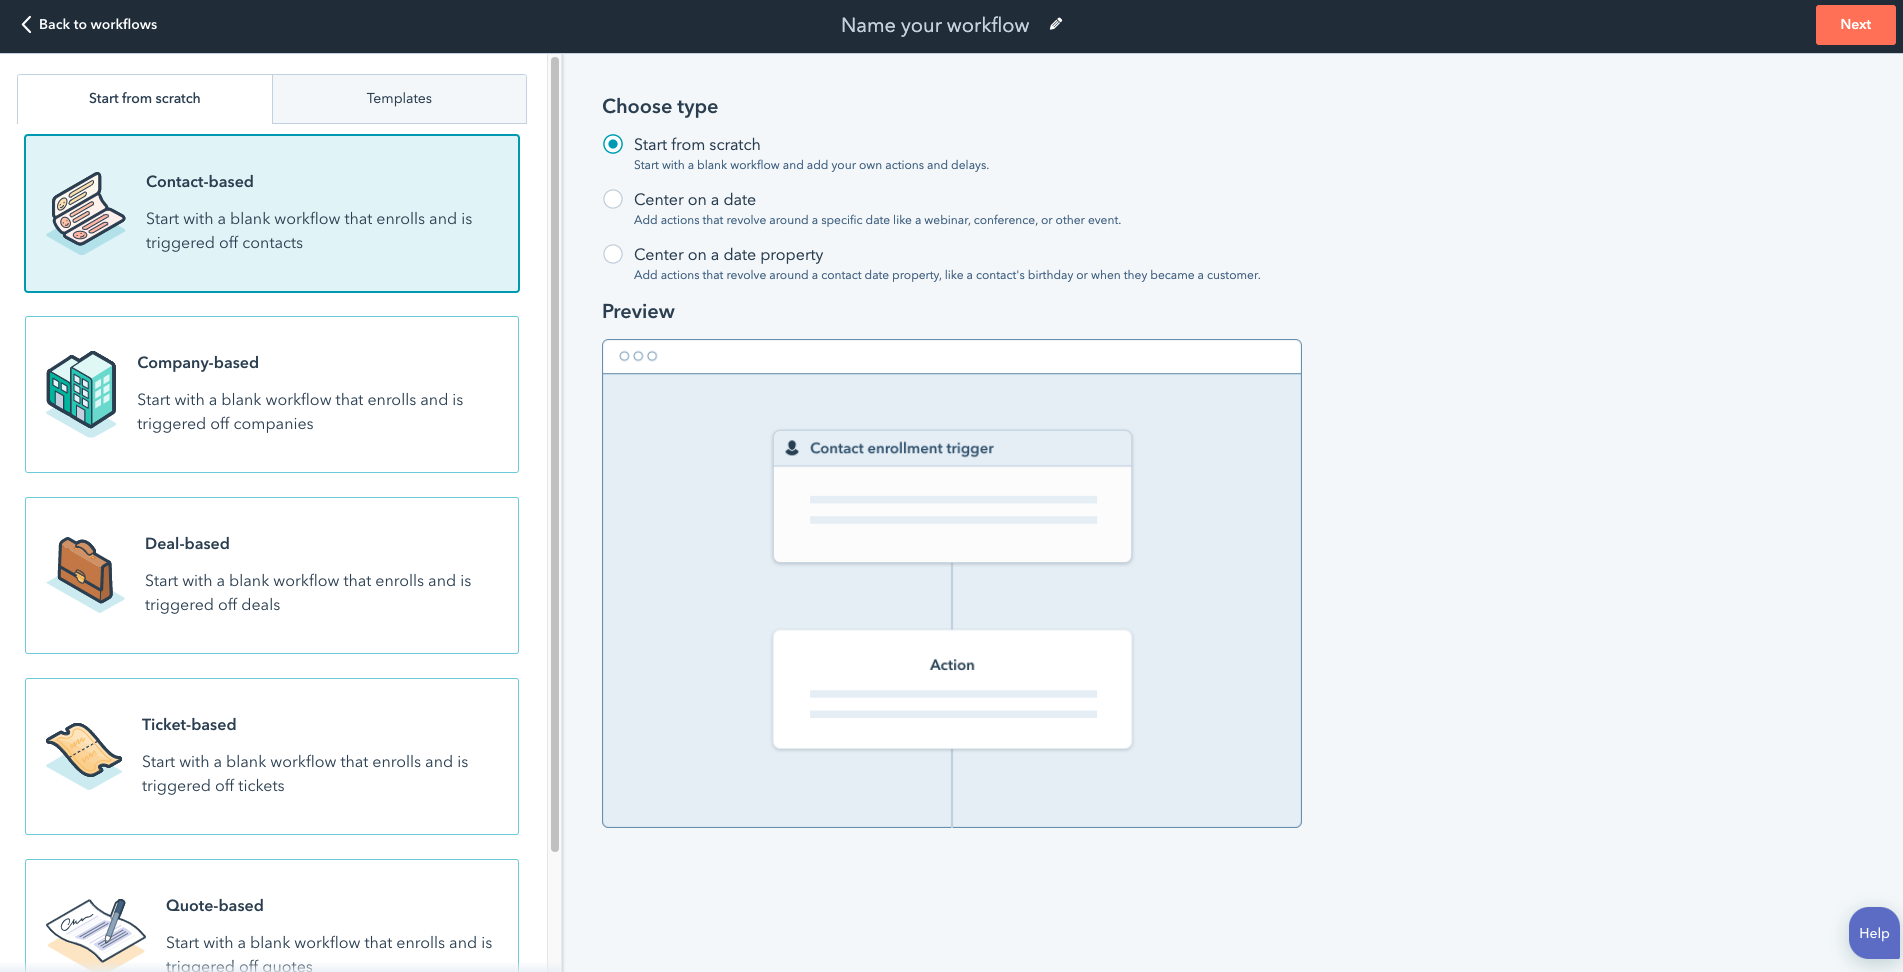
- Reset Name for your Workflow.
- Select Contact Enrolment Triggers with filter and click on Apply Filter.
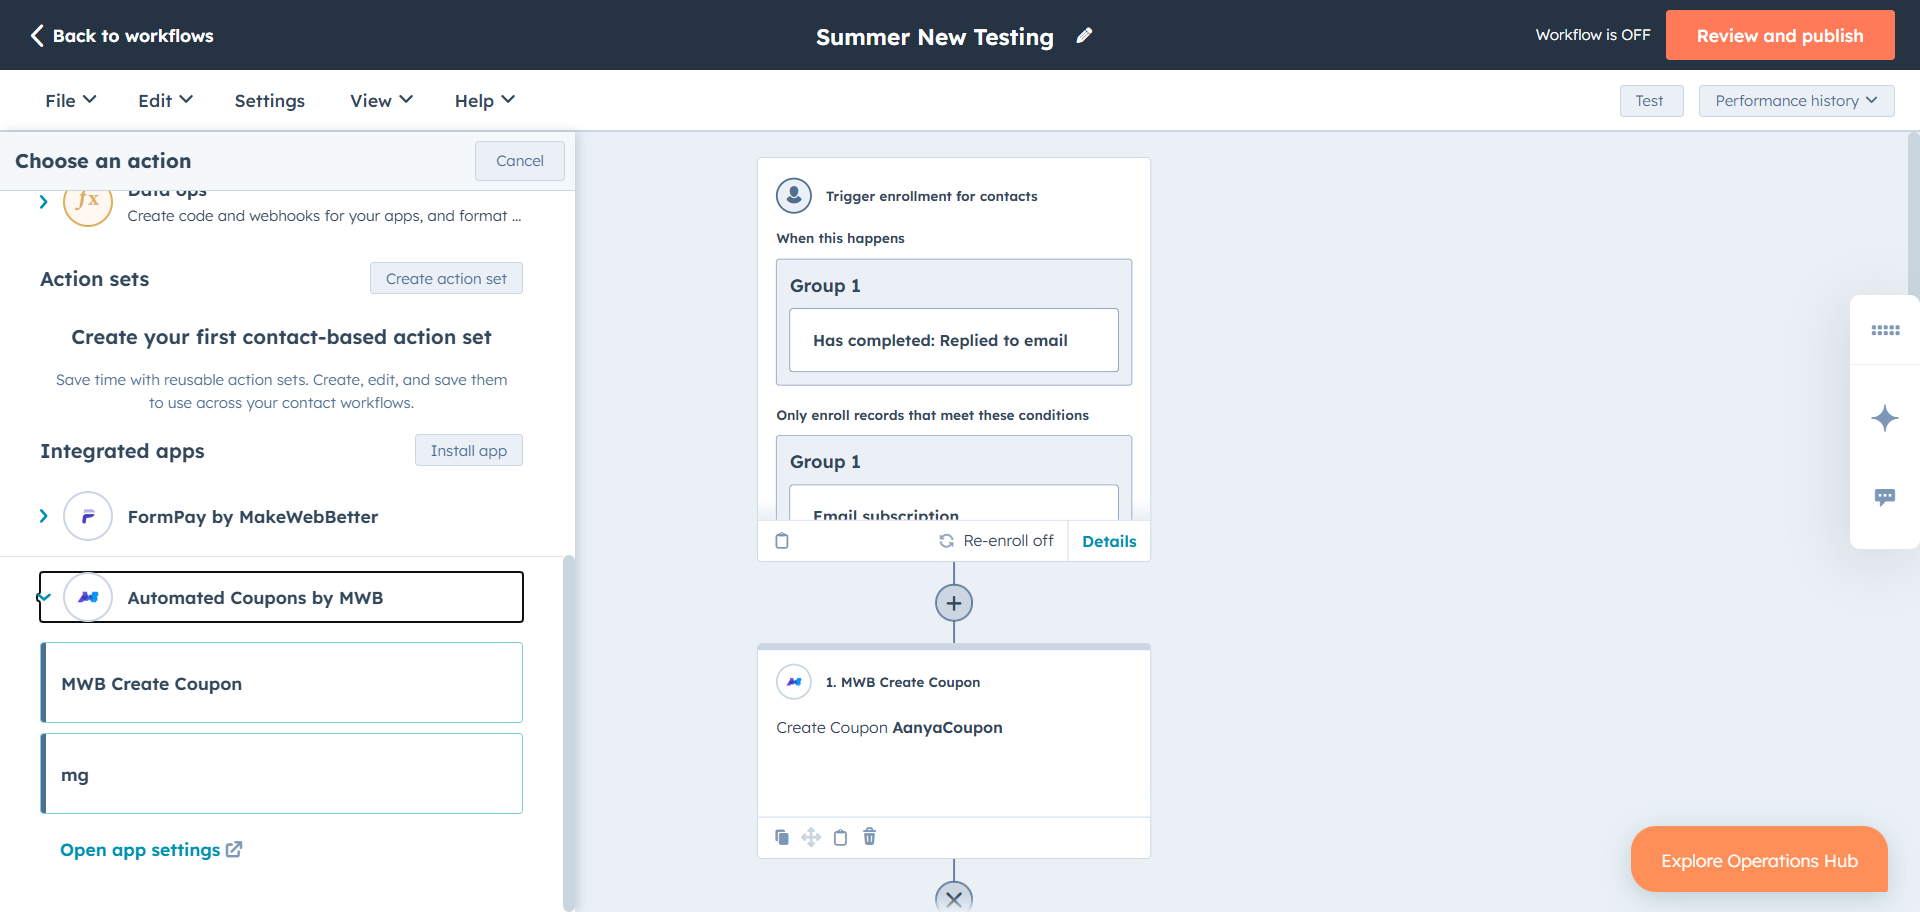
- Next, choose the workflow action. In the list of actions, you’ll spot the “MWB Create Coupon” action under Automated Coupons by MWB.
- Select this action, then choose the WooCommerce coupon rule you created earlier from the drop-down list, and click Save.
Moreover, you can choose the following Contact Enrollment Triggers under Contact Properties while creating a HubSpot workflow that suits your purpose.Now, you have a WooCommerce coupon code generator in HubSpot.
6.2.Generate Coupons using HubSpot
App Card
Automated Coupons has a functionality within HubSpot to create contact-specific coupons. Using the HubSpot App Card feature, you can create HubSpot automated coupons for WooCommerce contacts.
The app card is simply an easy-to-access section, accessible as tabs in the timeline events (Overview) of the HubSpot contacts records. The Automated Coupons app leverages this setup to enable you to create coupons, specifically for your HubSpot contacts.
Previously, the ‘Create Coupon’ functionality was present in the CRM Cards section. However, the Classic CRM Cards are to be discontinued by HubSpot. This deprecation process will begin June 16, 2025; no new apps in the HubSpot App Marketplace will be allowed to include Classic CRM Cards, and developers will no longer be able to add new ones to the HubSpot UI.
By October 31, 2026, existing apps that use Classic CRM Cards must be migrated to the newer, more flexible App Cards built with React.
6.2.1.How to enable the Automated Coupons App Card in HubSpot?
To create coupons and access the Automated Coupons App Card feature in HubSpot, you must first configure the setup discussed below.
In the Automated Coupons App,
- First, make sure you have connected your HubSpot account & portal with the Automated Coupons app.
- Then connect your store with the app. And you will be able to view the Automated Coupons’ App Card feature in your contact.
In HubSpot,
- Log in to HubSpot with the same account/portal used for the Automated Coupons App signup.
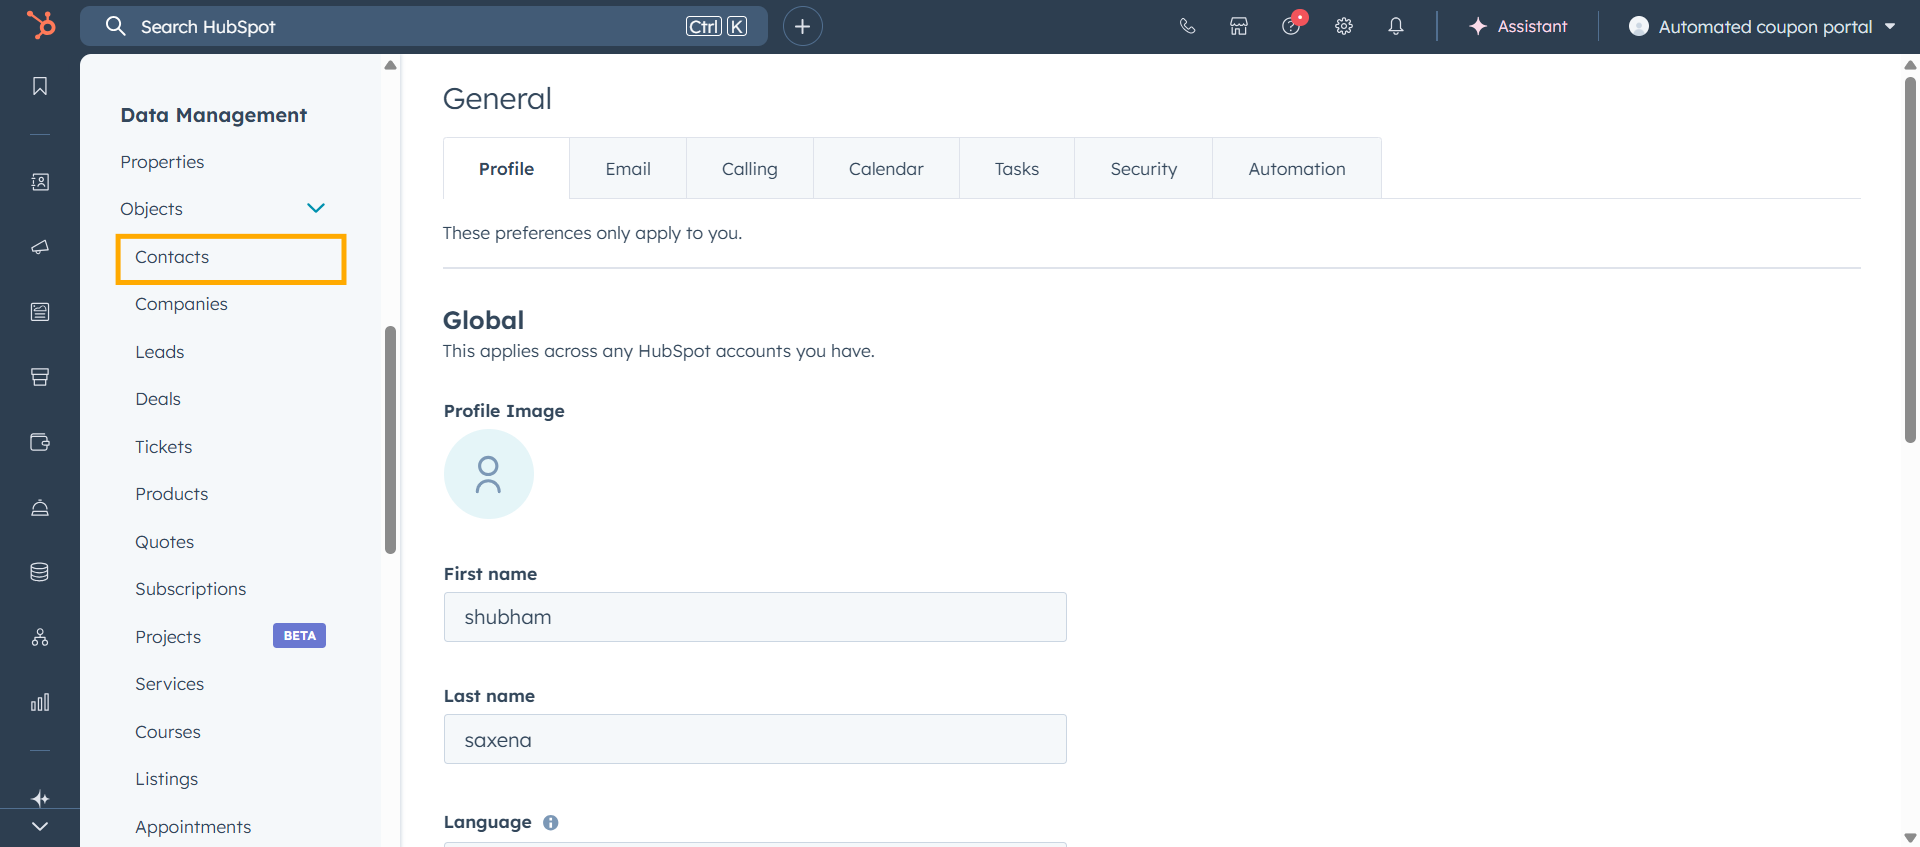
- Once inside HubSpot, click on the ⚙ (Settings button) located at the top.
After this, in the scrollable menu on the right, go to Data Management > Object > Contacts.
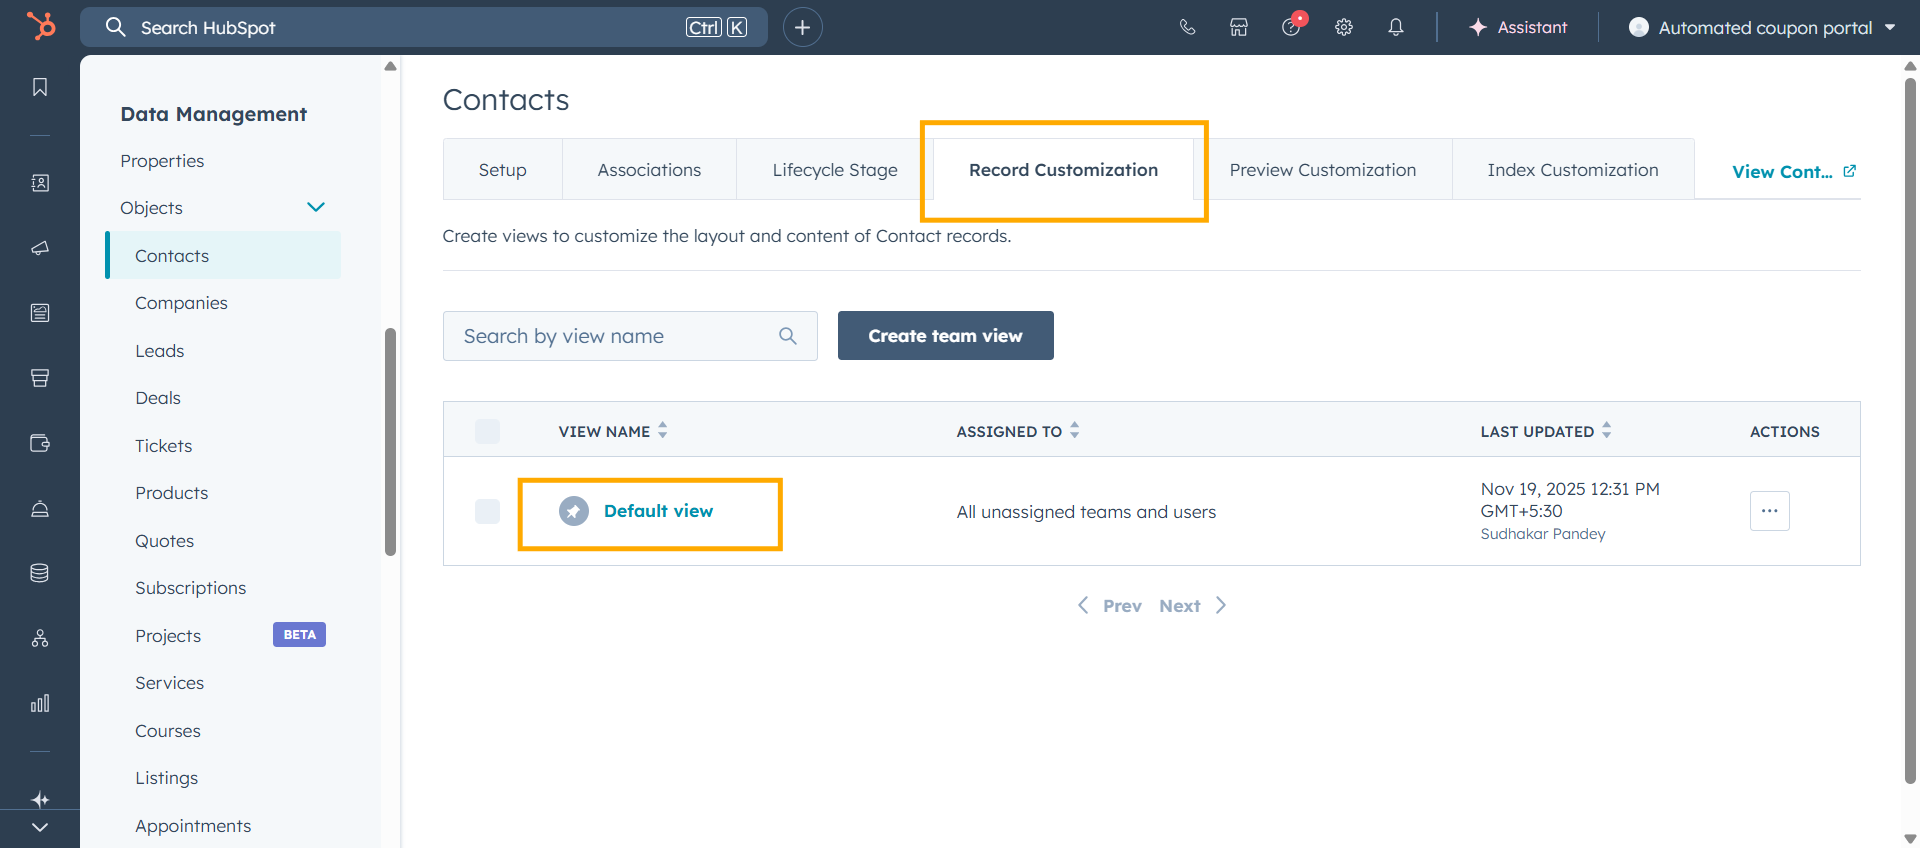
- Then, click on the Record Customization tab in Contacts.
- Next, click on the Default View team view.
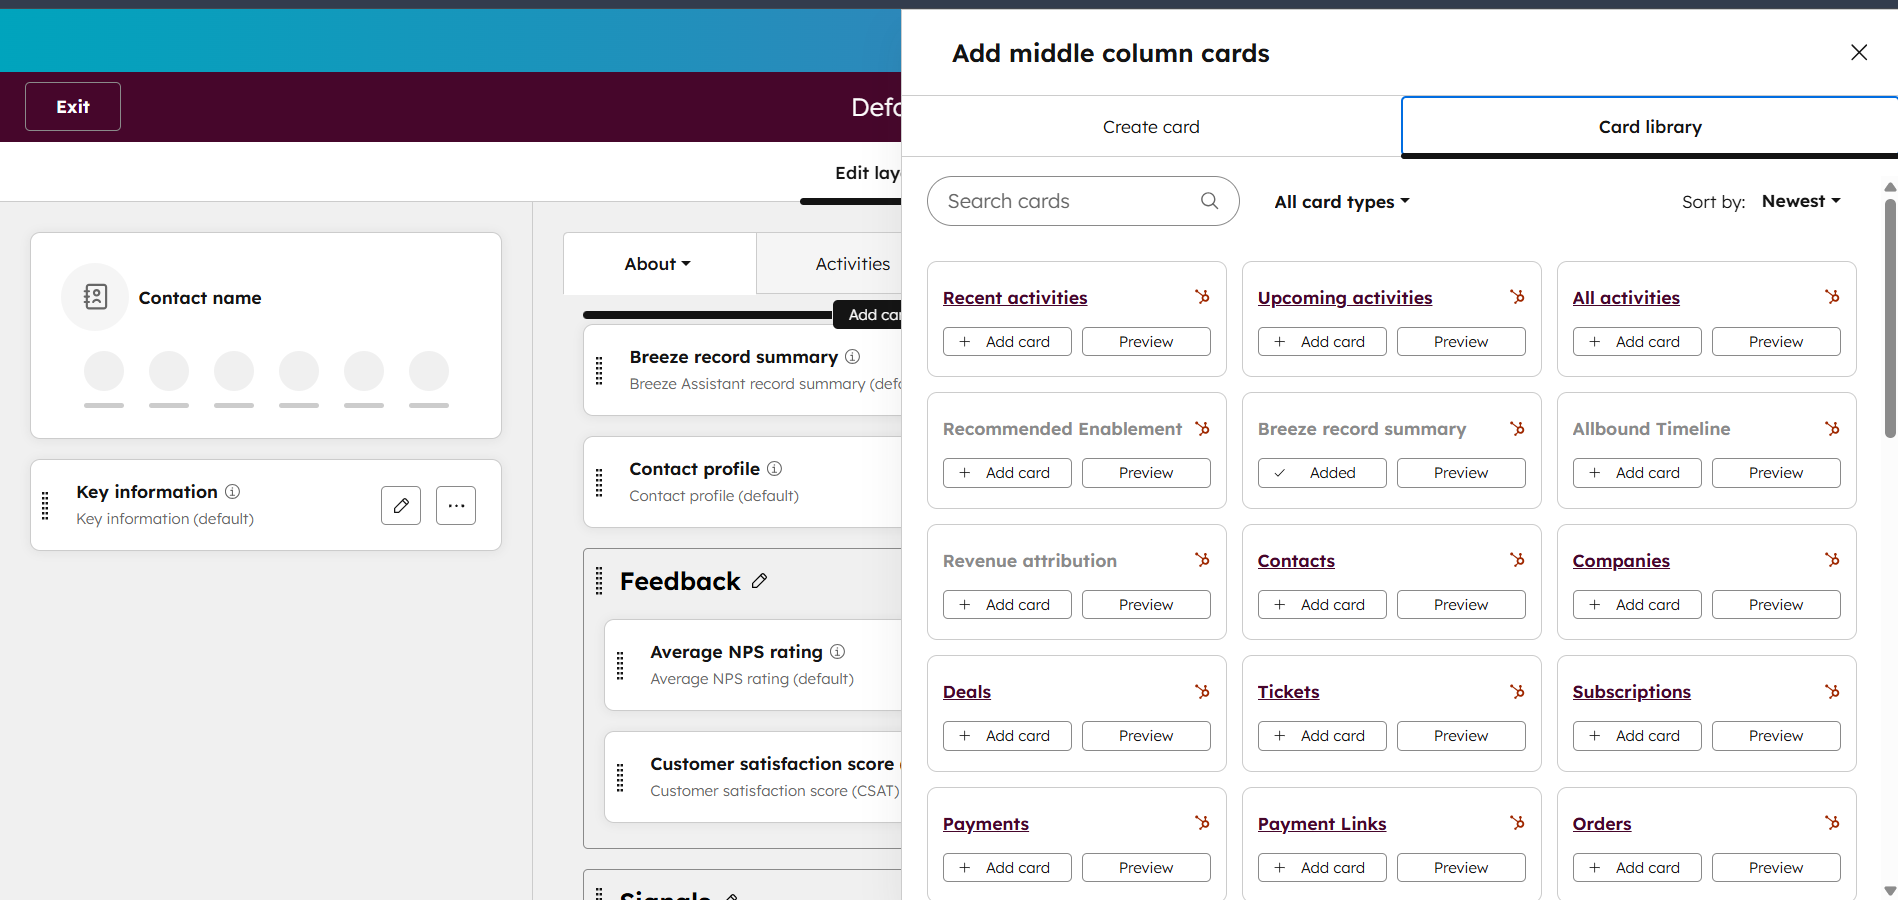
- On the next page, you will be able to customize (add, remove, arrange) the tabs in your Contact Timeline Event > Overview section.
- To add the Automated Coupons app card in the Contact Event Overview tabs, simply hover above the top tab and then click Add Card.

- After this, the Card Library will slide in from the right.
- Type ‘Coupon’ in the Search cards box.
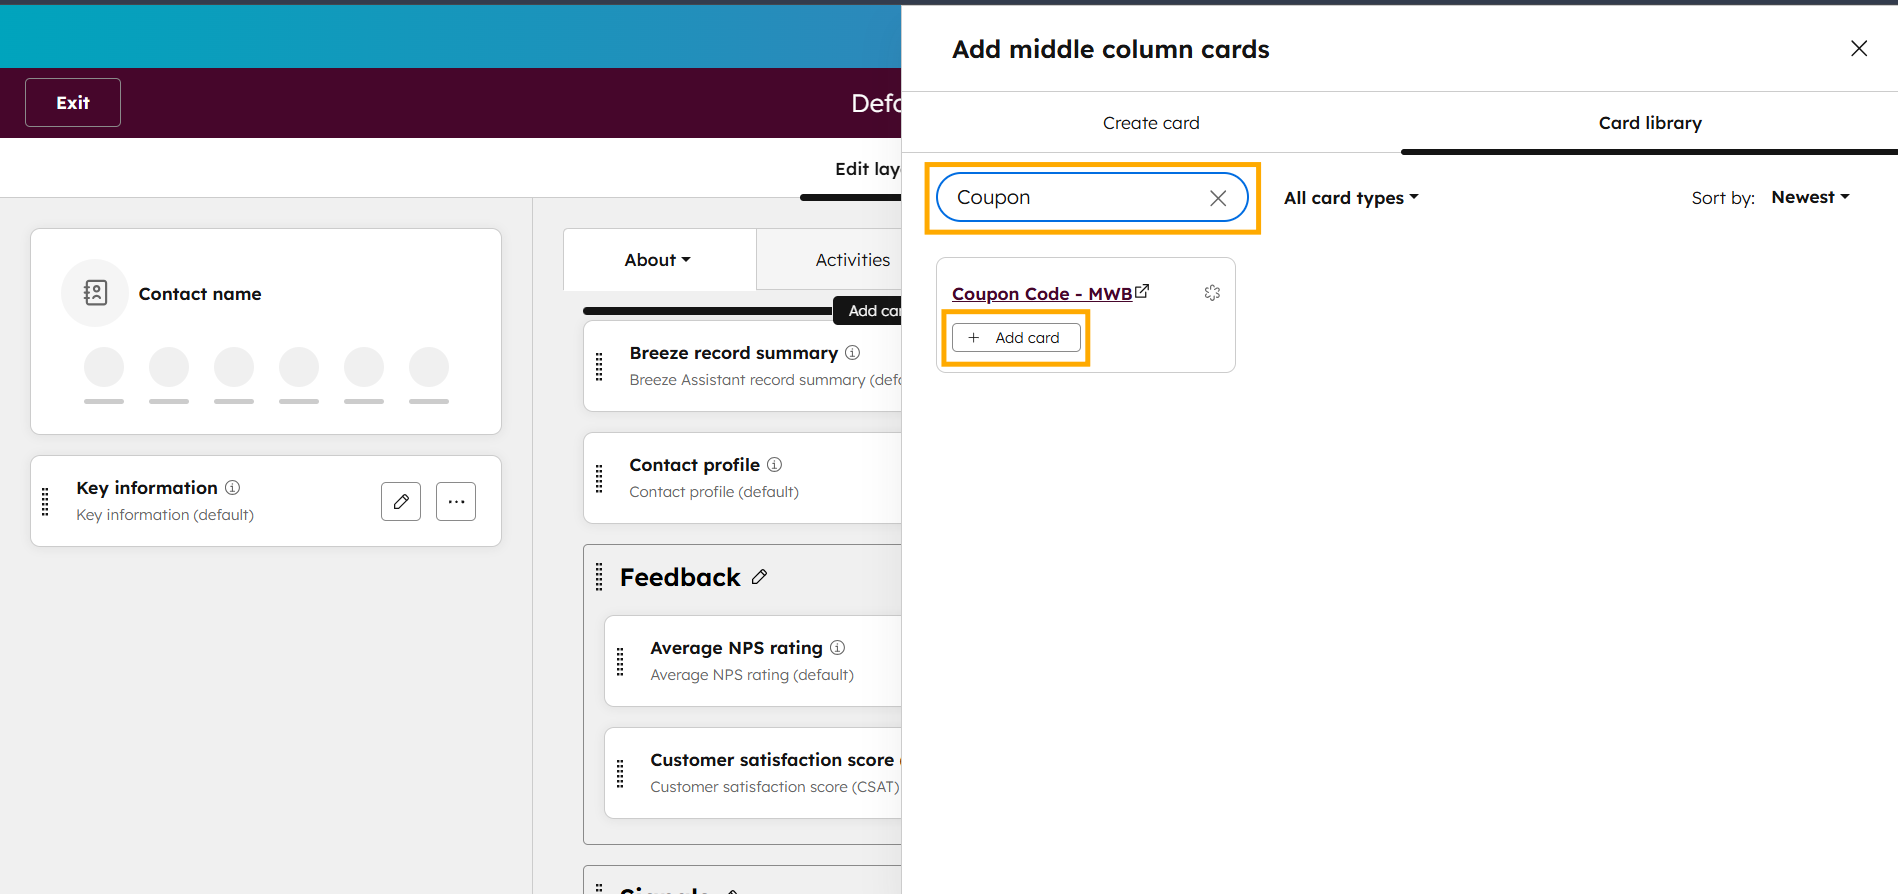
- Next, click + Add Card button under “Coupon Code – MWB”.
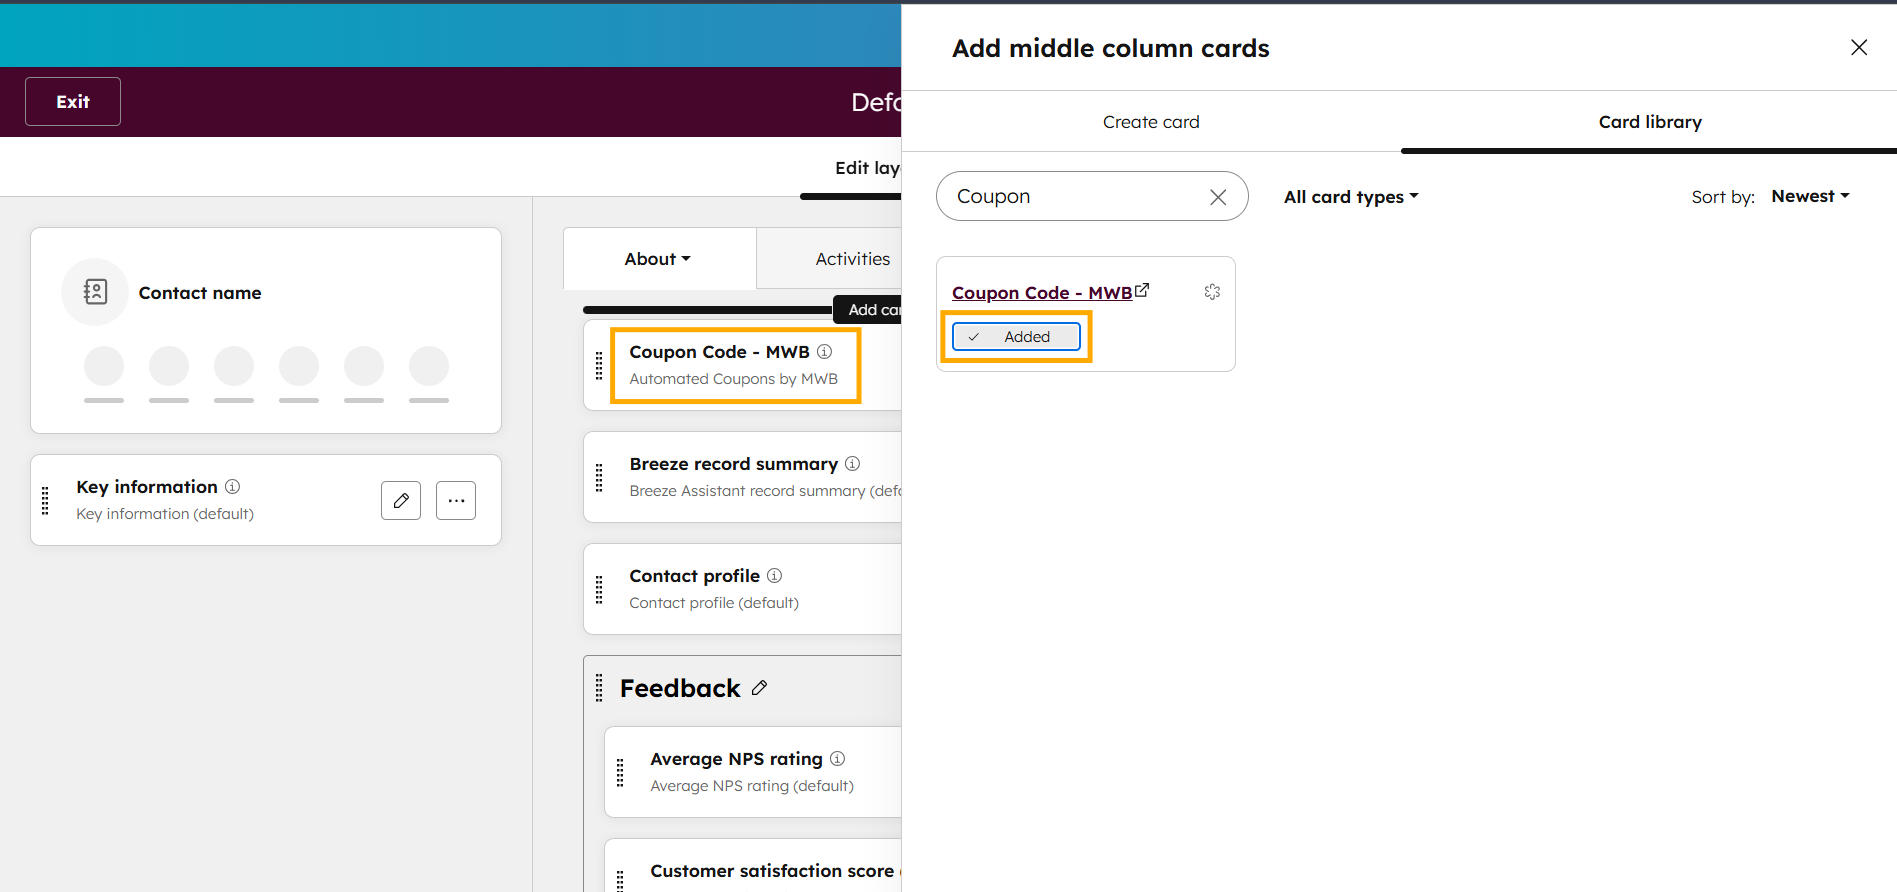
- By following this setup, you’ll be able to access the Automated Coupons App Card in the Timeline Events Overview section of your contacts.
6.2.2.How to create Coupons using the Automated Coupons App Card in HubSpot?
Once you’ve set up the Automated Coupons App Card through HubSpot Contacts settings, you can create coupons for your contacts.
To create a coupon for your contacts using the Automated Coupons App Card, follow the steps below:
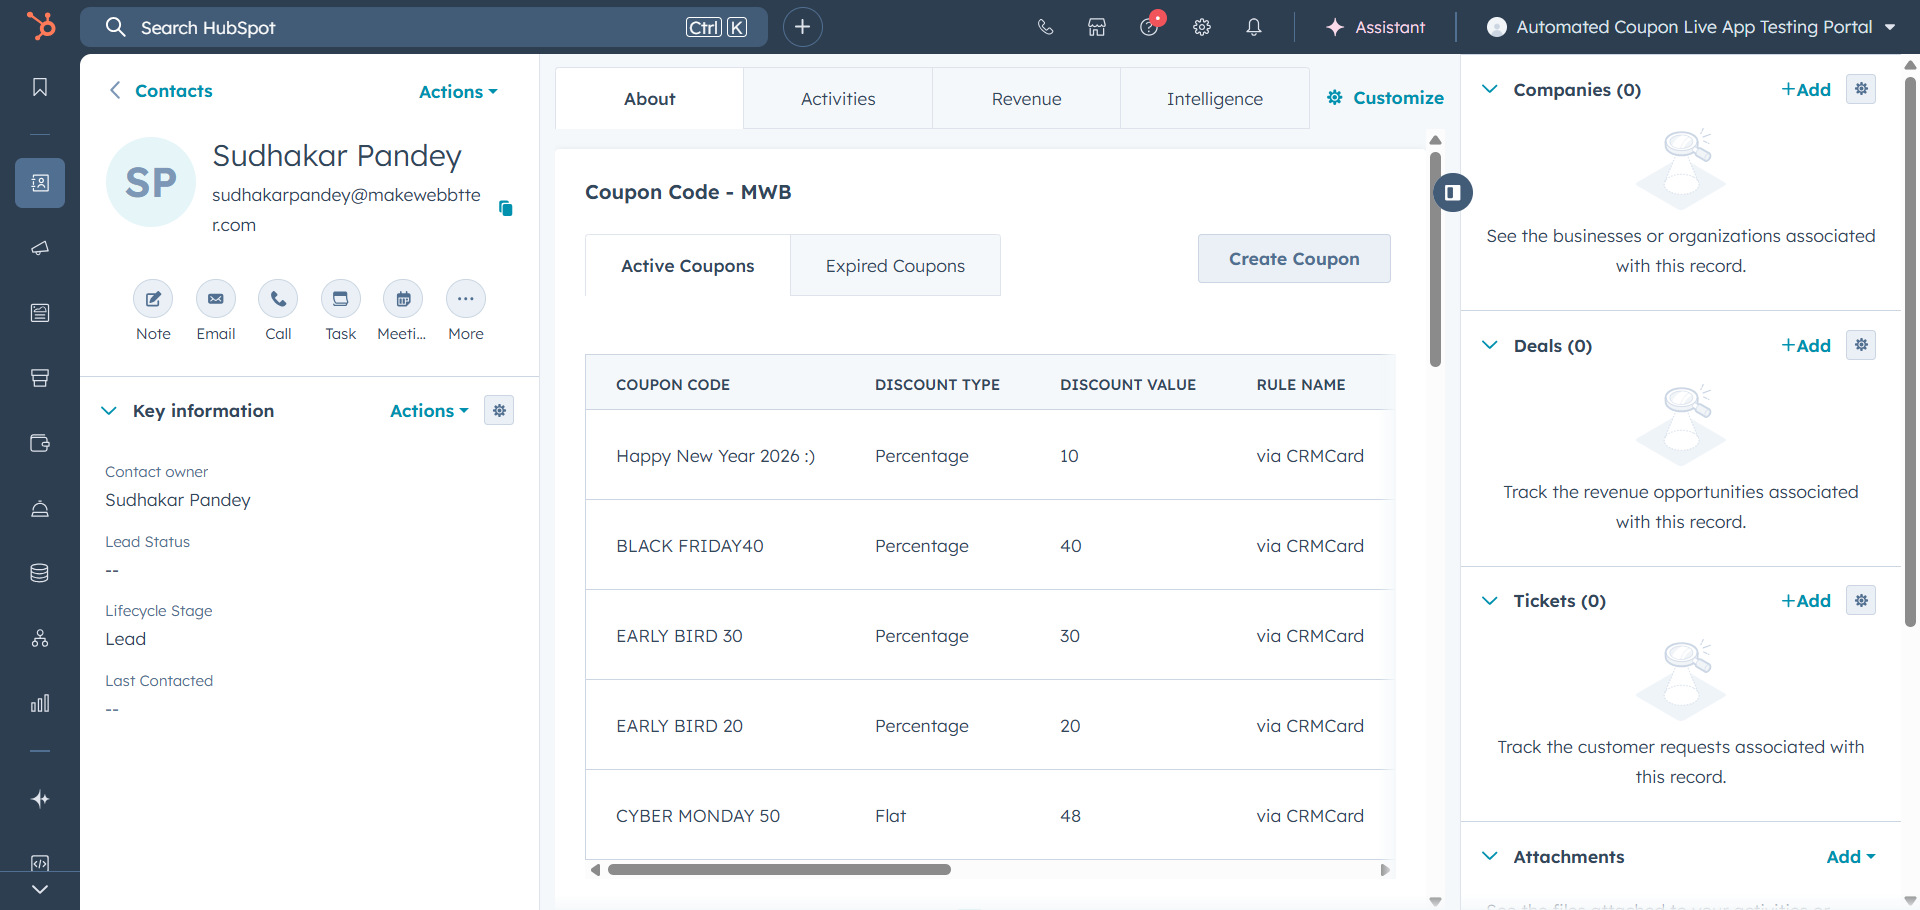
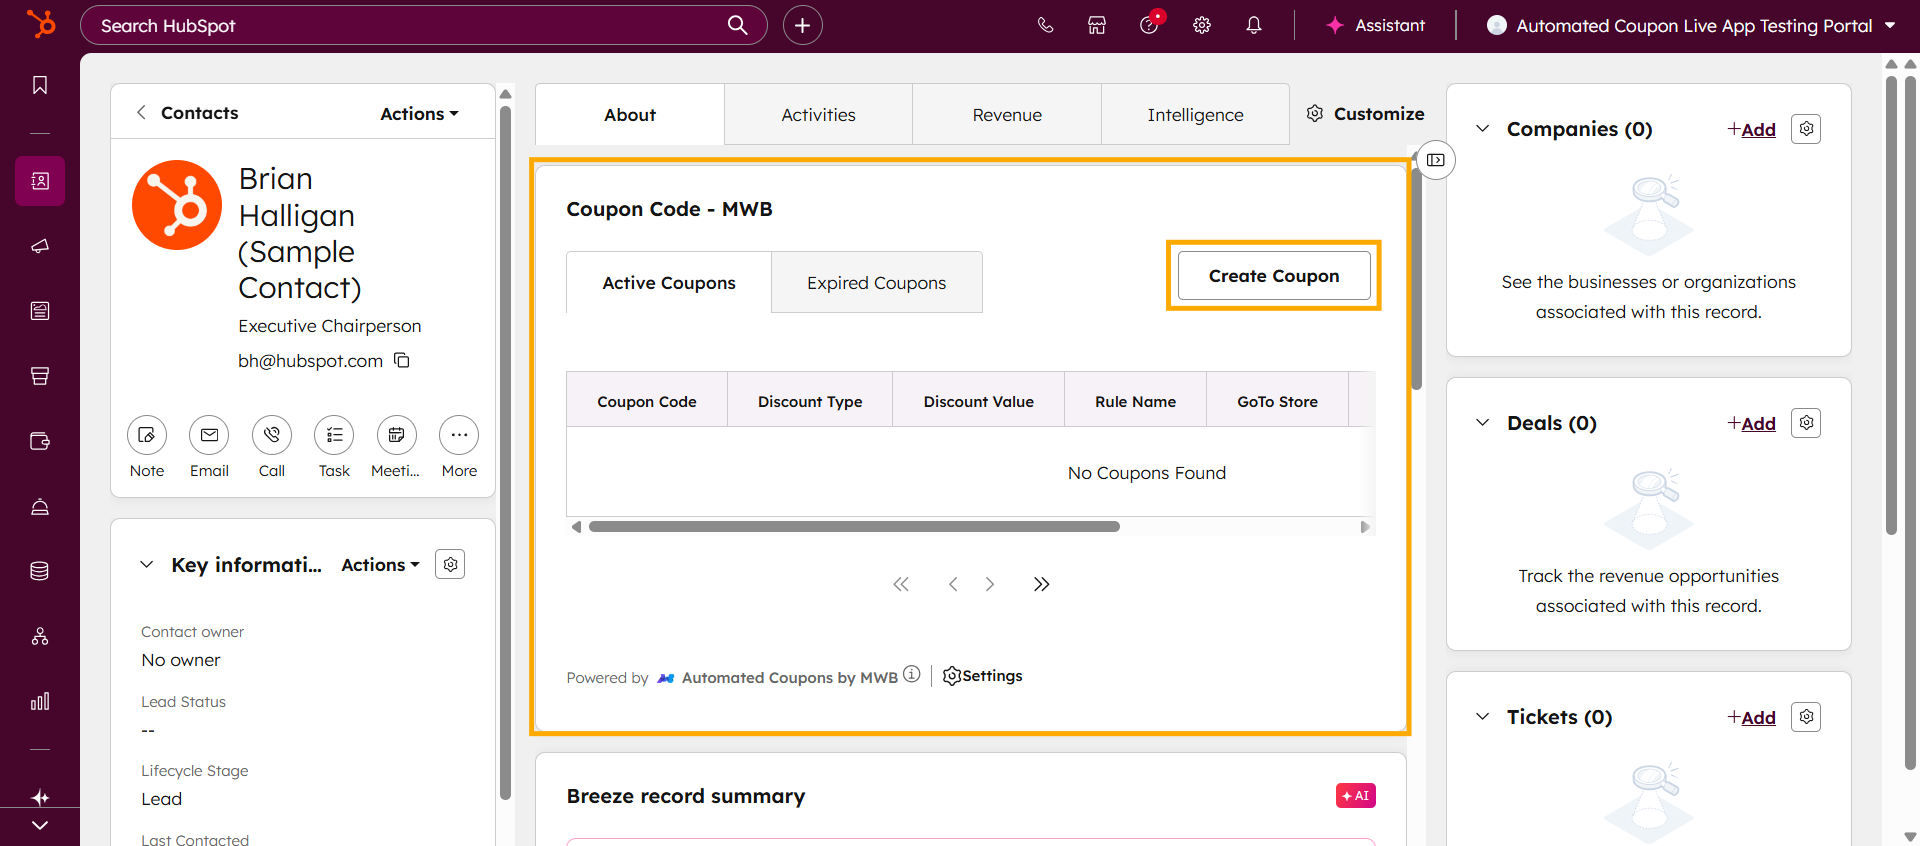
- Navigate to the particular HubSpot Contact for whom you want to create a coupon.
- Click on the Create Coupon button.
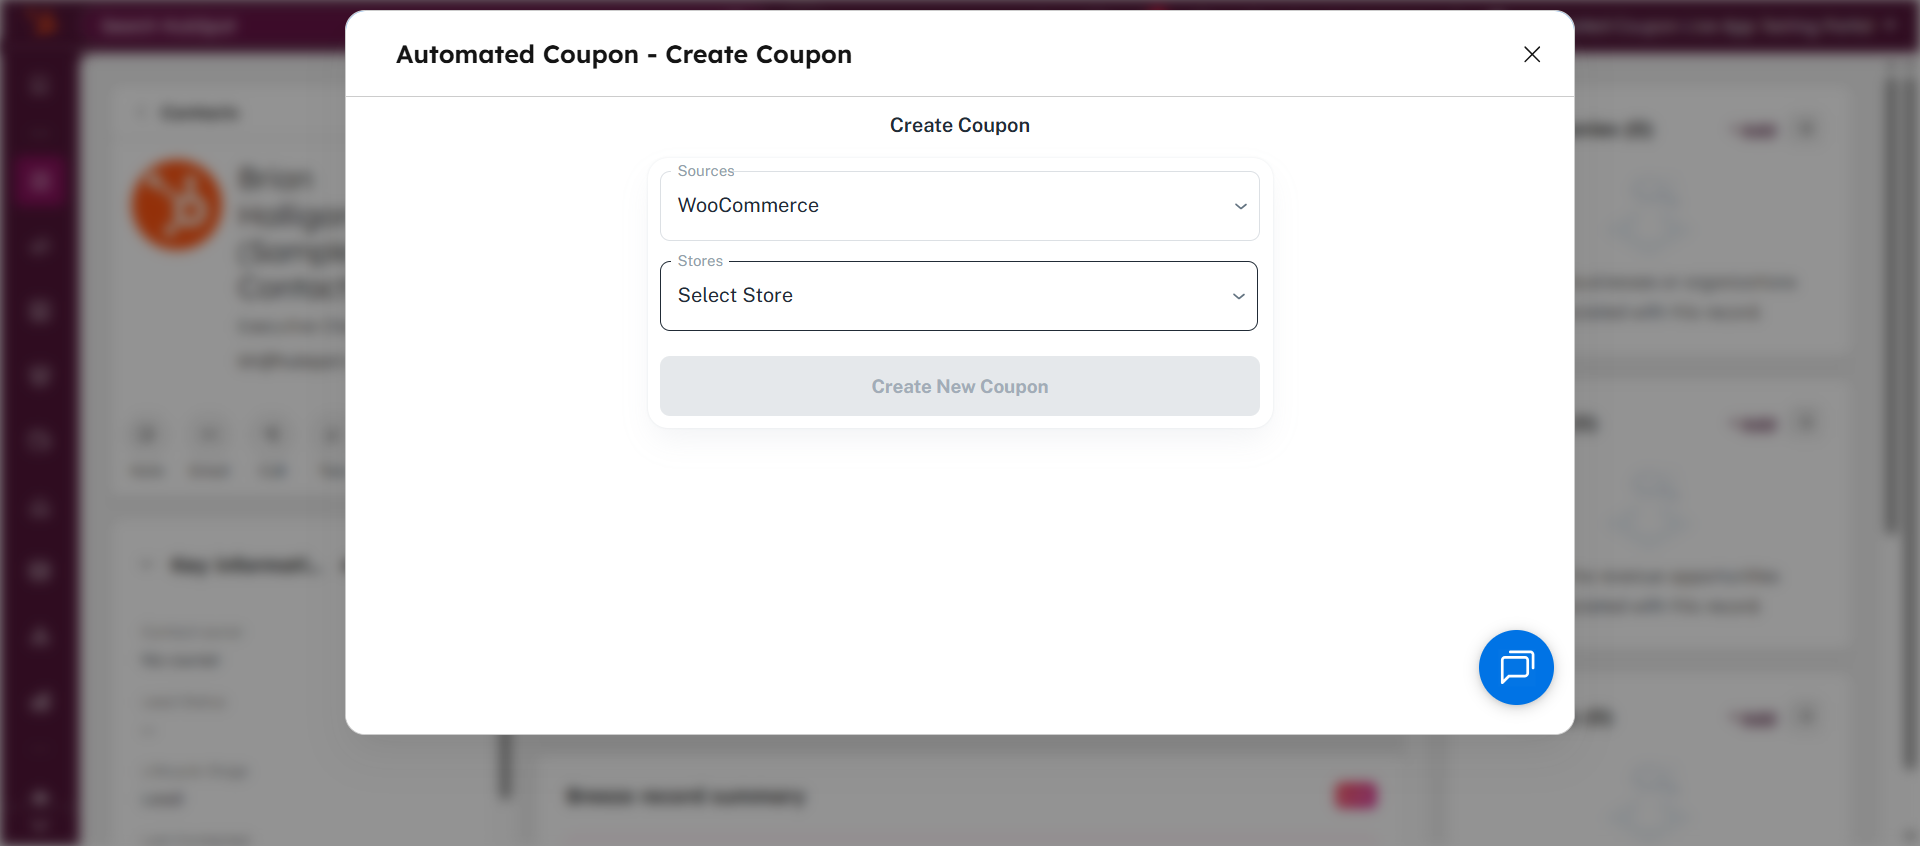
- Select the Source and Store URL from the drop-down. (HubSpot will fetch your store URL automatically as you have connected your store to our app.)
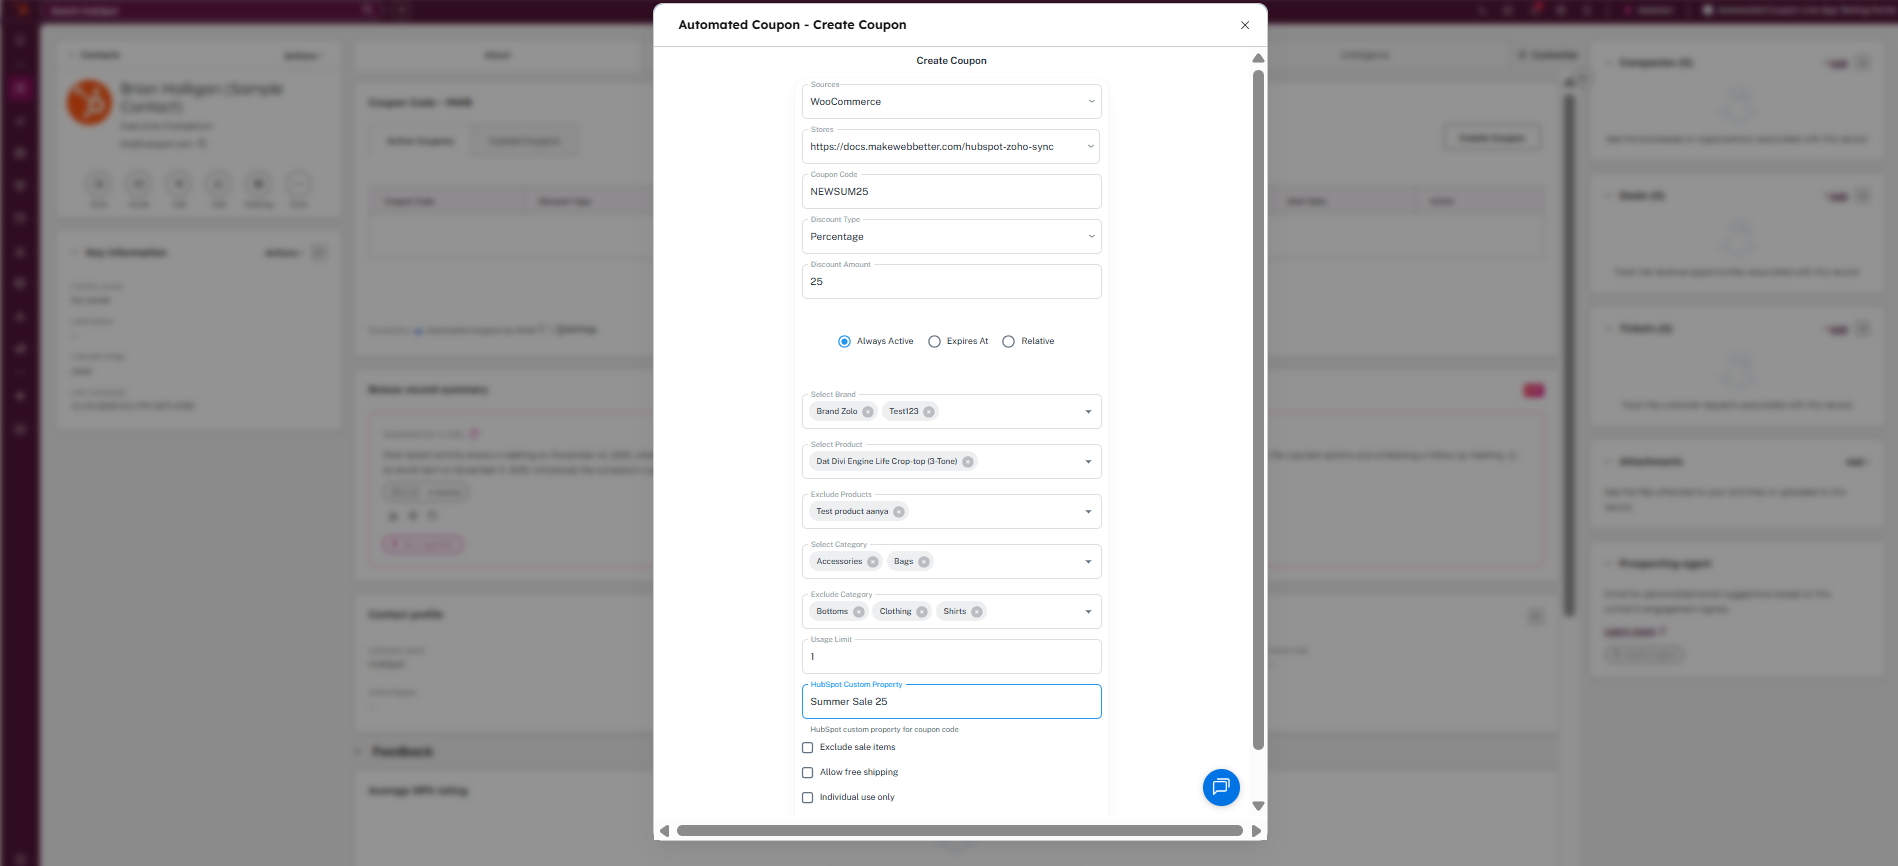
- Then, fill in these fields in the modal: a unique coupon code, discount type, discount amount, expiration (or always active), restrictions of applicability (applies to brands, products, categories), and usage limits. Furthermore, you have the option to create a dedicated HubSpot property for this coupon. Moreover, you also have the other coupon option to ‘Exclude sale items’, ‘Allow free shipping’, and ‘Individual use only’. (All his serves the same purpose as it does in the app.)
- Finally, click on the Create New Coupon button at the bottom.
Now, you can send this coupon to a contact via email or a preferred medium. Moreover, you can set up an email sequence to send, follow up, or upsell using this coupon.
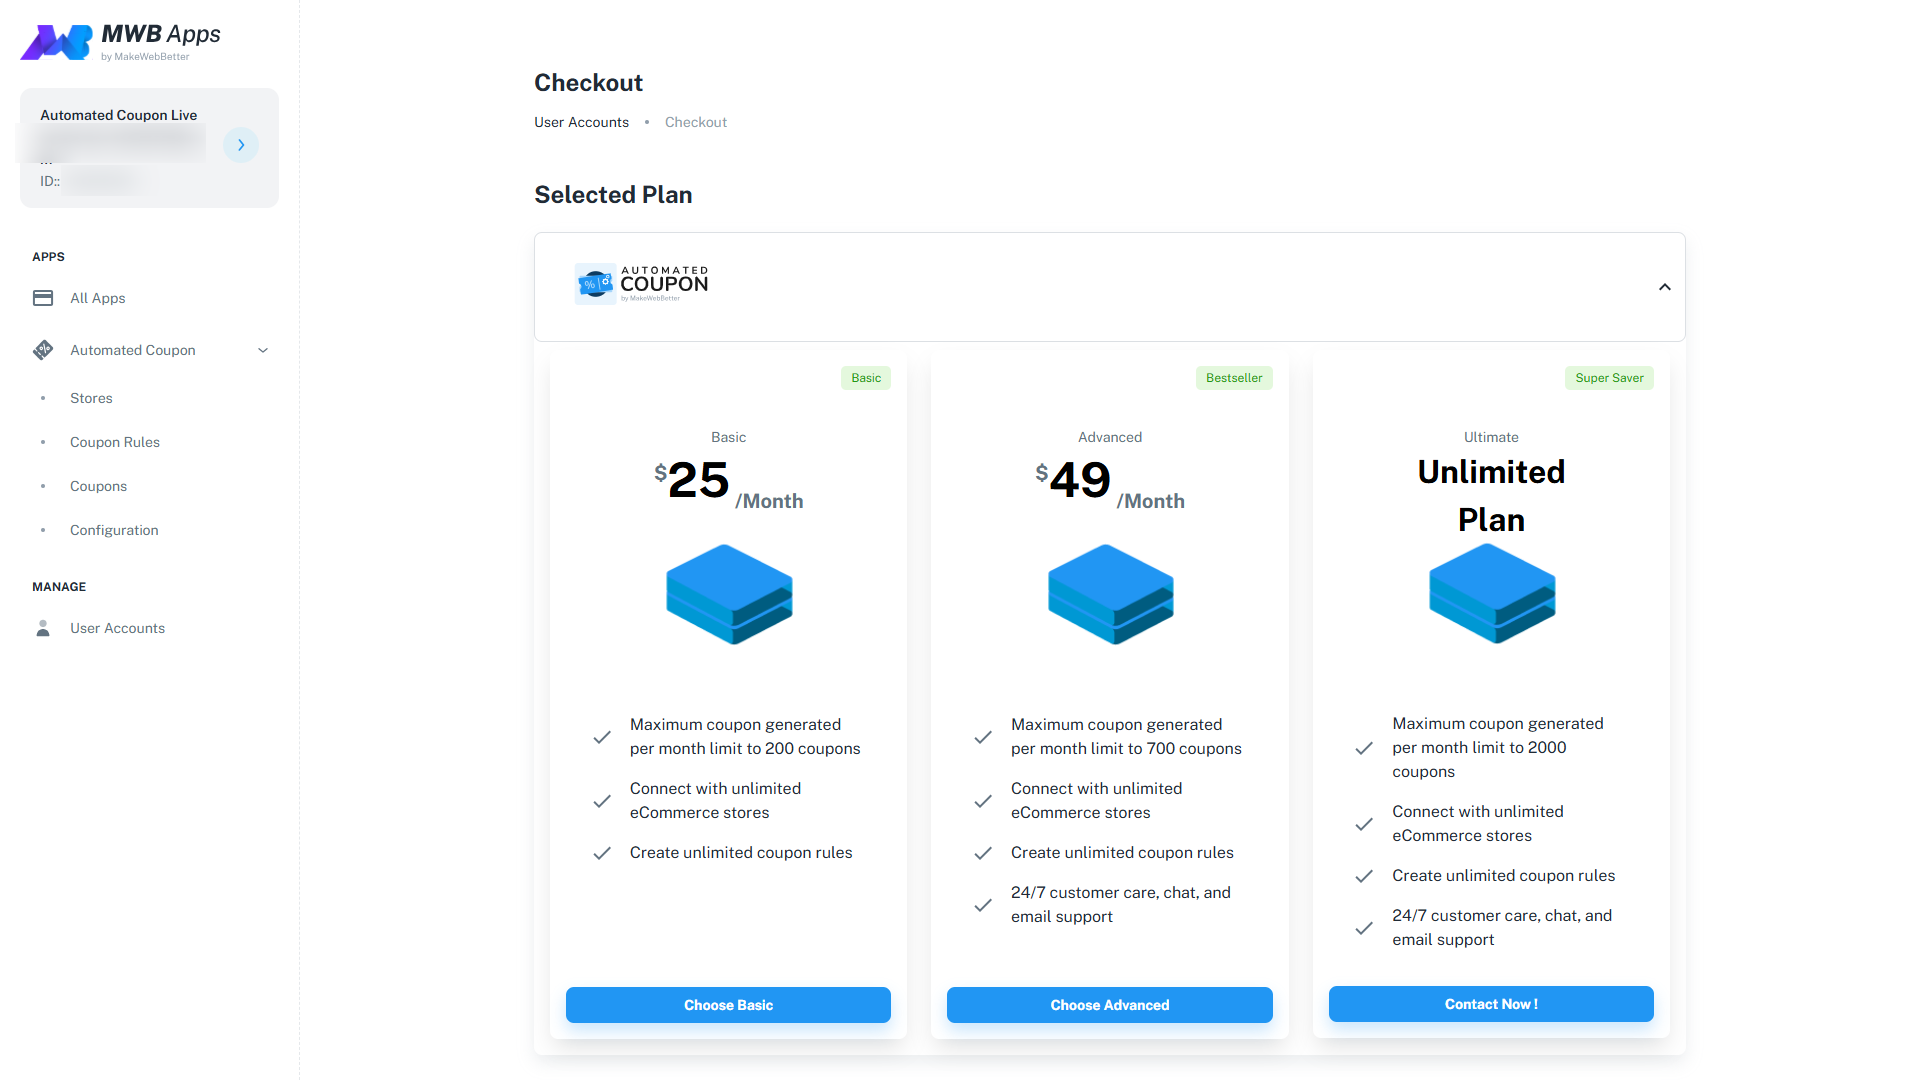
7.Pending Coupons
The plan you purchase for the Automated Coupons app determines the number of coupons that can be created using the app. The following are the limits.
- Free Trial Period – 100 Coupons.
- Basic Plan – 200 Coupons.
- Advanced Plan – 500 Coupons.
- Ultimate – Unlimited Coupons.
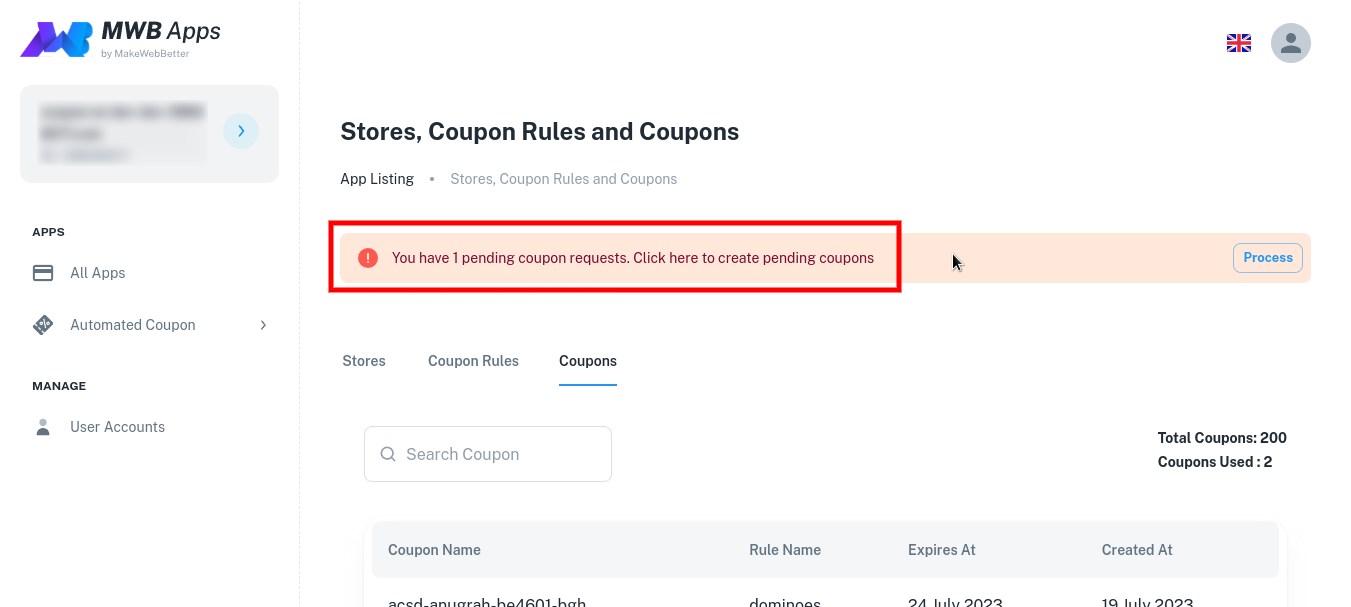
Although even if you have exceeded the limit, coupons can still be created, but no one will be able to use them. To use them, you will have to upgrade your plan accordingly. Suppose you are on the Basic Plan and the 201st coupon has been created, then you will have to upgrade your plan to Advanced to use Coupon No.201 to use.