
1.Overview
- Sync Shopline Contacts, Deals, and Products over HubSpot CRM
- Workflows to automate daily repetitive tasks
- Smart HubSpot lists for perfect contact segmentation
- Track and recover abandoned carts
- Custom properties to sync special data over the CRM
- RFM Settings to rate your customers on their buyer behavior
2.Installation
-
- To install the app, you need to go to either Shopline or HubSpot marketplace.
- Install the app on your Shopline dashboard and then go to Apps in your Shopline backend and select HubSpot Shopline Integration. You’ll see the start screen of the app where you can start the set up from.

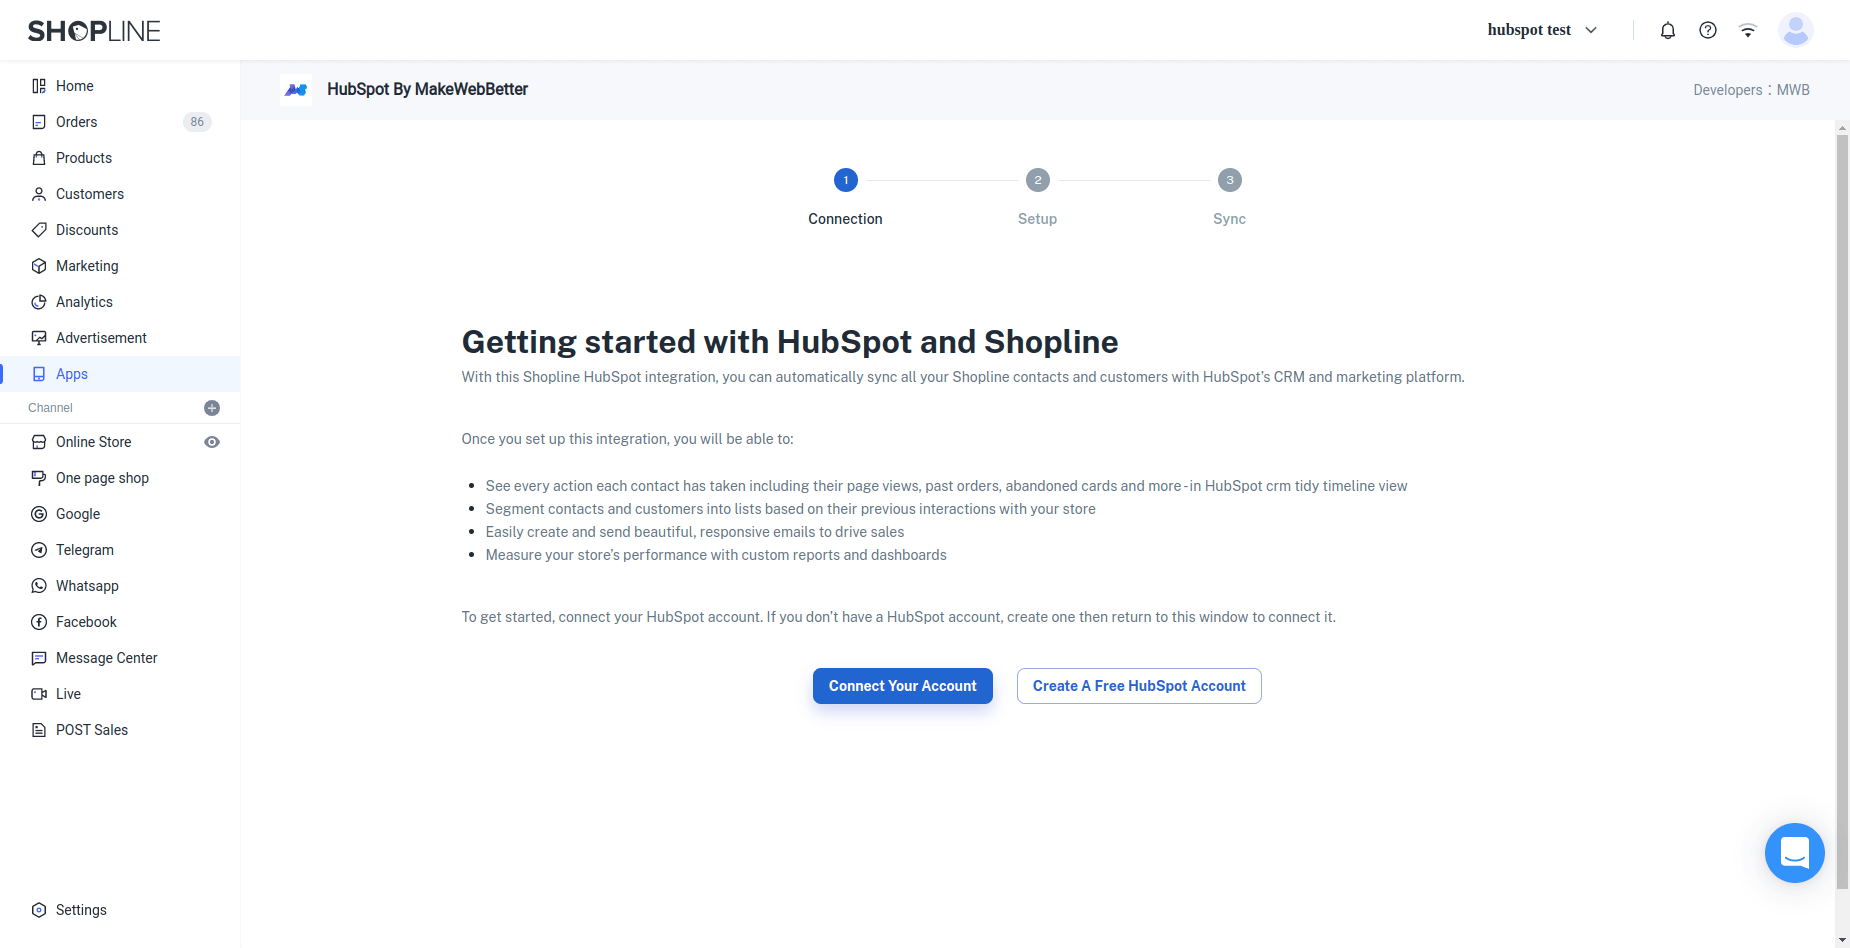
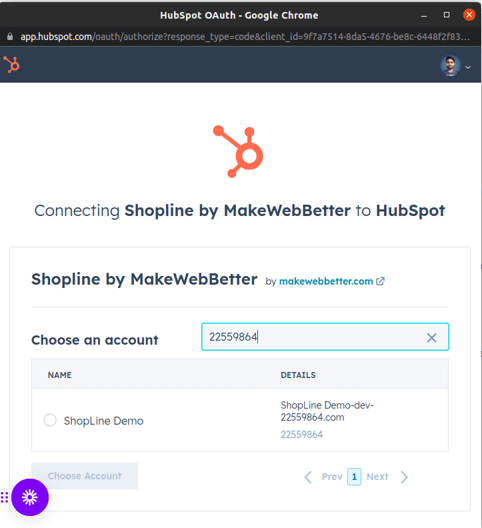
- Click on Connect Your Account and you’ll see a popup asking you to select the HubSpot portal you want to connect.

- Select the HubSpot portal you want to connect and click Choose Account.
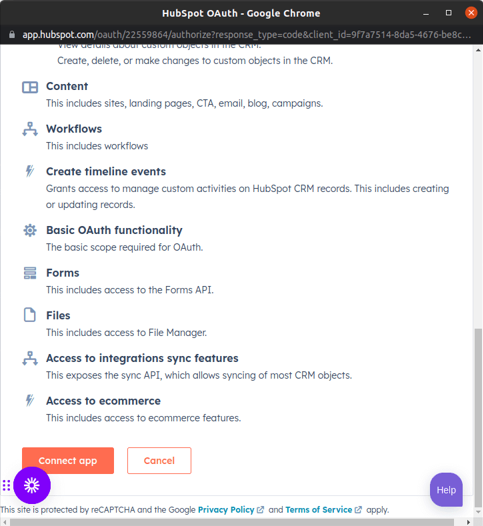
- Once you select the account, click on Choose App and your account will be connected.
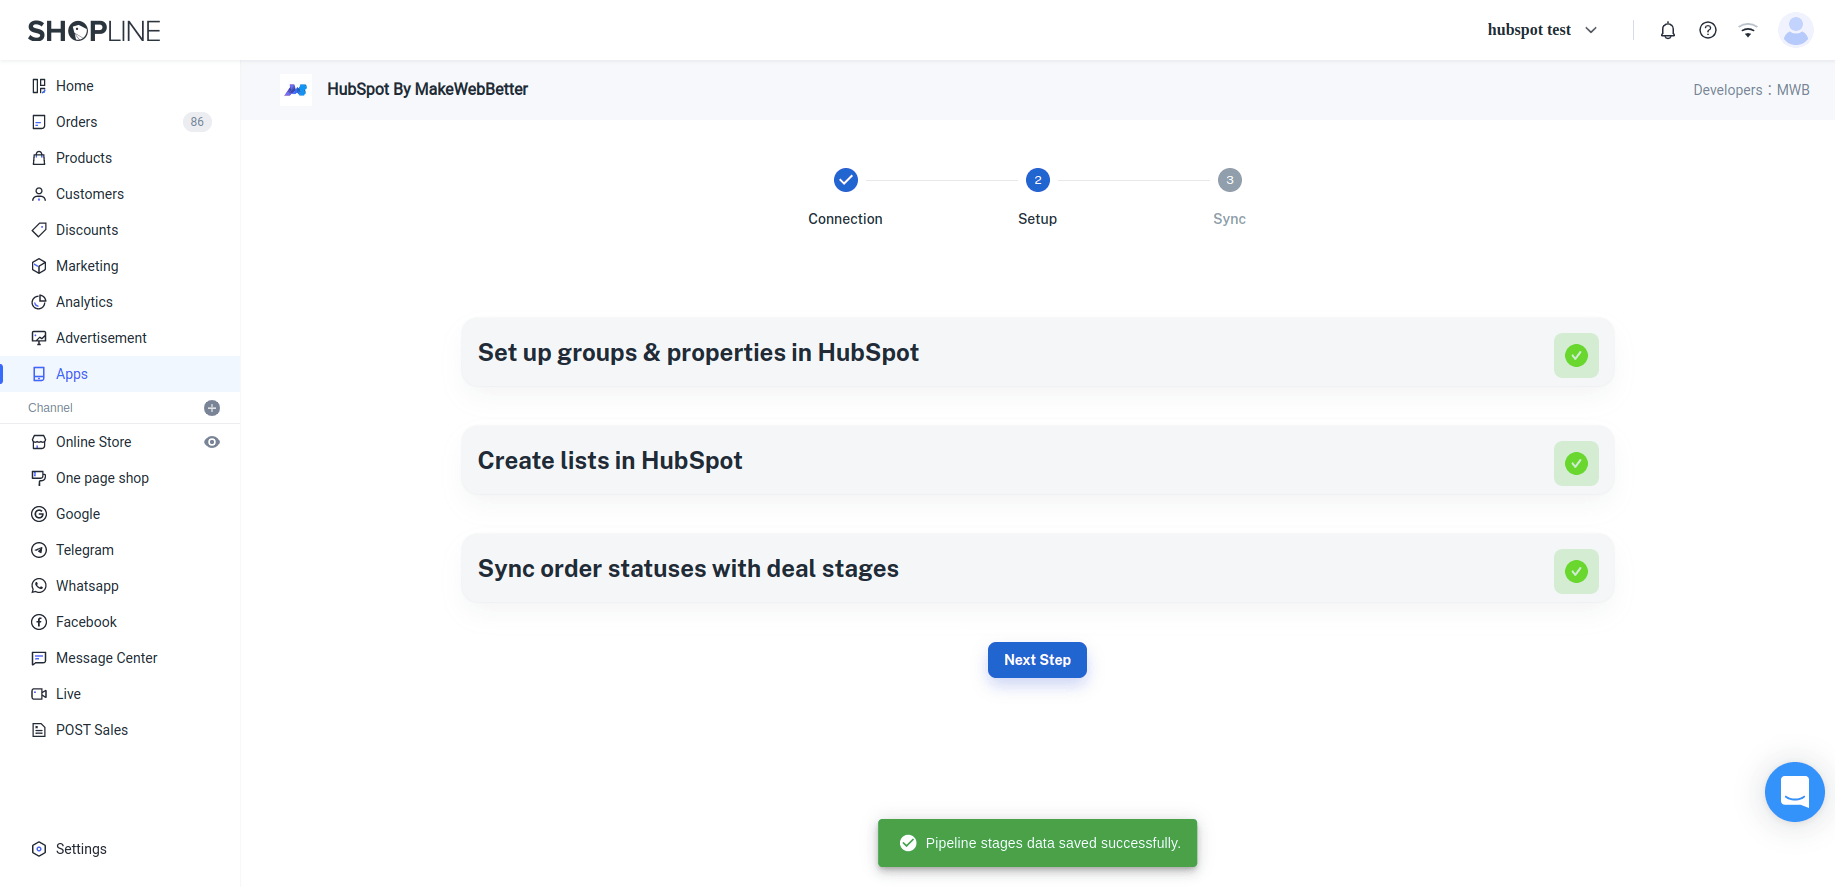
- After the account is connected, you’ll see the setup process where the first step is to create groups and properties.

- Click on Create groups & Properties and all the custom properties this app comes with will start creating in your HubSpot CRM.
- Click on Create groups & Properties and all the custom properties this app comes with will start creating in your HubSpot CRM.
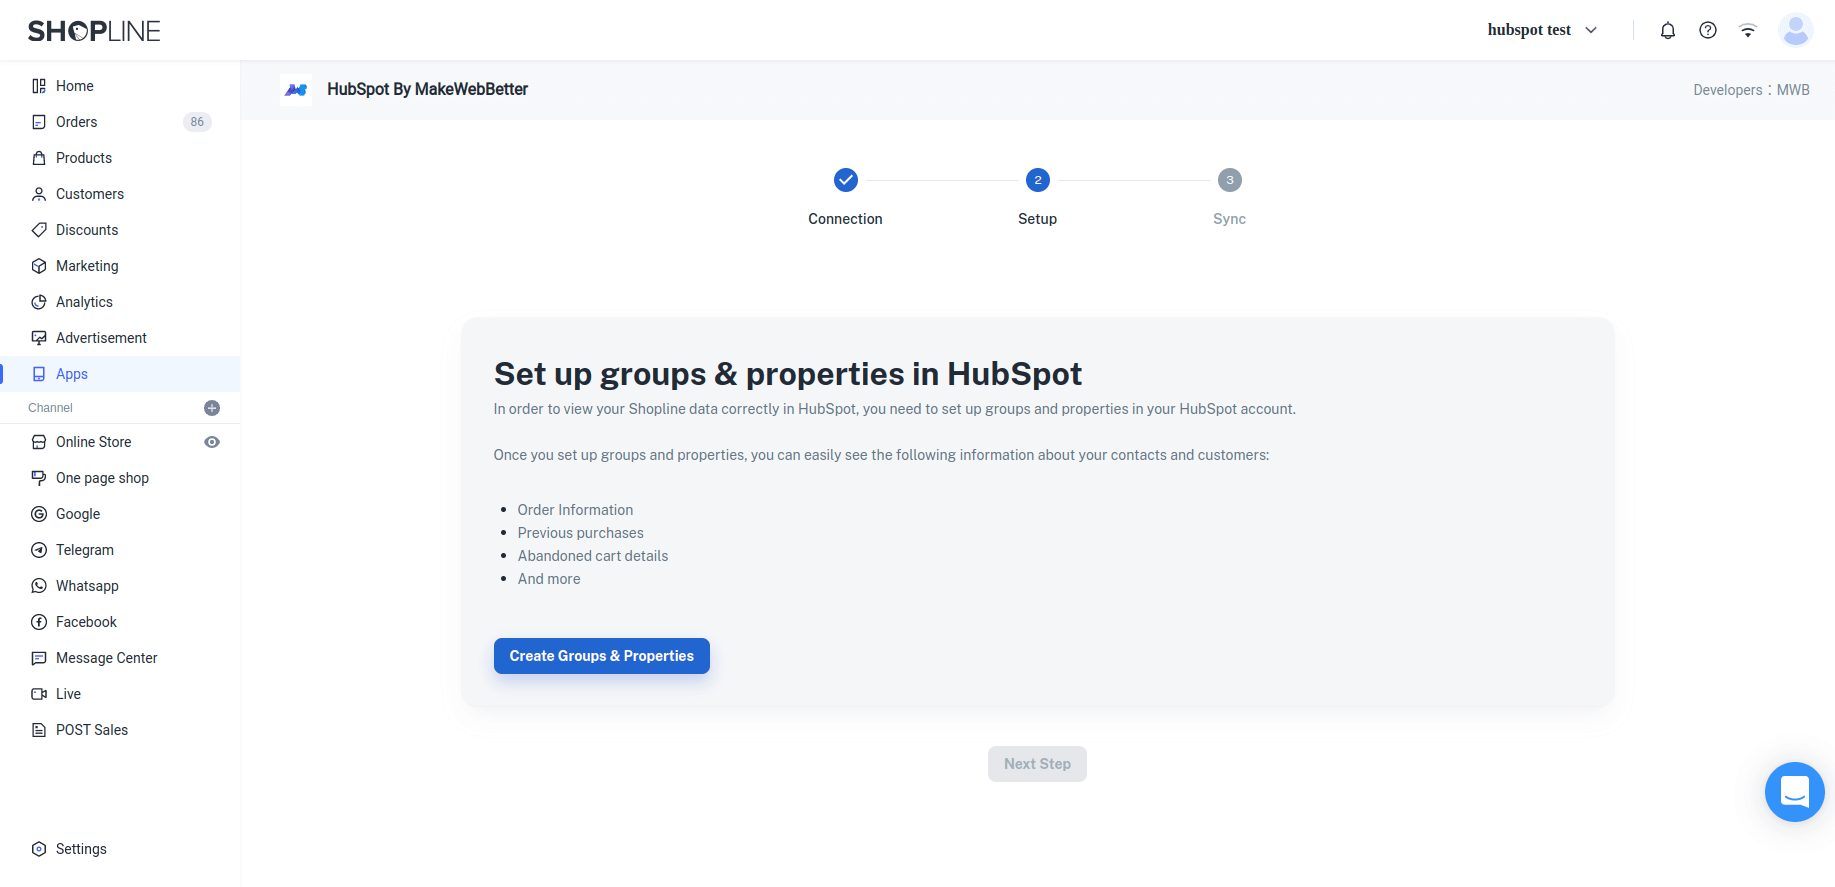
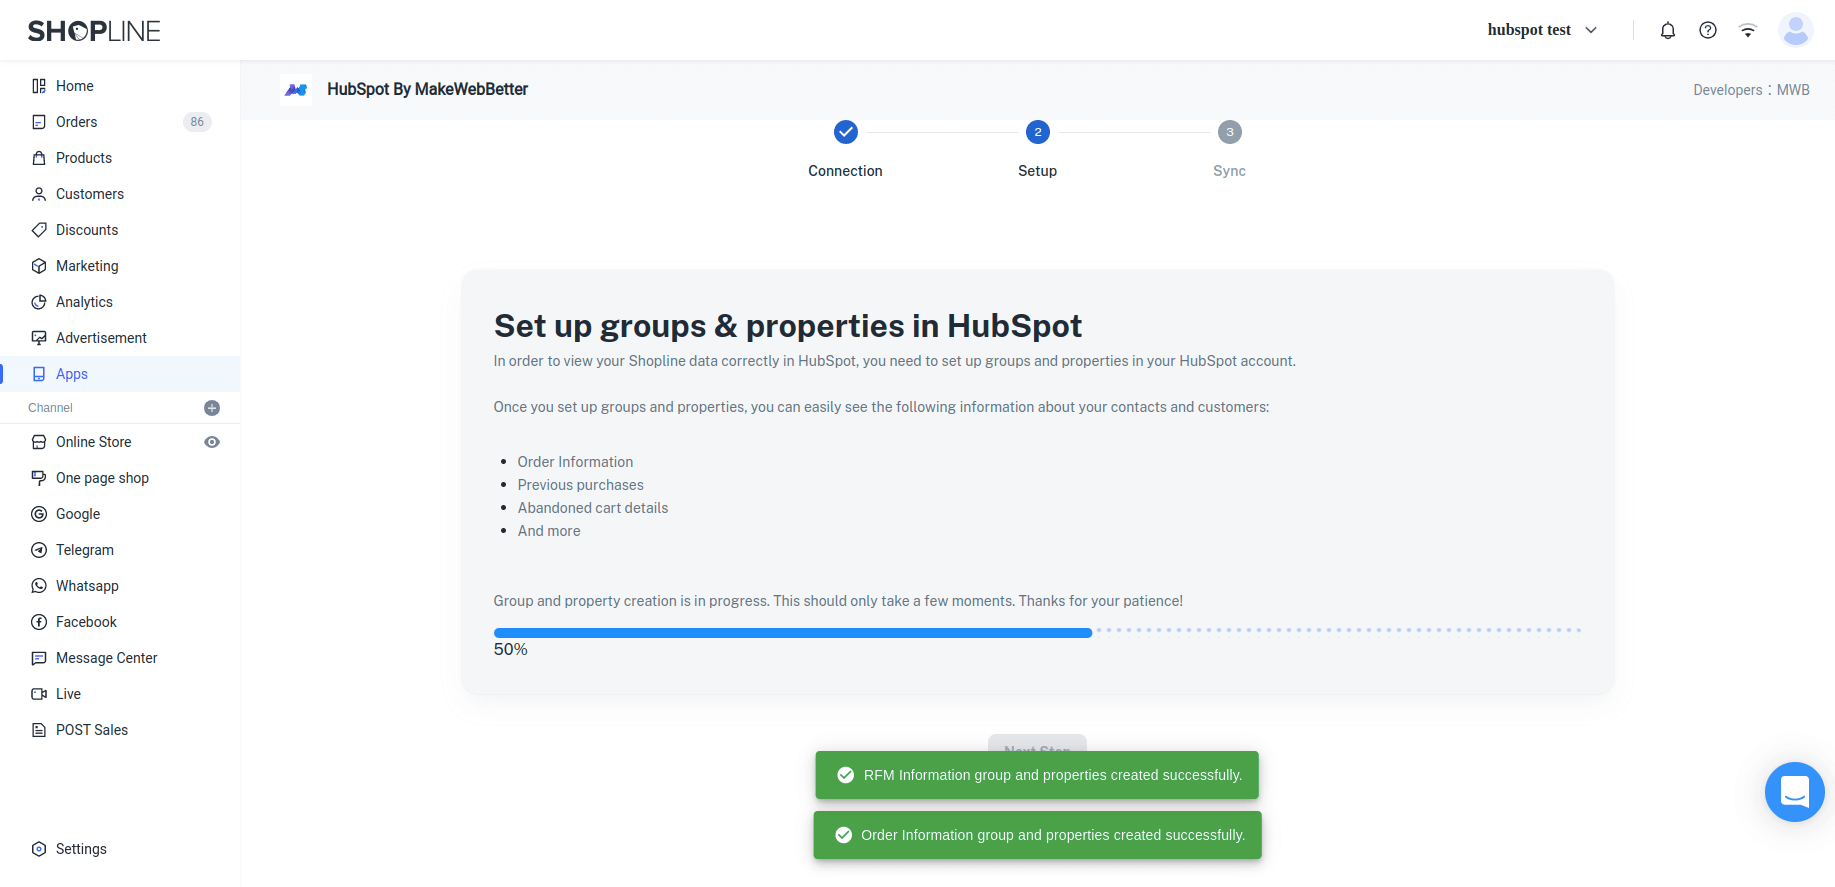
- Once done, click on Next Step to proceed.
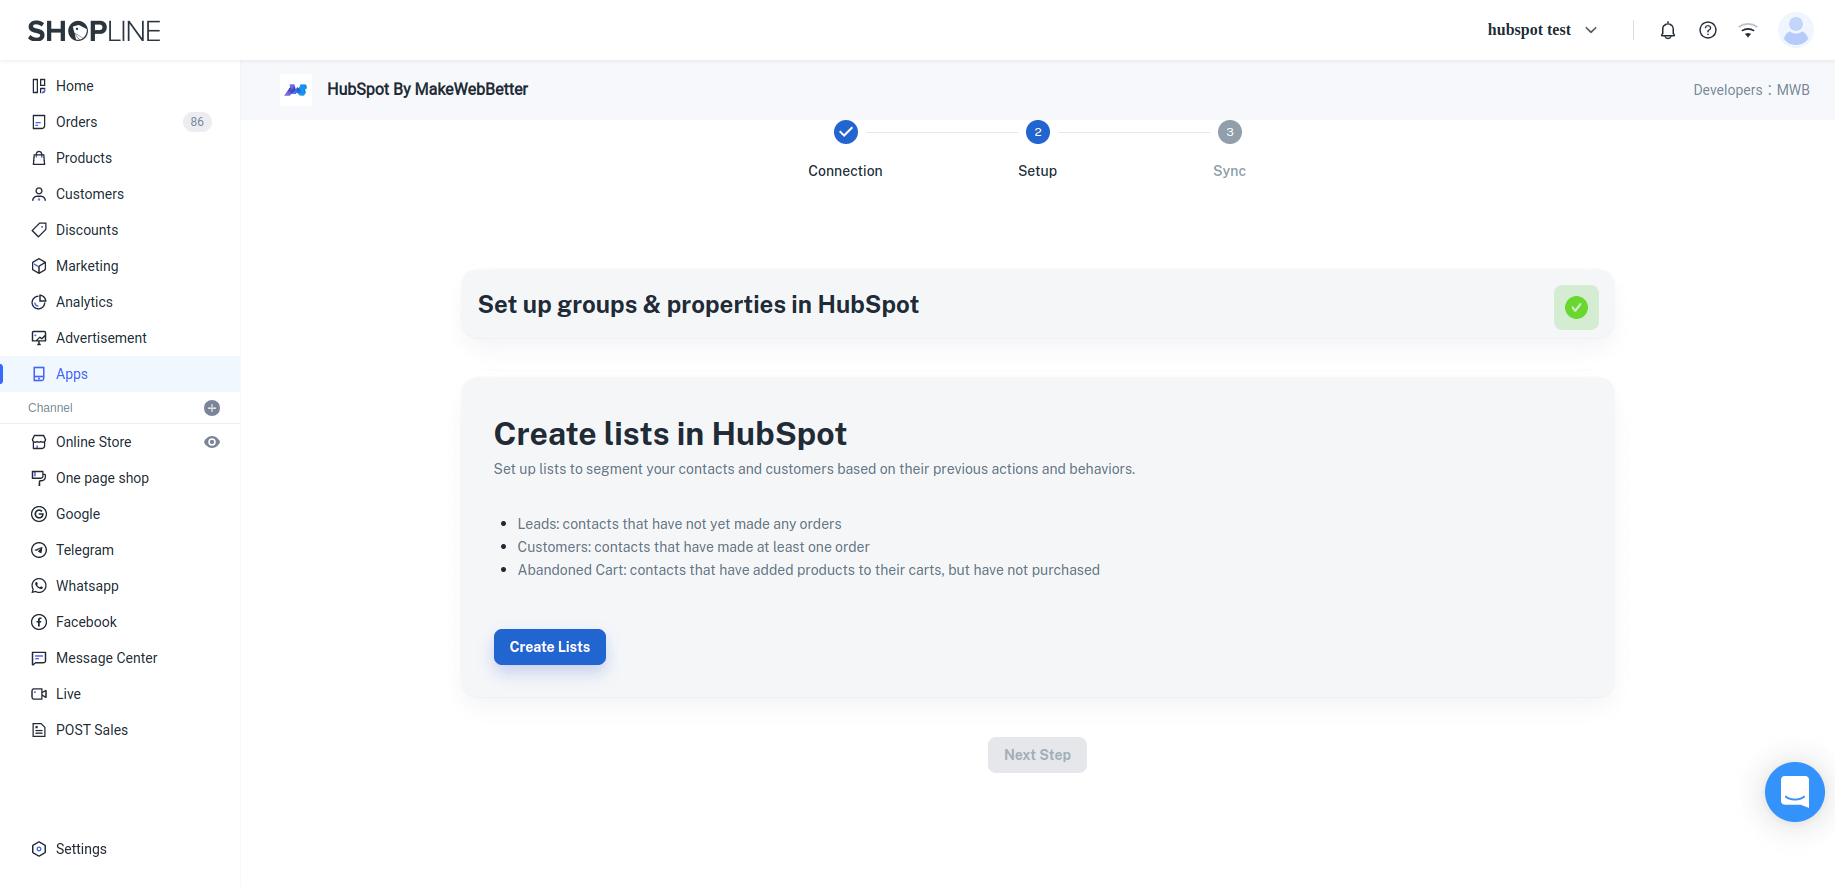
- The next step is creating lists. Click on Create Lists to create all the lists this app comes with in your HubSpot CRM. You can later use these lists to segment your HubSpot data.
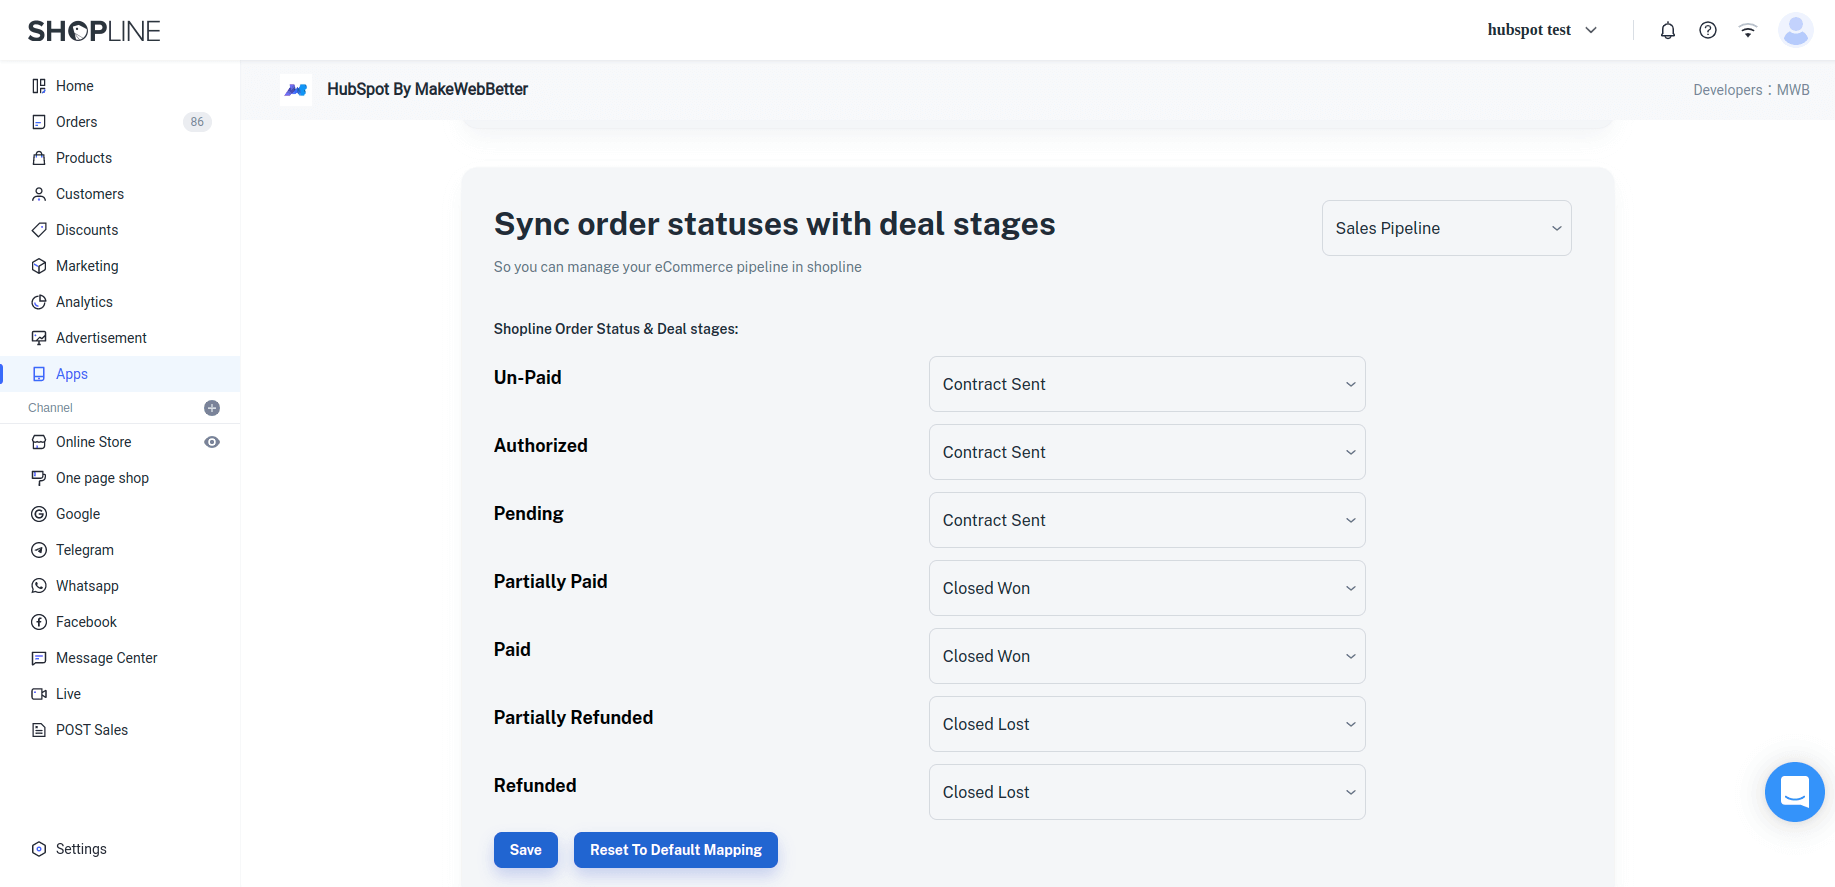
- The next step is to map your Shopline order statuses with deal stages. You can select a pipeline where you want to map your order status with deal stages.
- Once you select the pipeline, choose the deal stages and click Save to map them.
- After you map the order status successfully, you’ll see this kind of screen.
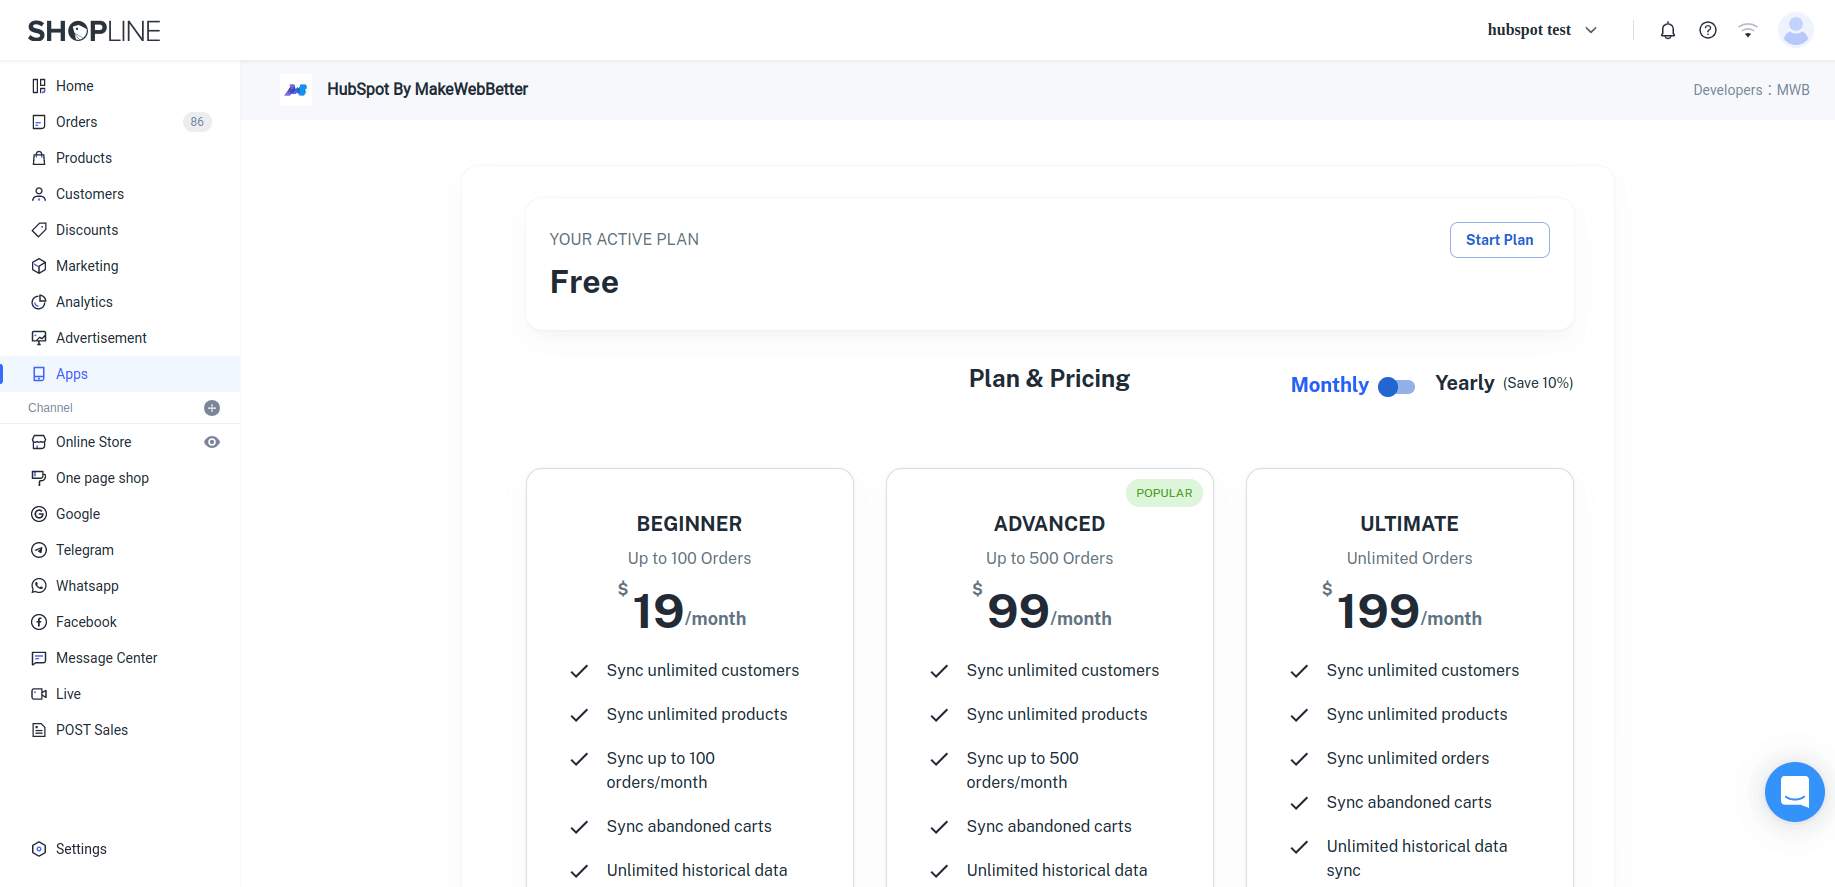
- Then, you need to select your plan. You can select either the Free, Beginner, Advanced, Ultimate to start with the app.
- You can also skip this part and select your plan later from the Plan section.
And you’ve successfully installed and set up this HubSpot Shopline integration.
3.Workflow
Let’s look at the settings you get in this HubSpot Shopline integration to understand the workflow of this app.
3.1.Home
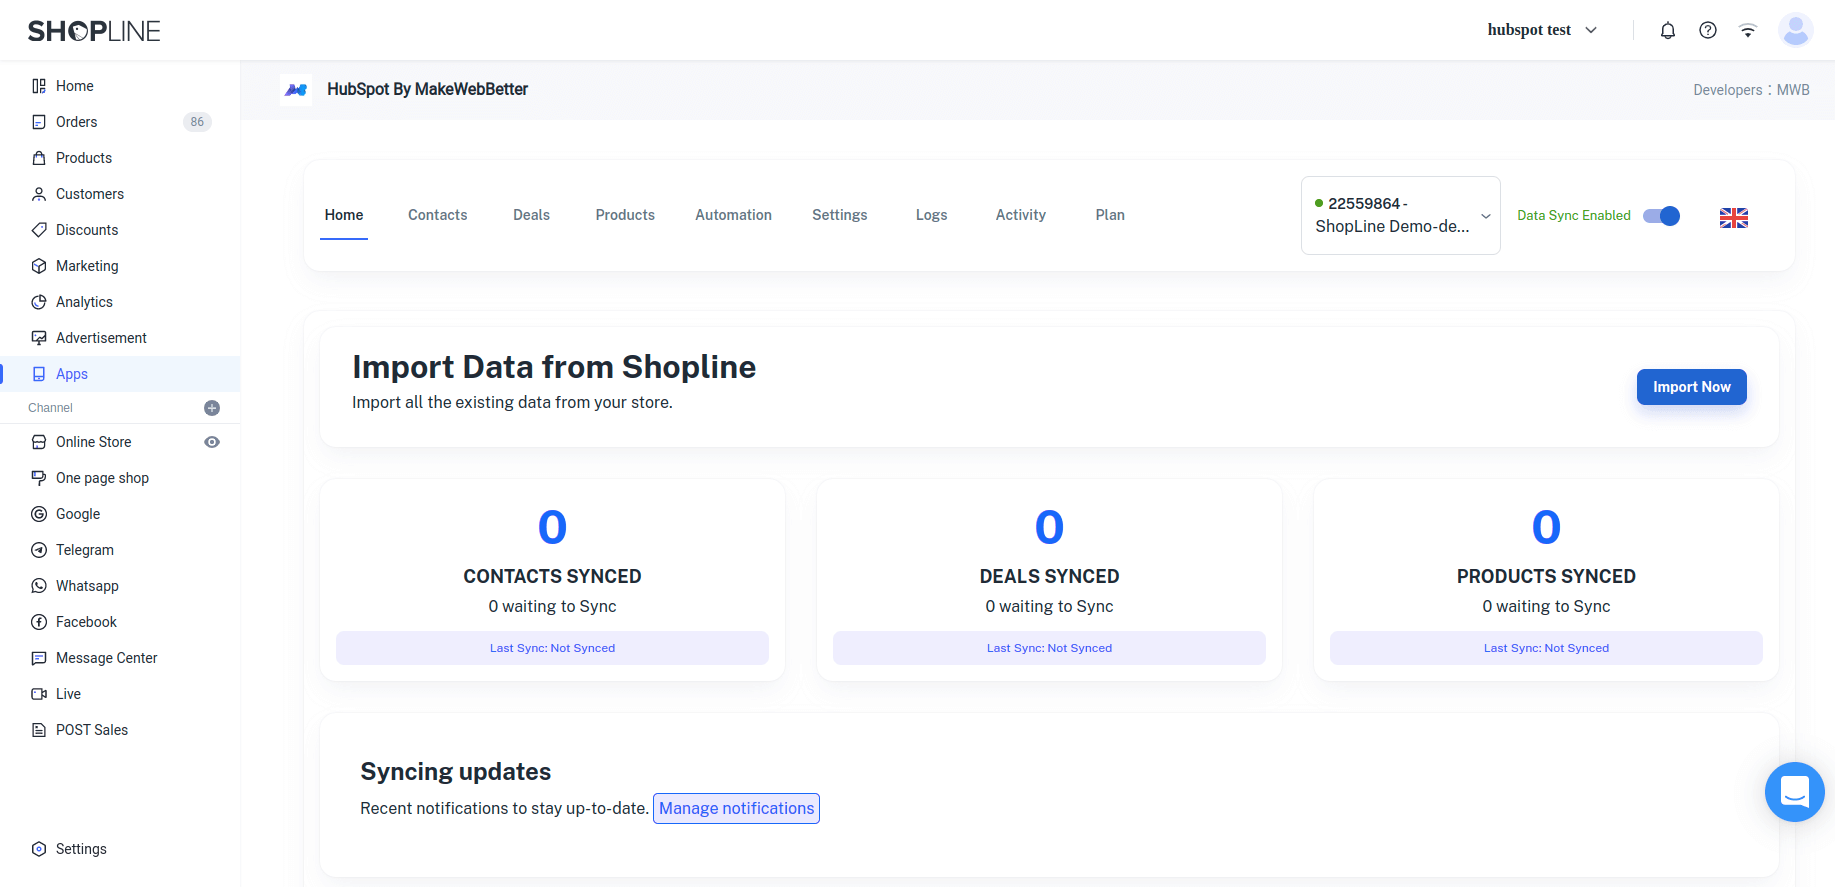
- After setting up the app successfully, you’ll see this home page of the app. The home section is the dashboard of this Shopline app. You can see the details of all your Shopline data this app has synced over HubSpot CRM.
- You can see the number of Contacts, Deals(Orders), Products synced over HubSpot so far.
Note : If you deal with any issue related to data sync, connect with us and we’ll fix it.
3.2.Contacts
- Every contact that registers on your Shopline store will be synced over HubSpot CRM. And this section shows all the contact-related details.
- You get 3 different tabs here. Let’s look into them:
3.2.1.Contact List
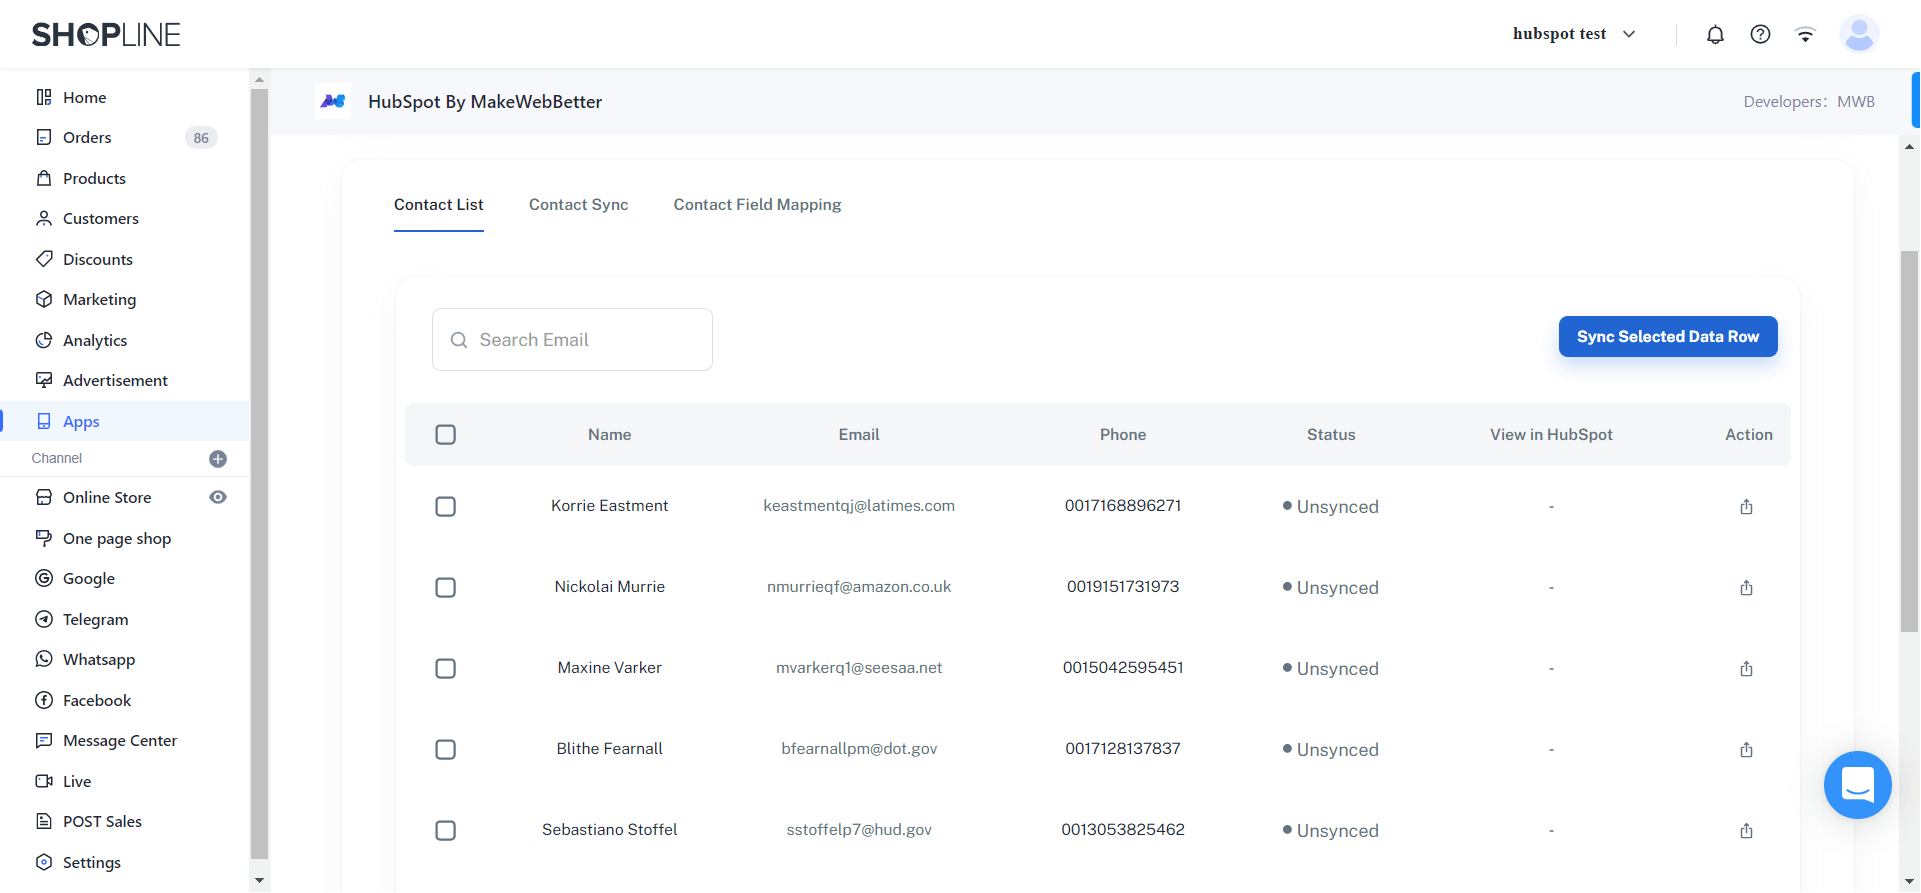
- You can see the complete list of all the contacts that are synced to HubSpot CRM through this app. You can also select any record to sync it over HubSpot if it is not synced successfully.
3.2.2.Contact Sync
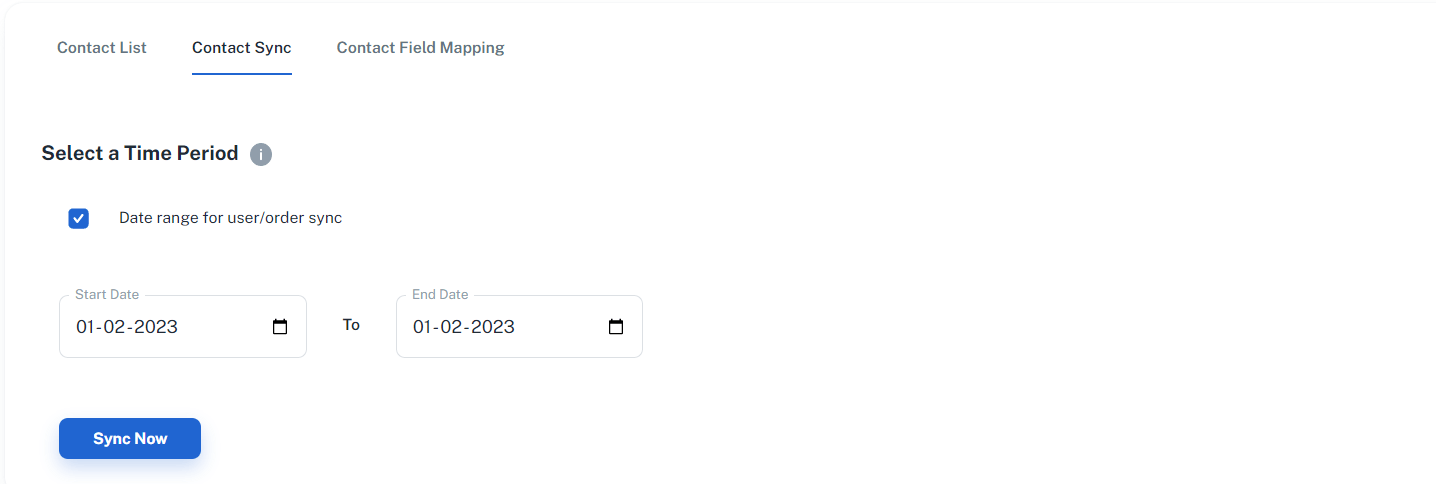
- In this section, you can sync your Shopline contacts for a selected date range.
3.2.3.Contact Field Mapping
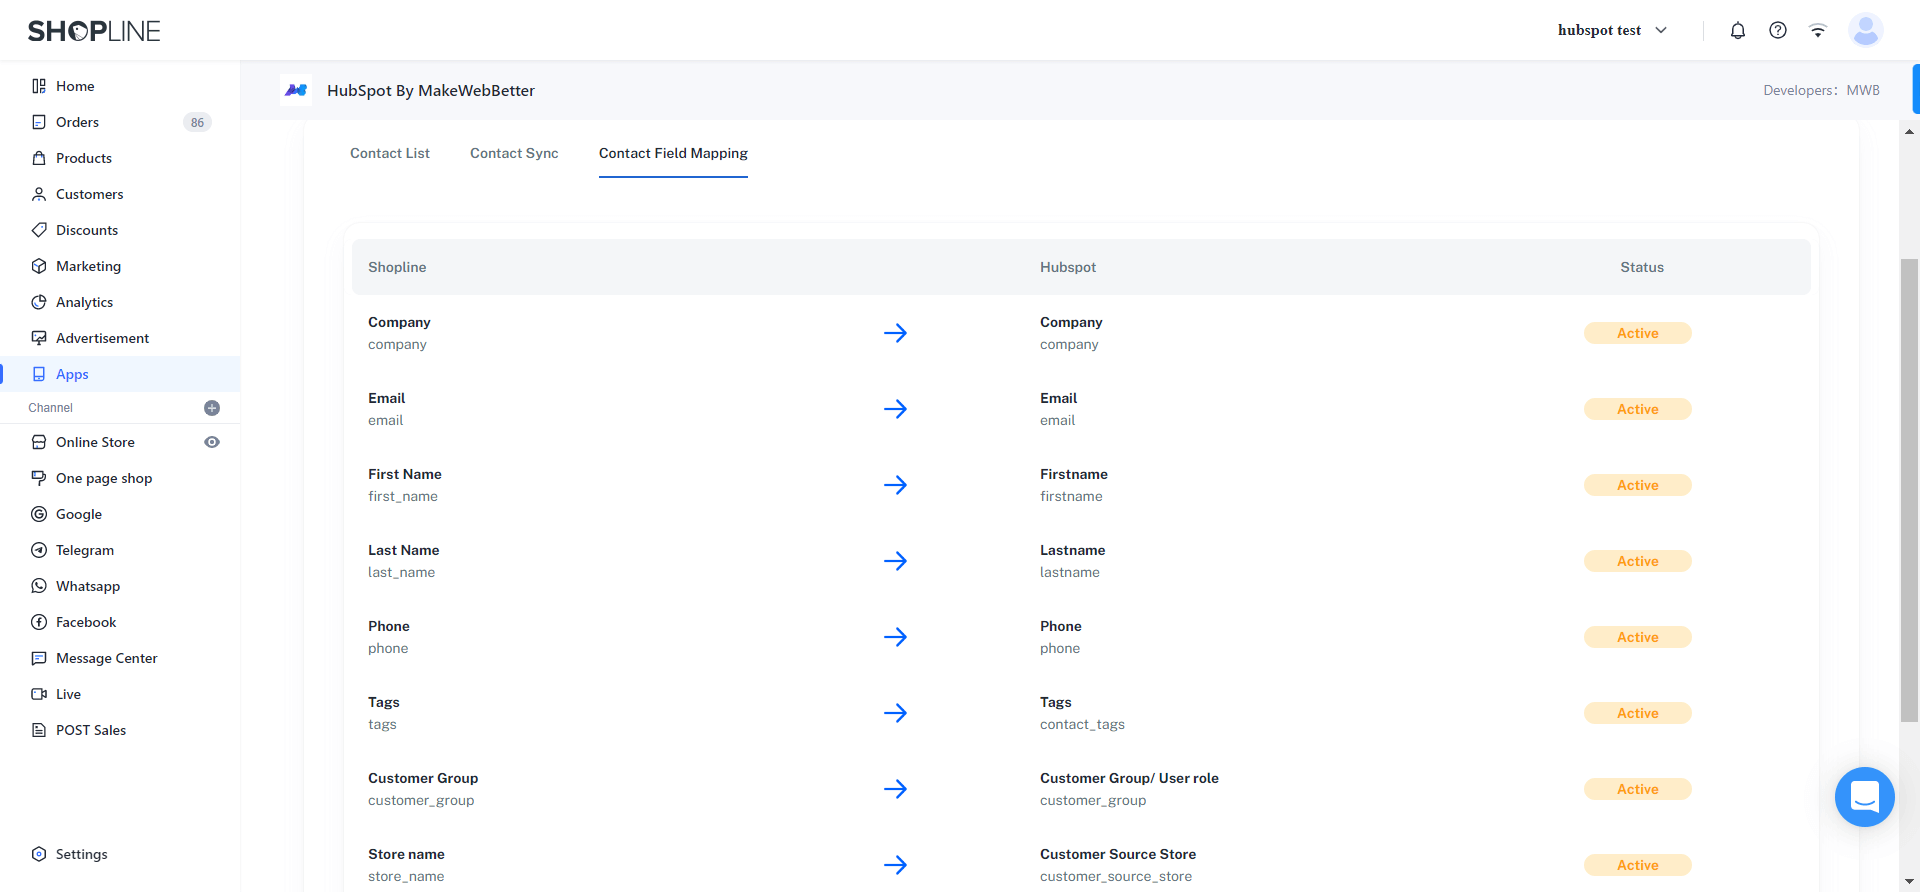
- This section shows the default mapping between your Shopline and HubSpot fields.
3.2.3.Deals
- Every order placed on your Shopline store will be synced over HubSpot as a deal. And this section shows all those deal-related details.
- You get 4 different tabs here. Let’s look into them:
3.2.3.1.Deal List
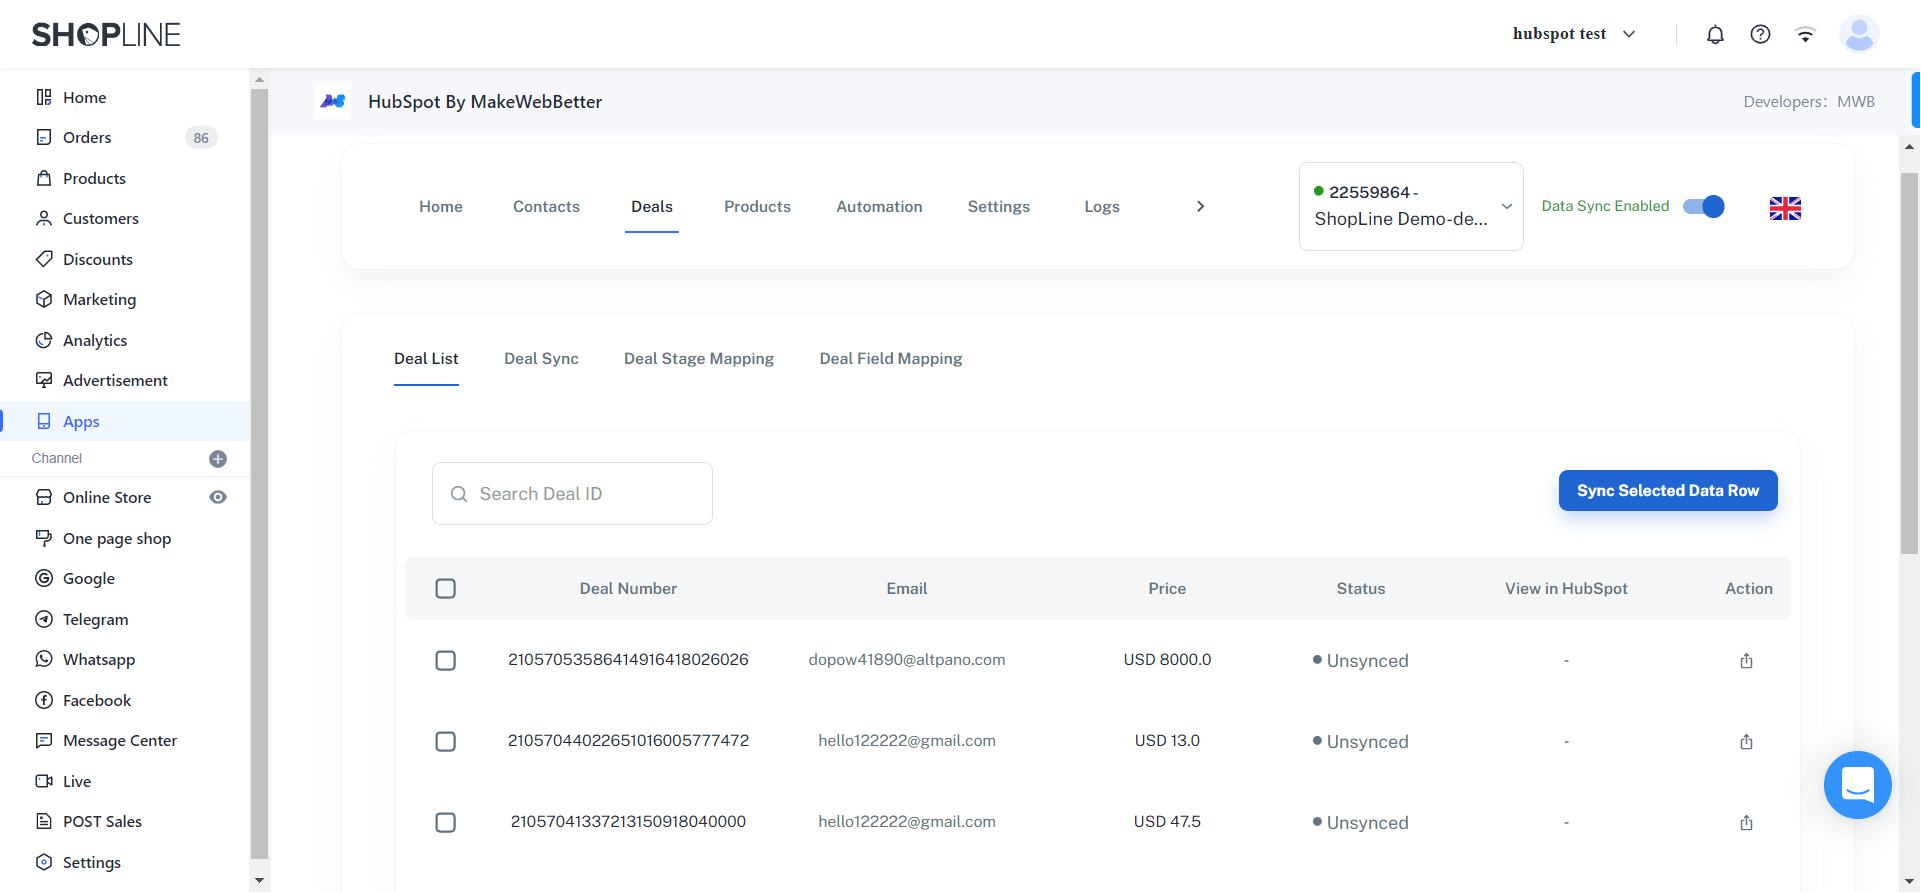
- All the orders that are synced over HubSpot as deals will be displayed here. You can also select any record to sync it over HubSpot if it is not synced successfully.
3.2.3.2.Deal Sync
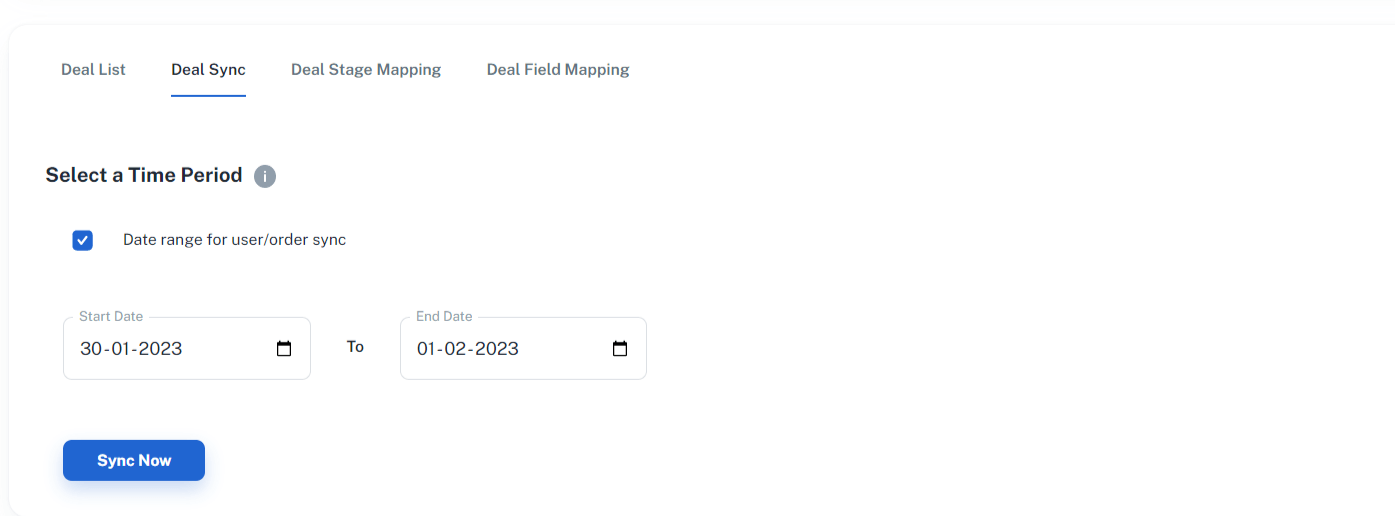
- In this section, you can sync your Shopline orders for a selected date range as HubSpot deals.
3.2.3.3.Deal Stage Mapping
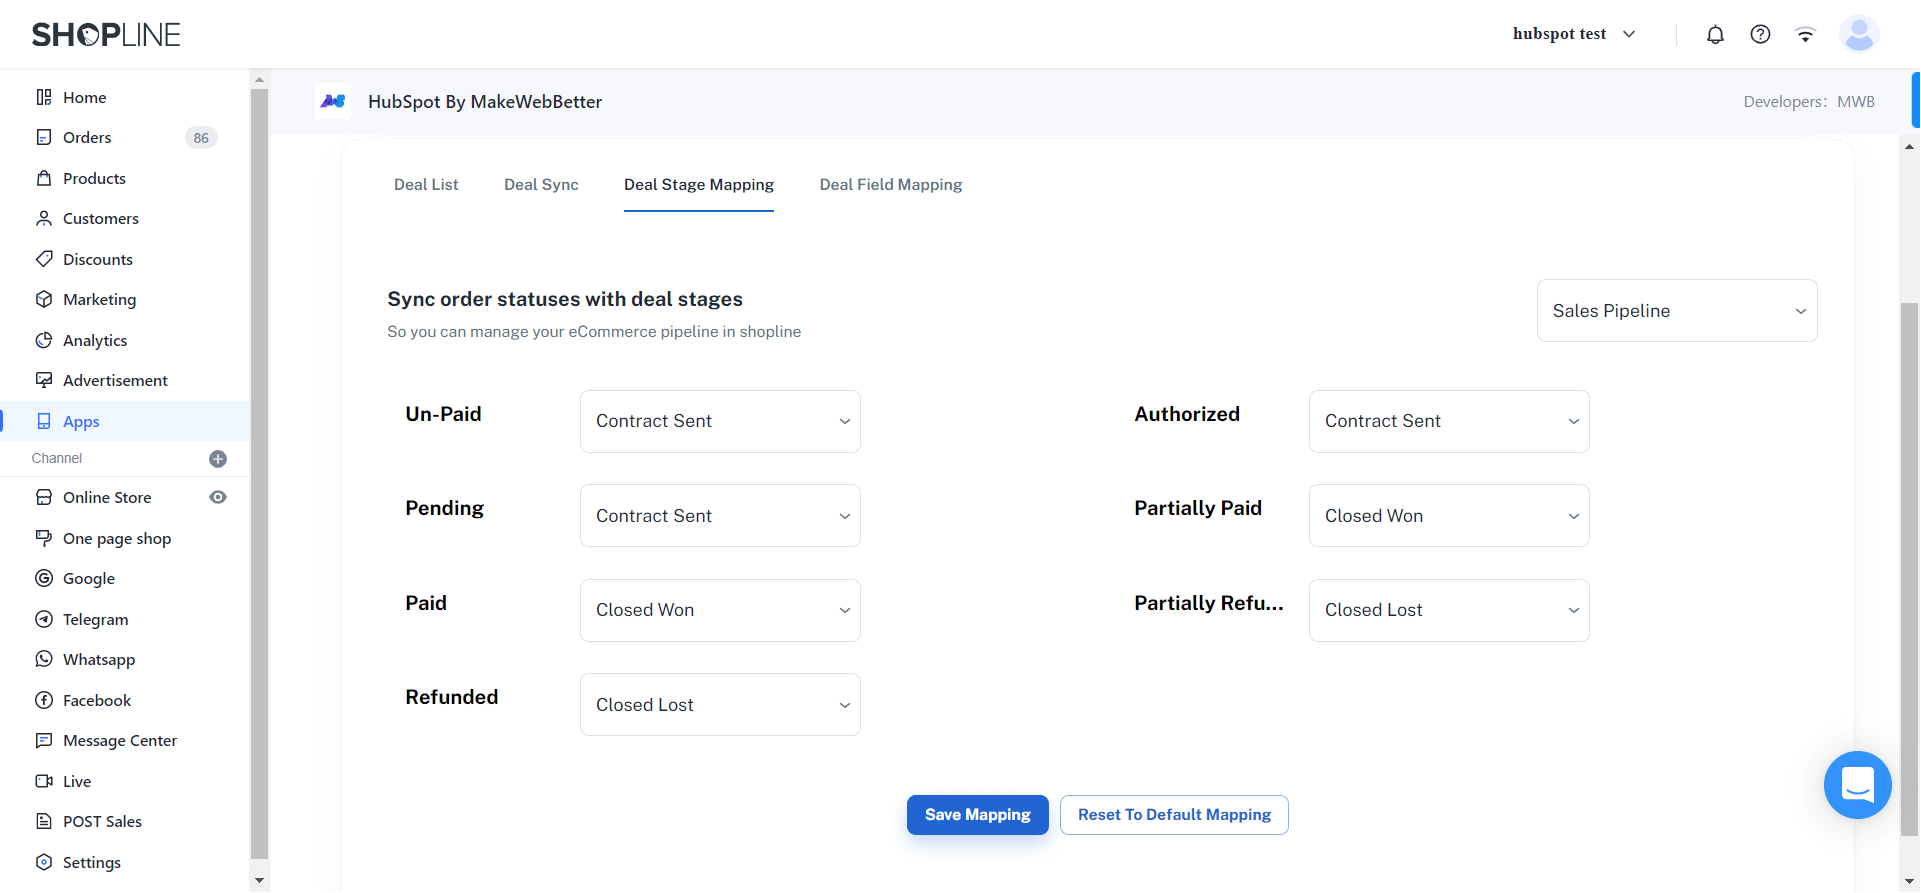
- You can map your Shopline order status as HubSpot deal stages in this section.
3.2.3.4.Deal Field Mapping
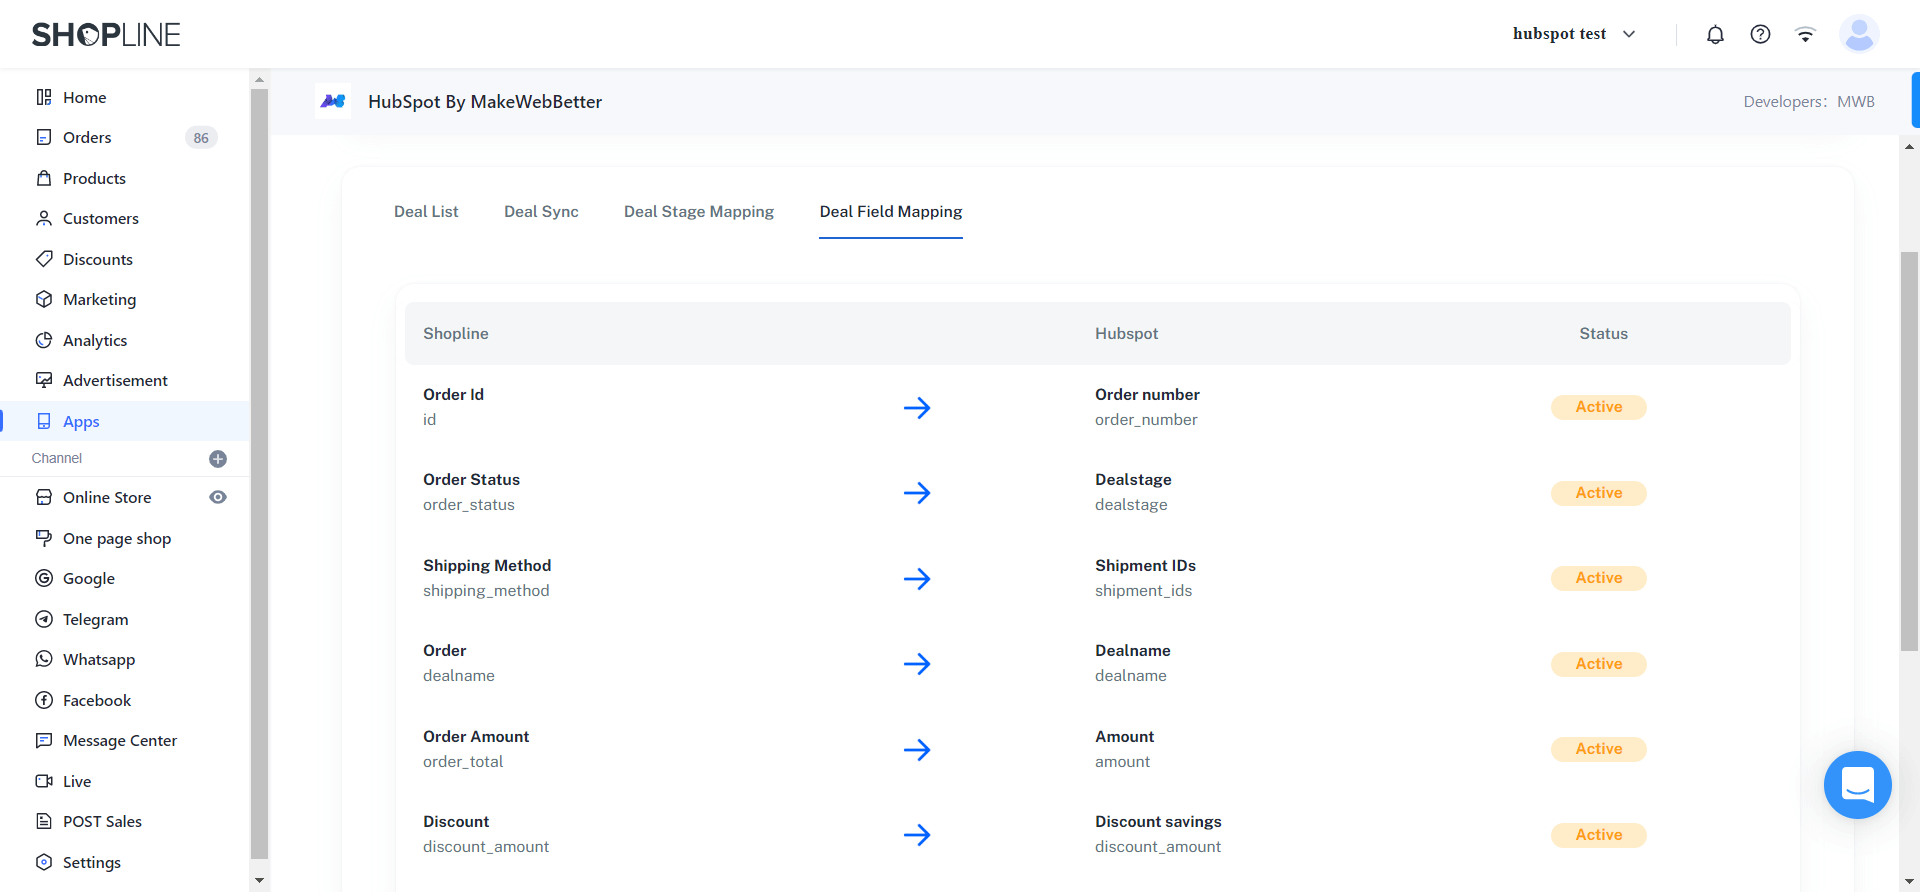
- This section shows the default mapping between the deal-related Shopline and HubSpot fields.
3.2.3.4.Products
- You can see all your products’ data here in this section. Every product you’ve created on your Shopline store will be synced on HubSpot CRM. And this section shows all your product-related details.
- You get 3 different tabs here. Let’s look into them:
3.2.3.4.1.Product listing
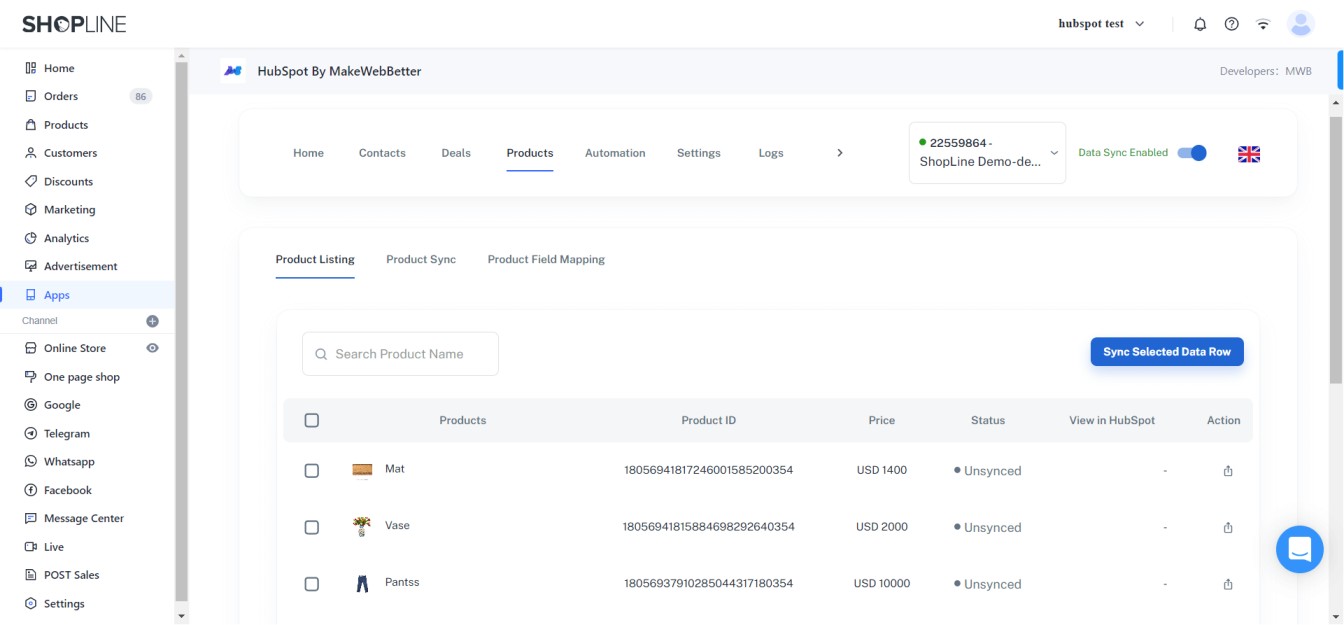
- All your Shopline orders that are synced successfully over HubSpot CRM will be displayed here. You can also select any product to sync it over HubSpot if it is not synced successfully.
3.2.3.4.2.Product sync
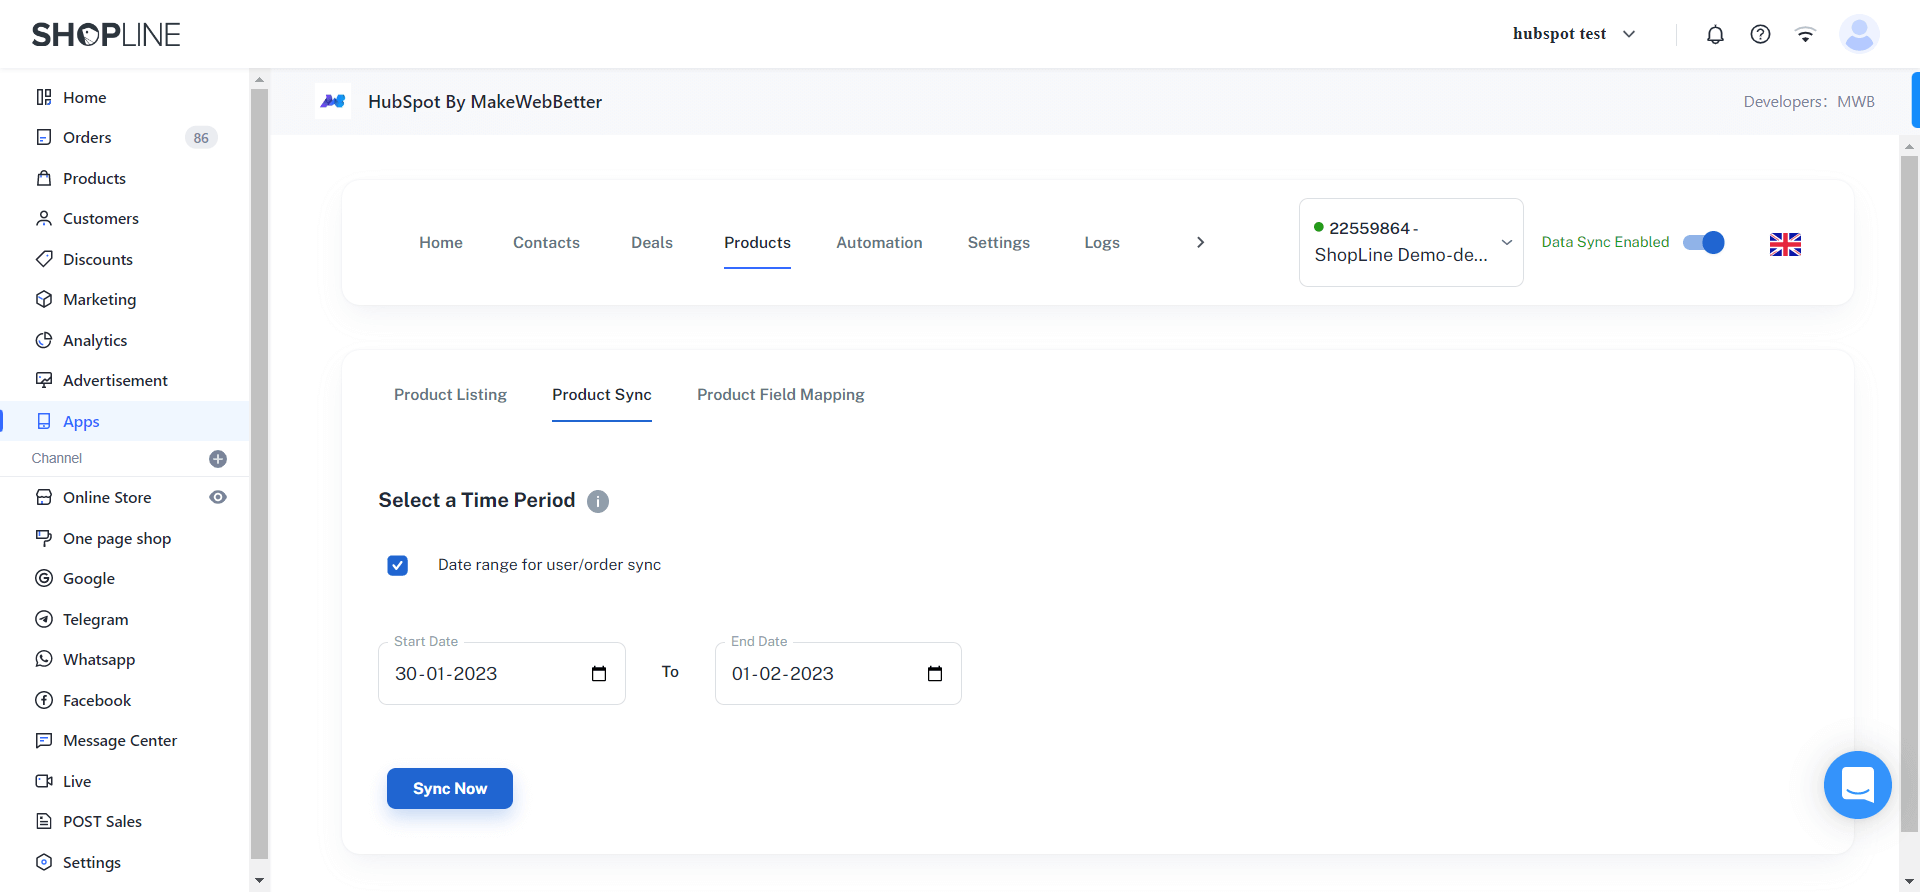
- In this section, you can sync your Shopline products for a selected date range.
3.2.3.4.3.Product field mapping

- This section shows the default mapping between the product-related Shopline and HubSpot fields.
3.2.3.4.5.Automation
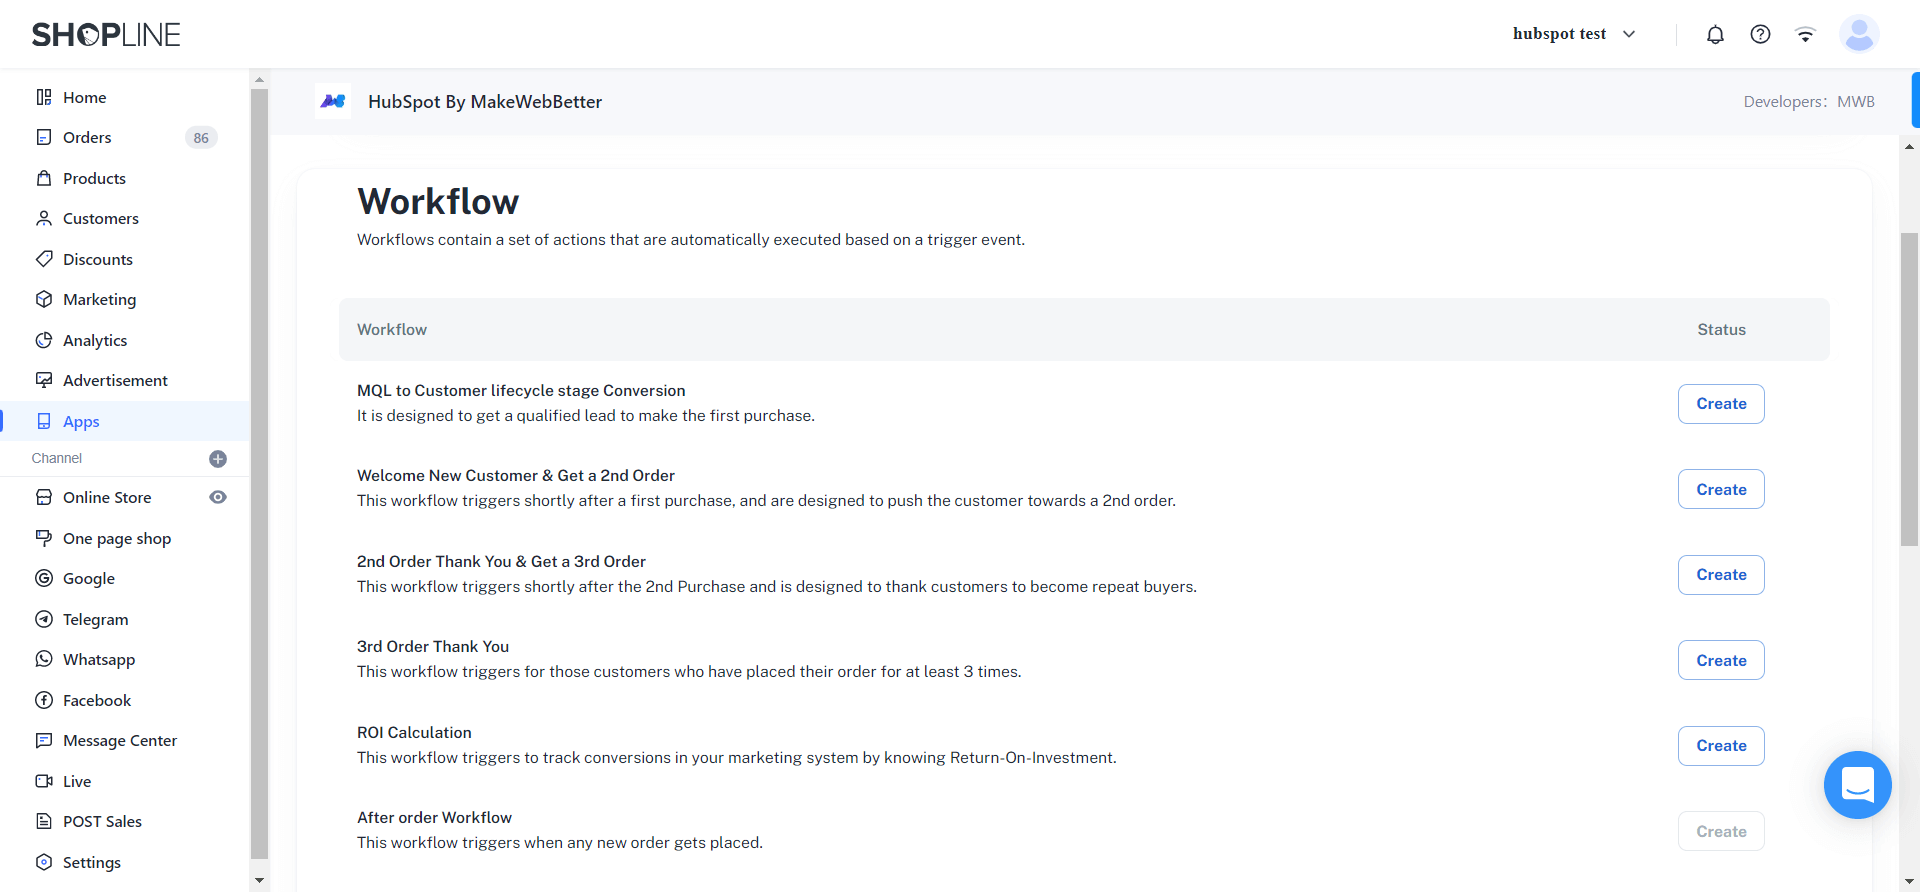
- This section contains some workflows you can directly create into your HubSpot CRM in one click. You just need to click on the Create button in front of the workflow and the workflow will be created in your HubSpot CRM.
- You can use these workflows for abandoned cart recovery, sending thank you emails, targeting repeat customers and more.
3.2.3.4.6.Settings
- This section contains different settings for this app. Let’s look into each of them:
3.2.3.4.6.1.General Settings

This section contains 2 different settings:
- Enable two-way sync for contact tags: Enable this toggle to sync your contacts tags from HubSpot CRM to your Shopline store. For example, if you add a contact tag in your HubSpot CRM, by enabling this toggle, it will be synced over Shopline automatically.
- Enable abandoned cart sync: If you enable this toggle, your abandoned cart data will be synced over HubSpot CRM so you can create and run campaigns to recover them.
3.2.3.4.6.2.RFM Settings(Manage ROI Tracking)
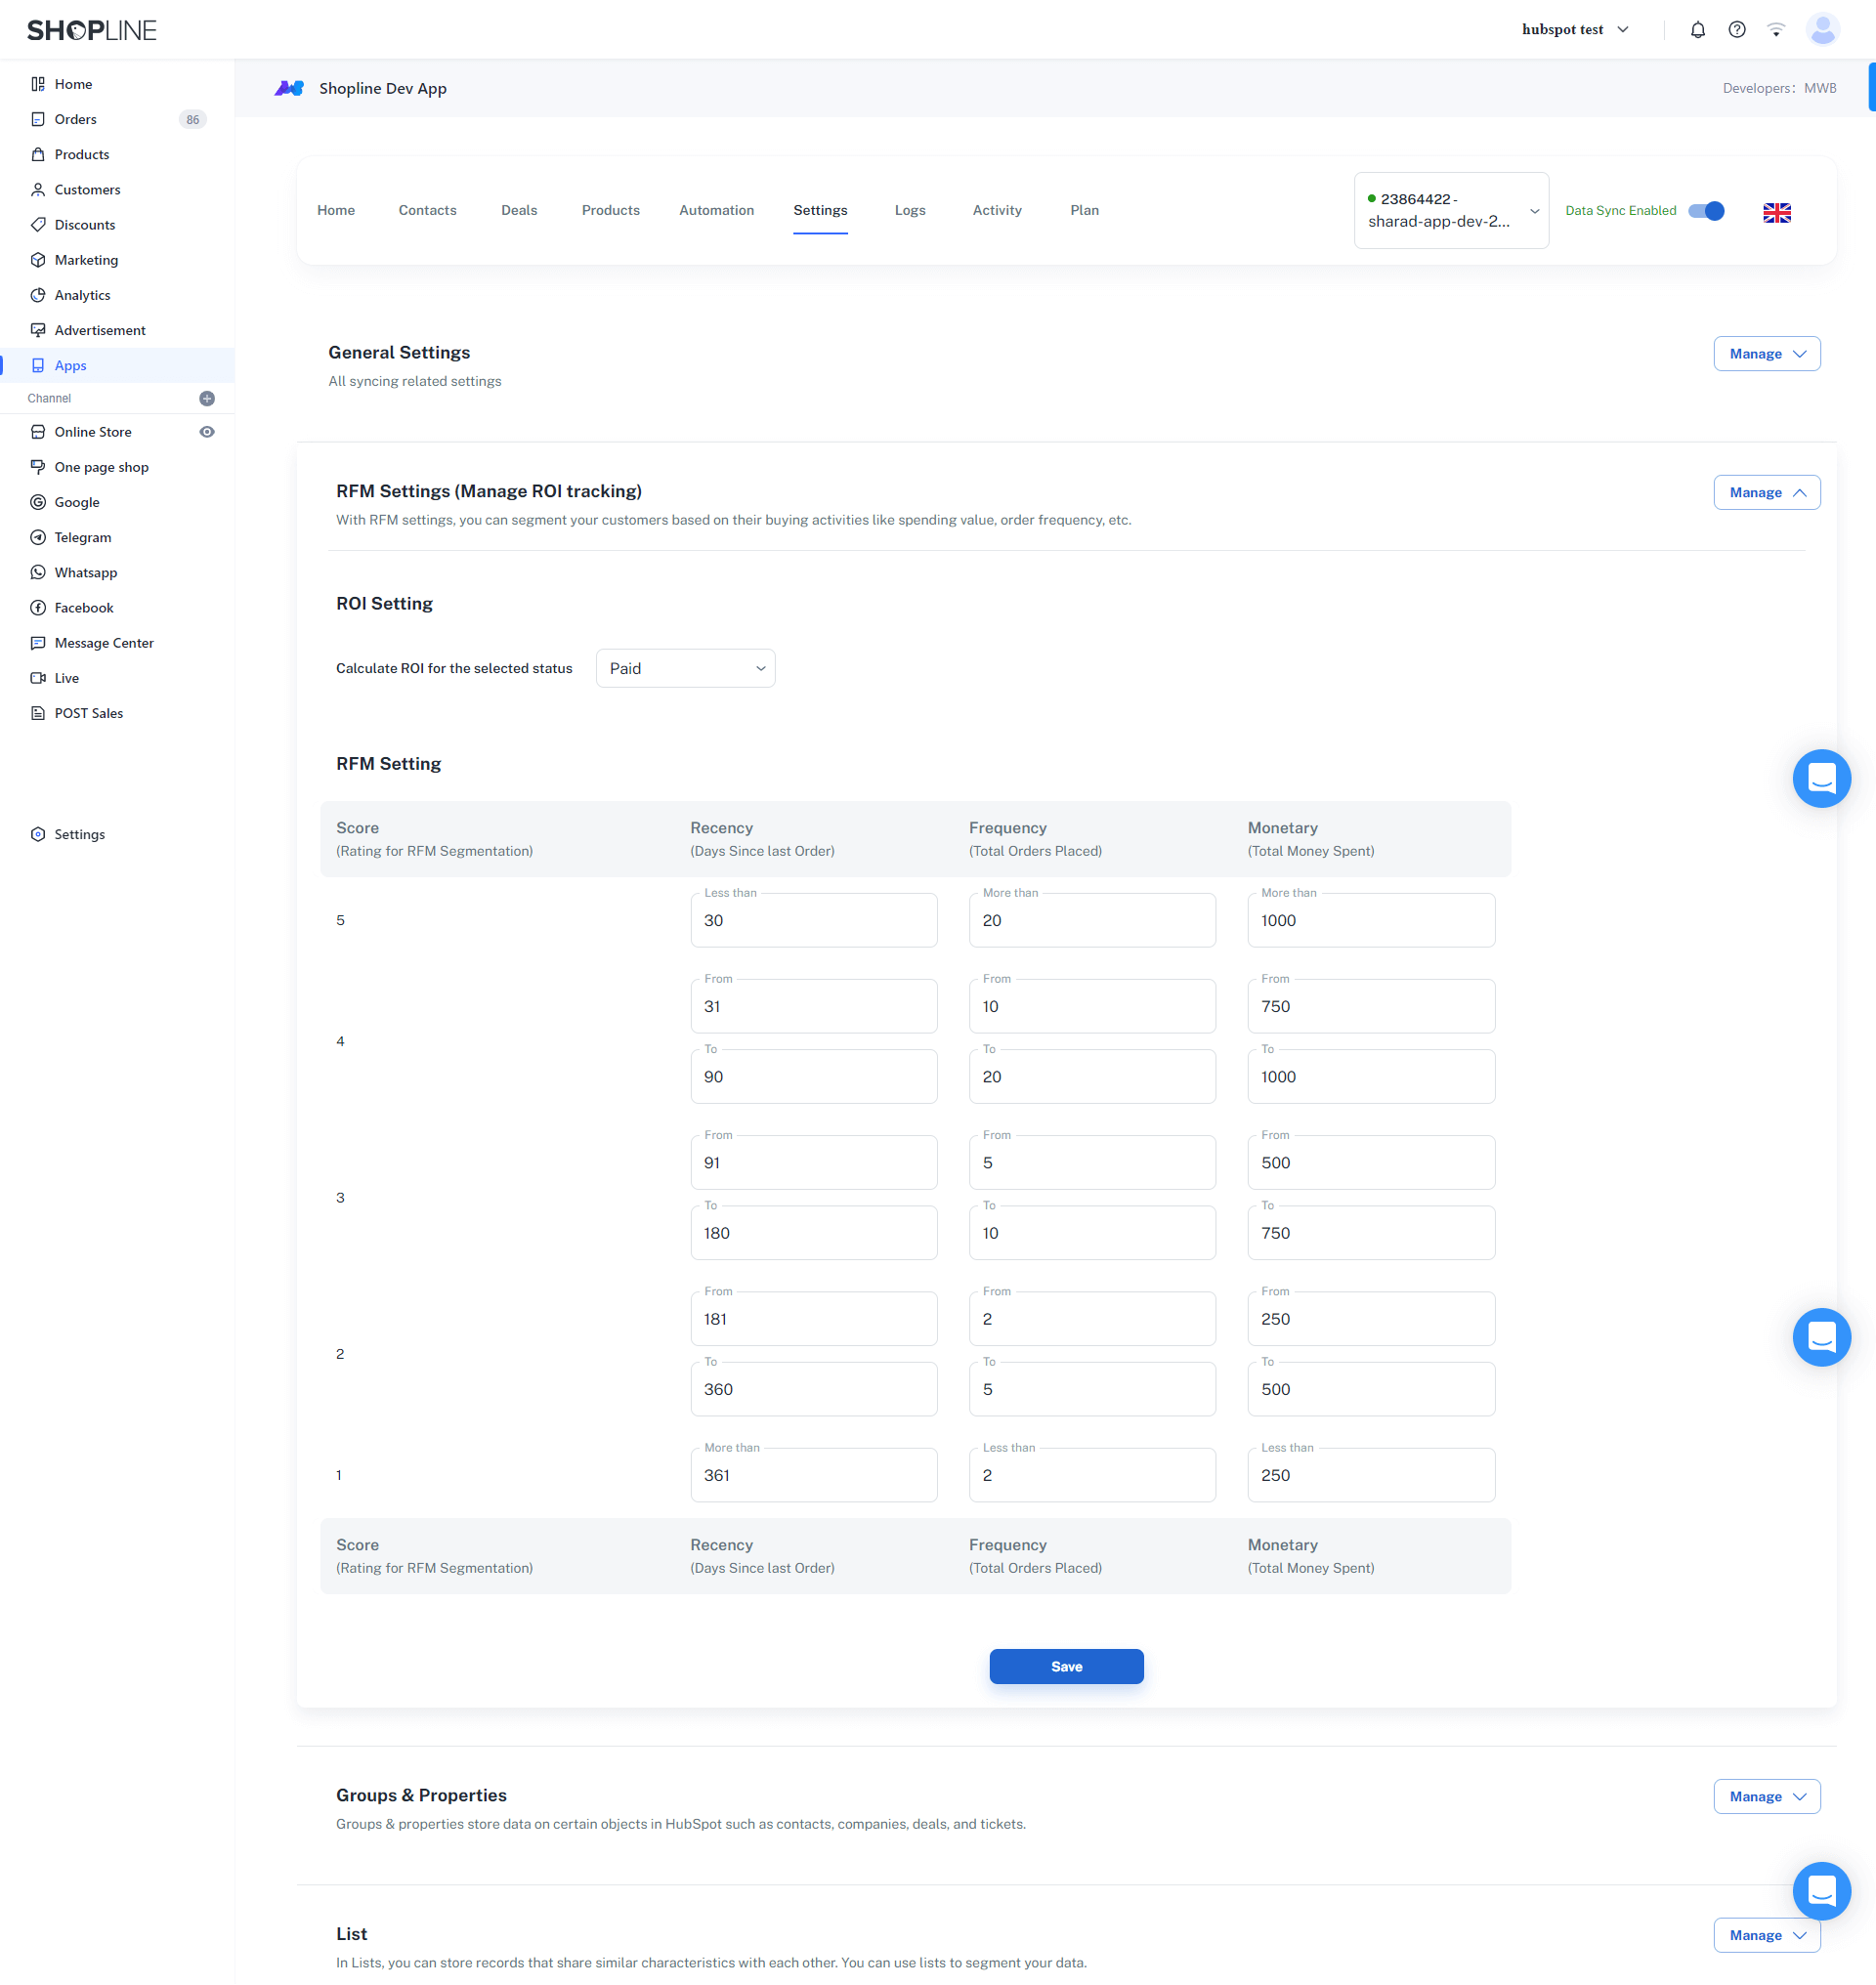
- RFM (Recency, Frequency, and Monetary) segmentation lets you give ratings to your customers based on their buyer behavior. This helps you segment your customers and target them with relevant content and offers. For example, you can use RFM segmentation to classify your high and low spenders and then create campaigns accordingly.
3.2.3.4.6.3.Groups & Properties

- This section shows all the custom properties this Shopline HubSpot integration creates in your HubSpot CRM once you install it.
Here’s the complete list of Groups and Properties you get in this HubSpot Shopline integration:
Order Information
- Last Order Status
- Last Order Fulfillment Status
- Last Order Tracking Number
- Last Order Tracking URL
- Last Order Shipment Date
- Last Order Number
- Last Order Currency
- Total Number of Current Orders
Products Bought
- Last Product Bought
- Last Product Types Bought
- Last Products Bought
- Last Products Bought HTML
- Last Total Number Of Products Bought
- Product Types Bought
- Products Bought
- Total Number Of Products Bought
- Last Products Bought Product 1 Image URL
- Last Products Bought Product 1 Name
- Last Products Bought Product 1 Price
- Last Products Bought Product 1 Url
- Last Products Bought Product 2 Image URL
- Last Products Bought Product 2 Name
- Last Products Bought Product 2 Price
- Last Products Bought Product 2 Url
- Last Products Bought Product 3 Image URL
- Last Products Bought Product 3 Name
- Last Products Bought Product 3 Price
- Last Products Bought Product 3 URL
Shopping Cart Information
- Shipping Address Line 1
- Shipping Address Line 2
- Shipping City
- Shipping State
- Shipping Postal Code
- Shipping Country
- Billing Address Line 1
- Billing Address Line 2
- Billing City
- Billing State
- Billing Postal Code
- Billing Country
Customer Group
- Customer Group/ User role
- Customer Source Store
- Accepts Marketing
- Marketing Newsletter
- Shopping Cart ID
Categories Bought
- Last Categories Bought
- Categories Bought
RFM Information
- Total Value of Orders
- Average Order Value
- Total Number of Orders
- First Order Value
- First Order Date
- Last Order Value
- Last Order Date
- Average Days Between Orders
- Account Creation Date
- Monetary Rating
- Order Frequency Rating
- Order Recency Rating
SKUs Bought
- Last SKUs Bought
- SKUs Bought
ROI Tracking
- Customer New Order
- Abandoned Cart Recovery Workflow Conversion
- Abandoned Cart Recovery Workflow Conversion Amount
- Abandoned Cart Recovery Workflow Conversion Date
- Abandoned Cart Recovery Workflow Start Date
- Current ROI Campaign
- Customer Re-engagement Workflow Conversion
- Customer Re-engagement Workflow Conversion Amount
- Customer Re-engagement Workflow Conversion Date
- Customer Re-engagement Workflow Start Date
- Customer Rewards Workflow Conversion
- Customer Rewards Workflow Conversion Amount
- Customer Rewards Workflow Conversion Date
- Customer Rewards Workflow Start Date
- MQL Capture, Nurture & Conversion Conversion
- MQL Capture, Nurture & Conversion Conversion Amount
- MQL Capture, Nurture & Conversion Conversion Date
- MQL Capture, Nurture & Conversion Start date
- New Customer Workflow Conversion
- New Customer Workflow Conversion Amount
- New Customer Workflow Conversion Date
- New Customer Workflow Start Date
- Second Purchase Workflow Conversion
- Second Purchase Workflow Conversion Amount
- Second Purchase Workflow Conversion Date
- Second Purchase Workflow Start Date
- Third Purchase Workflow Conversion
- Third Purchase Workflow Conversion Amount
- Third Purchase Workflow Conversion Date
- Third Purchase Workflow Start Date
Abandoned Cart Details
- Current Abandoned Cart
- Abandoned Cart Date
- Abandoned Cart Counter
- Abandoned Cart URL
- Abandoned Cart Products SKUs
- Abandoned Cart Products Categories
- Abandoned Cart Products
- Abandoned Cart Products HTML
- Abandoned Cart Tax Value
- Abandoned Cart Subtotal
- Abandoned Cart Total Value
3.2.3.4.6.4.Lists
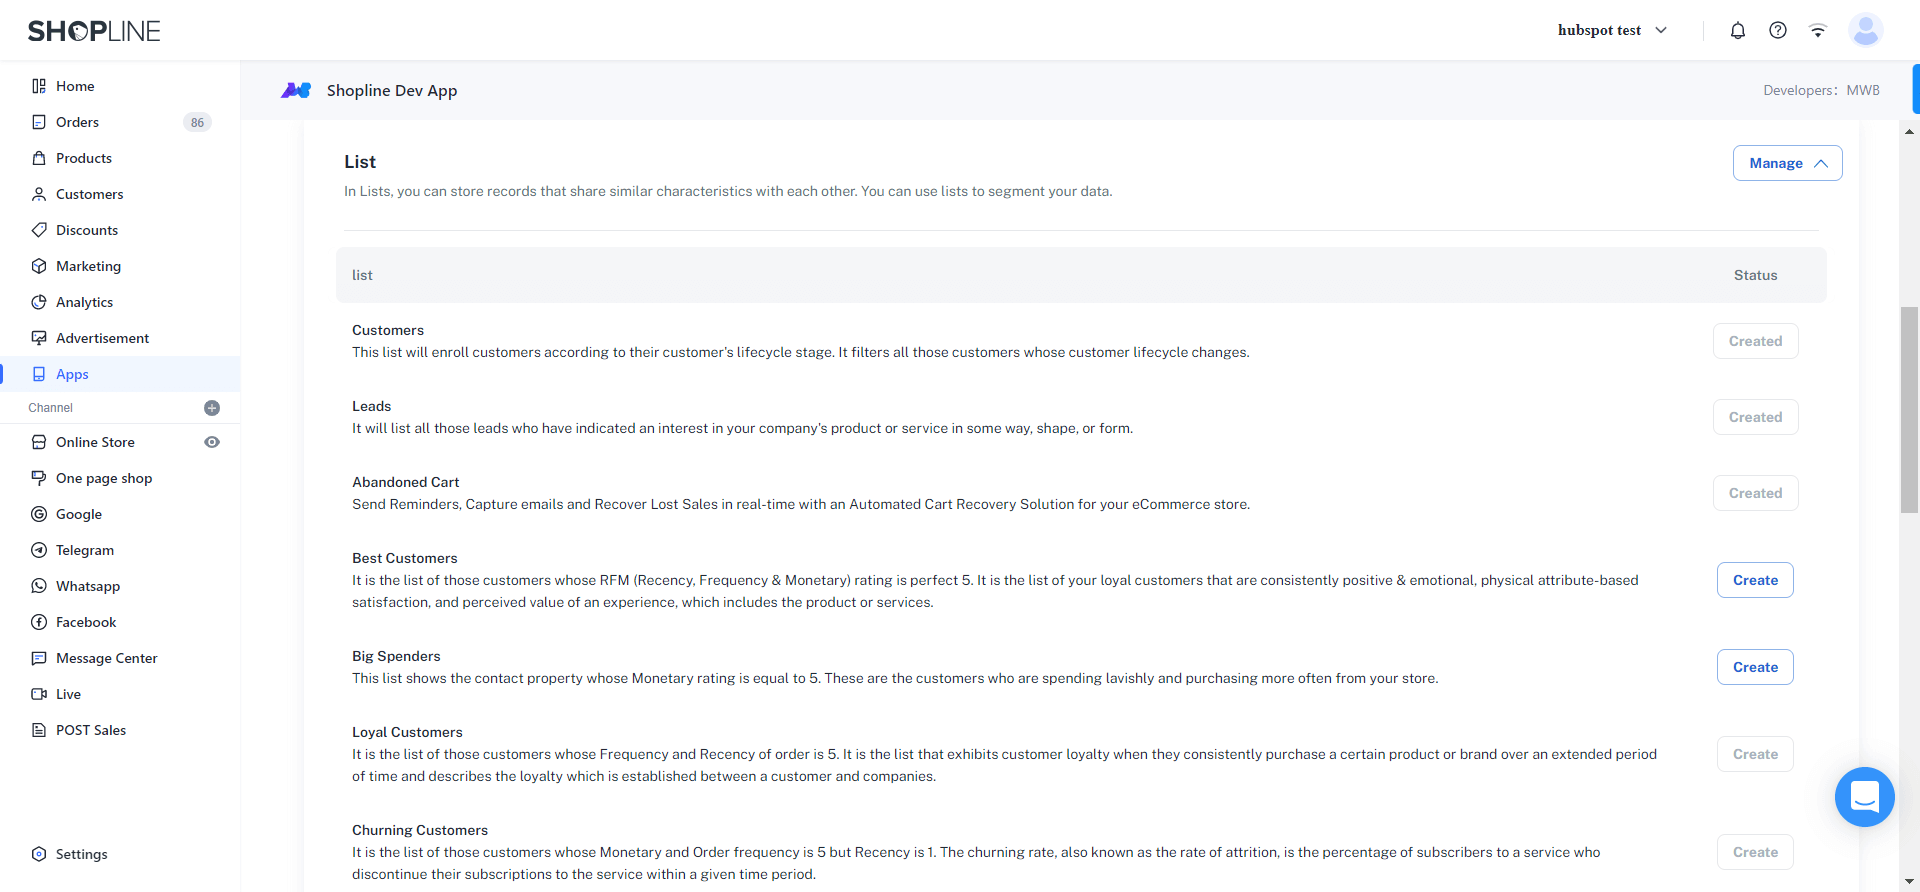
- Like Workflows, this section contains multiple lists. You can create these lists in your HubSpot CRM and use them to segment your contacts.
3.2.3.4.6.7.Logs
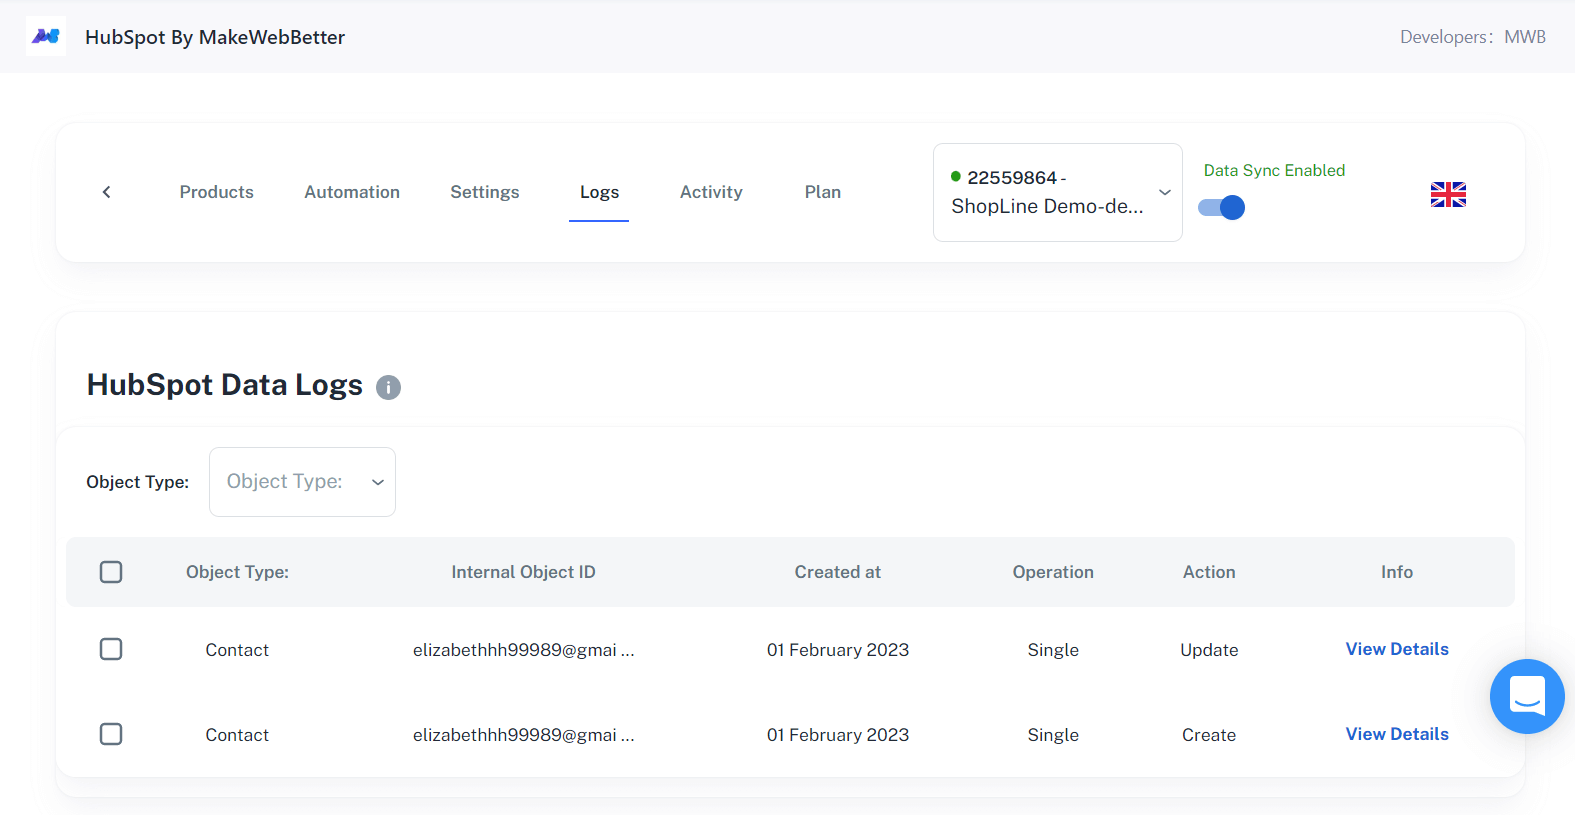
- This section shows the log details of all the data you’ve synced to HubSpot CRM using this app. These details let you keep track of the data this app has synced and help you track any data sync errors.
3.2.3.4.6.8.Activity
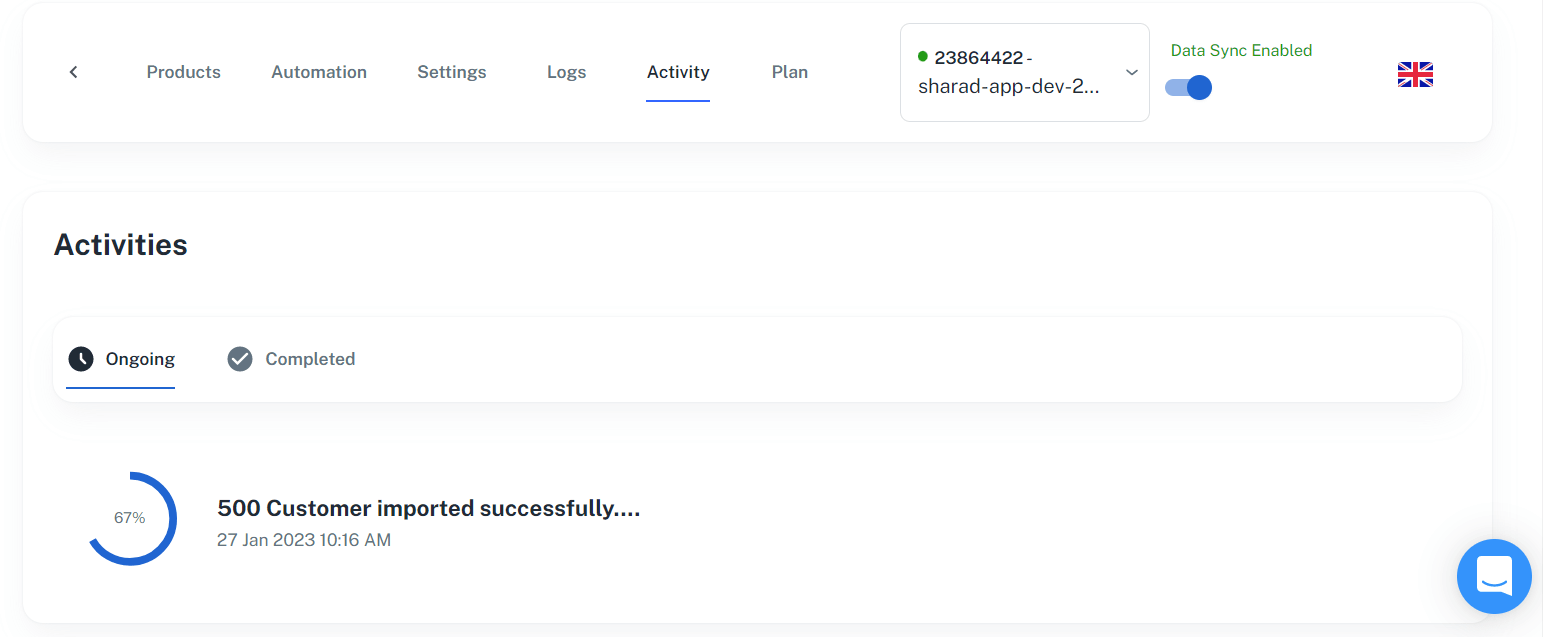
- The Activity section shows all the data sync activities that are ongoing as well as completed.
3.2.3.4.6.9.Plan
- This section shows all the details of your current plan. You can see your transaction history as well as upgrade or cancel your plan from here.
4.FAQs
What are the pricing plans for the Shopline HubSpot integration?
To access all the features of the HubSpot Shopline Integration you can choose the plan most suitable to your use.
The features of the integration service are categorized into three plans:
- Beginner - $15/month. With 100 orders to sync every month.
- Advanced - $49/month. With 500 orders to sync every month.
- Ultimate - $199/month. With unlimited orders to sync every month.
How do I export my old user contacts from Shopline to HubSpot?
- Open the HubSpot Shopline integration and navigate to Contacts.
- Click on the Contact Sync tab under the Contacts section.
- You’ll see a checkbox to select the time period.
- Click on the checkbox and select the time period you want to sync contacts for.
- Then click on the Sync now button to sync the contacts for that time frame.
- The contact will be exported successfully.
I linked the wrong account with the app. How do I switch my account?
You can switch your hubspot account by following the steps mentioned below:
- Open your Shopline HubSpot integration.
- You’ll see the HubSpot portal dropdown below the menu bar.
- Click on the dropdown and you’ll see the + Add new portal button there.
- Click on that button and you’ll see a popup asking you to select your HubSpot account you want to connect to.
- Select your account and the account will switch successfully.