
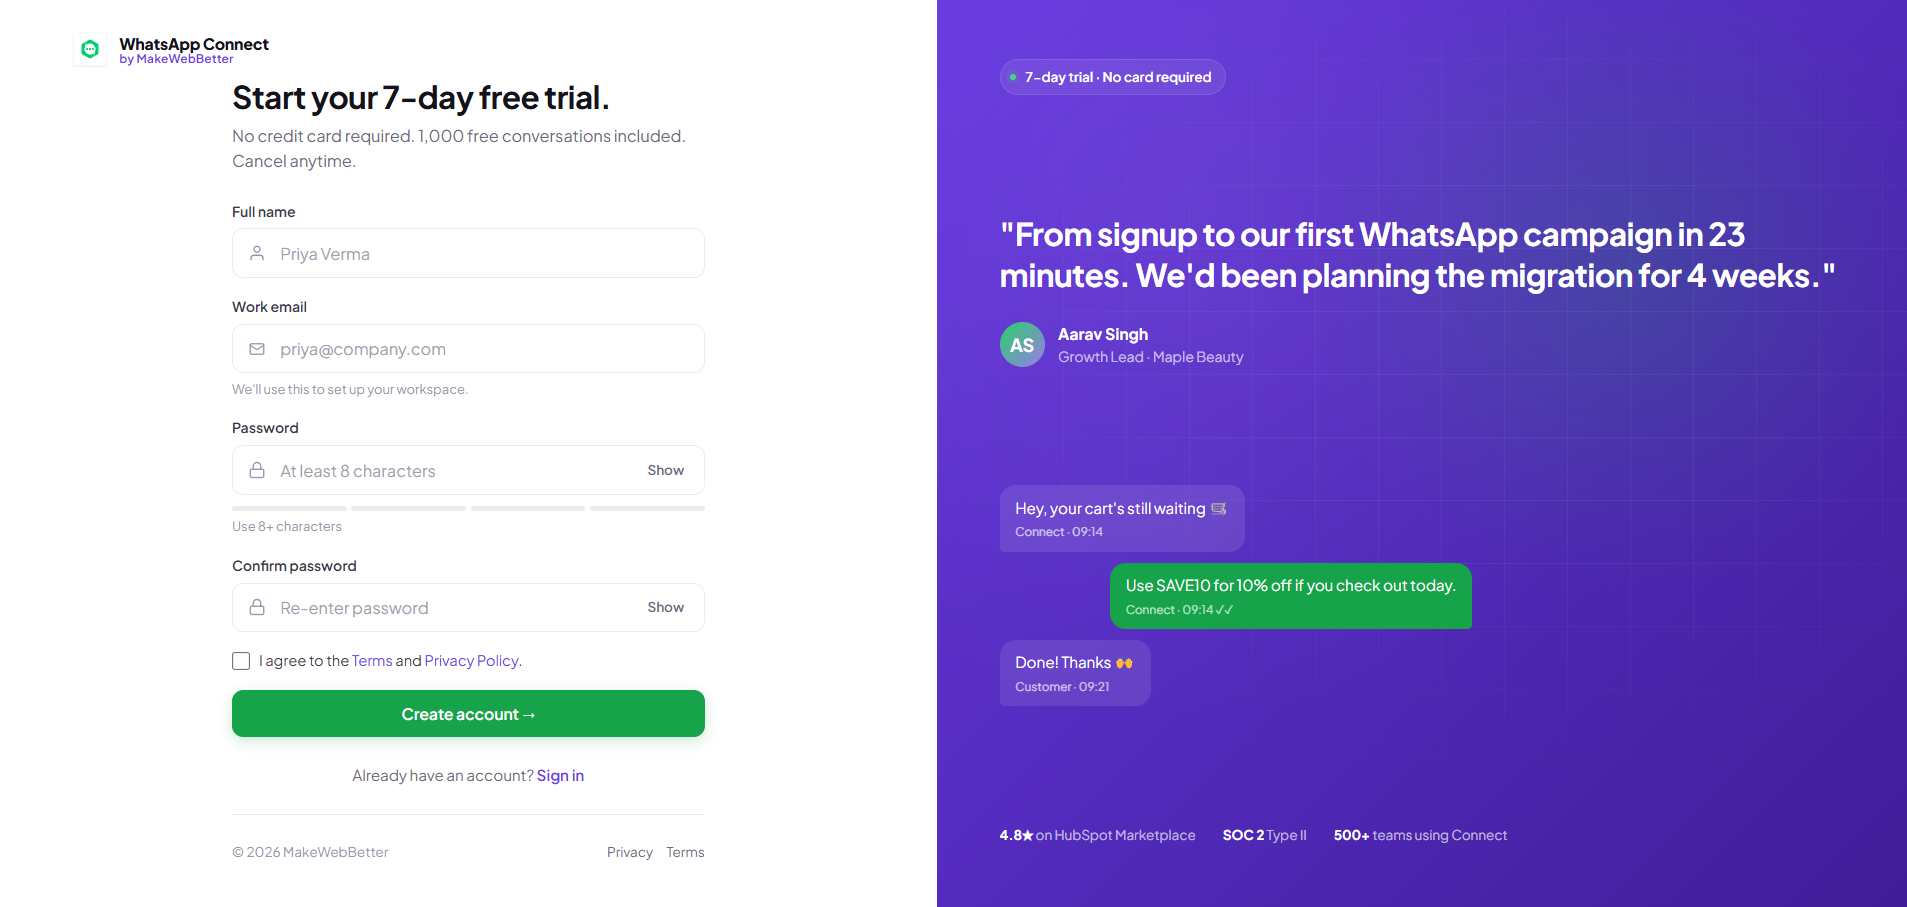
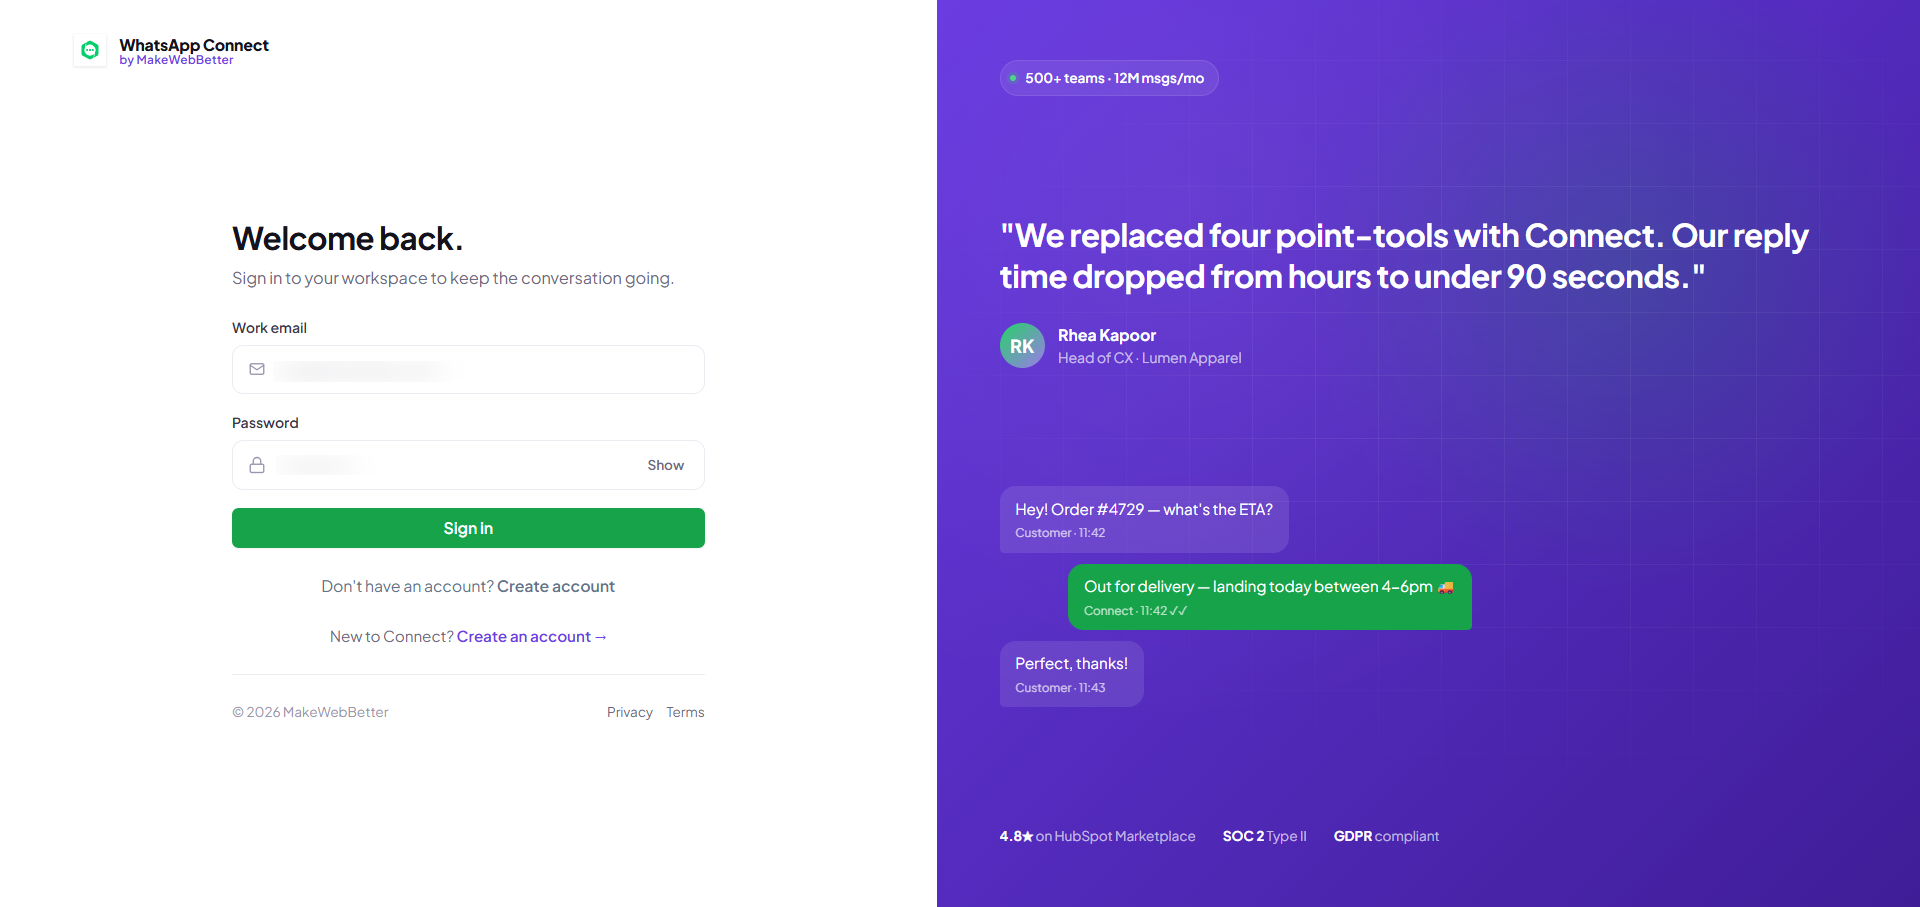
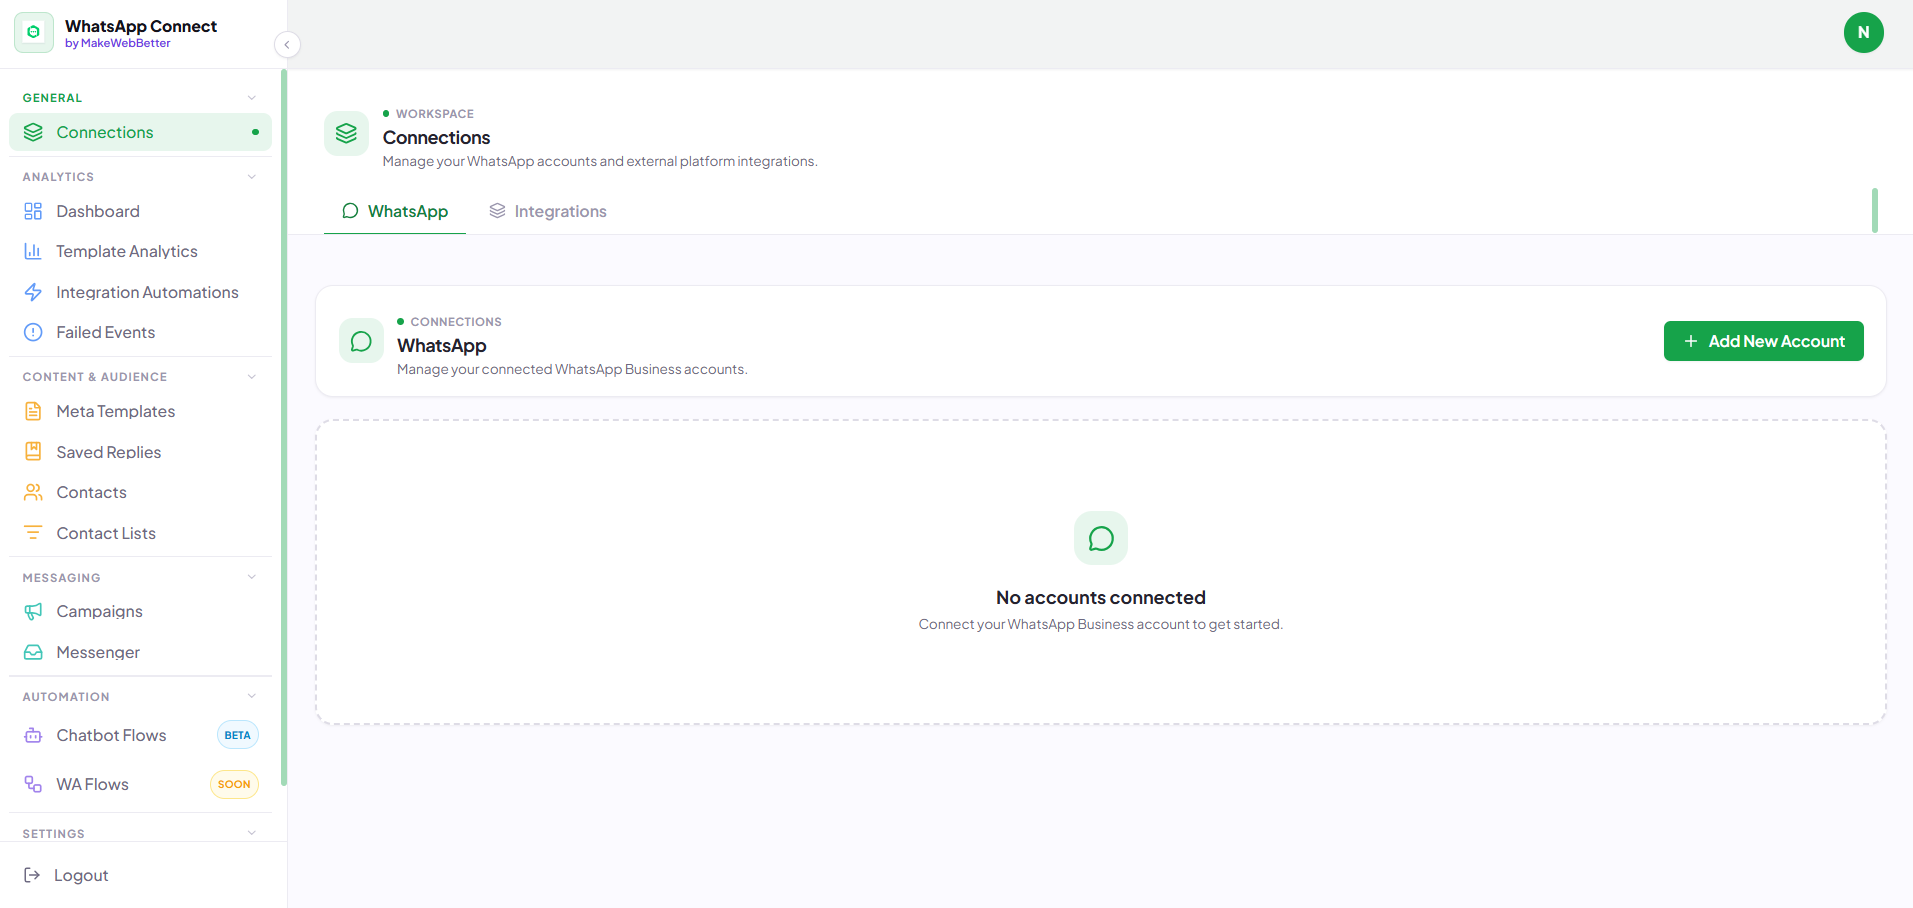
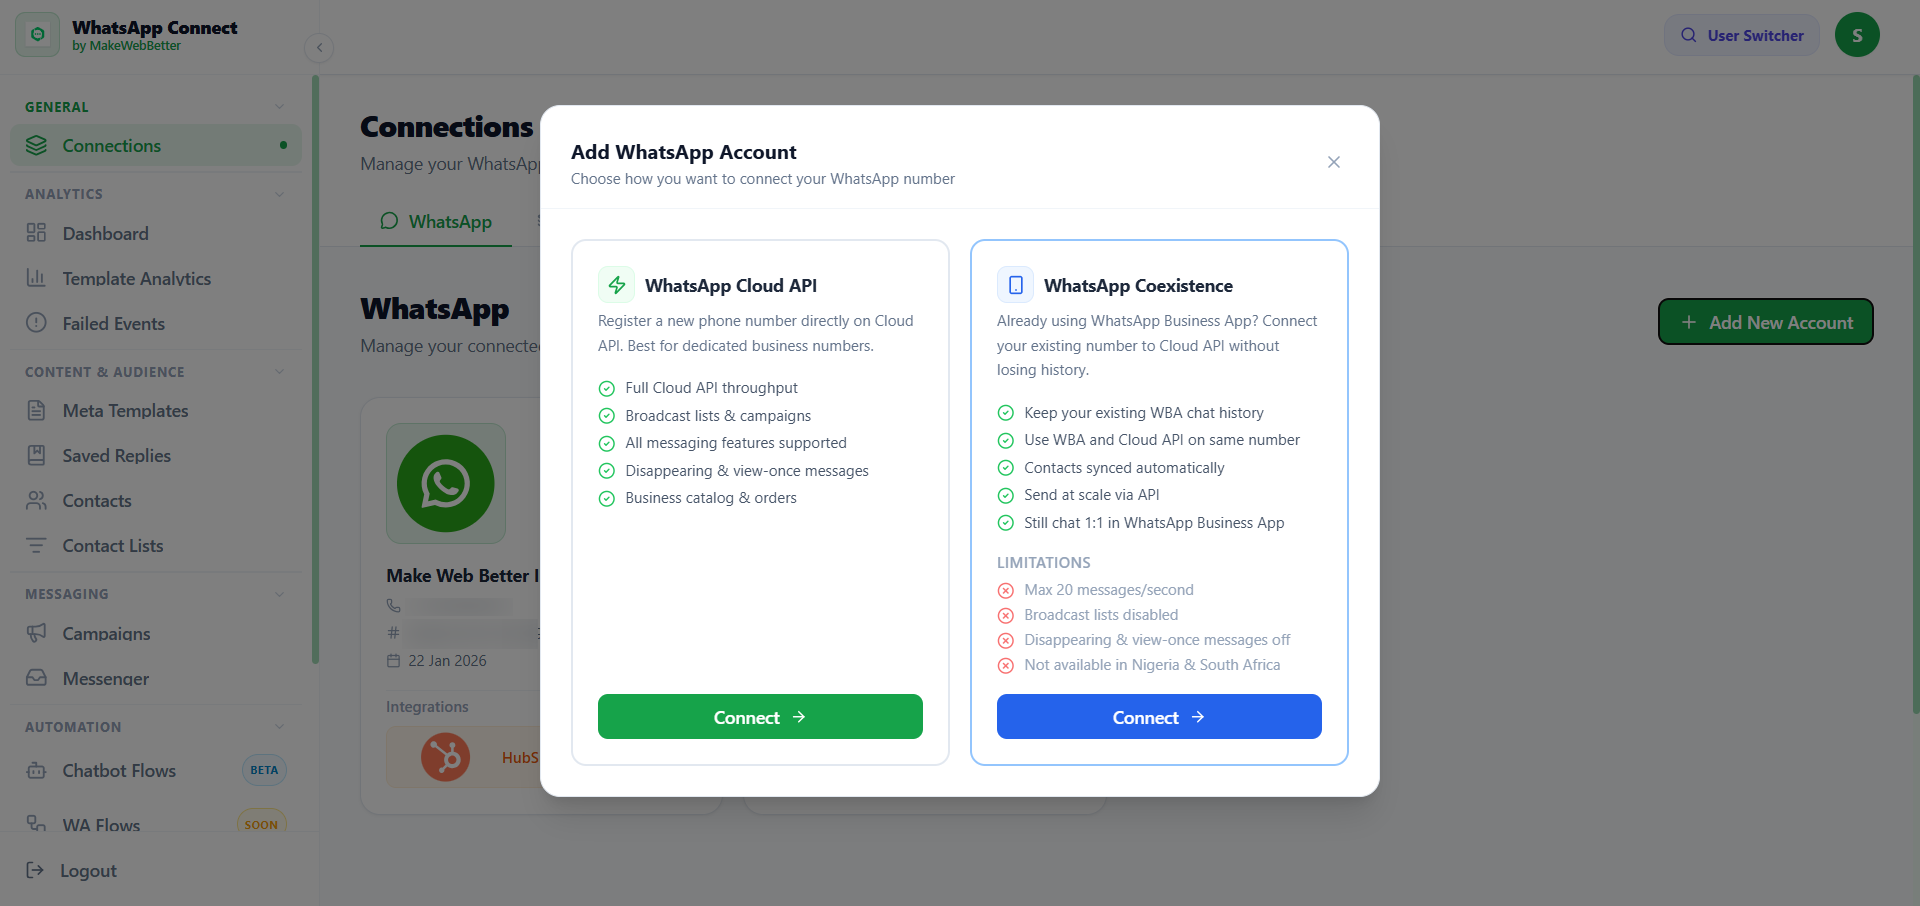
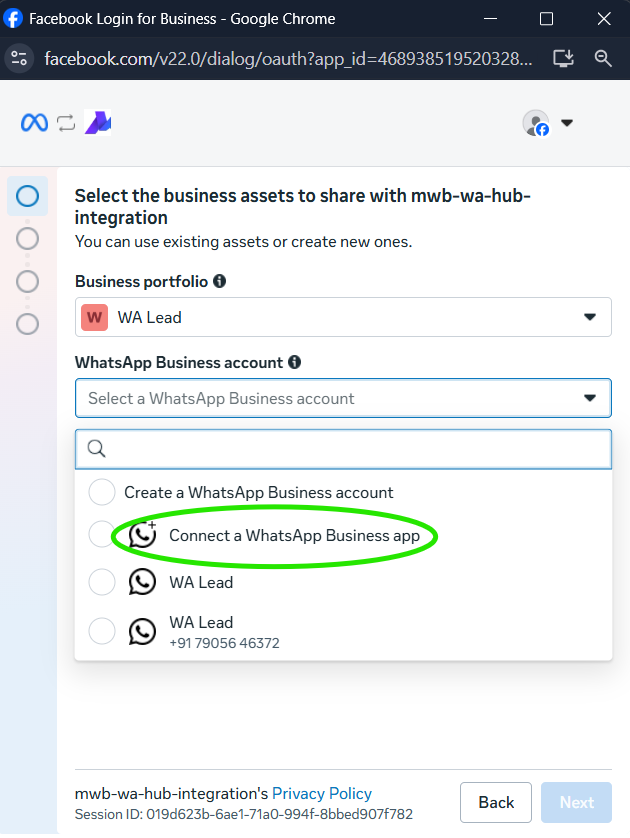
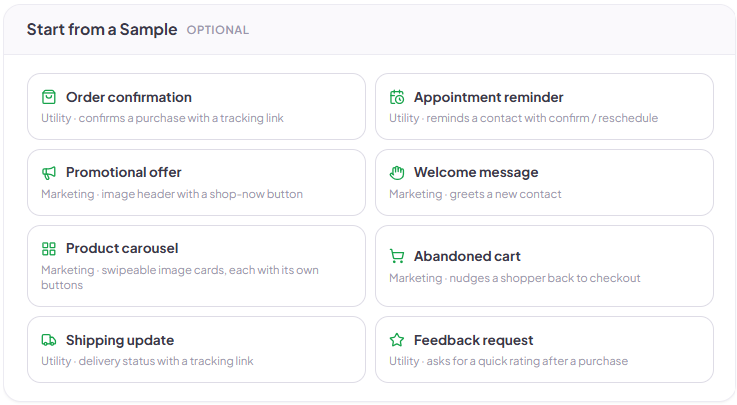
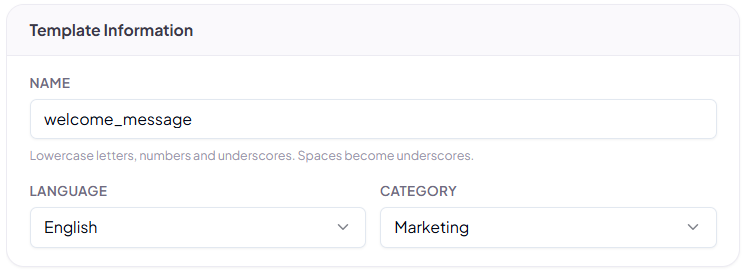
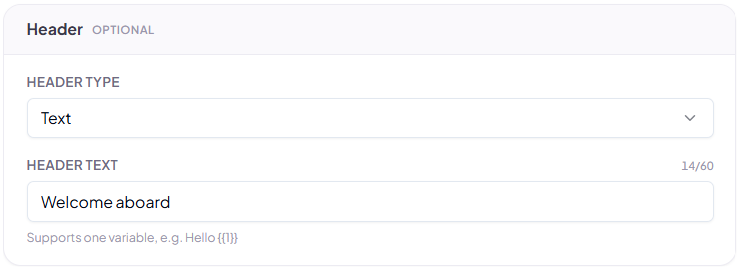
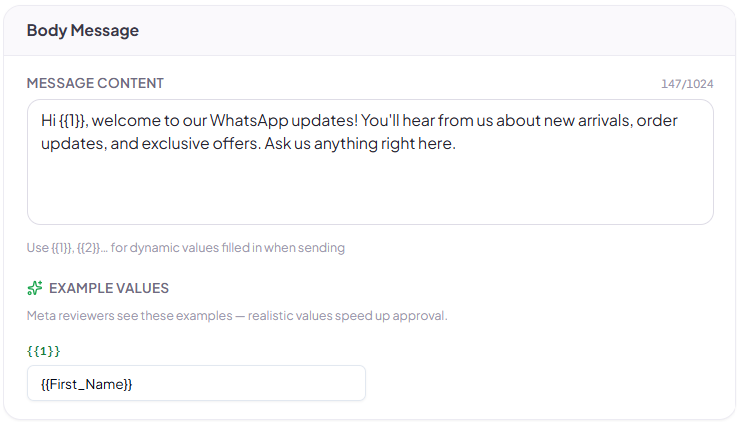
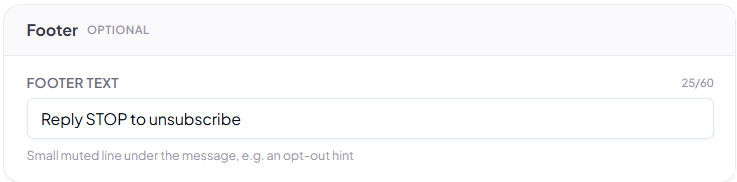
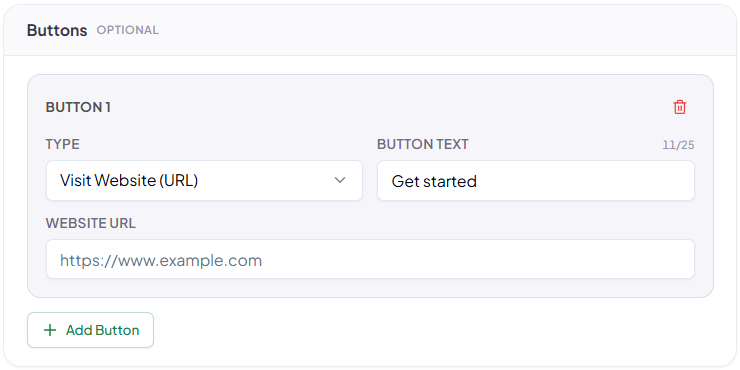
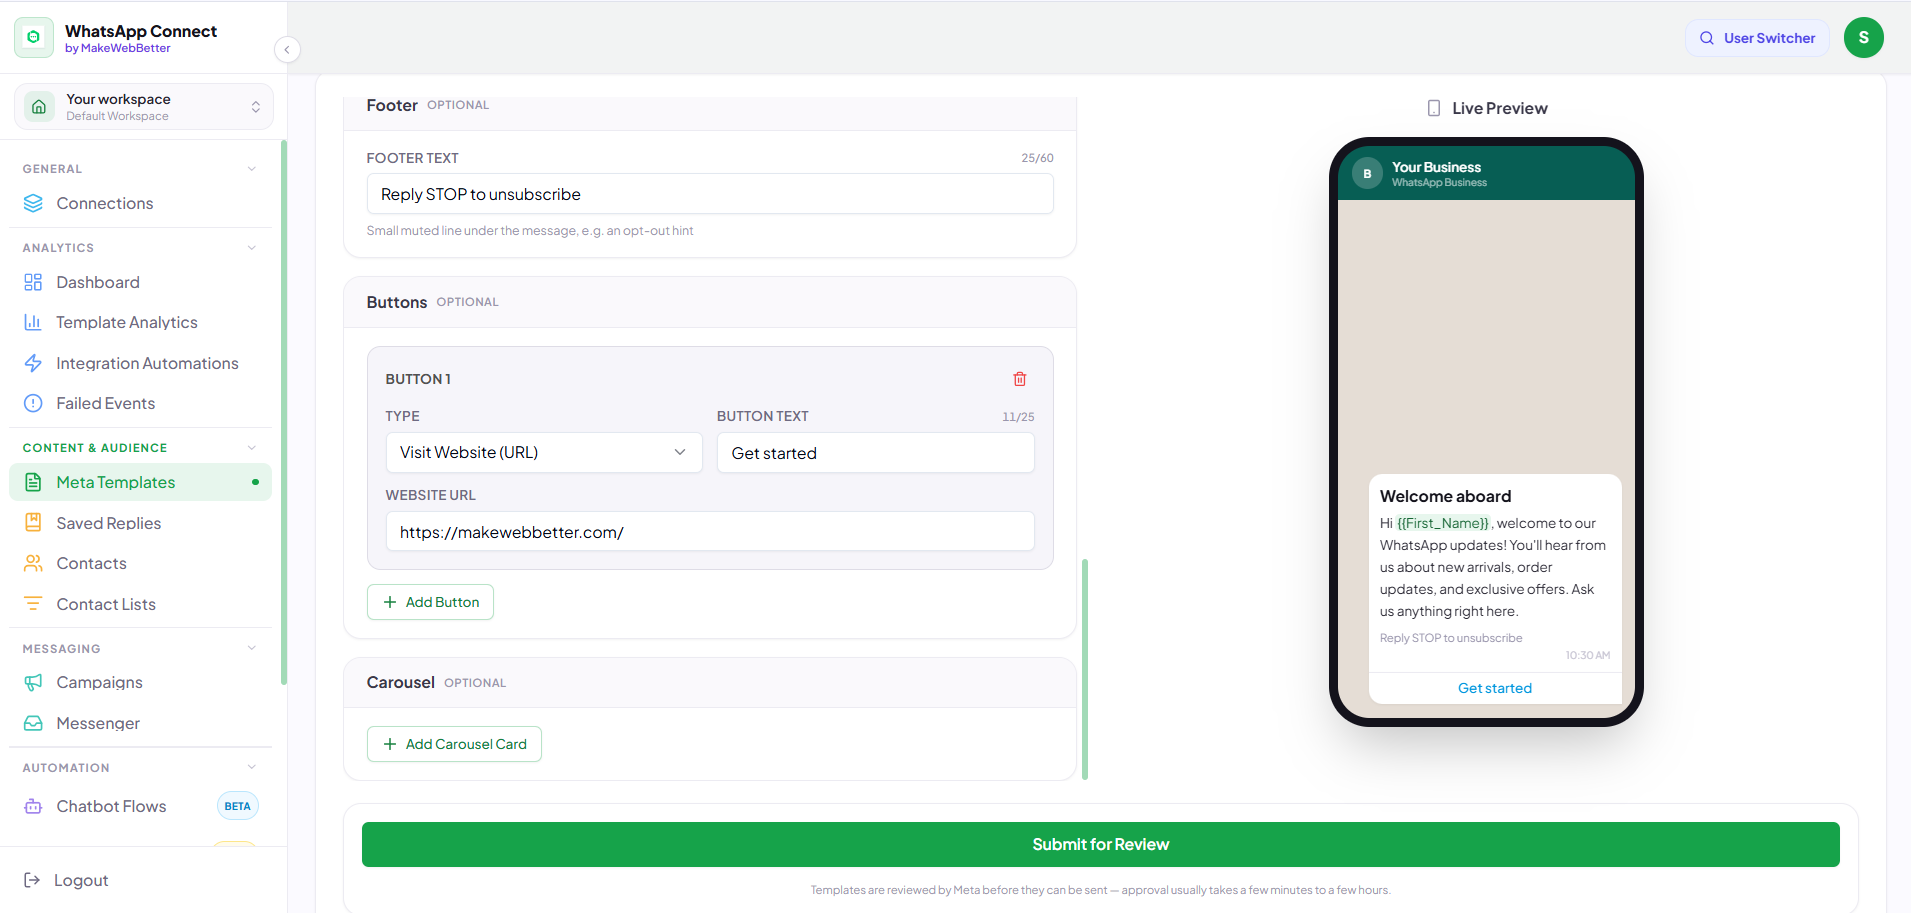
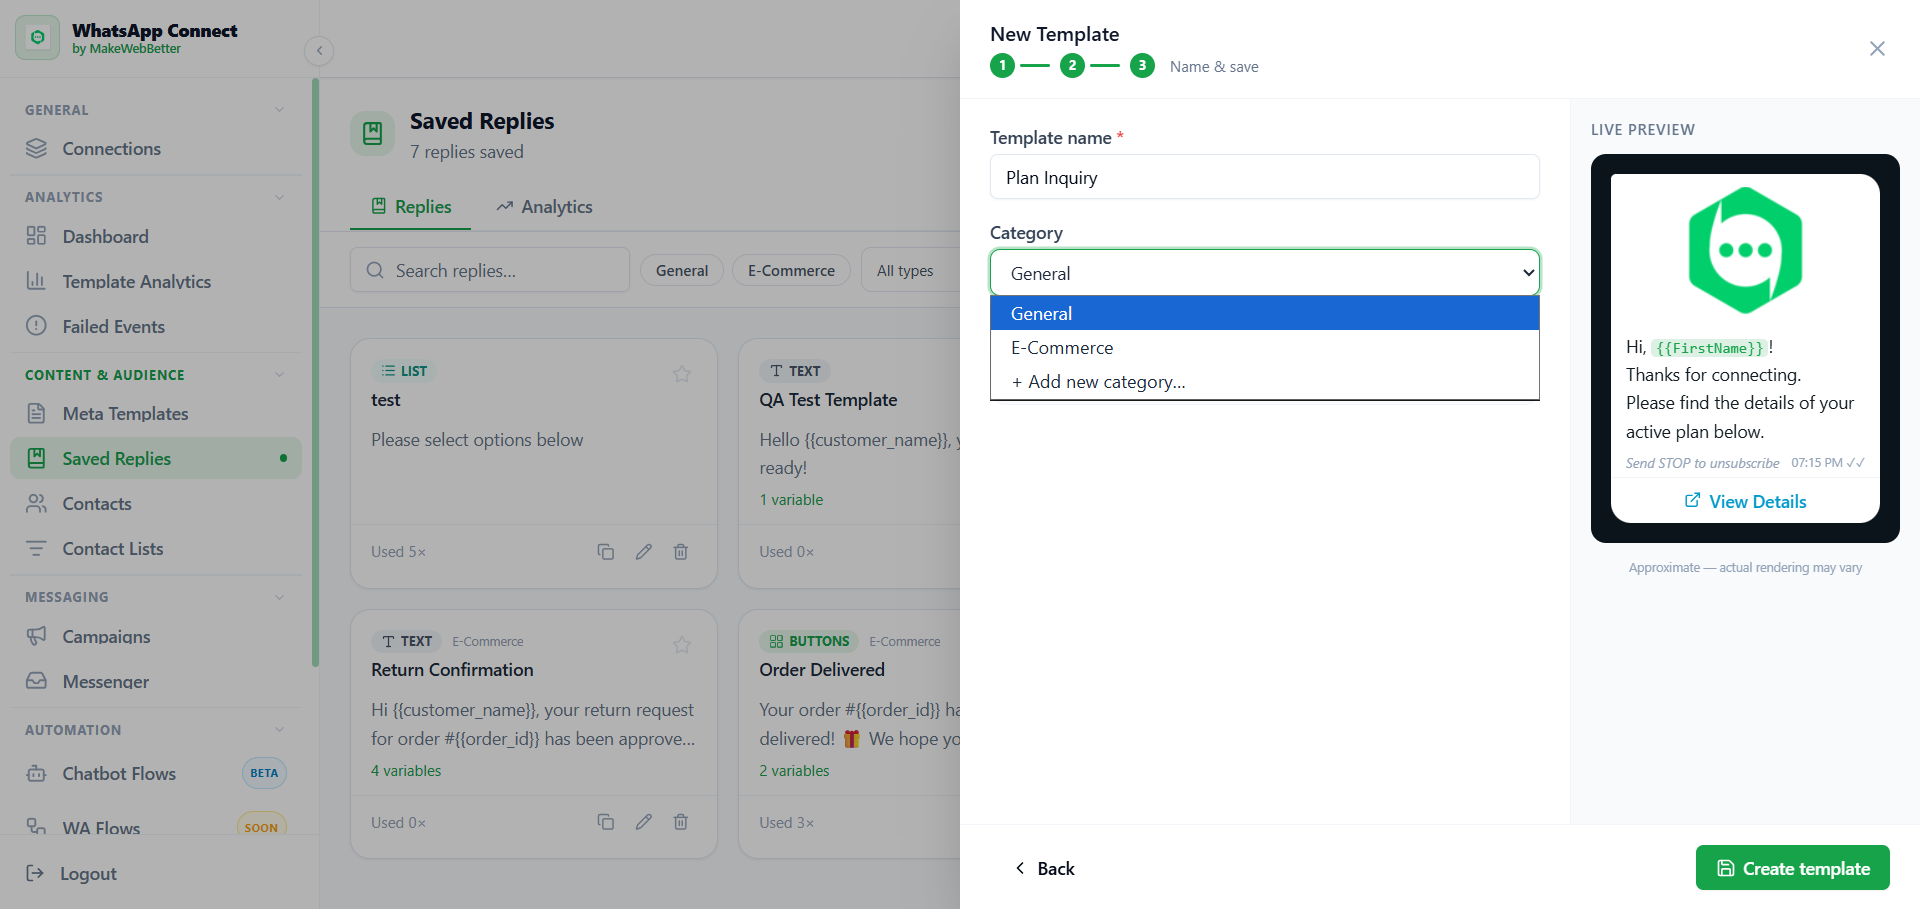
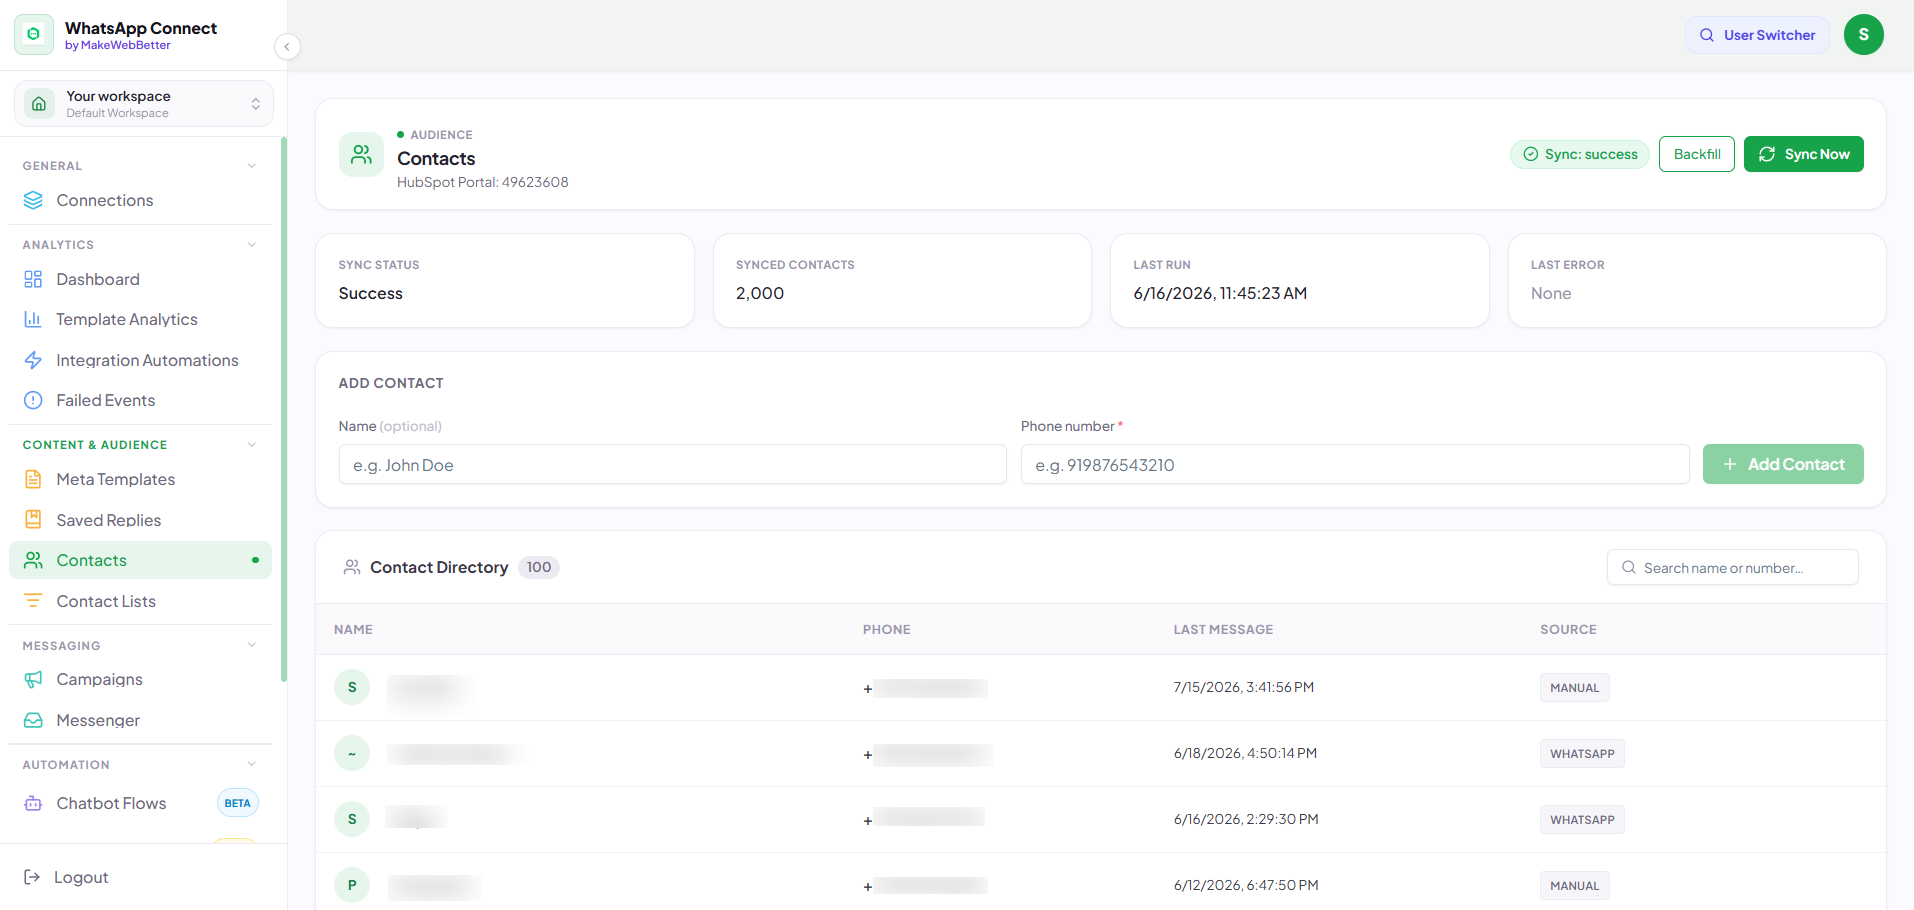
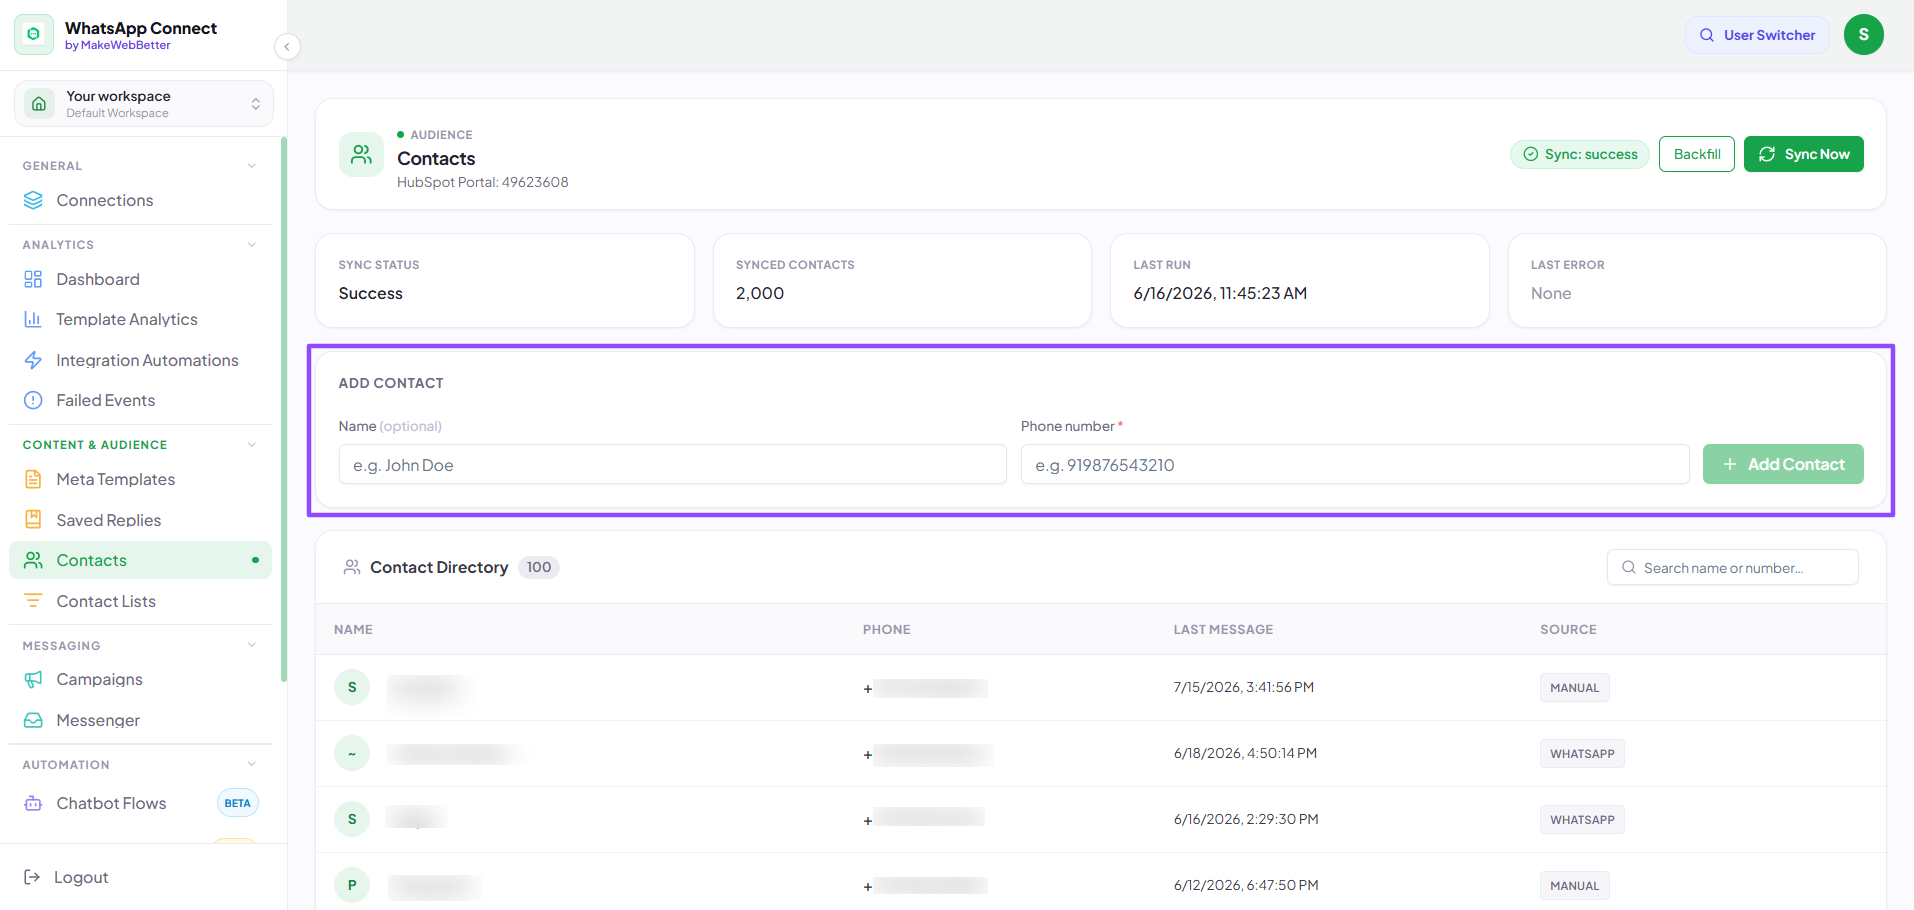
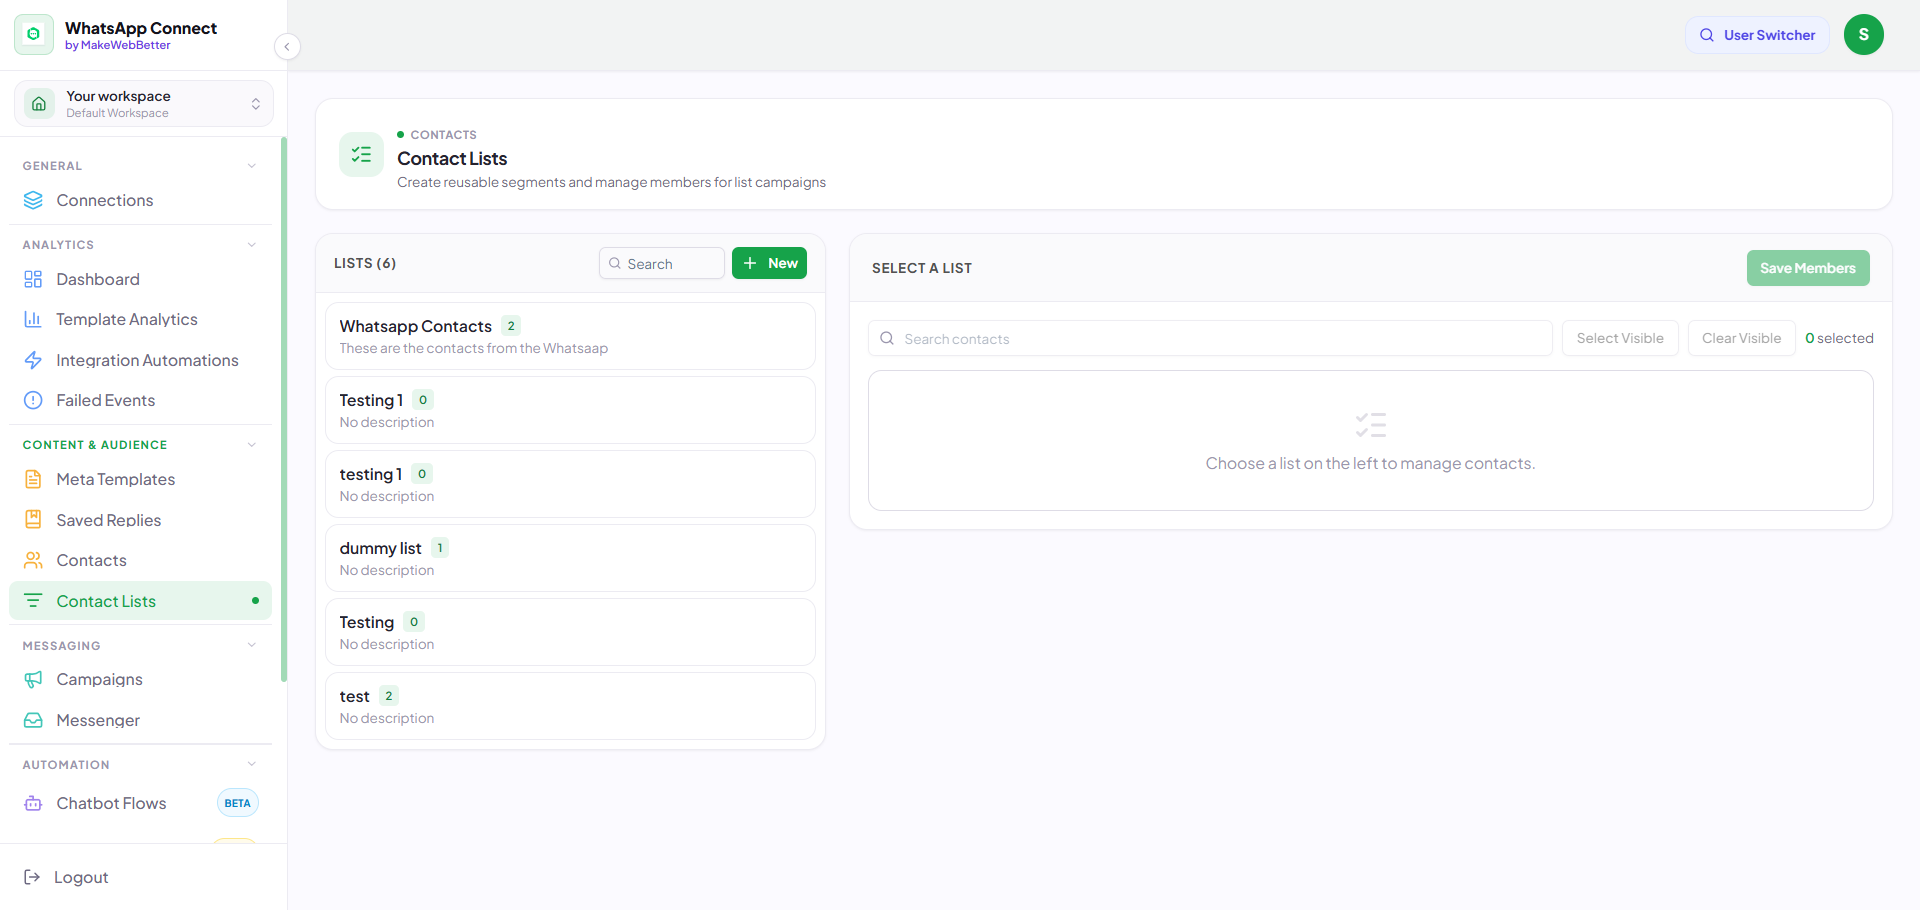
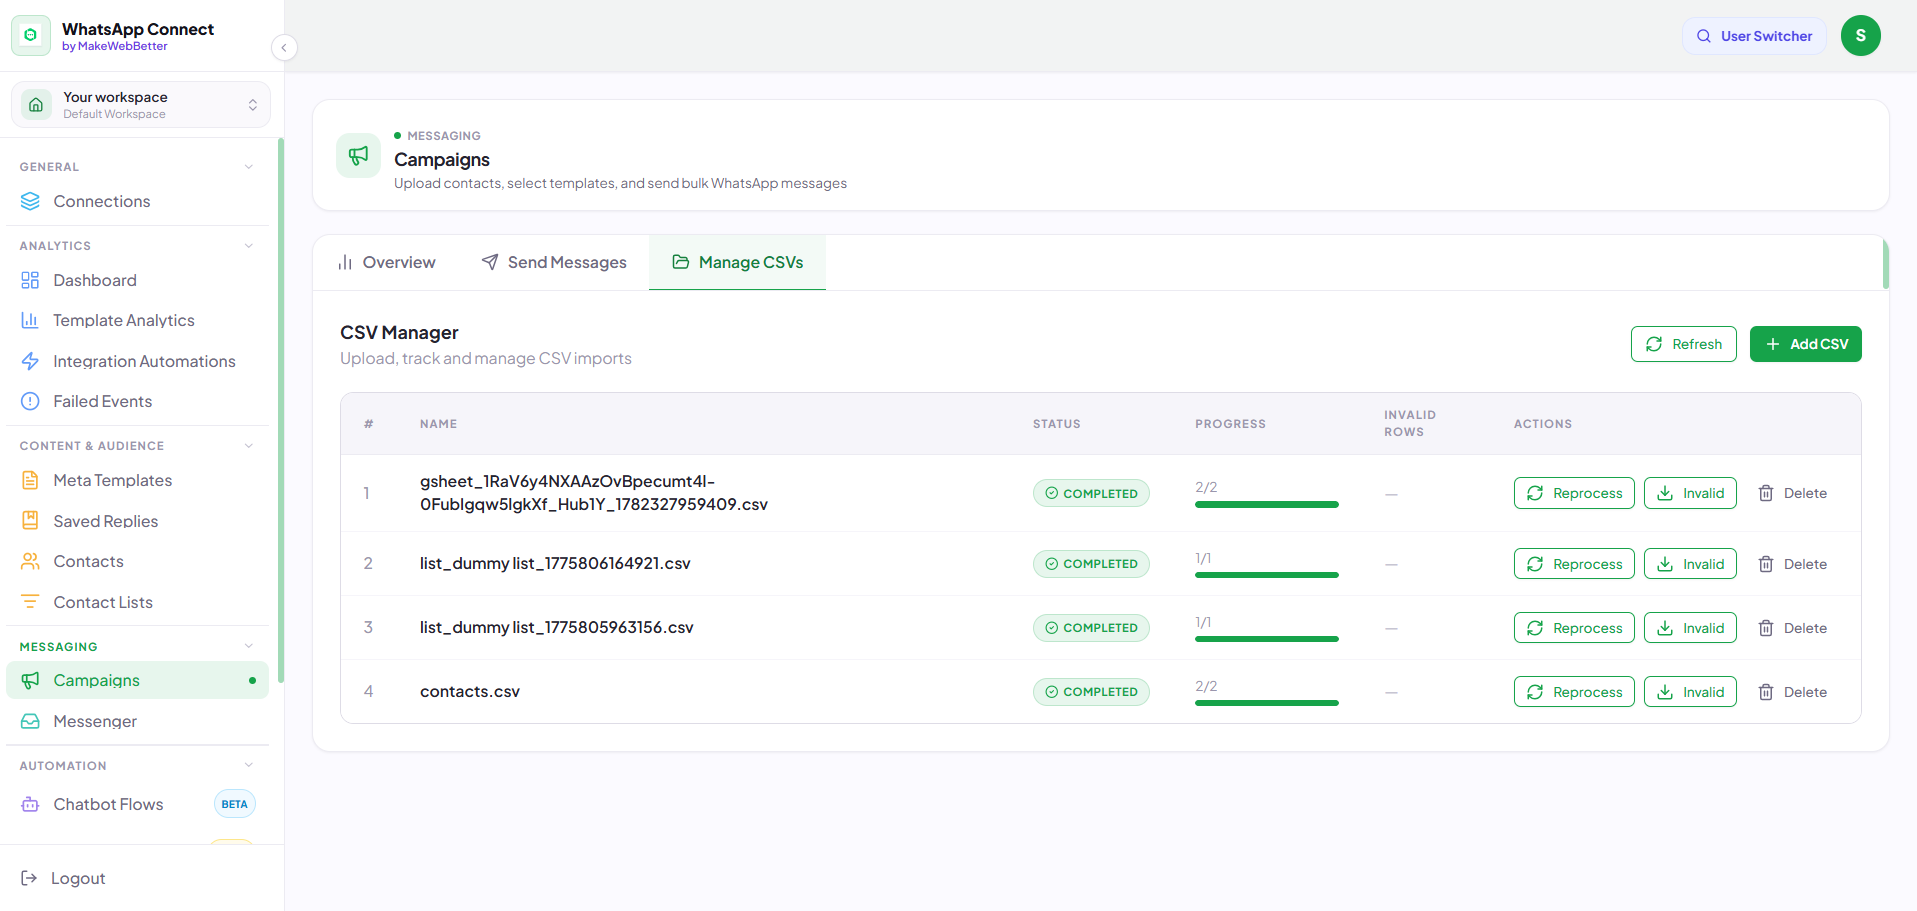
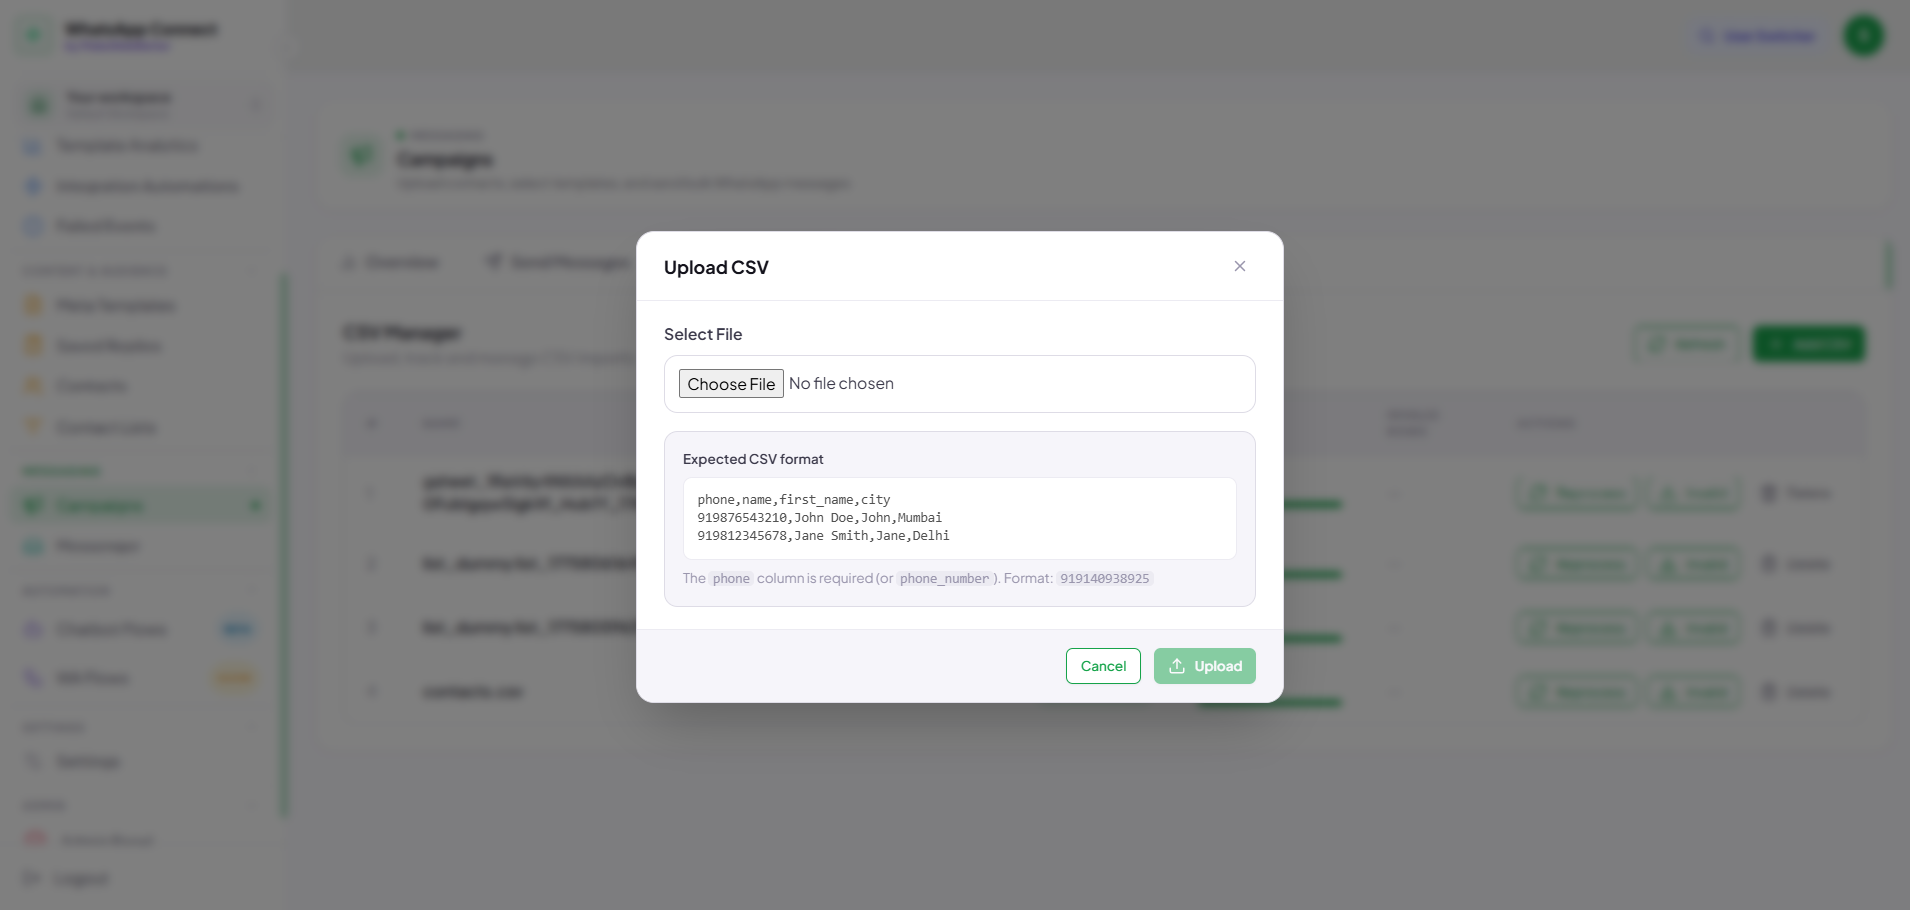
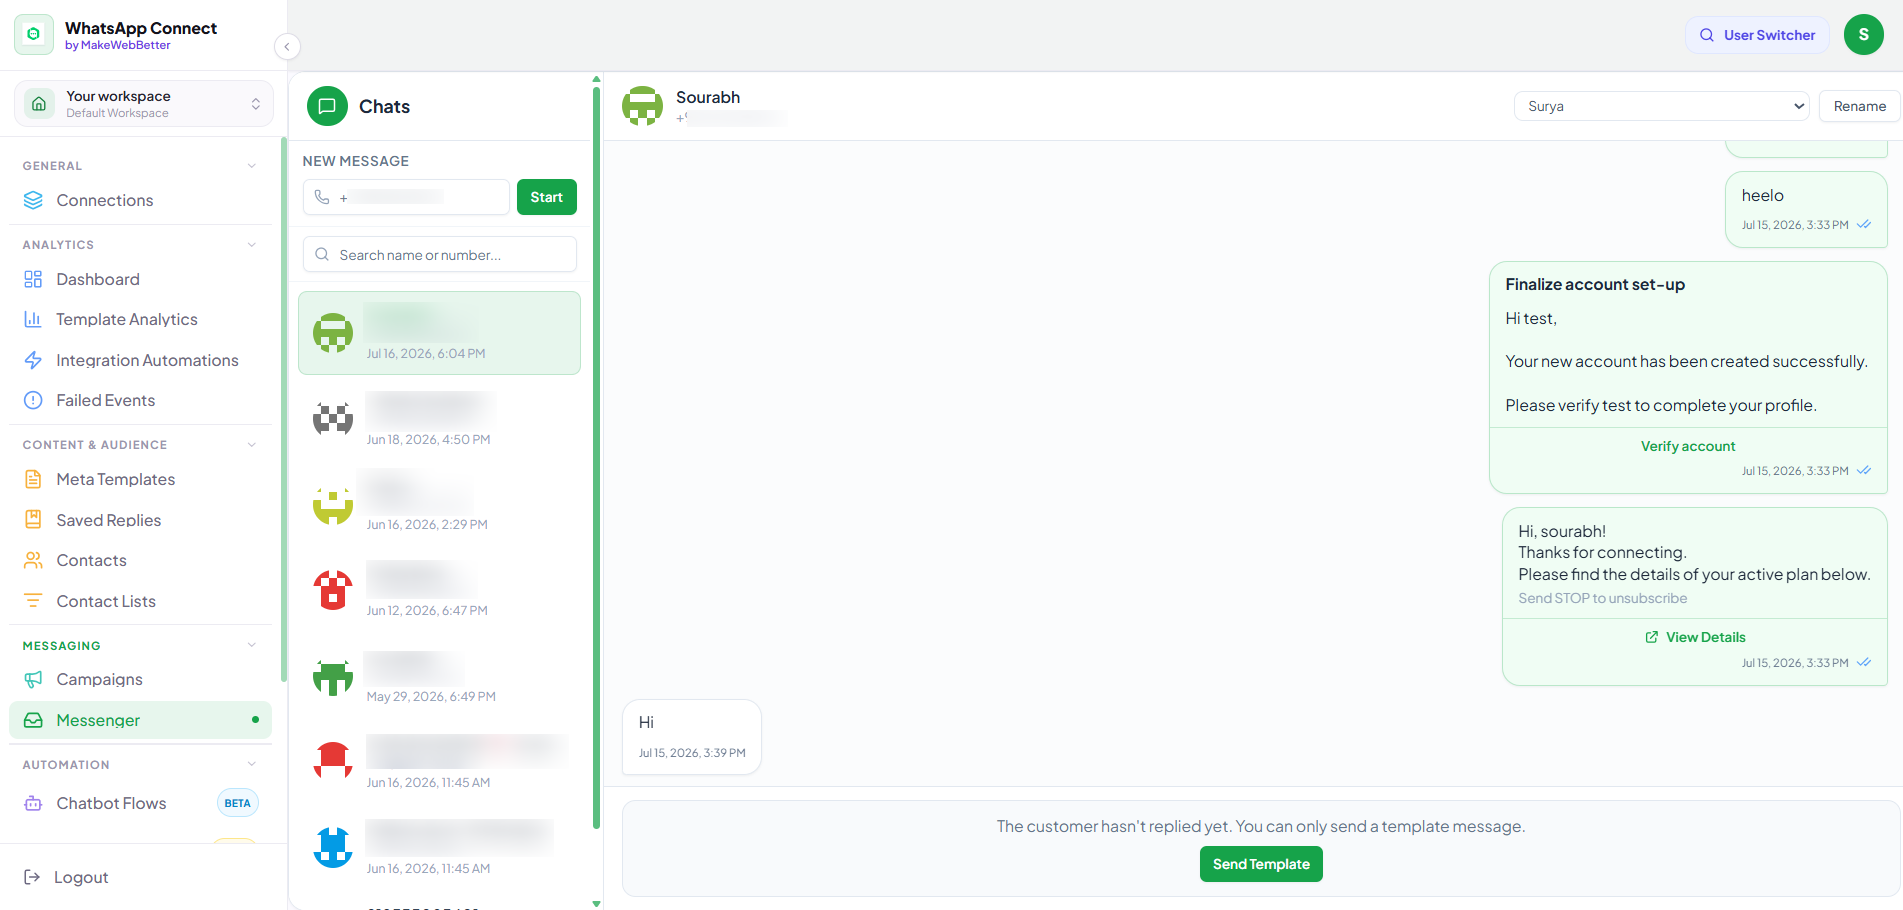
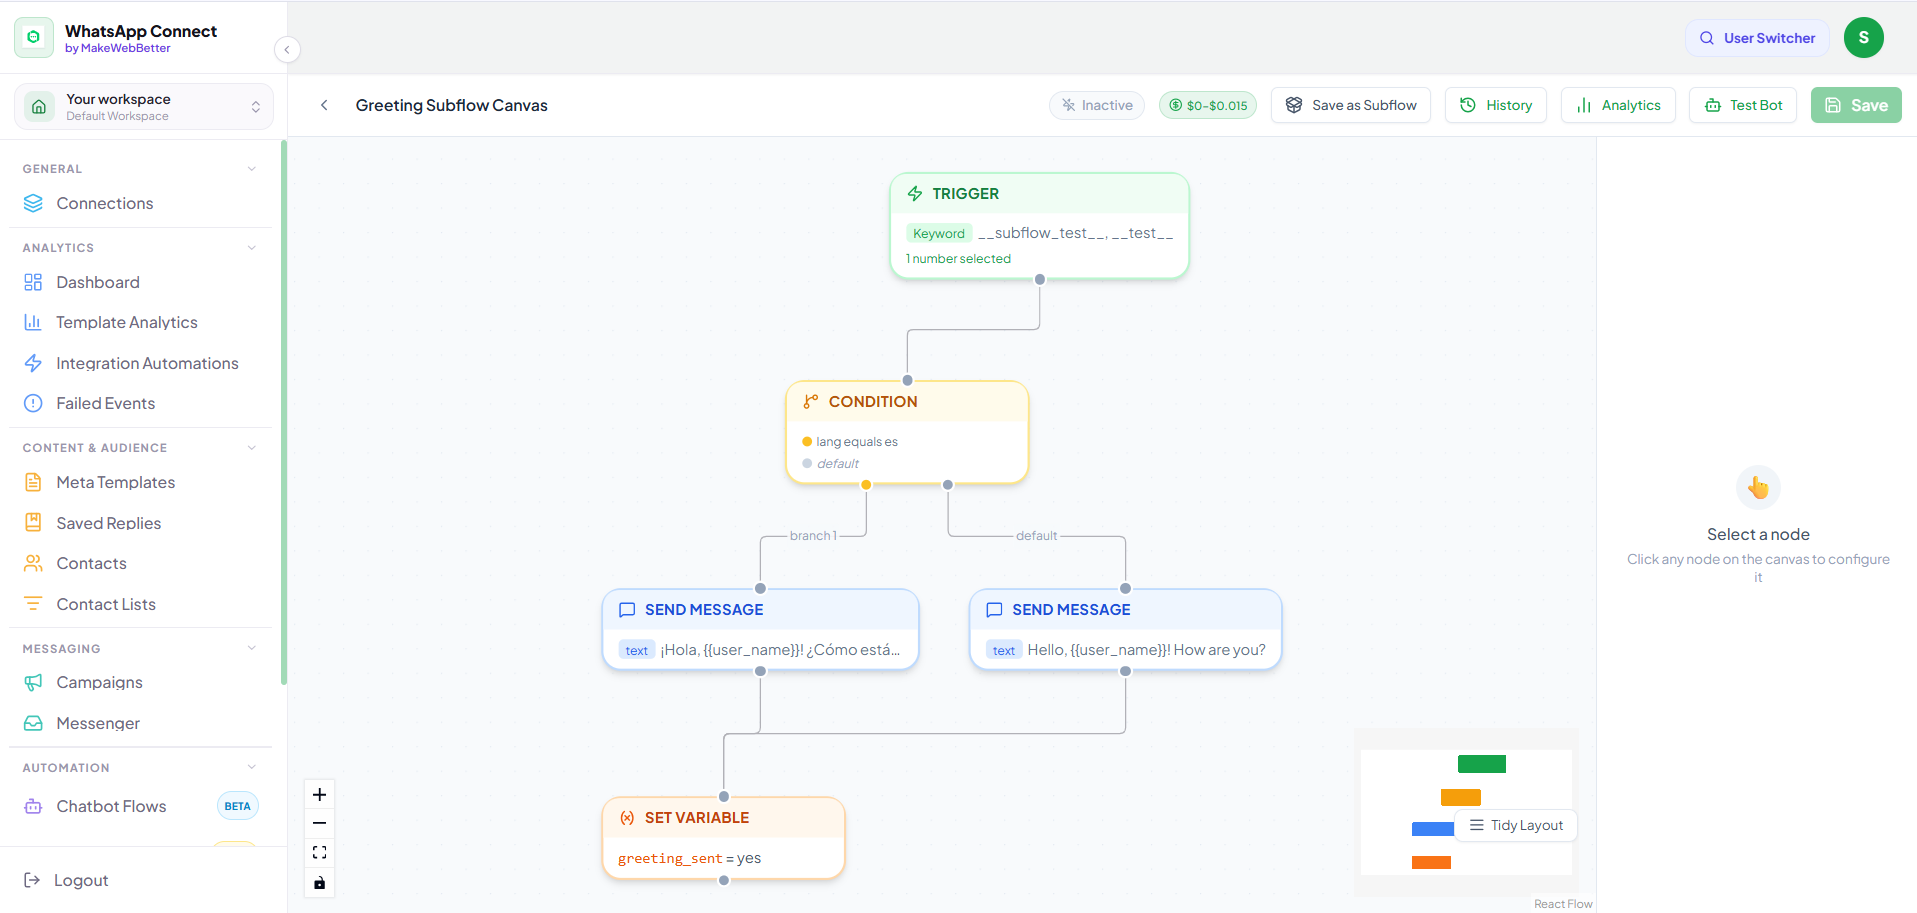
To start using WhatsApp Connect and its features, you need to first sign up on the platform. To start using the features, you need to add a WhatsApp Business account with your Meta/Facebook credentials. Next is connecting your WhatsApp Account with the WhatsApp Connect platform. Note: If you choose the WhatsApp Coexistence option when adding your WhatsApp account. Then you will see the option to ‘Connect a WhatsApp Business app’. When you do this, there will be additional steps added to the process. Follow the steps mentioned below to connect your HubSpot account: After connecting your WhatsApp account and your HubSpot account, you will be able to access the free version of WhatsApp Connect functionalities. (Upgrade to a paid plan to unlock full access.) Next, you can configure the HubSpot inbox to view the HubSpot-sent WhatsApp messages directly in your account. Additionally, you can also configure webhooks for HubSpot within the app to enable real-time, bidirectional synchronization of your WhatsApp conversations with HubSpot. The dashboard gives a quick overview of your WhatsApp messaging activities. The Performance Summary is where you can see the total number of messages sent, delivered, received, read, failed & engaged with across campaigns, workflows, and 1:1 messaging. You can filter this view to show data from the last 7, 30, or 90 days. The AI Insights section brings an AI-generated review of your WhatsApp sends in the last 30 days, showcasing how your campaigns and sends have performed and providing a broader view into your WhatsApp delivery funnel. Scrolling down will give you the recent communication log, alongside key metrics including engagement ratio, error ratio, and the monthly sent vs delivery graph. At the bottom, you can find the statistics on your templates to ascertain which tactics work best for you. This is aimed at enabling a quick assessment of delivery health and broader identification of issues without digging into individual sections. As the name suggests, this tab gives you the complete breakdown of the performance of each of the templates. This analytics includes the number of attempts, successful delivery, read, and failed delivery on the API, Webhook, and Ecosystem level. The ‘Top Template by Volume’ indicated the most utilized and most successful template. Further down the page, you can view how each of the templates performed. Note: WhatsApp Connect offers a dedicated template builder, where you can create and submit templates for Meta approval. We will learn more about it later in the ‘Meta Templates’ section. To analyze how your WhatsApp Sends are performing when launched through HubSpot automation, this tab allows all the insights you need to ascertain their performance and optimize accordingly. You can also add filters to analyze performance over a period of time. Click on the specific HubSpot WhatsApp automation; it will take you directly to the HubSpot workflows page to review and optimize accordingly. Additionally, the ‘High Fail’ status also highlights which automations haven’t been performing as intended. Review your WhatsApp message automation through sent, delivered, read, failed, skipped, and pending statuses. The failed messages appear here. WhatsApp Connect automatically retries failed messages where possible, over a defined period. If automatic retries are unsuccessful, you can retry messages manually or delete them if they are no longer required. WhatsApp Connect automatically retries these messages. From this section, you can review failed sends, retry them manually, or delete them if they are no longer required. Error Code 131008 100 131000 The Messages section lets you monitor and manage WhatsApp messages that fail to initiate from the app or fail at the API delivery level. You have the following options, along with the details of the error: You can also edit message body tokens where applicable and retry sending after making corrections. The Webhook section contains the failed messages log that occurred at the webhook level. When the message delivery encounters an error on the webhook provider’s system, due to server errors, timeouts, network issues, or an invalid URL/configuration. Then, the failed messages will appear in this tab. The Failed Webhook Messages contain the following details and options: The Ecosystem section gives the details of the messages that failed at Meta’s end due to platform restrictions, messaging guidelines, or ecosystem-level issues. WhatsApp Connect automatically retries these messages where possible. From this section, you can review failed sends, retry them manually, or delete them if they are no longer required. The WhatsApp templates are located in this tab. Here, you can create, submit, save, and manage your templates. These templates are utilized later while sending, scheduling, or automating messages. It’s the first step in the process when you want to set up campaigns, broadcast, or send a one-to-one message to your contacts. To create a new template: Note: These variables {{1}}, {{2}}, and so on, are the placeholders that fetch data directly from the uploaded CSV file, based on column order (1, 2, 3, 4). We will learn about it in detail in the next section. Saved Replies are your templates for pre-defined responses to frequently asked questions, common customer queries, or repetitive conversations—helping you respond faster, maintain consistency, and reduce manual effort across your communication channels. You can find your saved replies here. Moreover, you have the option to favourite and categorise your preferred replies. Click on the Starter Packs to get started with prebuilt WhatsApp reply templates. You can review which replies are performing well by analysing the frequency of the sends. To create Saved Replies templates: WhatsApp Connect offers built-in contact management, a robust directory layer that lets you add, sync, backfill, and delete contacts. With this, you always have access to your contacts and can monitor the growing customer base. In addition to syncing from HubSpot and WhatsApp Business, you can add contacts manually to the contact directory. For this, Contact Lists are your go-to list of contact segments, which can be reused for bulk sends and scheduling campaigns. For this, The campaign enables you to send messages in bulk using contact segments (lists) and CSV uploads. In the overview section, you can find all the details about your live campaigns: Apart from that, you will have the option for certain actions: This is your campaign launch panel, where you can send the messages immediately or schedule them for later. For this, follow the steps mentioned below: Moreover, you can schedule the message send-out. For this, click on the Enable tick which is next to the Schedule option. There, you can decide on the date on which you want to launch your WhatsApp campaigns. Here, you can upload your contacts in the form of CSV files directly and utilize them while sending or scheduling campaigns. To upload CSV files in WhatsApp Connect: Note: When you upload the contacts CSV file, use a similar format that will define the value of the variables (placeholders). To ensure accuracy, your CSV must follow this specific format: While framing the body text in the template, use the variables as ({{1}}, {{2}}, {{3}}, & {{4}}, they will correspond to the data you provided through the CSV file upload, in a similar order. Messenger is your inbox for all your interactions with your contacts. Start 1-on-1 conversations with new contacts or interact with your existing contacts. Moreover, you will find your new messages here, which are sent directly by your contacts. Utilise the existing Meta-approved message templates to initiate conversations with contacts. For new 1:1 conversations, click on the search box under ‘Message New User’, type in the WhatsApp number of your new contact, and then click the Start button. To send messages in existing conversations, use the templates. The in-built chatflow builder allows you to create your own WhatsApp chat automation and also deploy WhatsApp AI Chatbot features. (Available in beta) To create a new chat flow inside WhatsApp Connect: Next to the Save button, you have a few more options to manage your chatflow: Subflows are a modular, self-contained sequence containing conversational steps of the parent chatflow. You can access them from the primary page of the Chatbot flow. WA Flows (WhatsApp Flows) are in-chat interactive forms, built to prevent conversation back-&-forth using app-like screens (forms, dropdowns). These are similar to the WhatsApp Business functionality ‘WhatsApp Flows’, allowing you to centralise all your customisation through a single platform. Once the app is connected with your HubSpot account and WhatsApp account, you can access its functionalities within HubSpot. Follow the steps mentioned below to create workflow to automate WhatsApp message sendouts for your contacts. WhatsApp Connect also enables you to send WhatsApp messages directly to your contacts, using the App Card functionality. To enable the WhatsApp Connect send message functionality in your HubSpot, you need to configure the HubSpot App Card. Follow the steps mentioned below to do so. Follow the steps mentioned below to send messages: Moreover, you can opt to send a message. For this, You can track the message sent through HubSpot workflows or the HubSpot App Card. You can choose to view your WhatsApp interaction in your HubSpot account in: Explore WhatsApp Connect pricing plans and discover how it aligns with your business requirements. To add a role, click on the + New Role button, assign a name, and then define permissions. This documentation covers the core setup and usage needed to operate WhatsApp messaging effectively using WhatsApp Connect by MakeWebBetter. For a complete walkthrough of advanced capabilities and real-world use cases, book a free demo to see WhatsApp Connect in action.
1.Overview
2.Setup
3.Account Connection
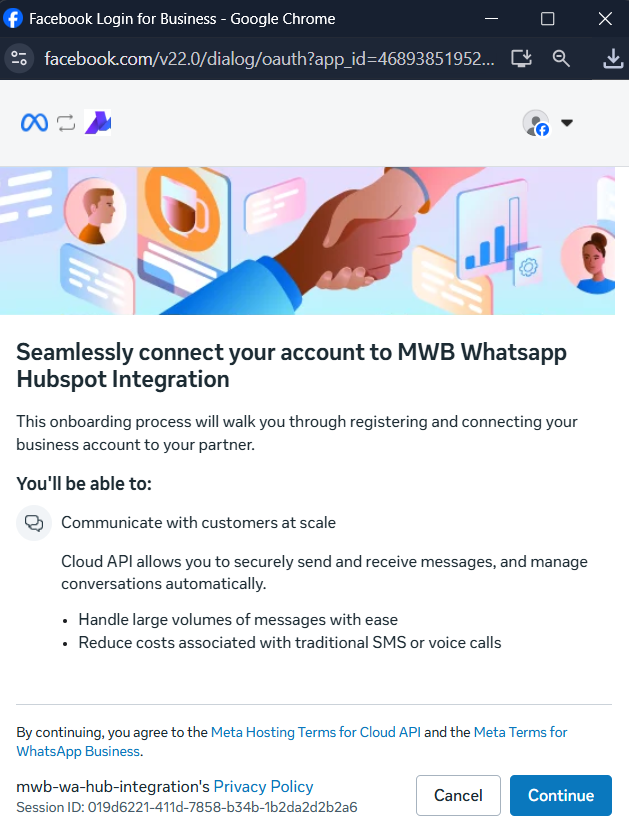
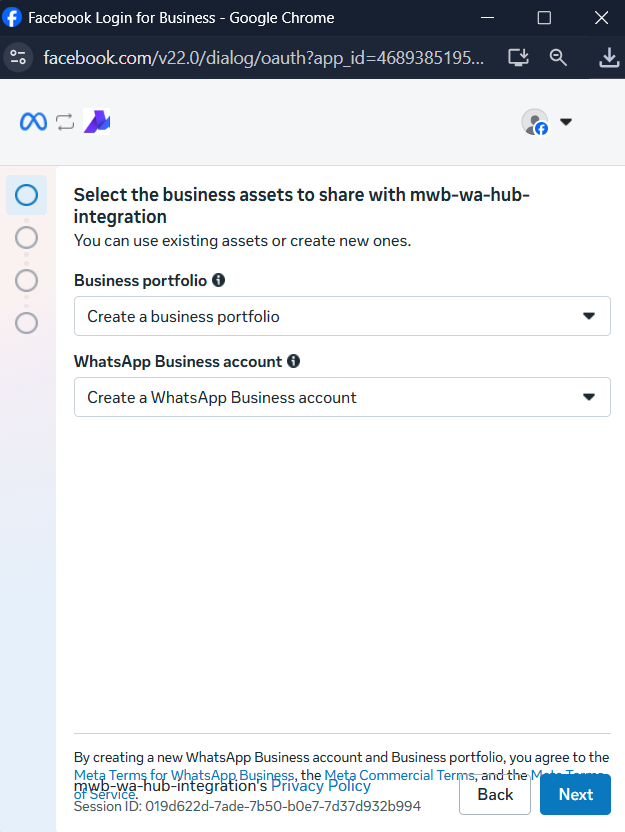
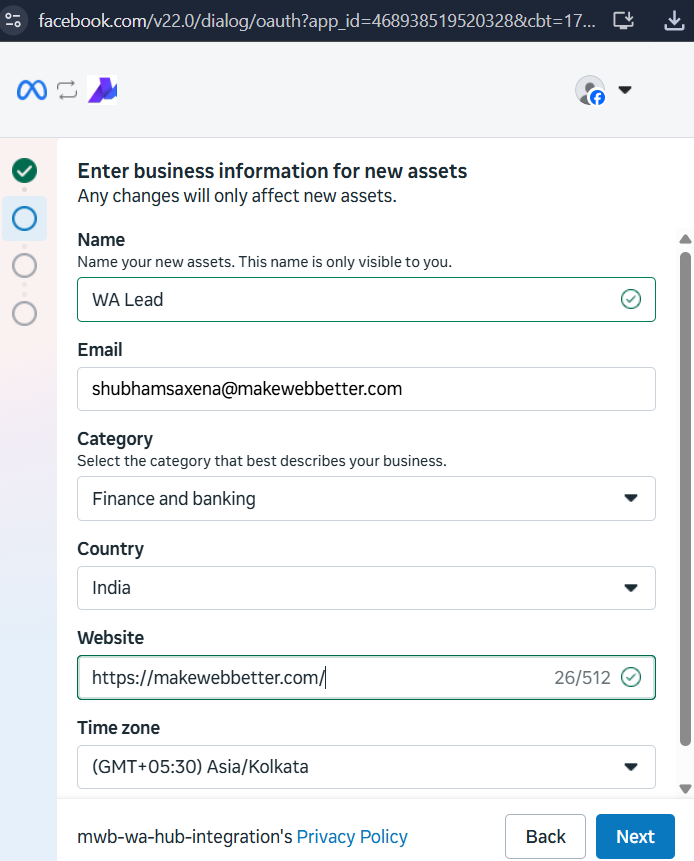
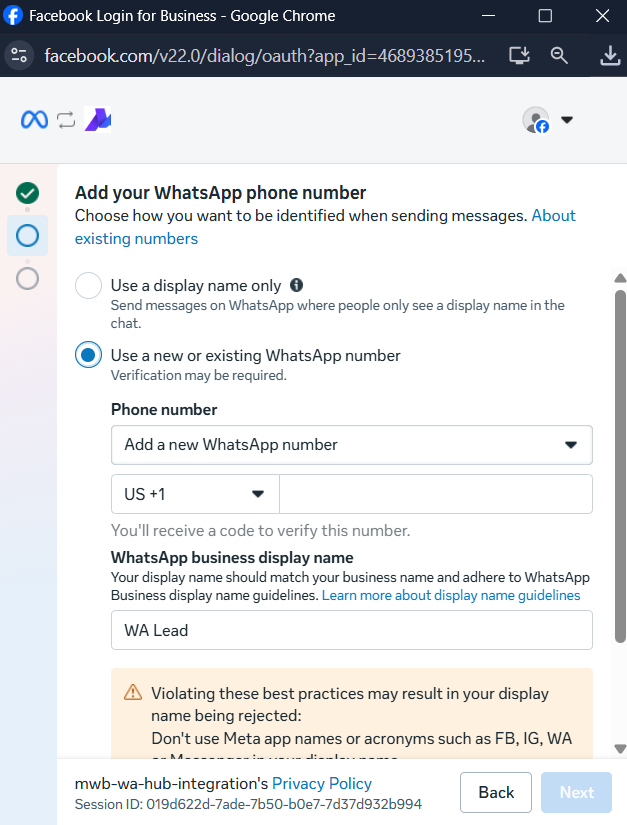
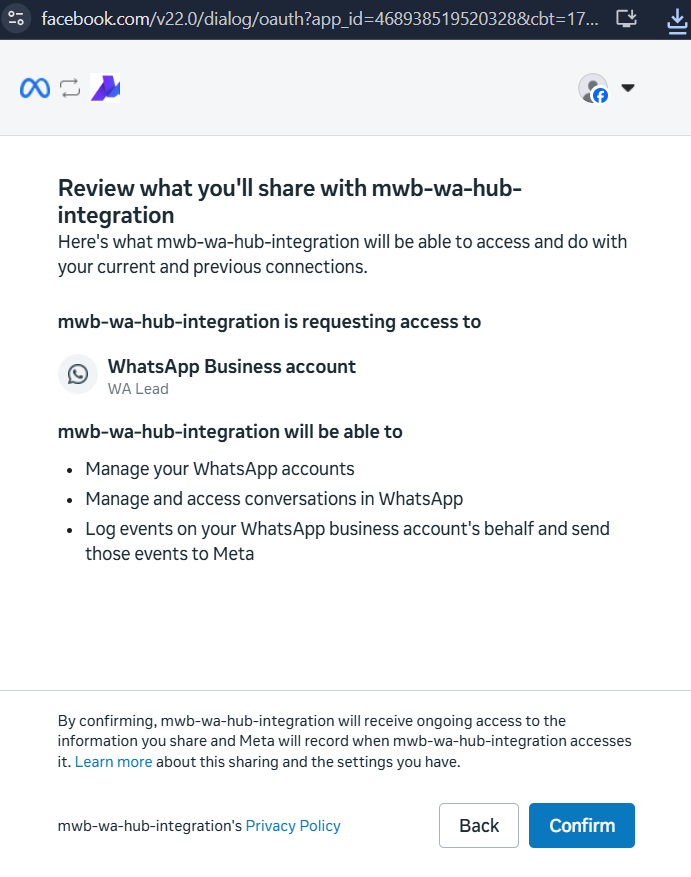
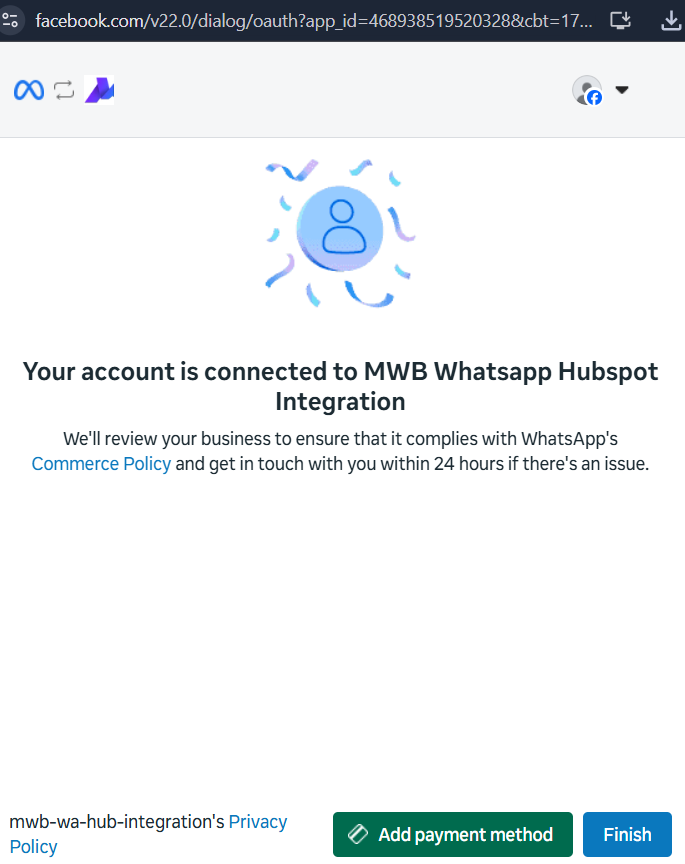
3.1.Connect WhatsApp Account
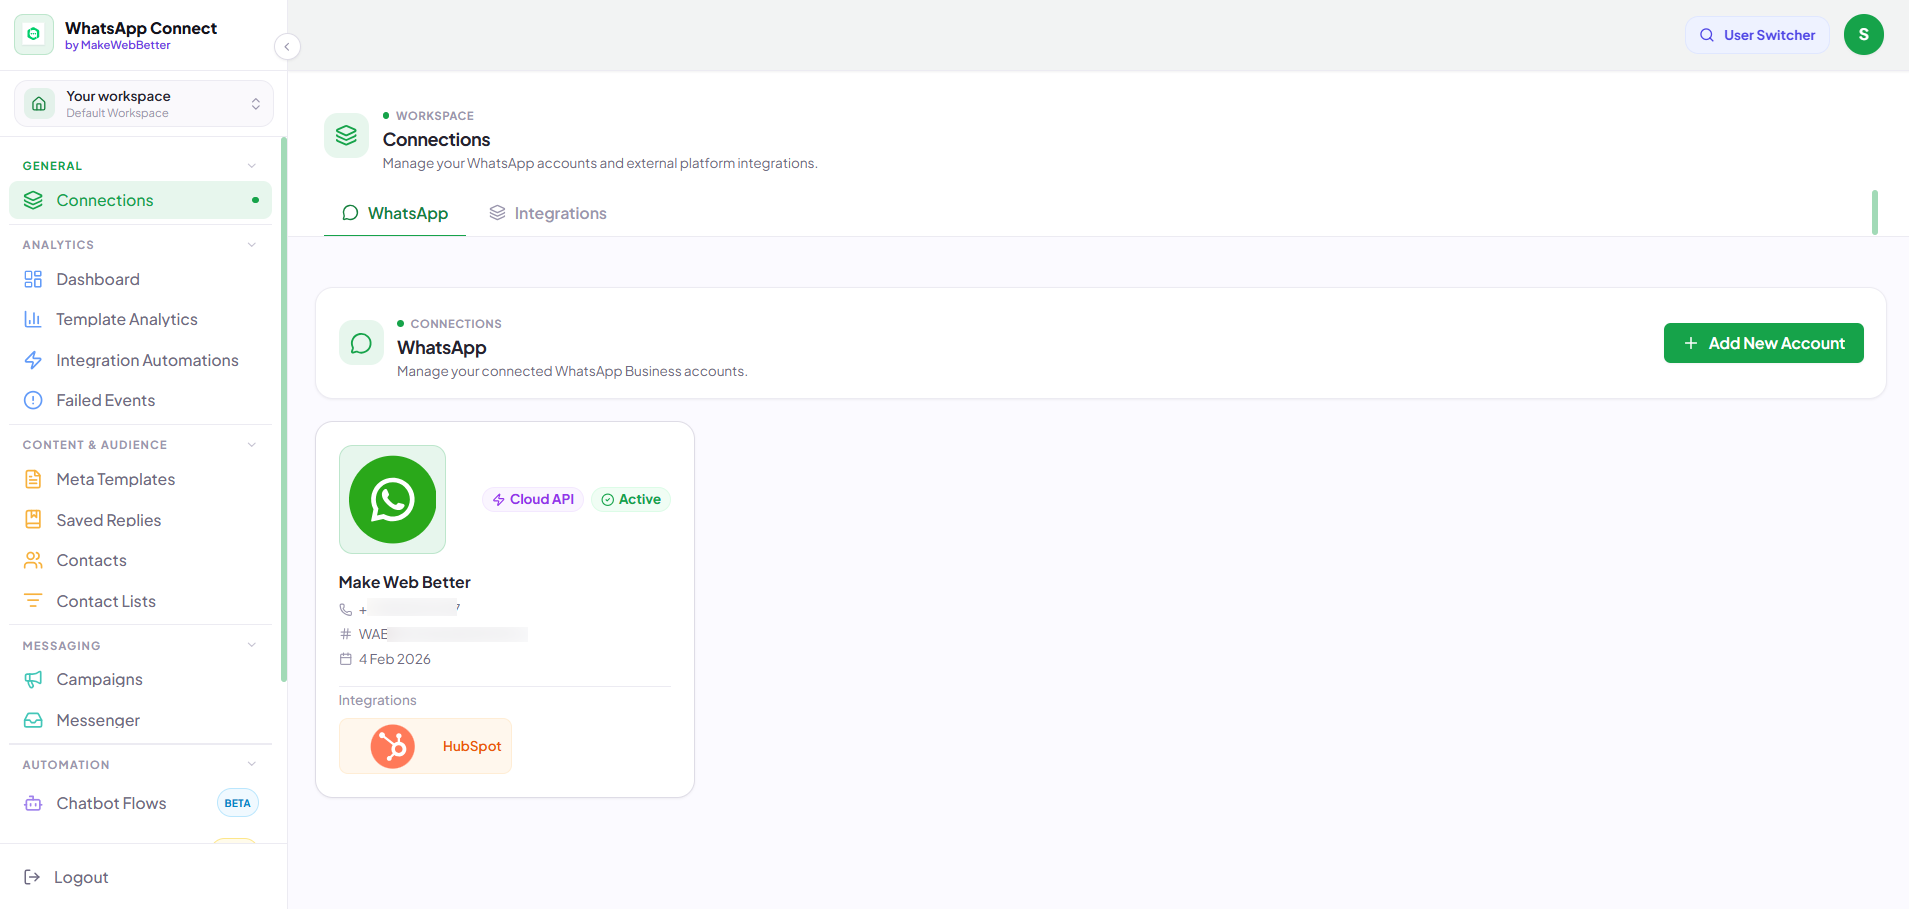
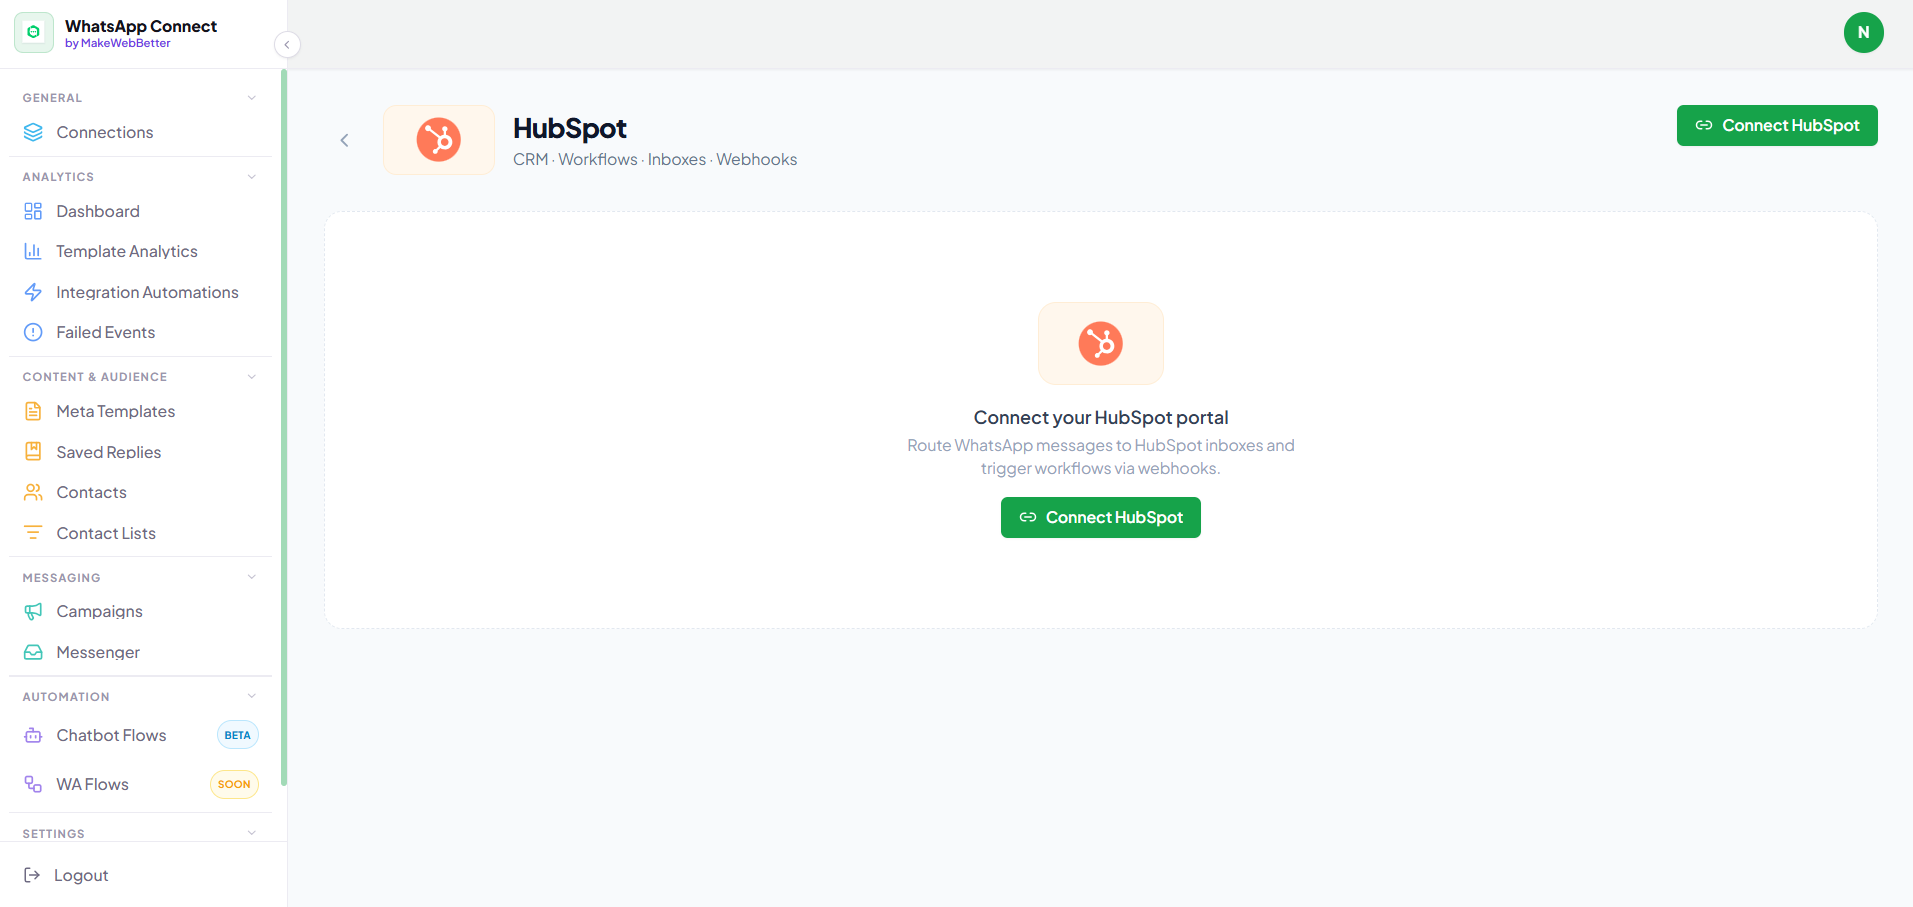
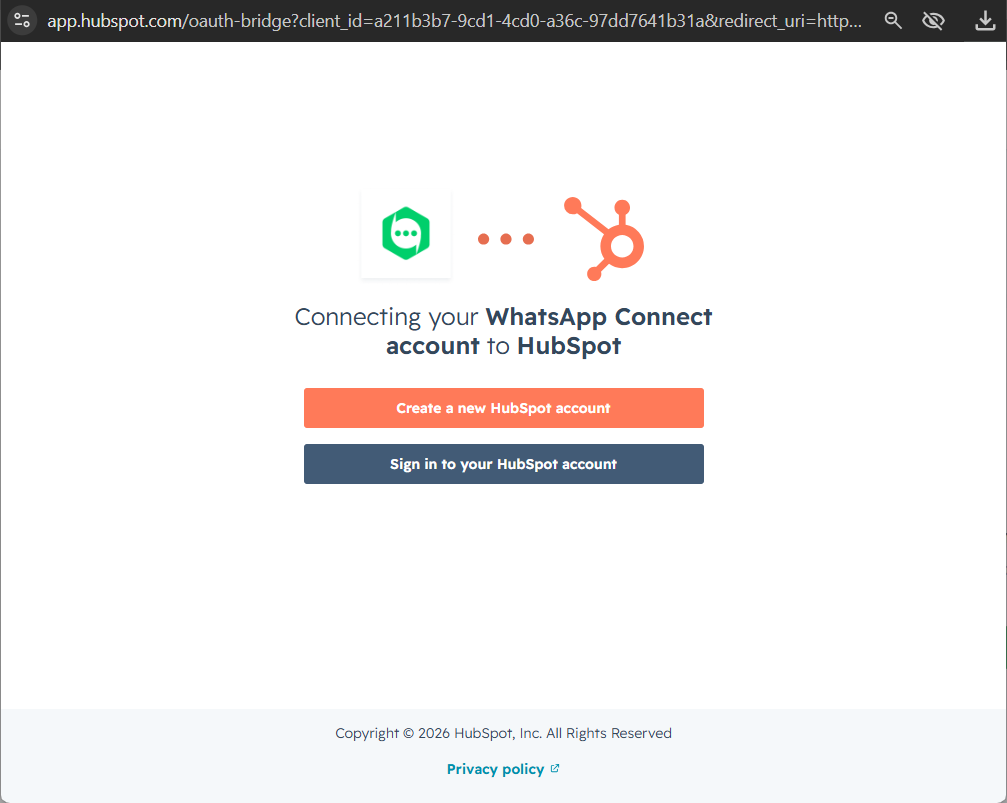
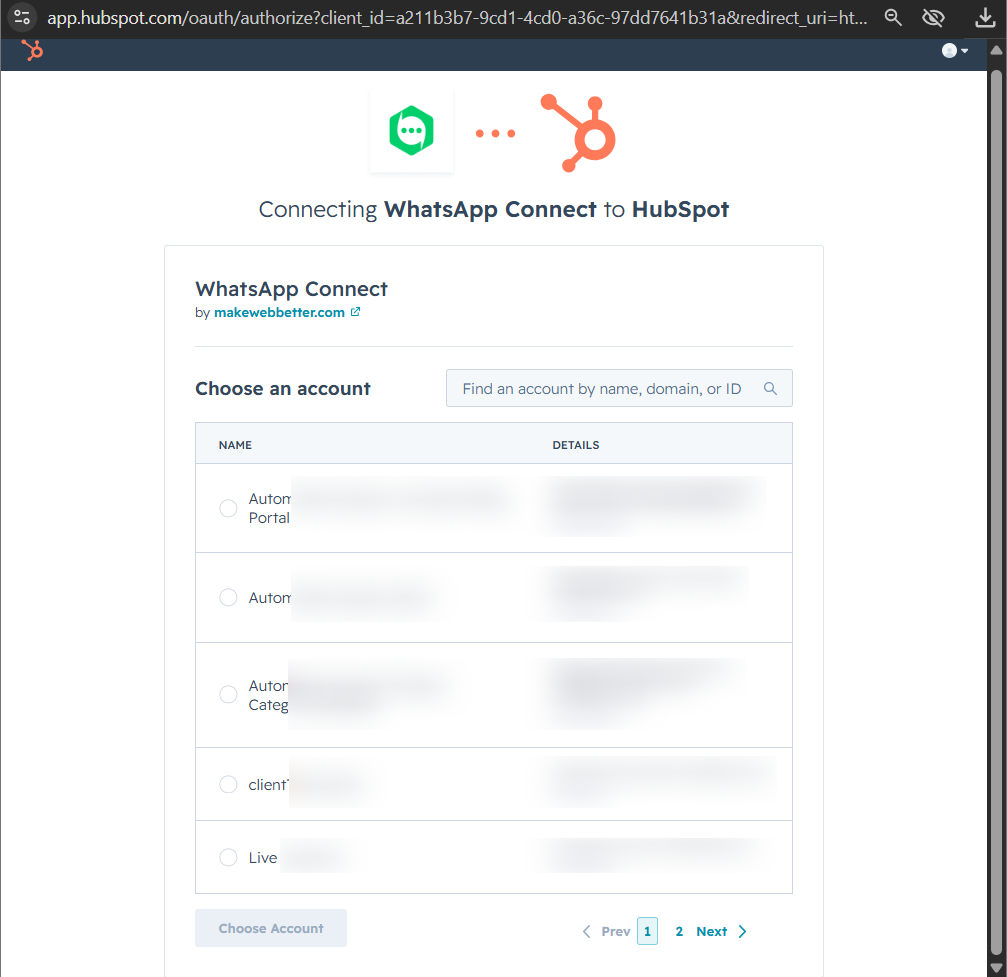
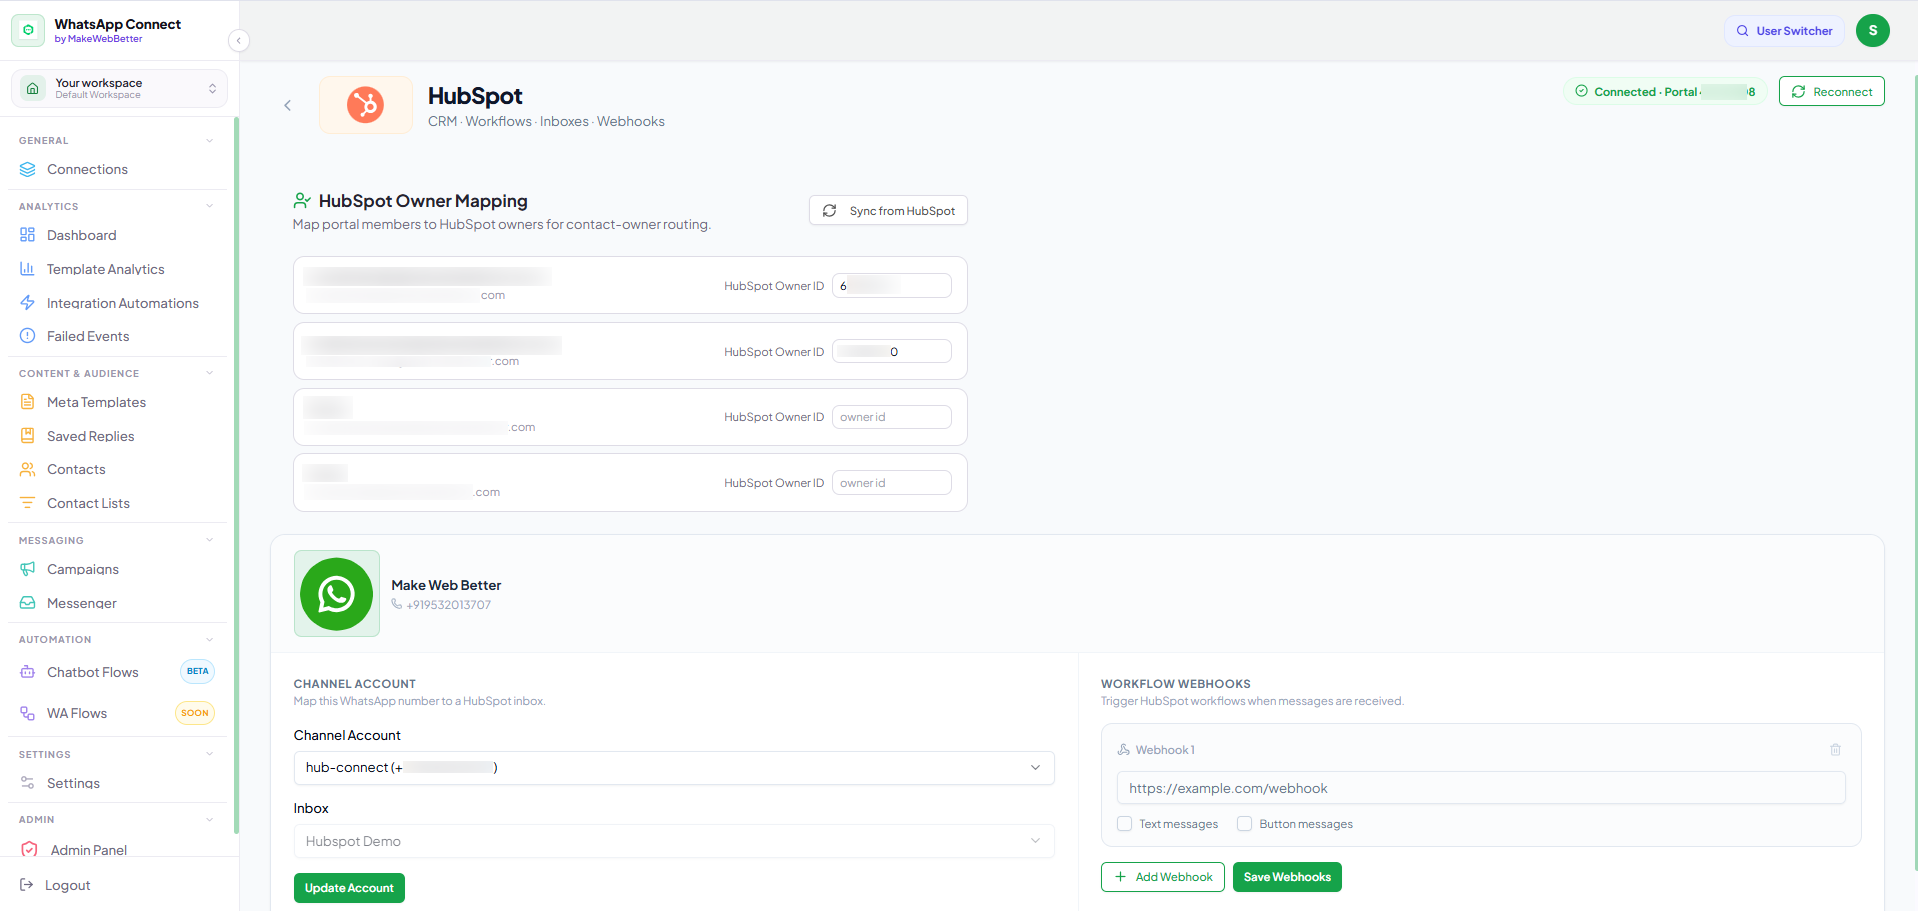
3.2.Connect HubSpot Account
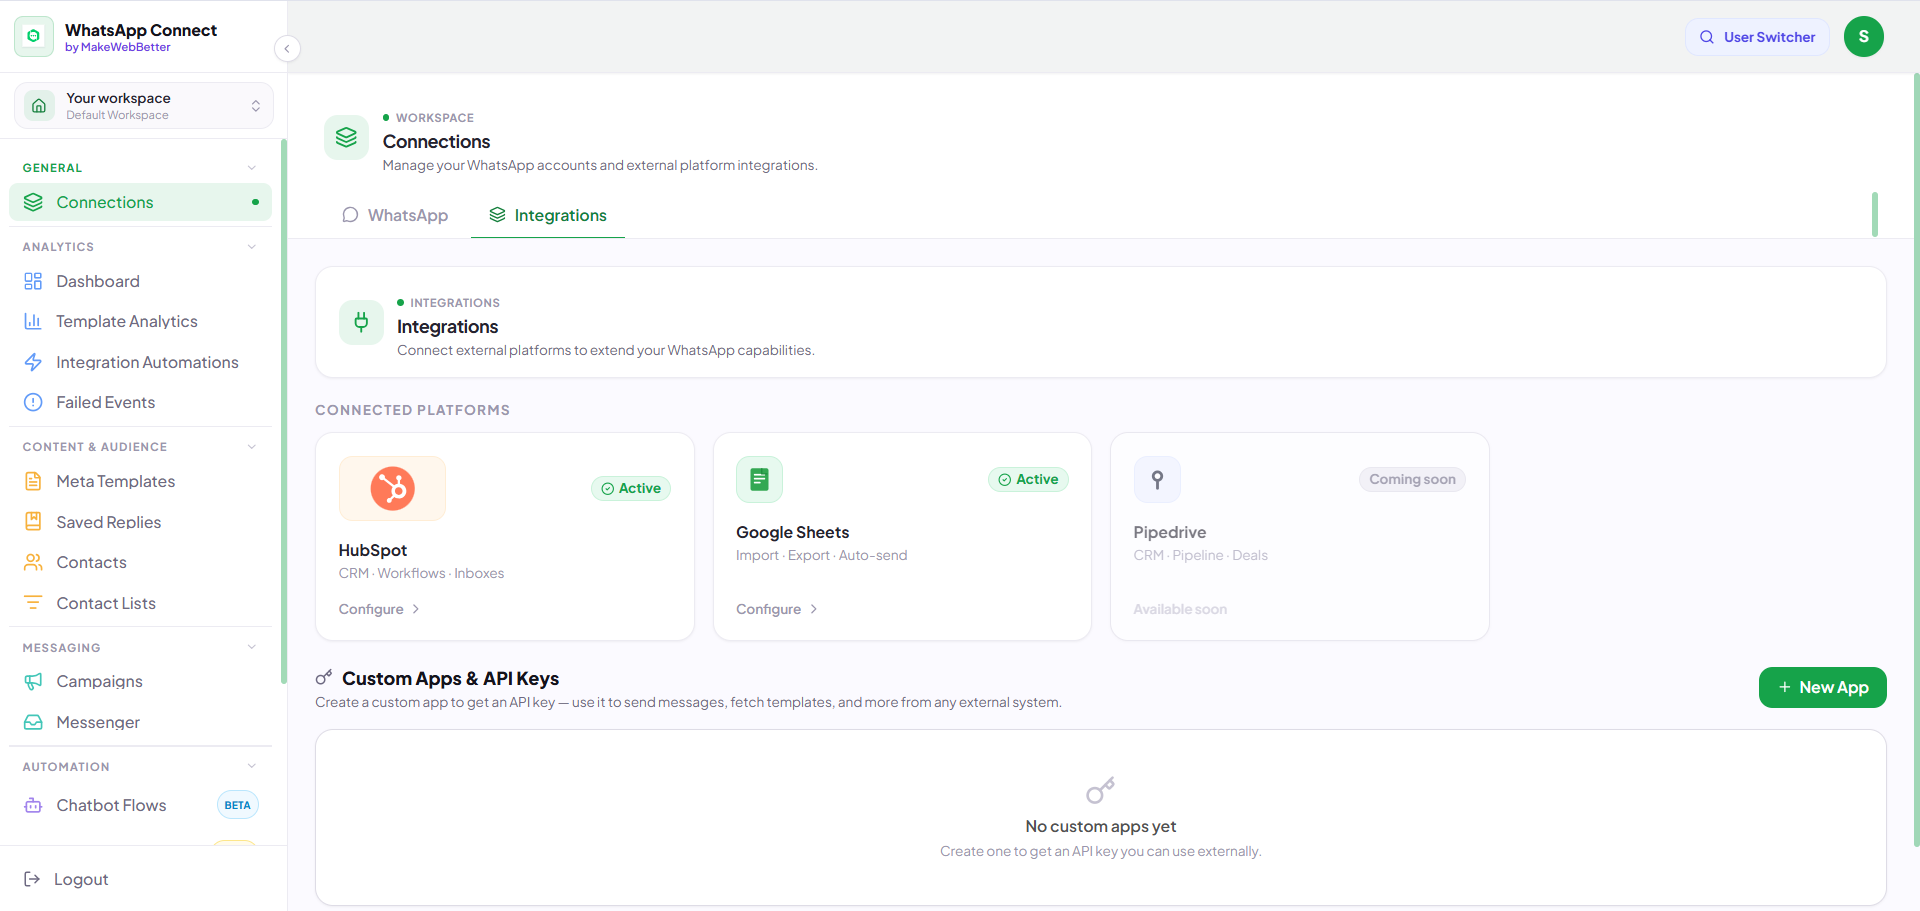
3.3.Configure HubSpot Inbox & Webhooks
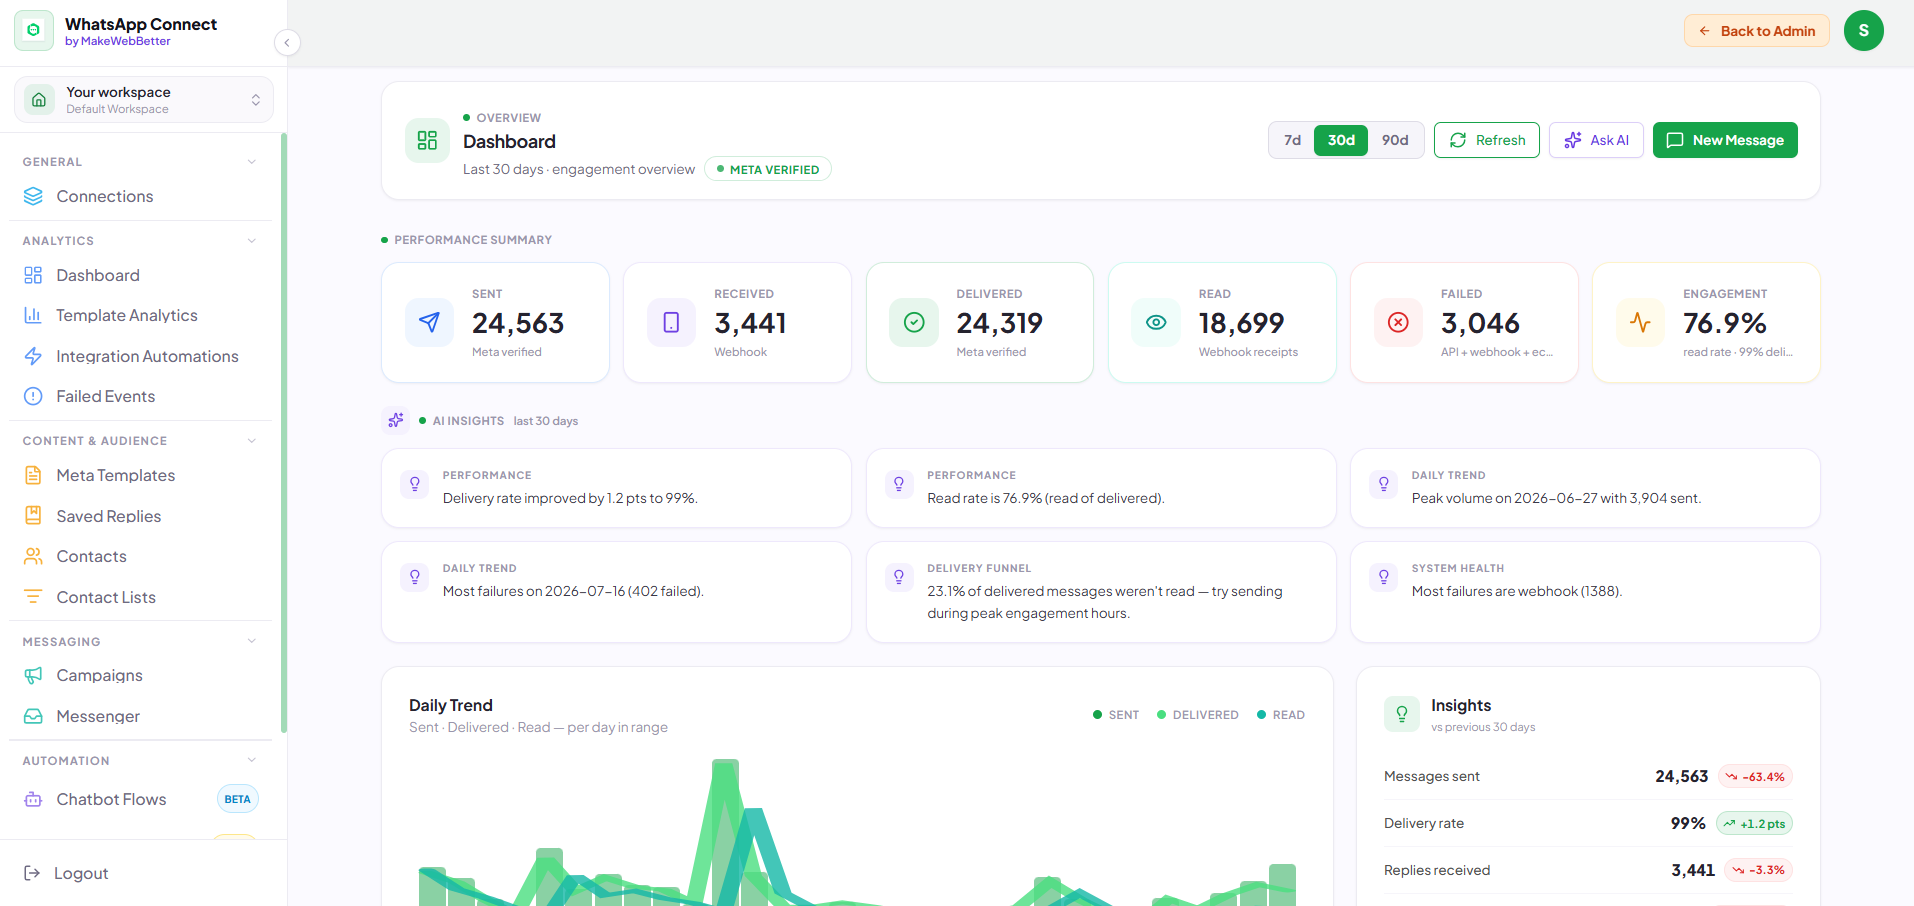
4.Dashboard
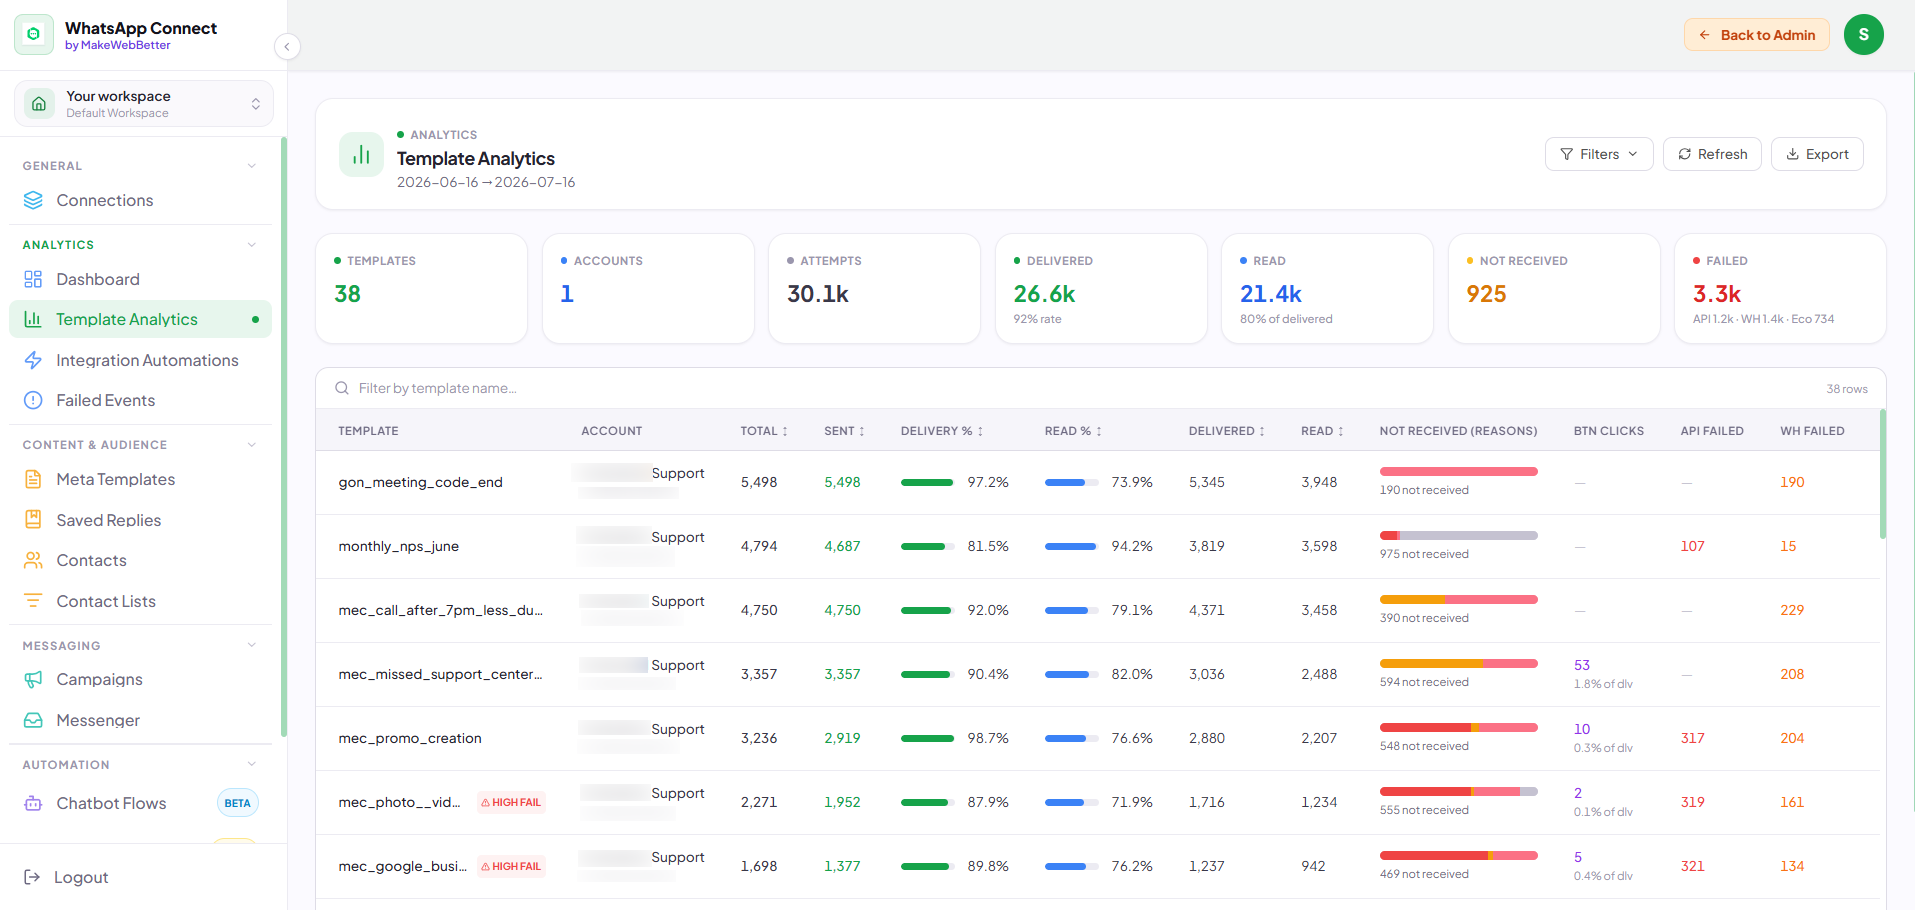
5.Template Analytics
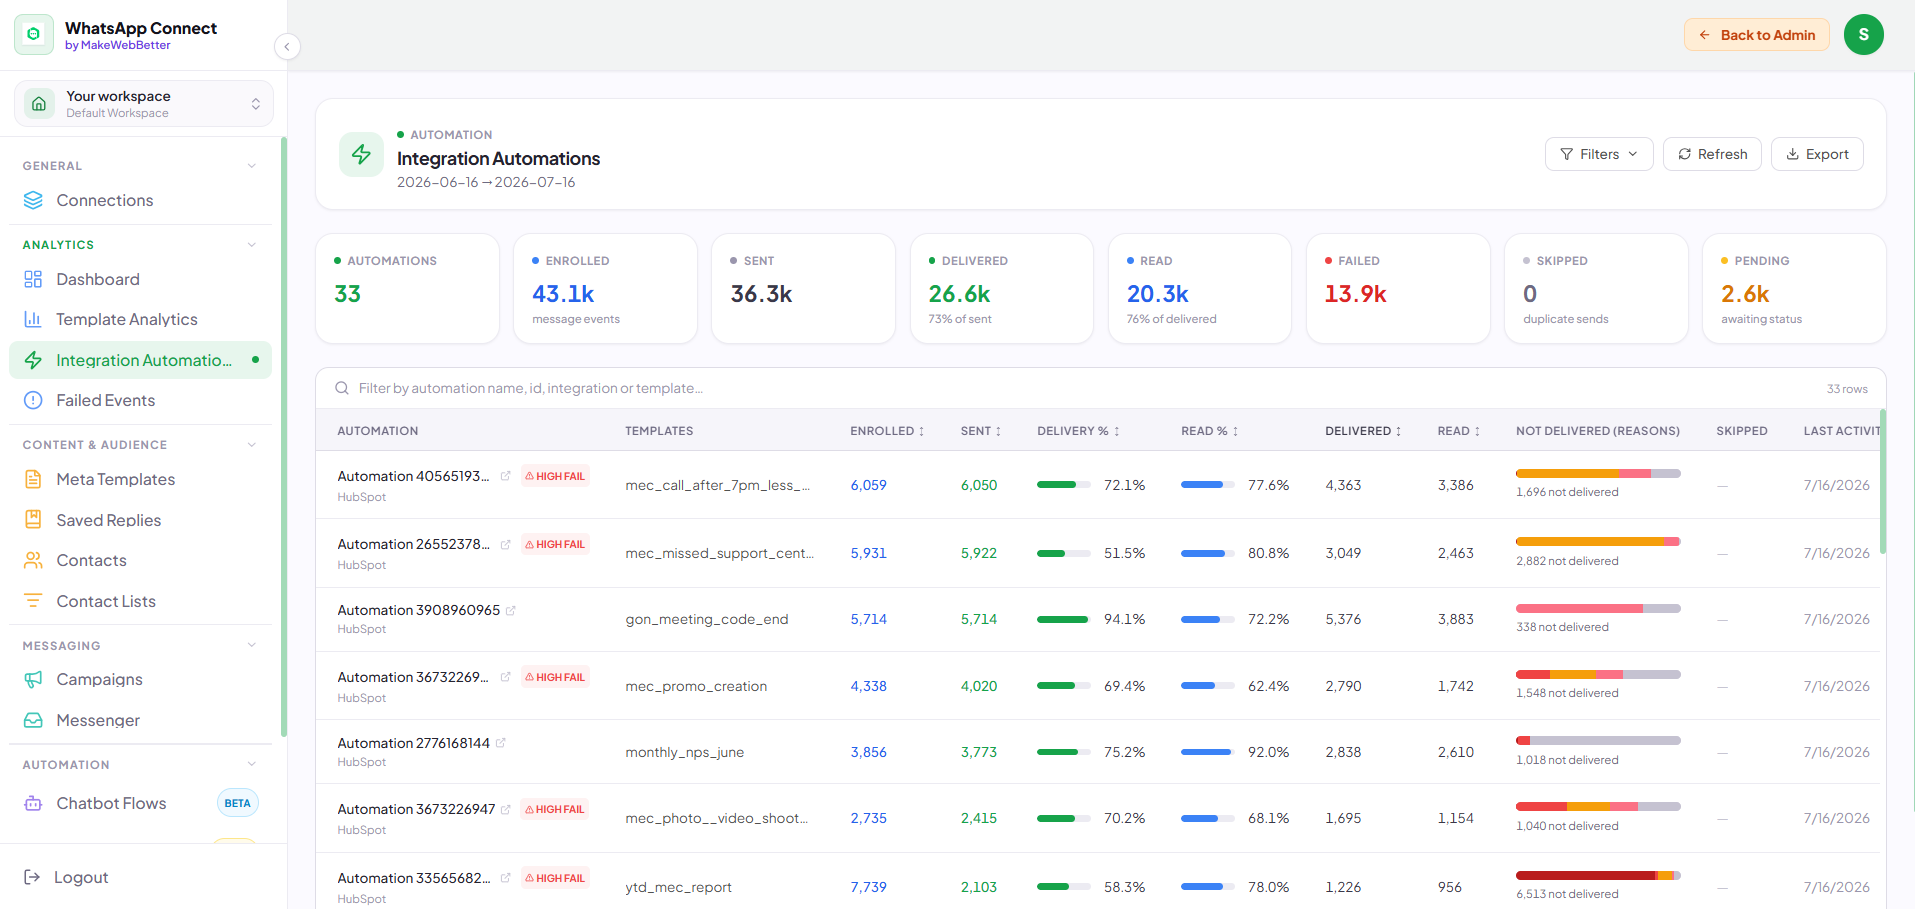
6.Integration Automations
7.Failed Events
Parameter of type text is missing text value.
The parameter ‘to’ is required.
Something went wrong.
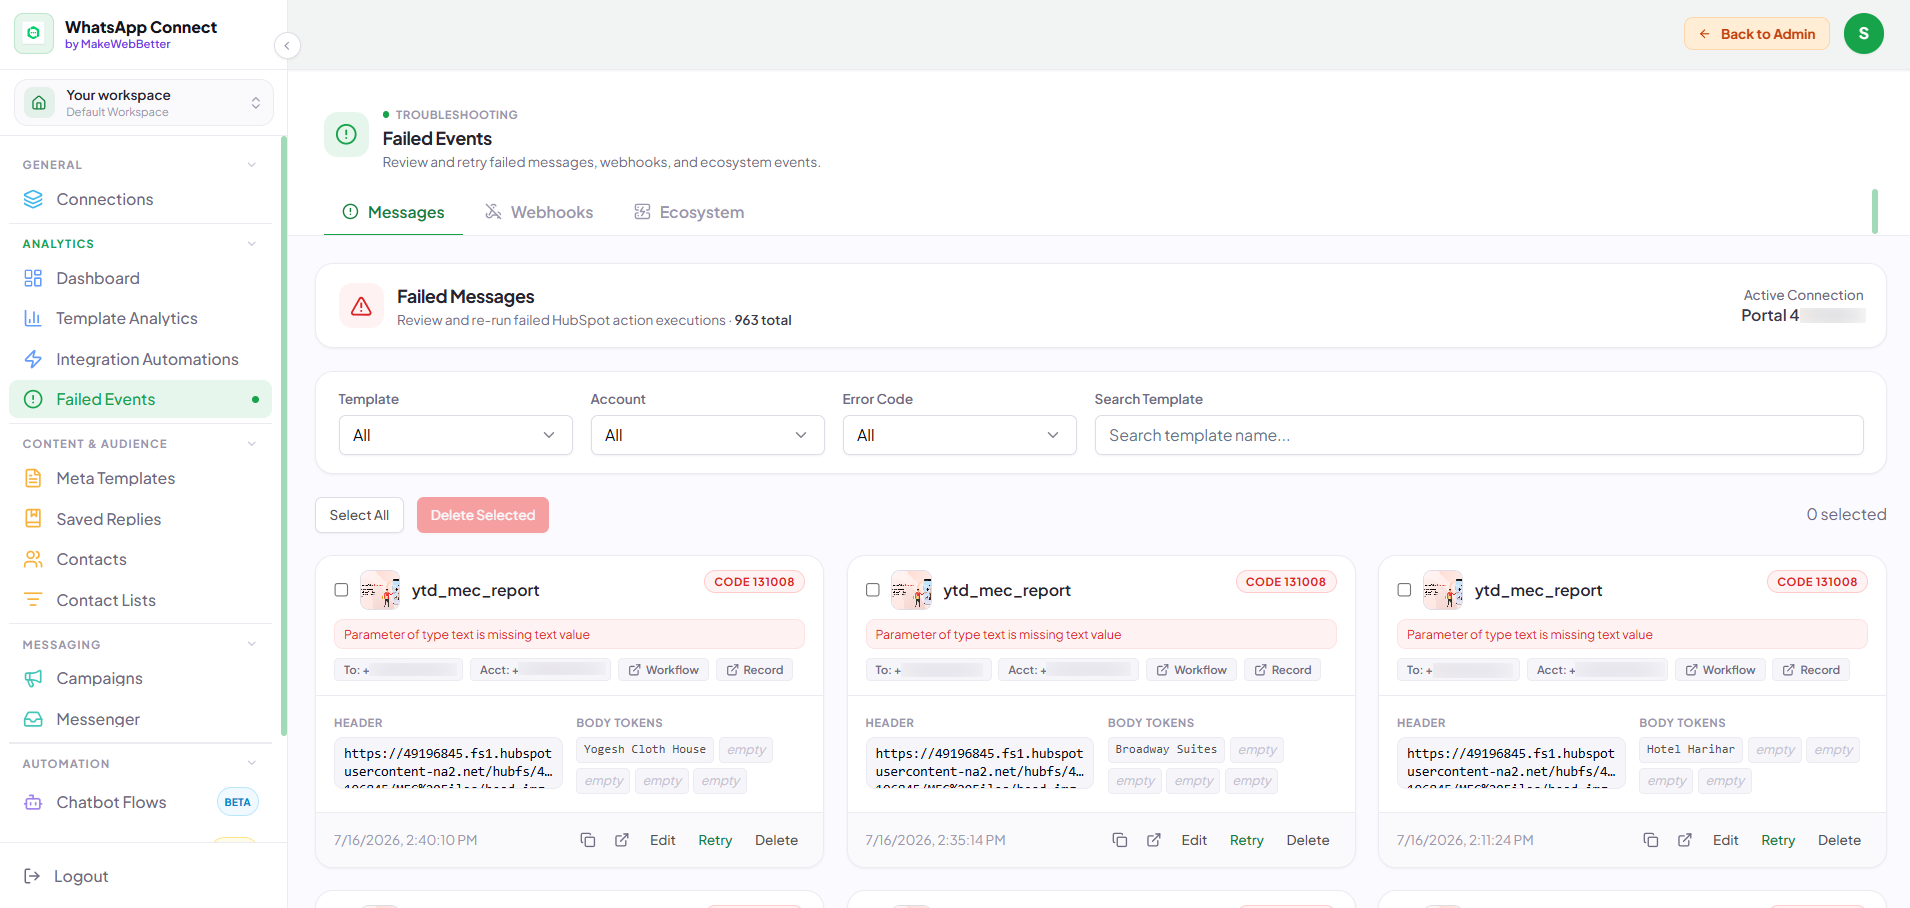
7.1.Messages
7.2.Webhooks
7.3.Ecosystem
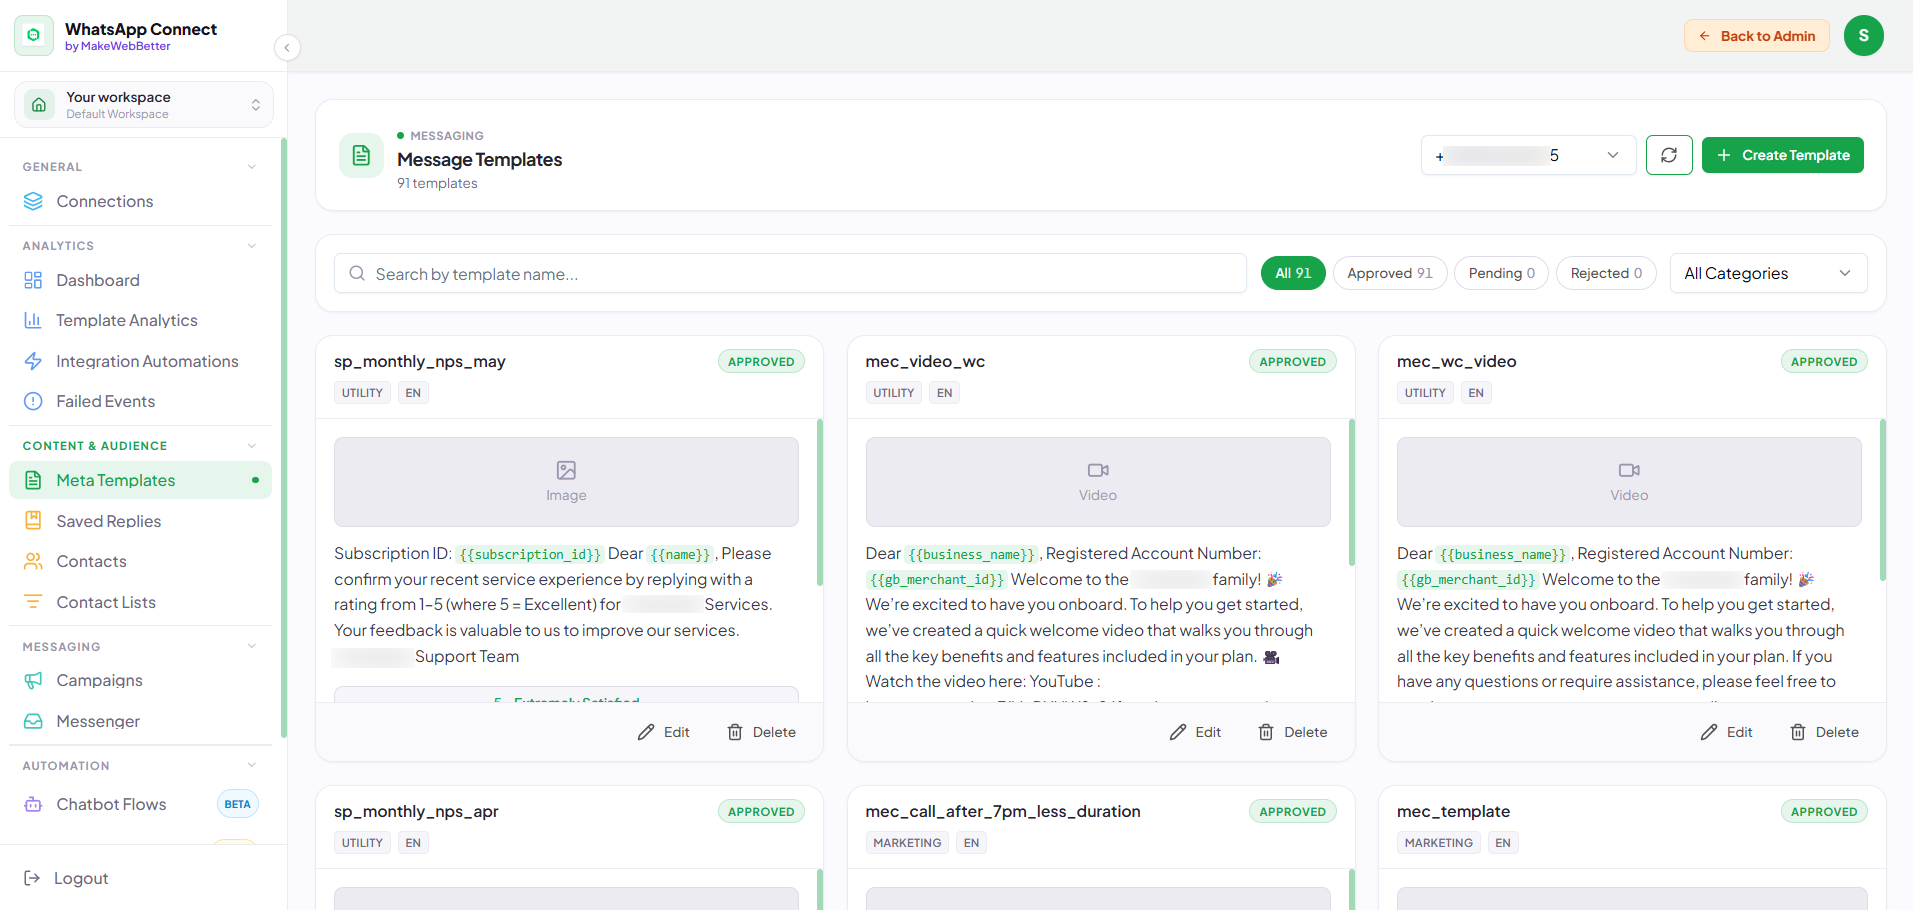
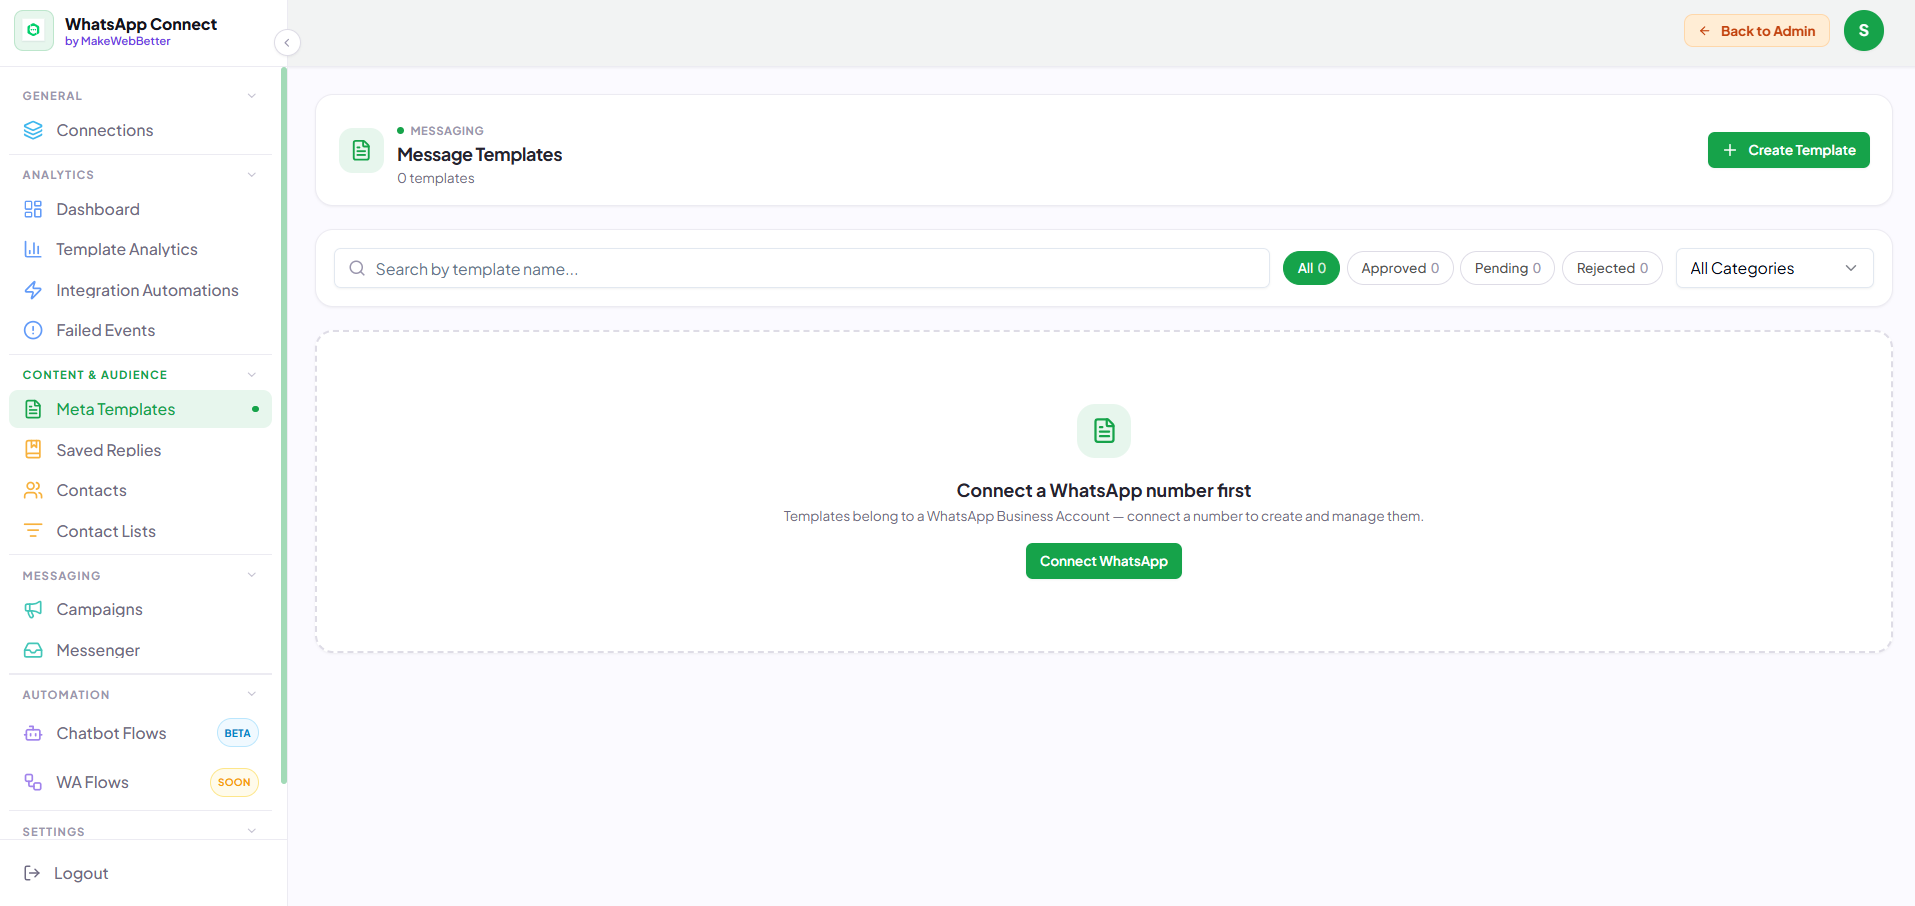
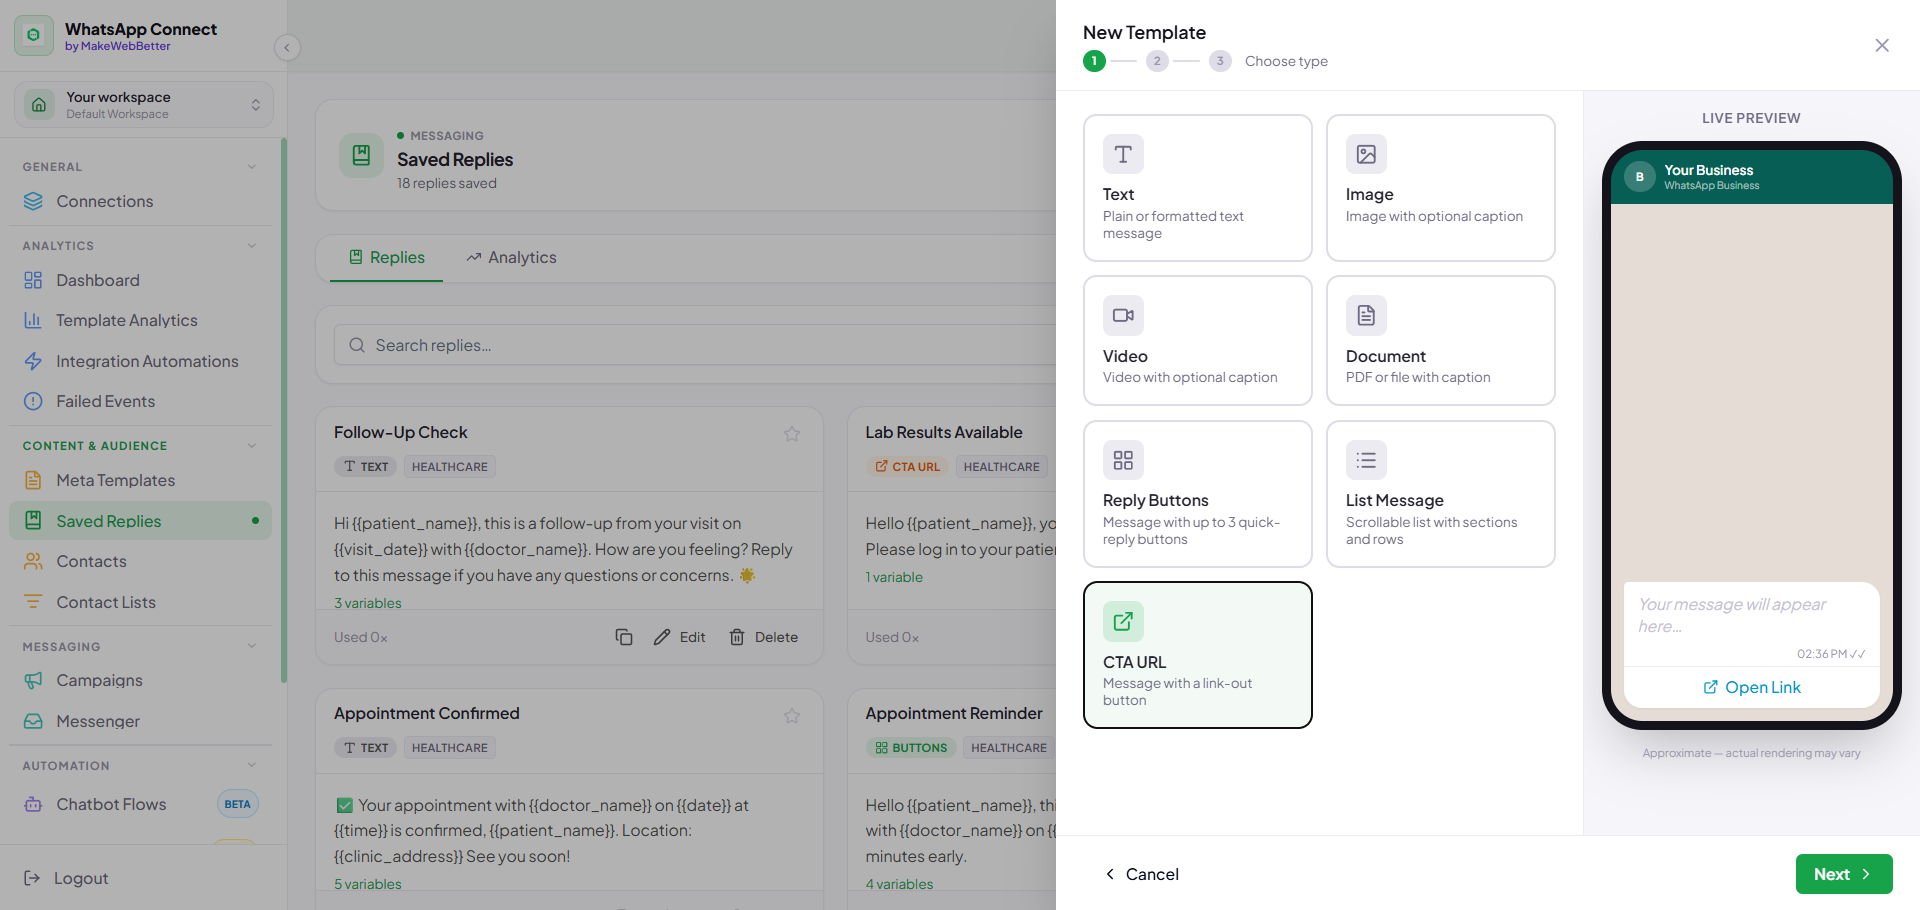
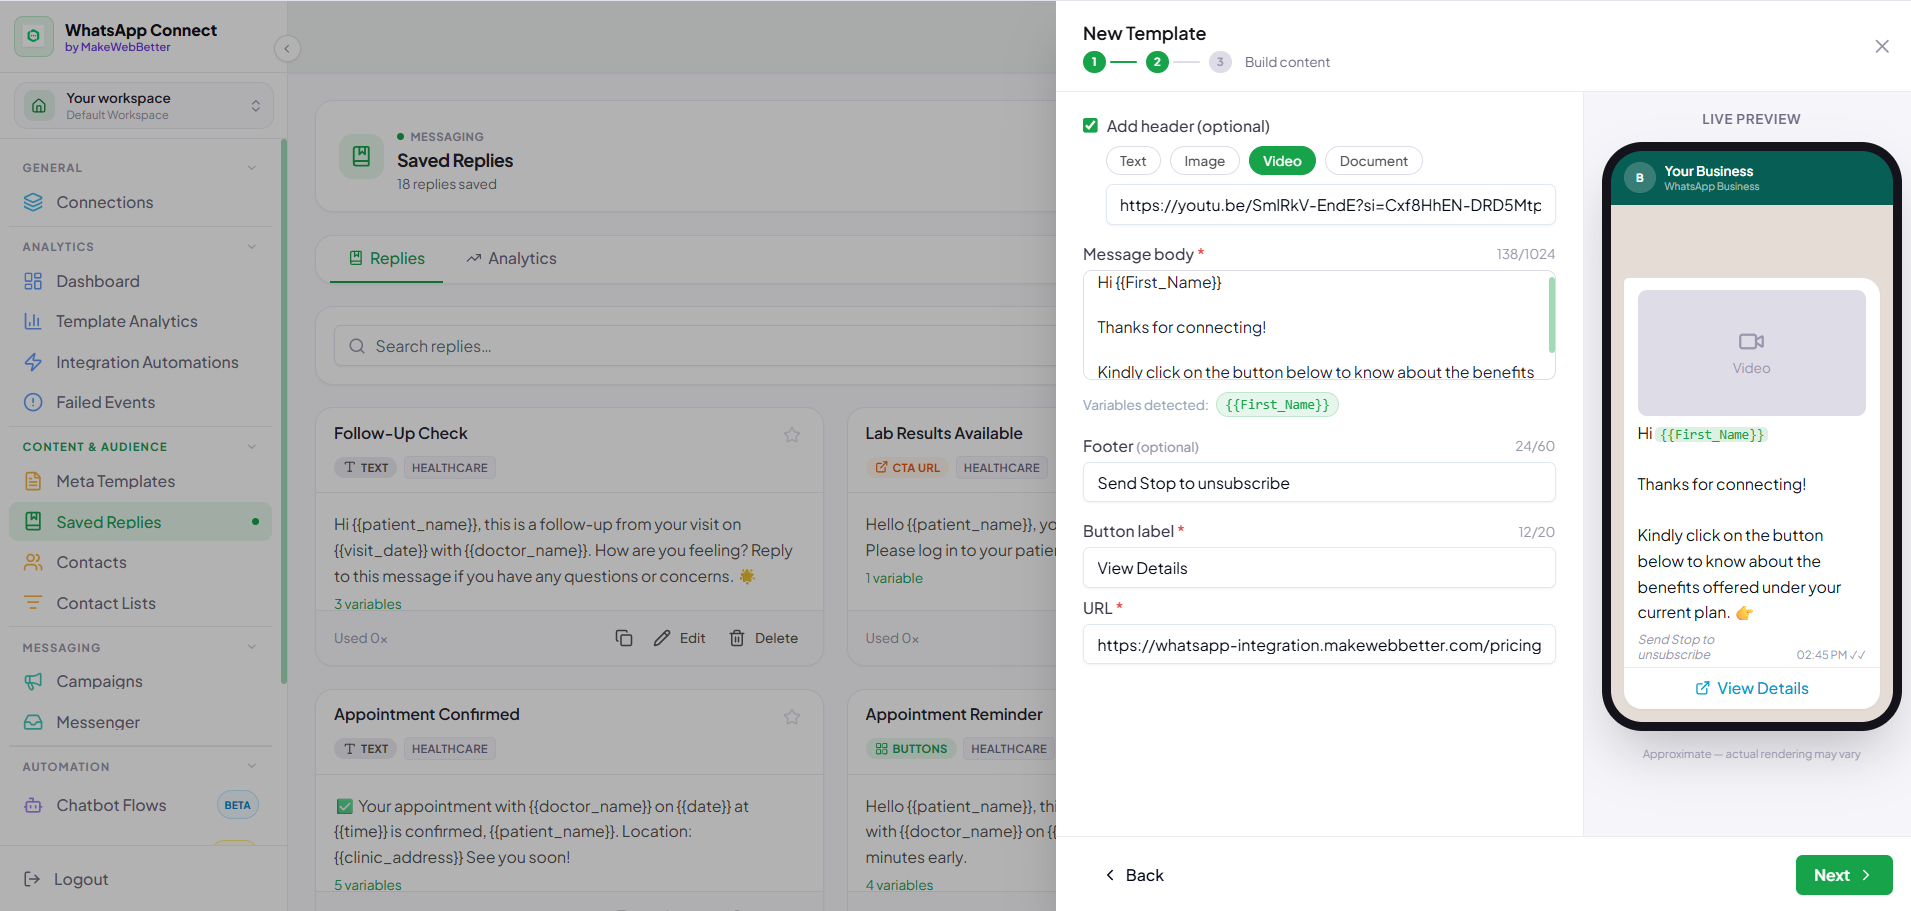
8.Meta Templates

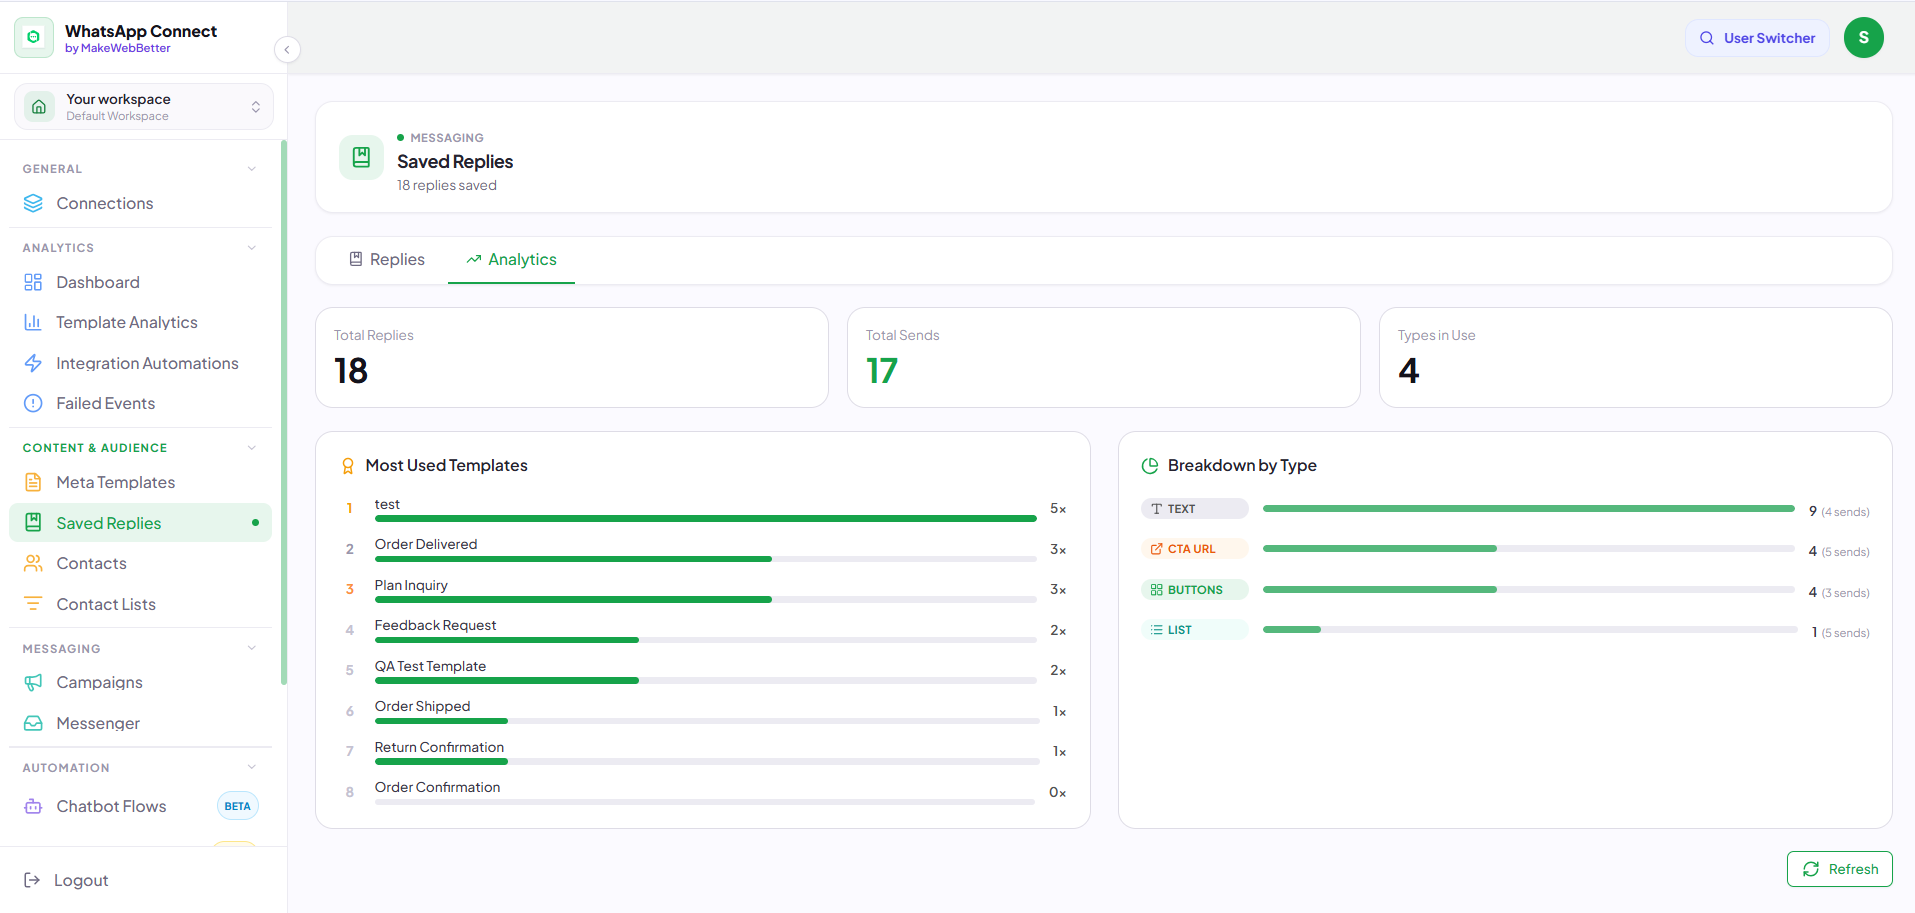
9.Saved Replies
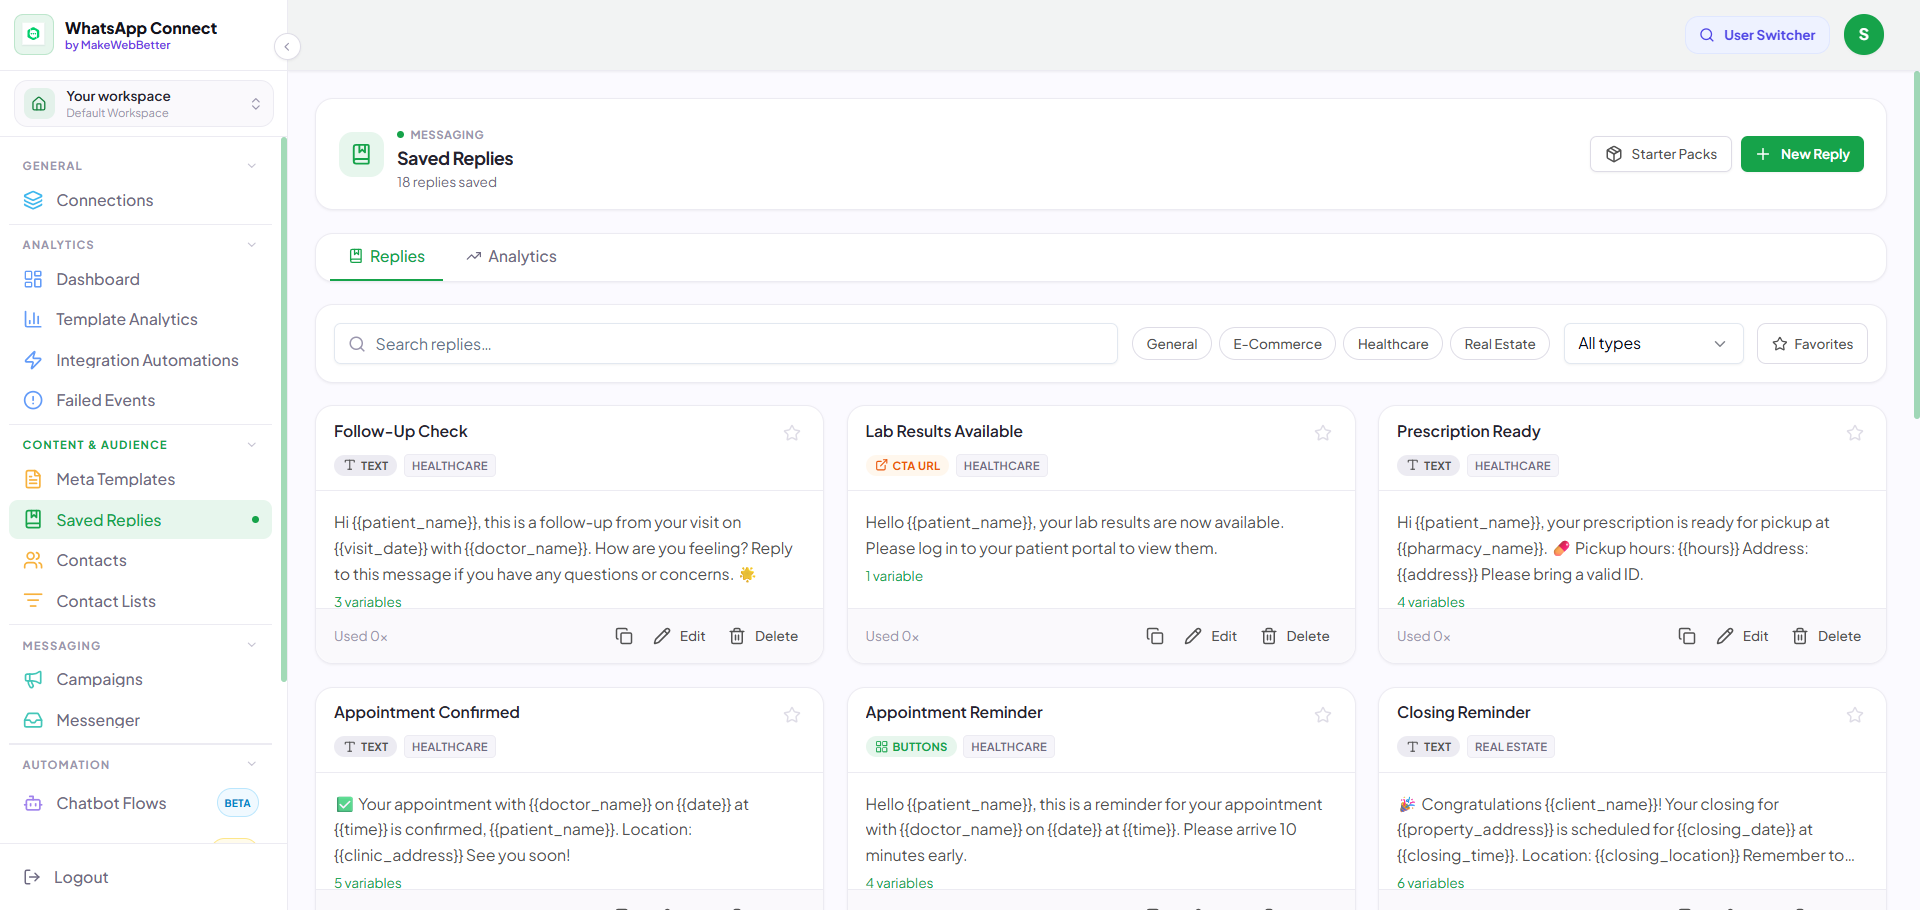
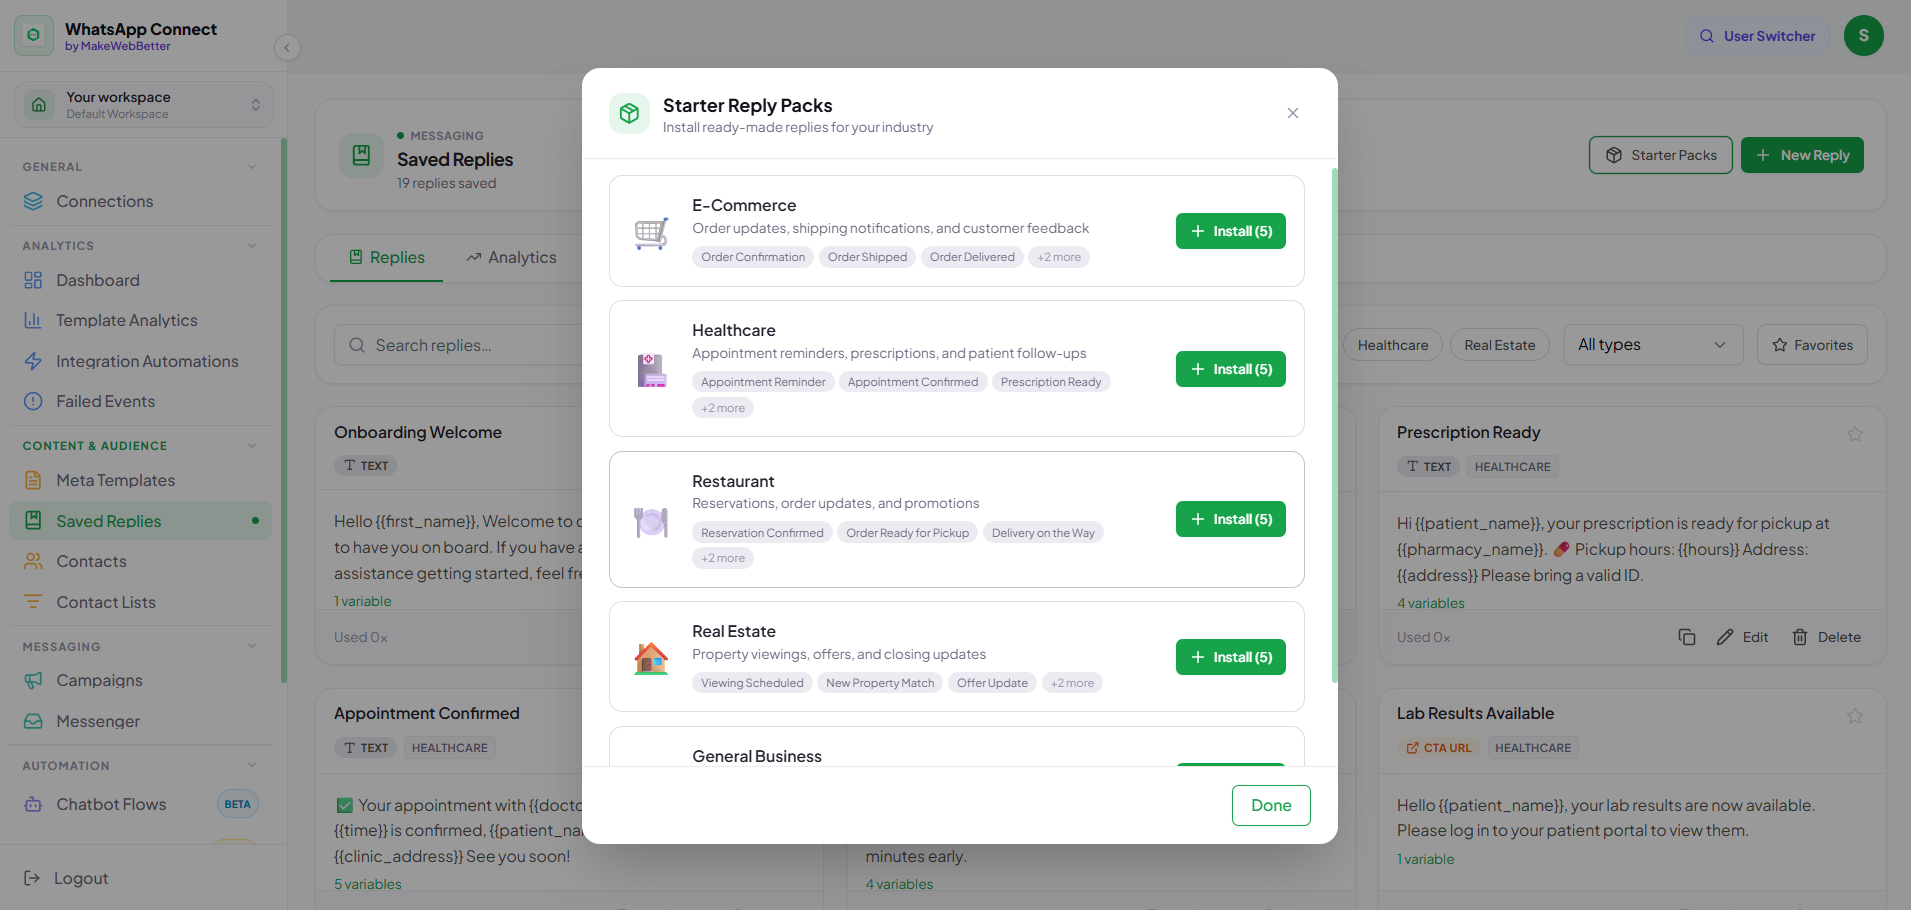
9.1.How to create Saved Replies templates in WhatsApp Connect?
10.Contacts
11.Contact Lists
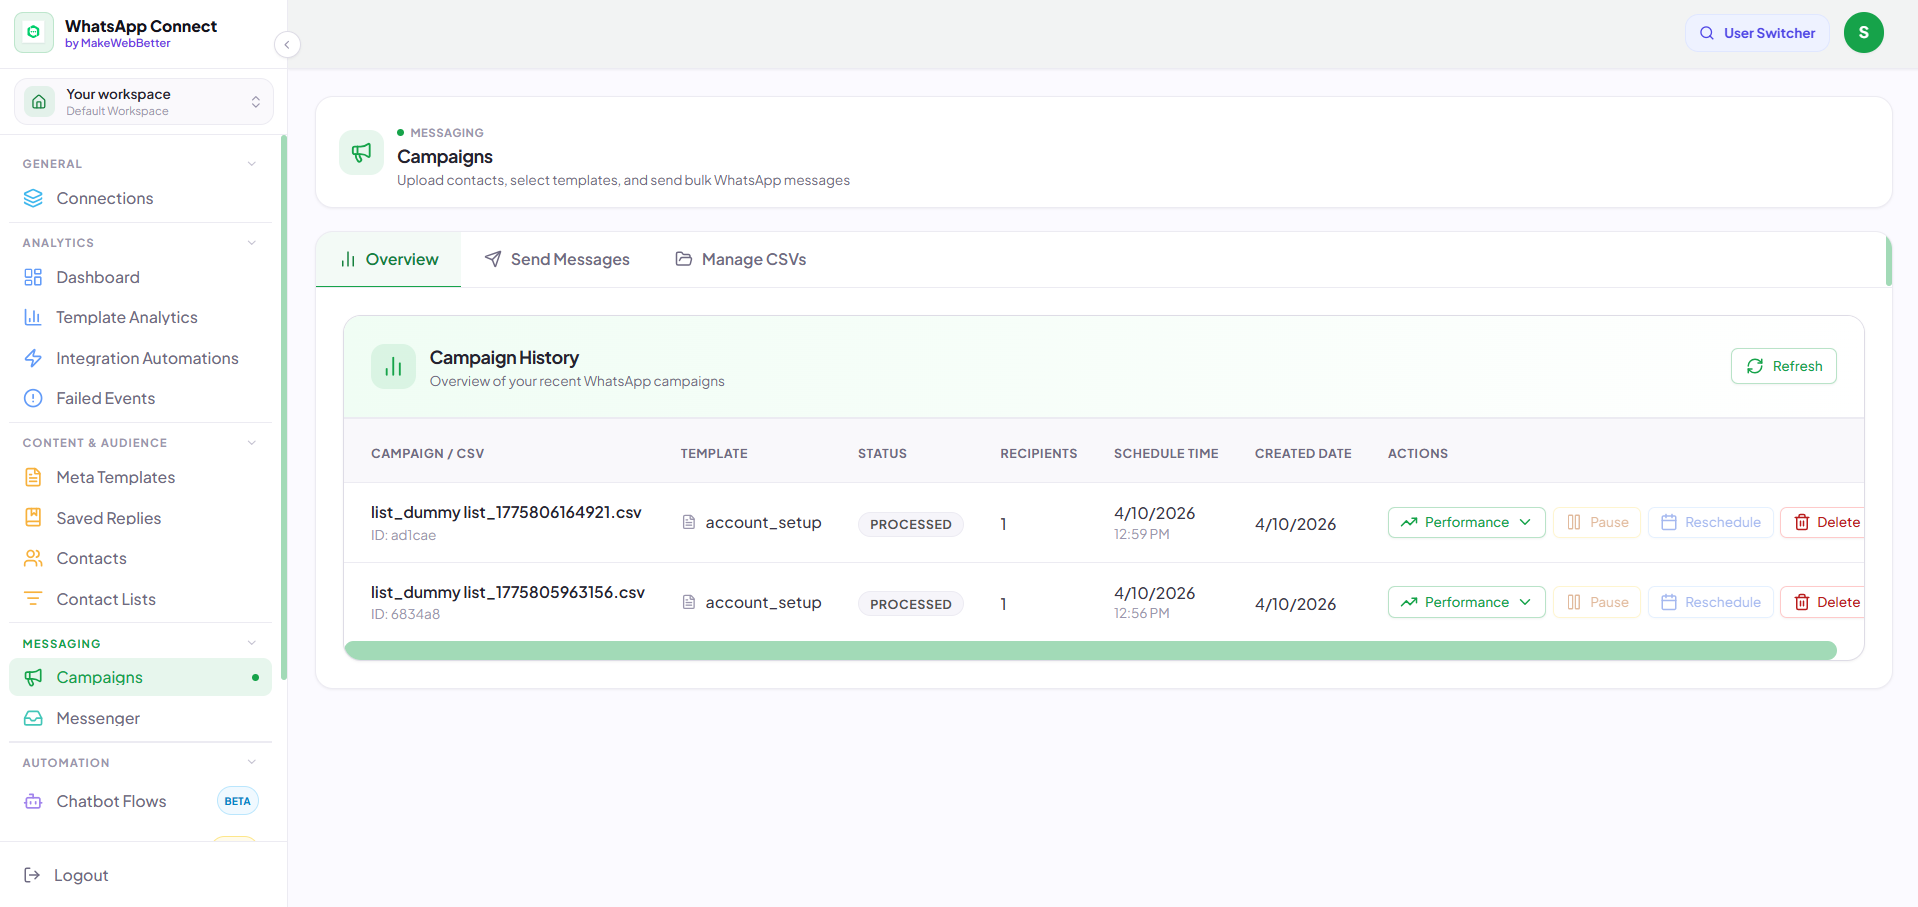
12.Campaigns
12.1.Campaigns Overview
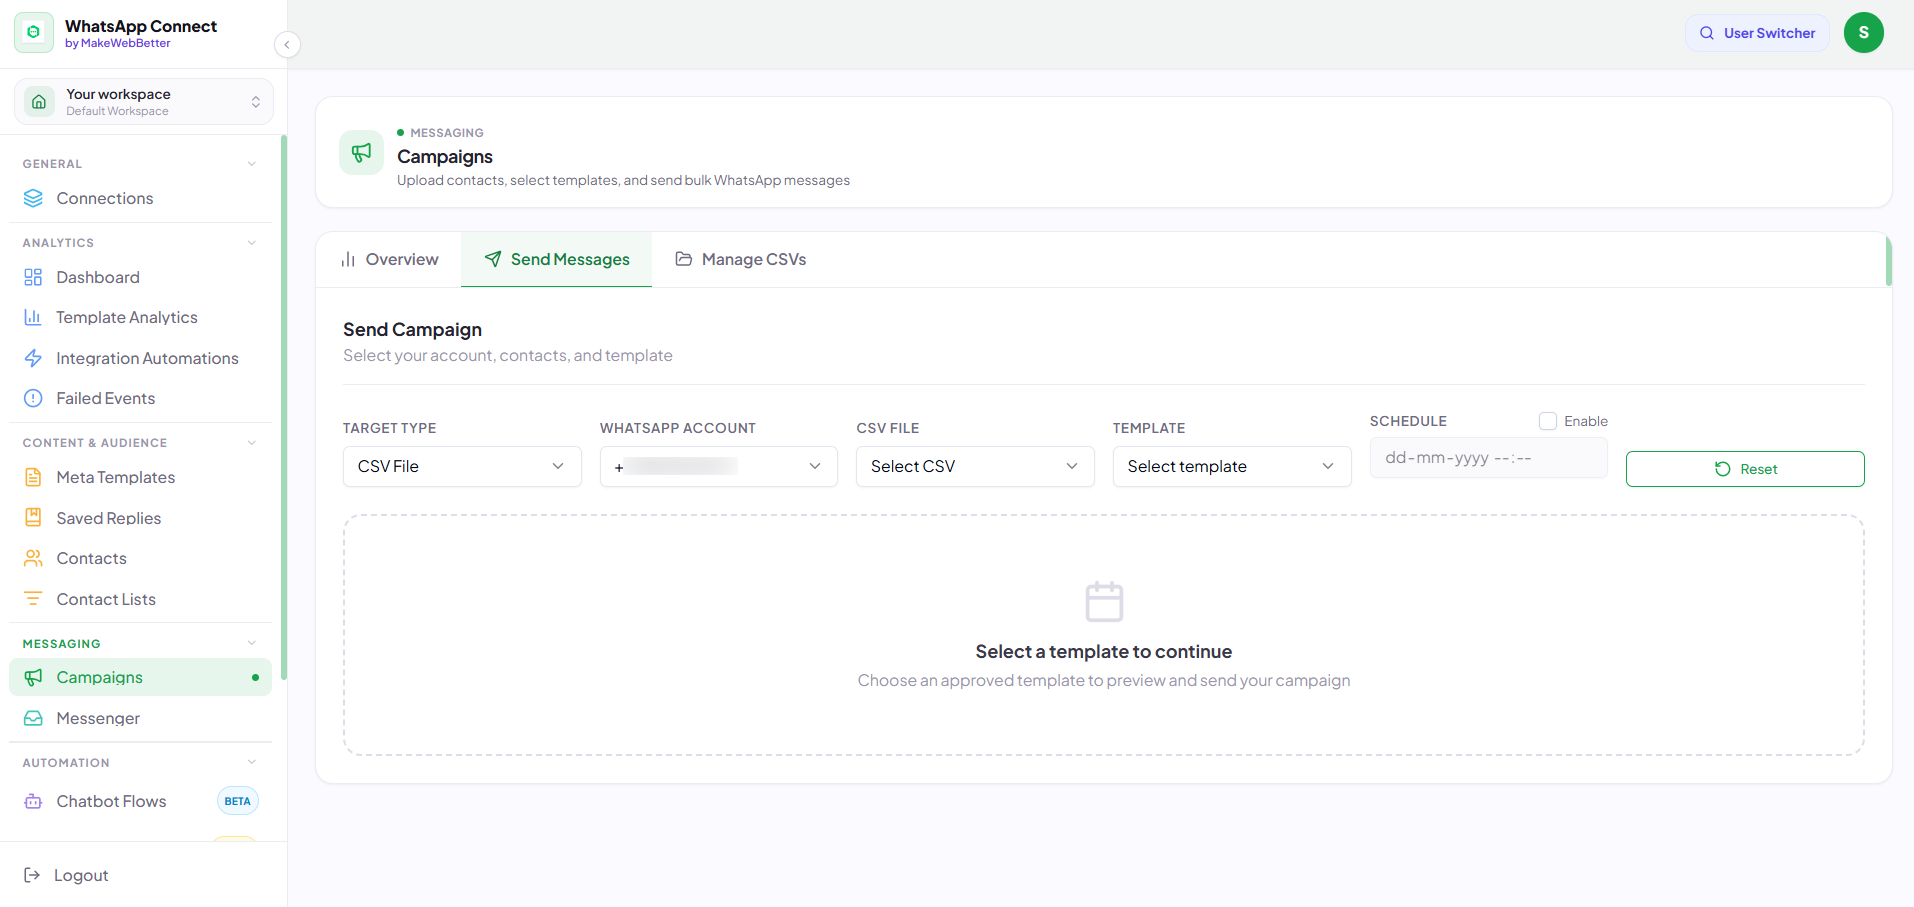
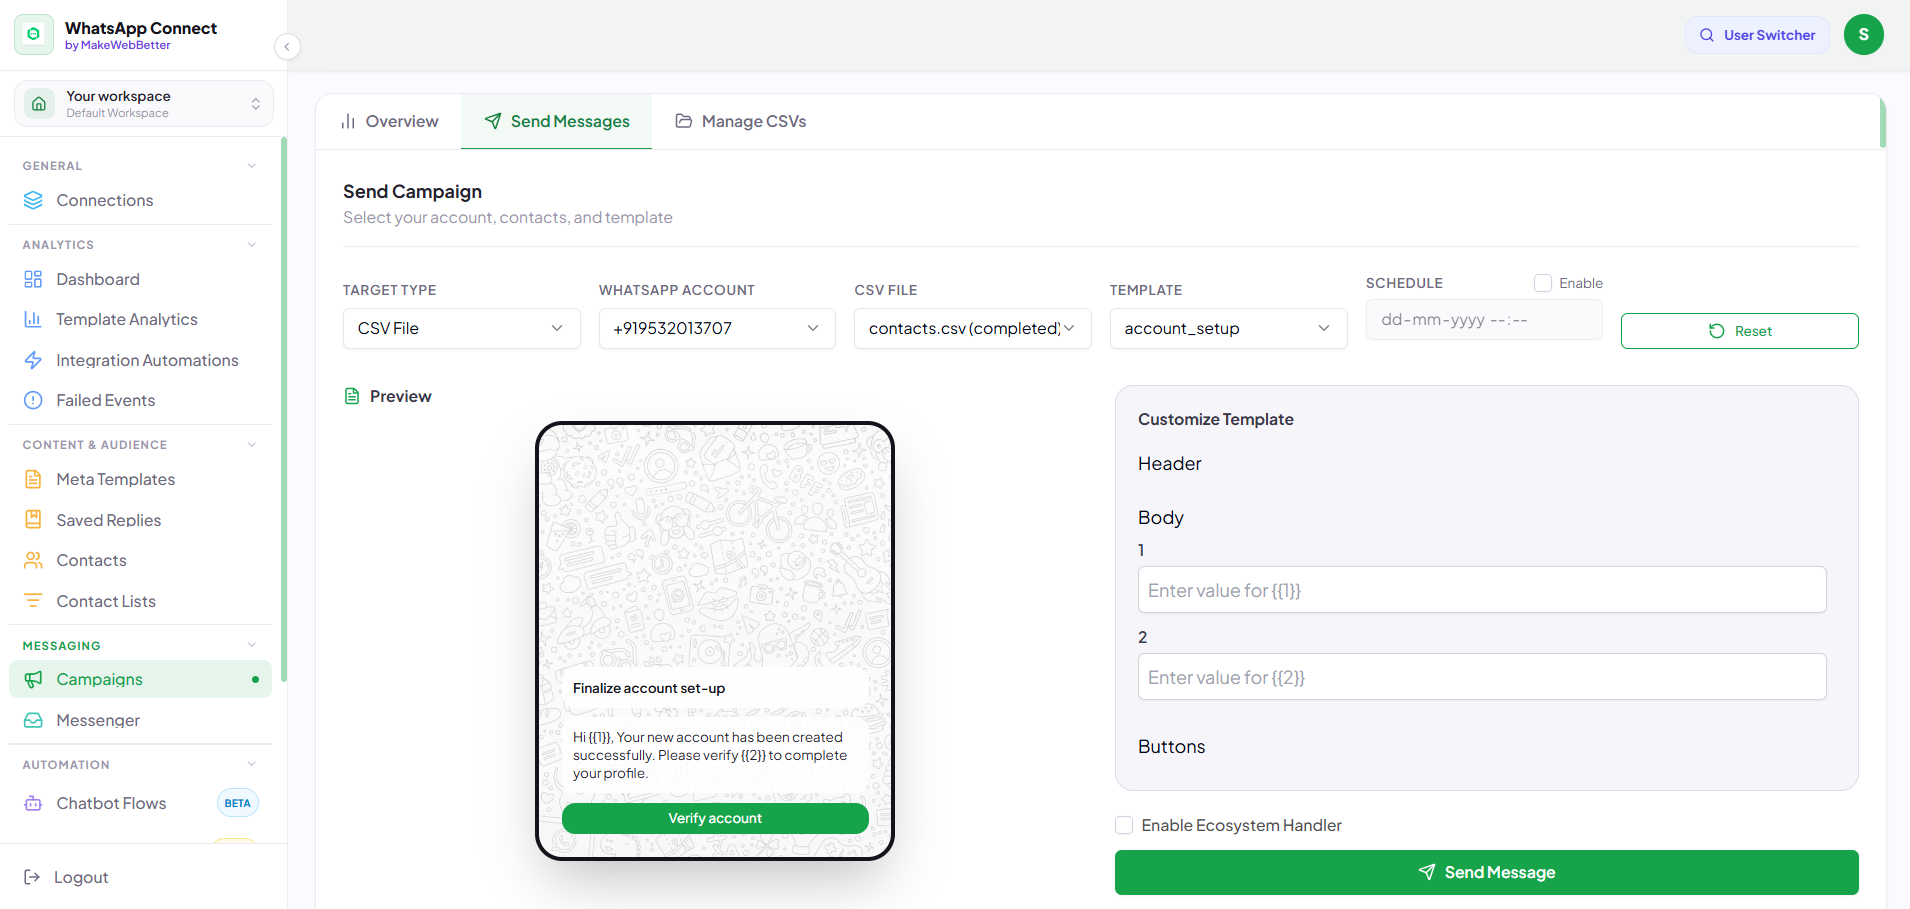
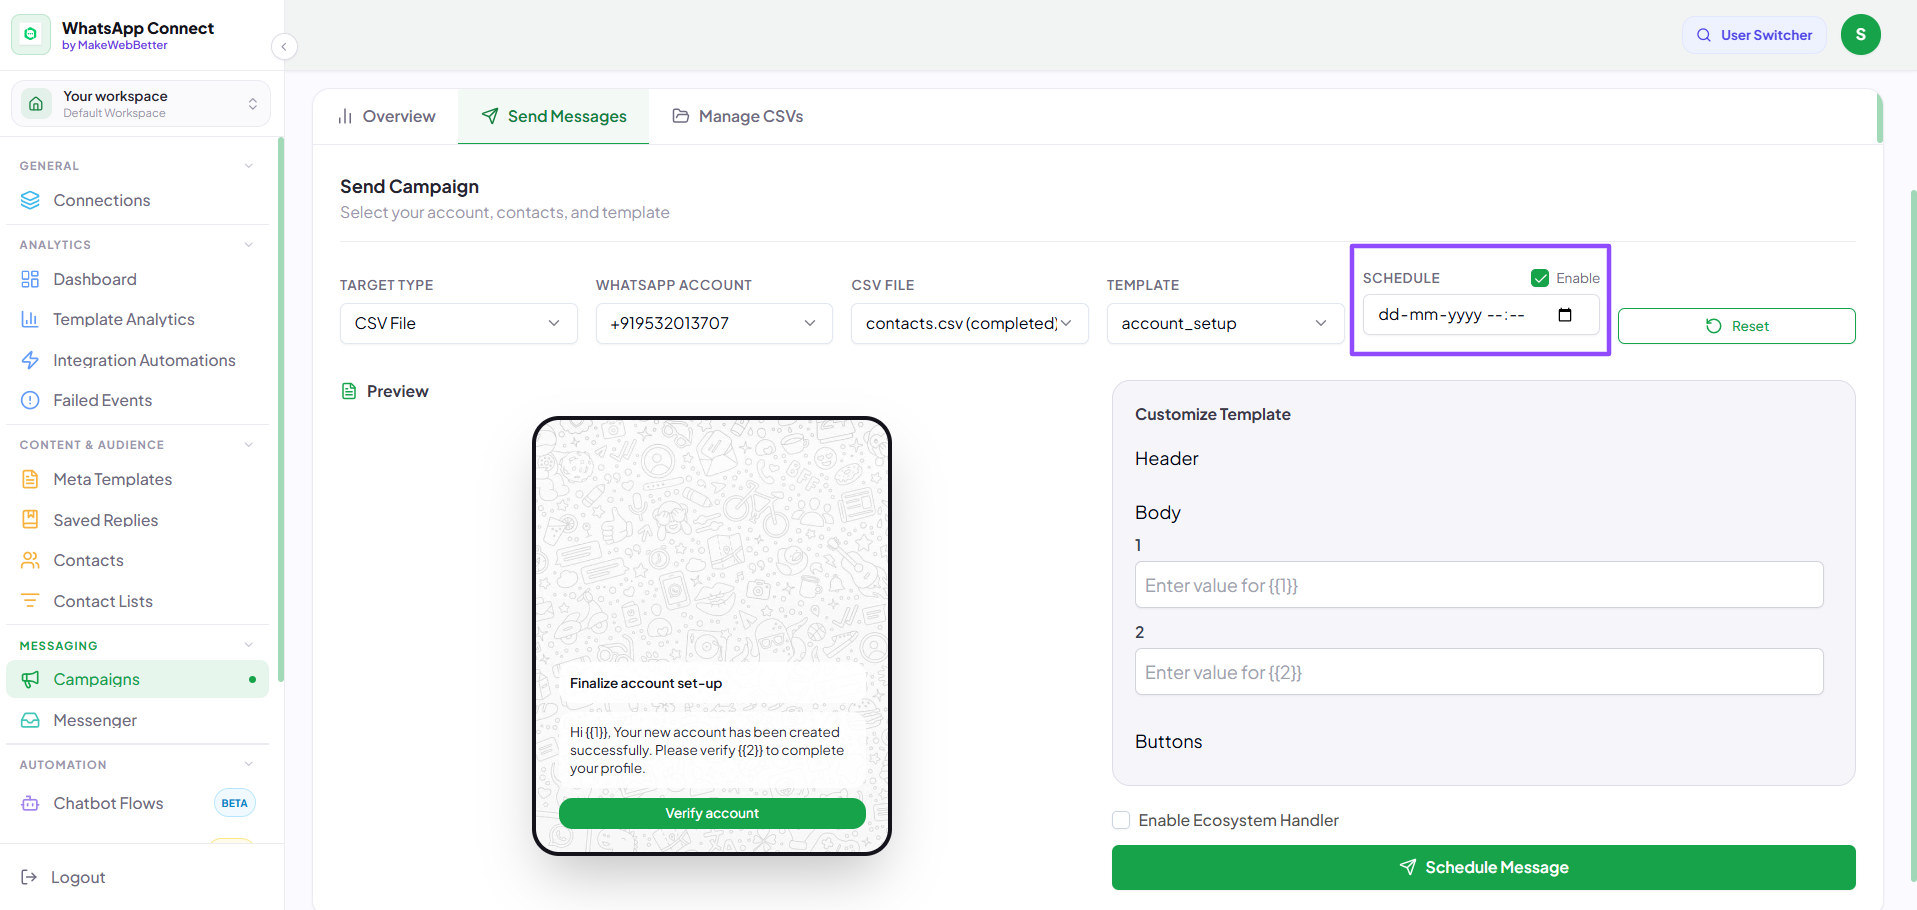
12.2.Send Messages
12.3.Manage CSVs
13.Messenger
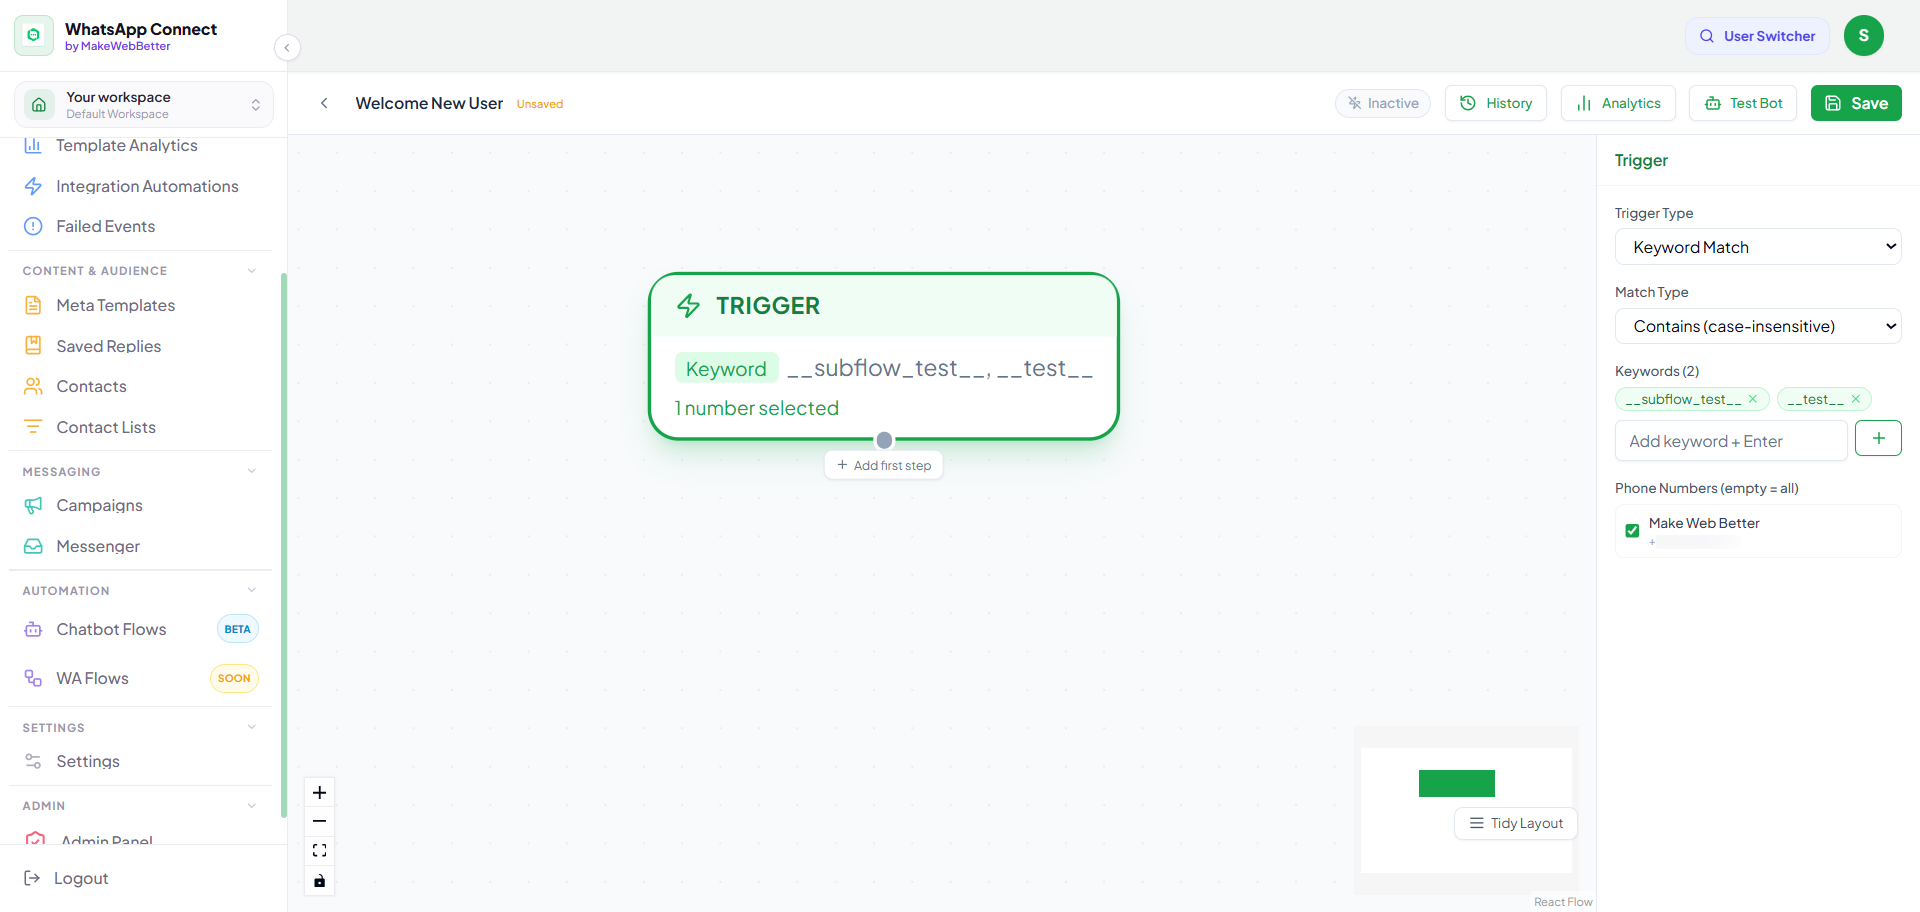
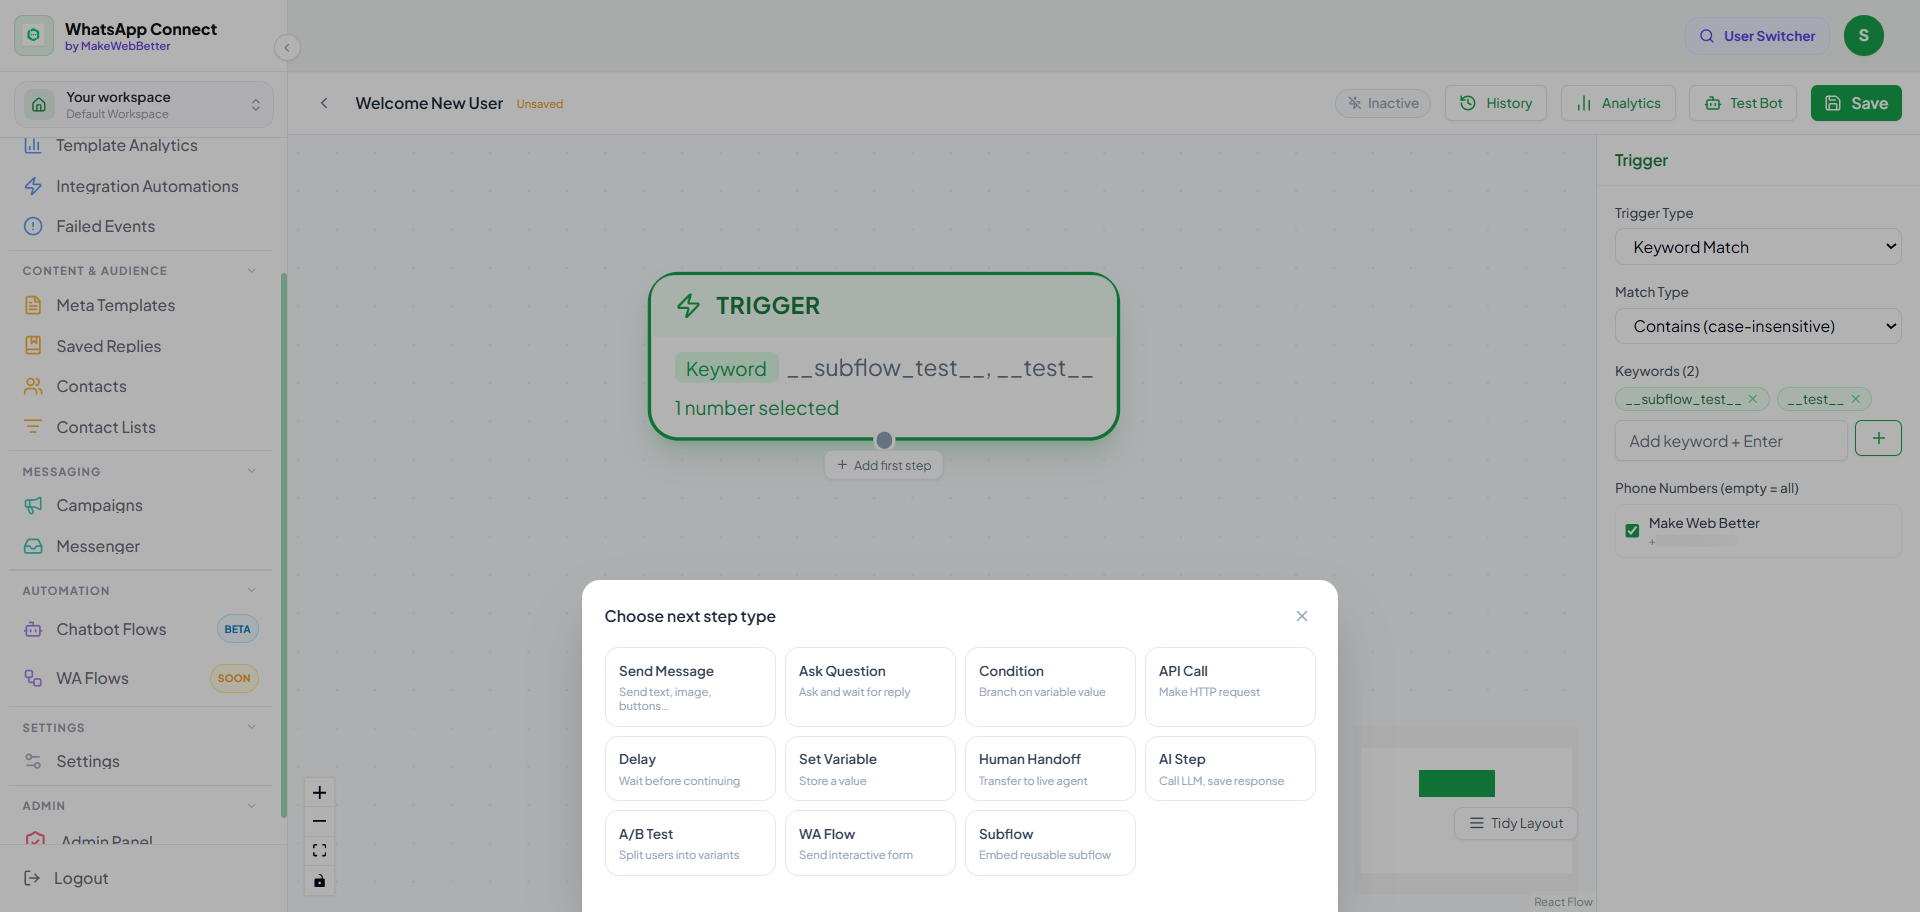
14.Chatbot Flows (Beta)
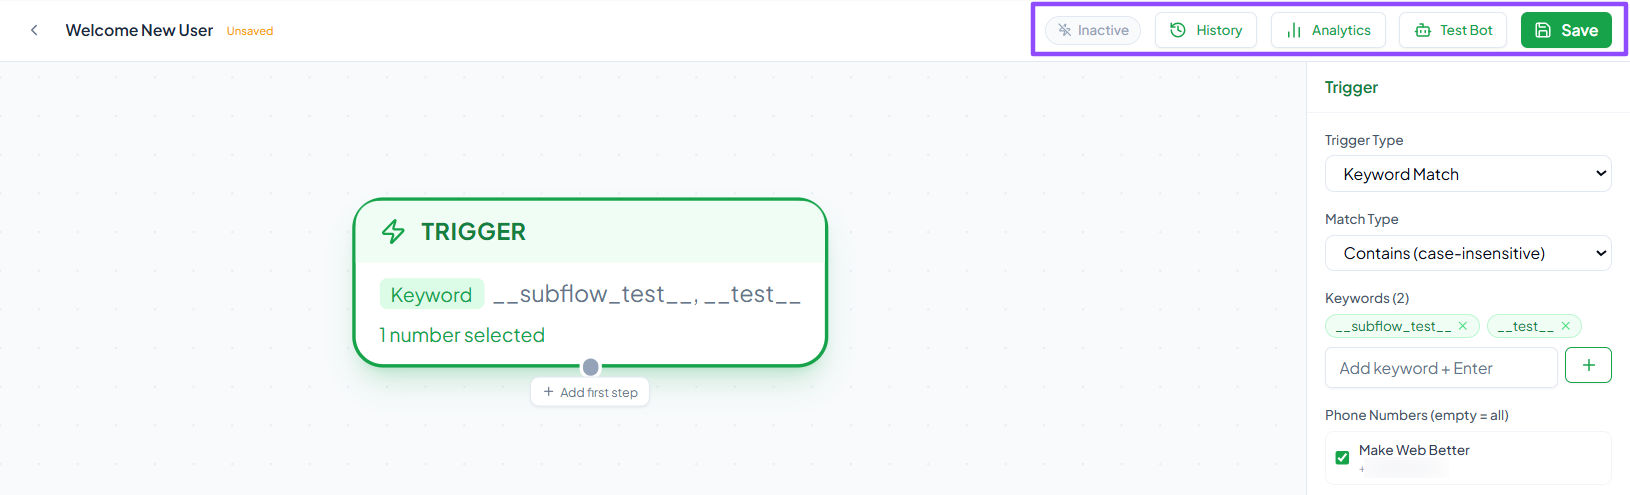
14.1.New Flow (Chatbot Builder)

15.WA Flows (Coming Soon)
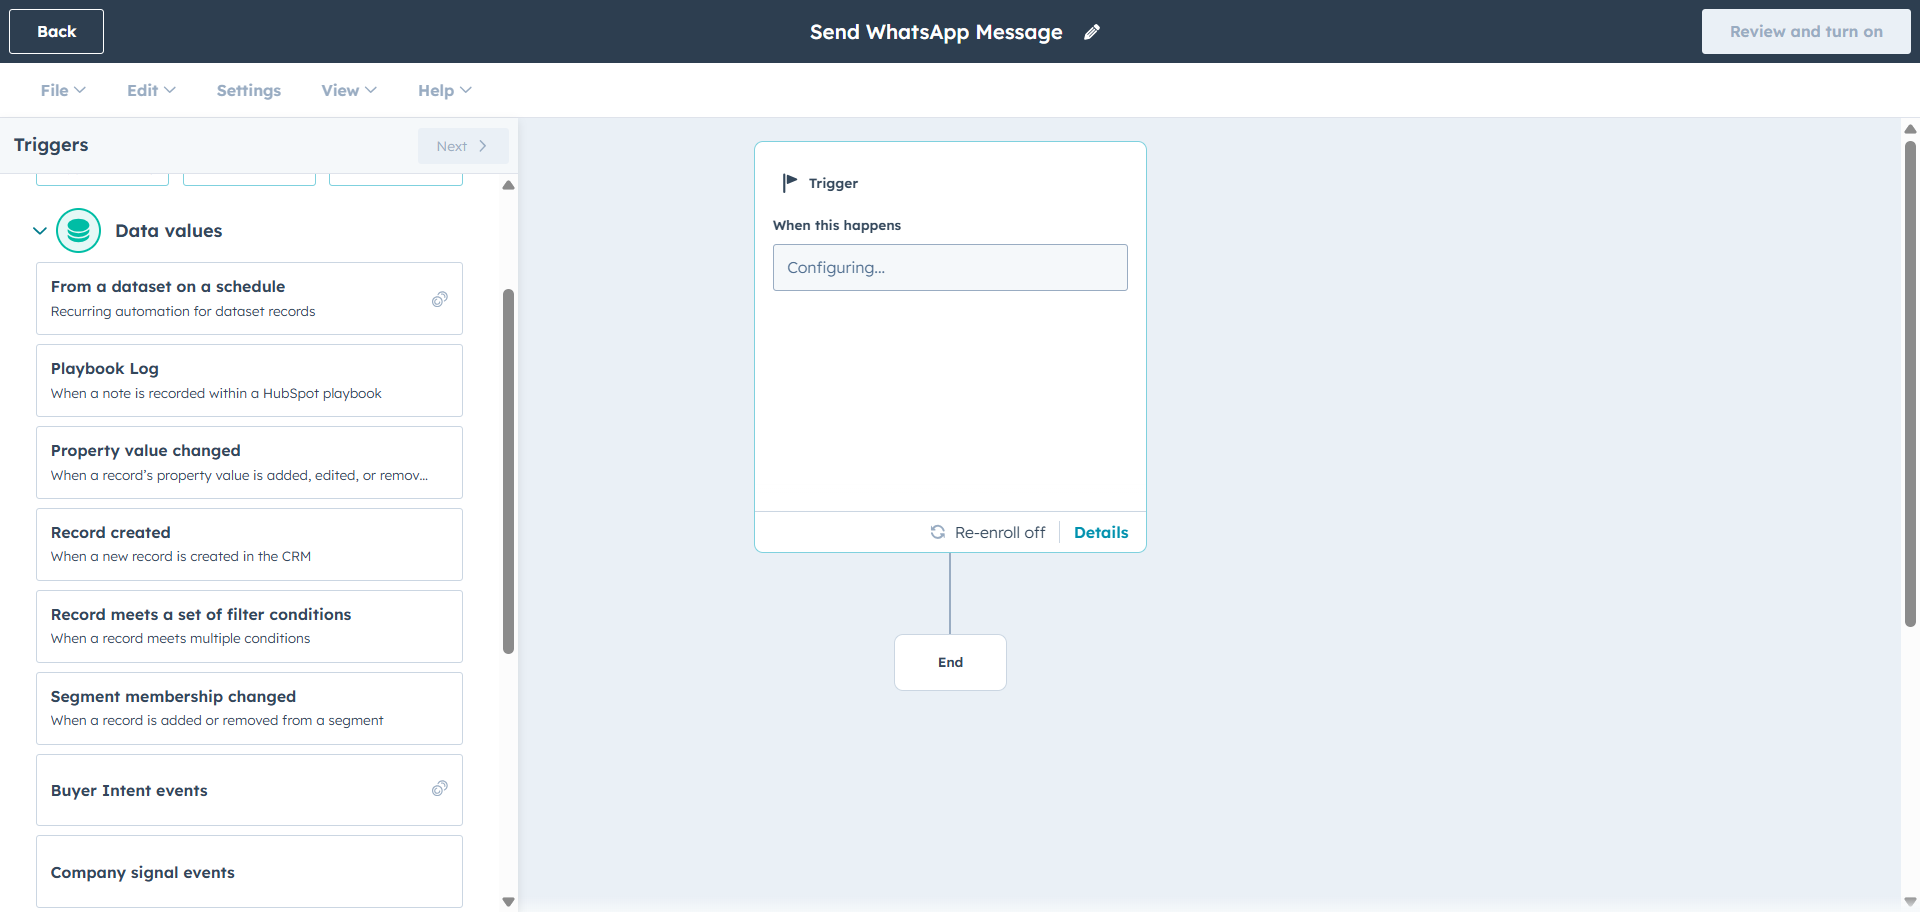
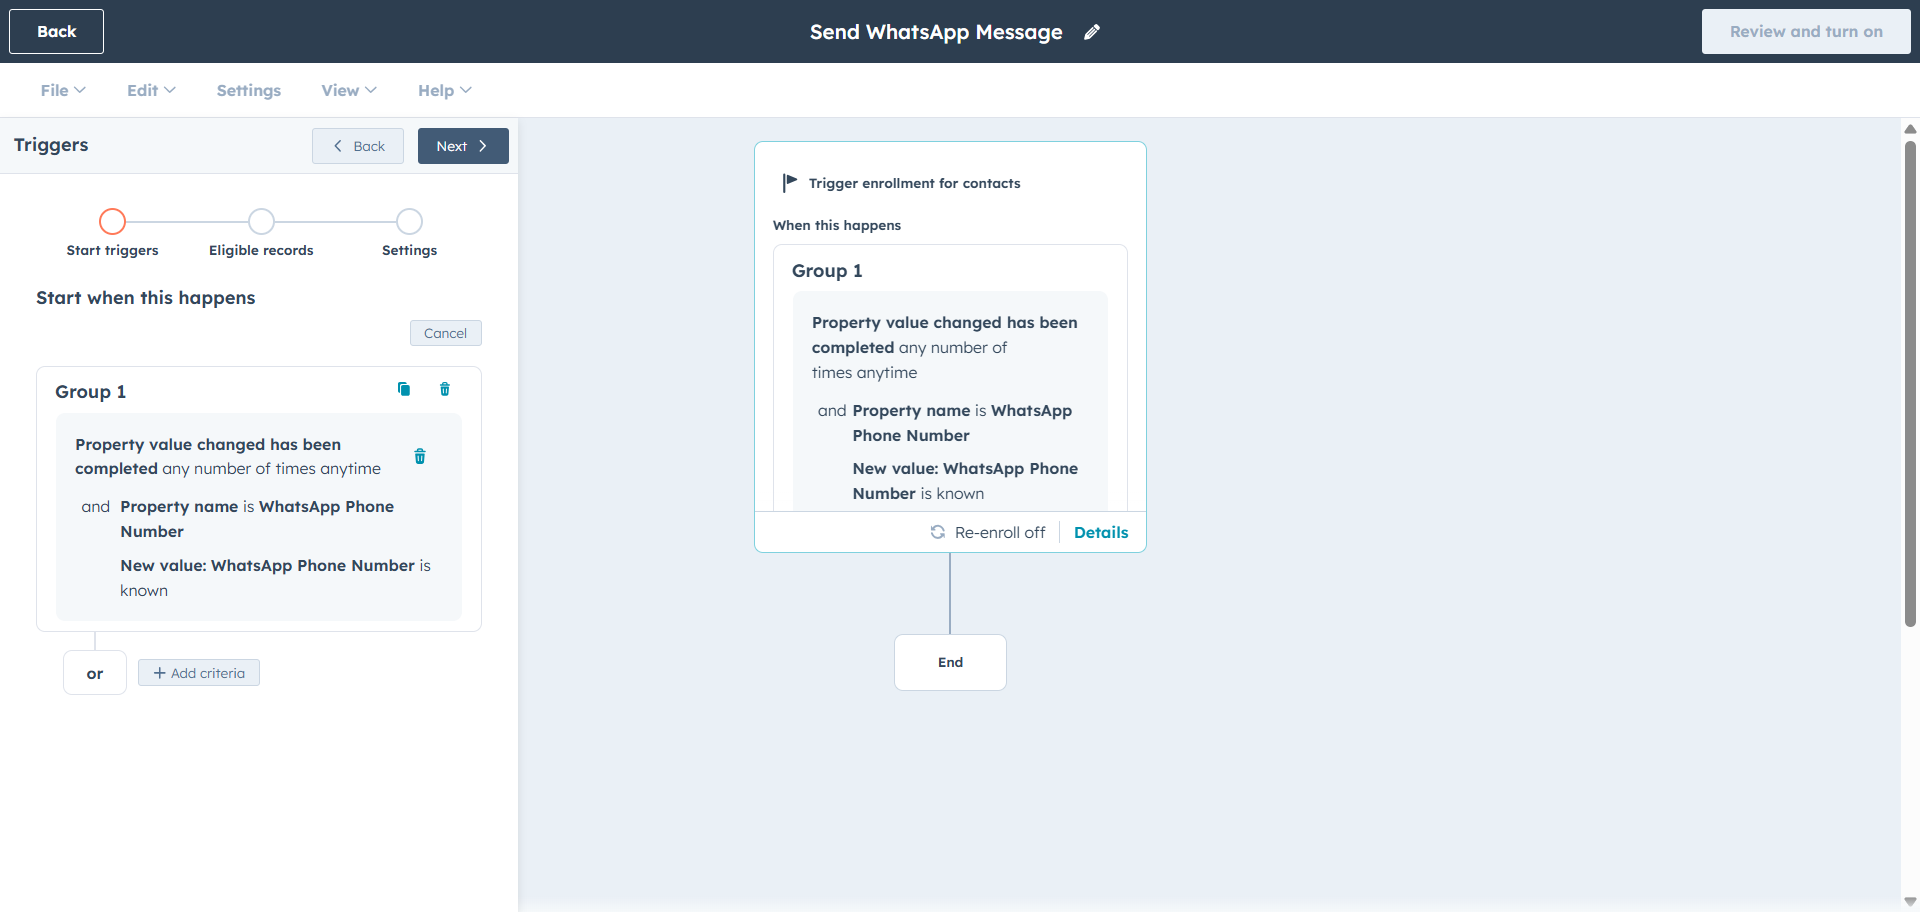
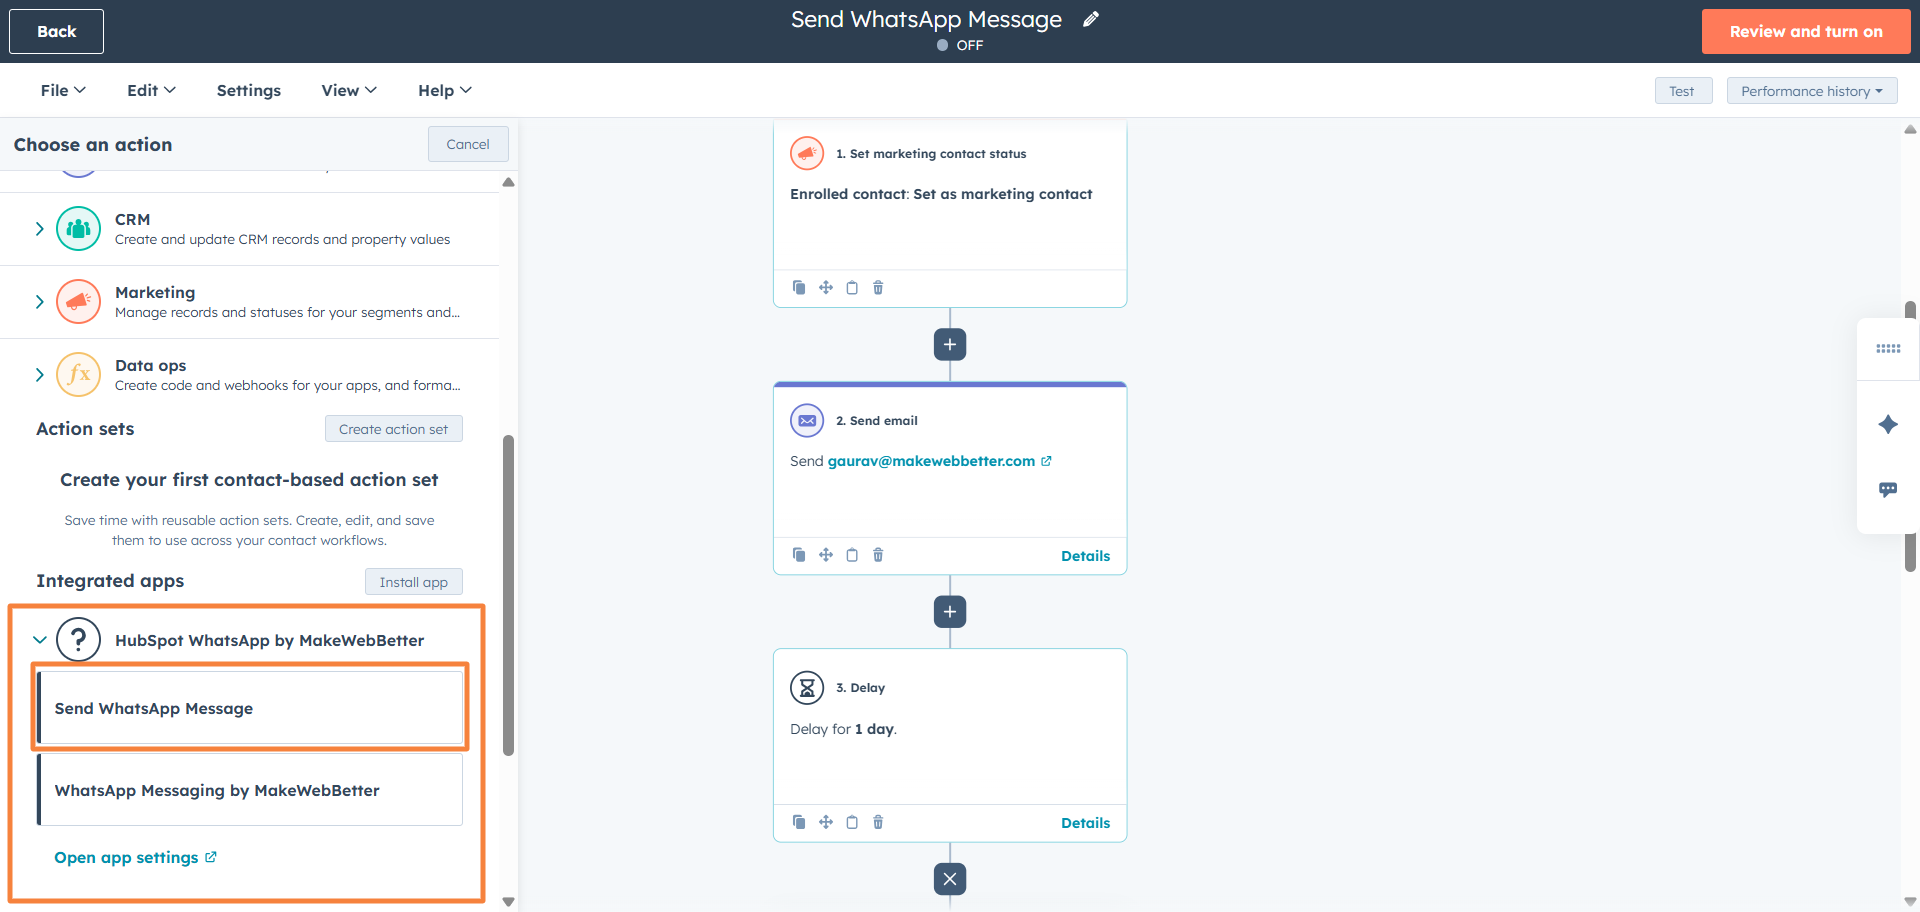
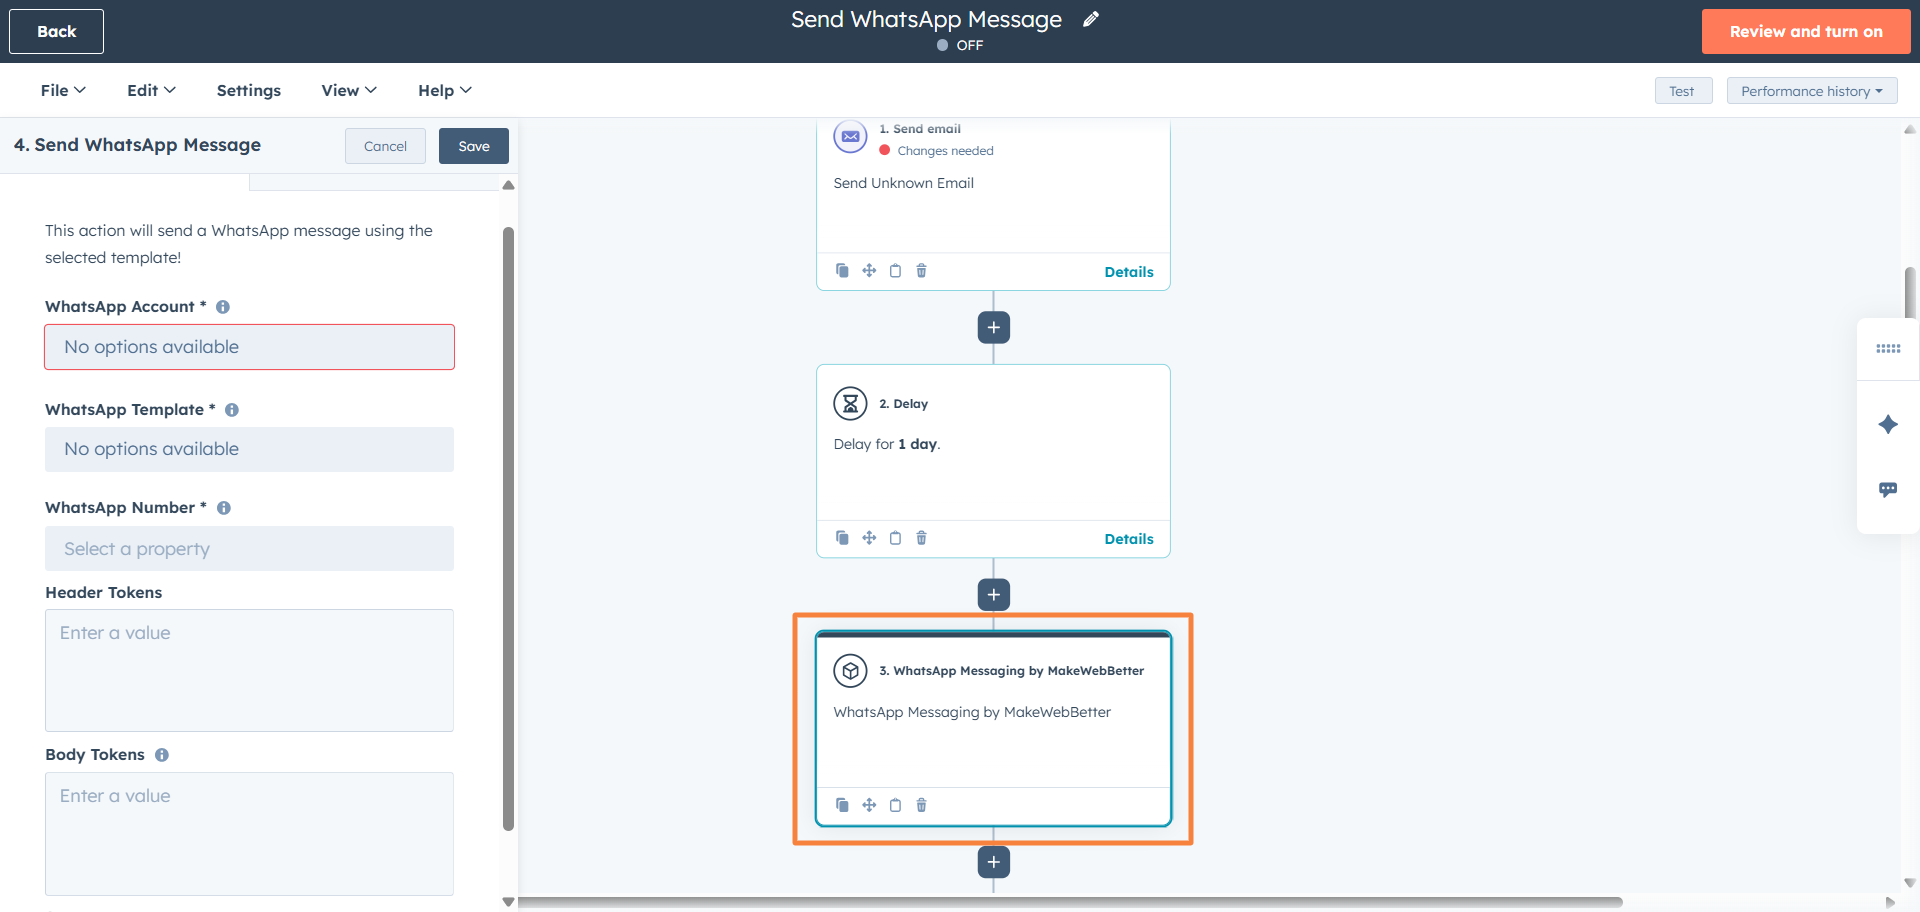
16.How to create a WhatsApp Messaging Automation using HubSpot Workflow?
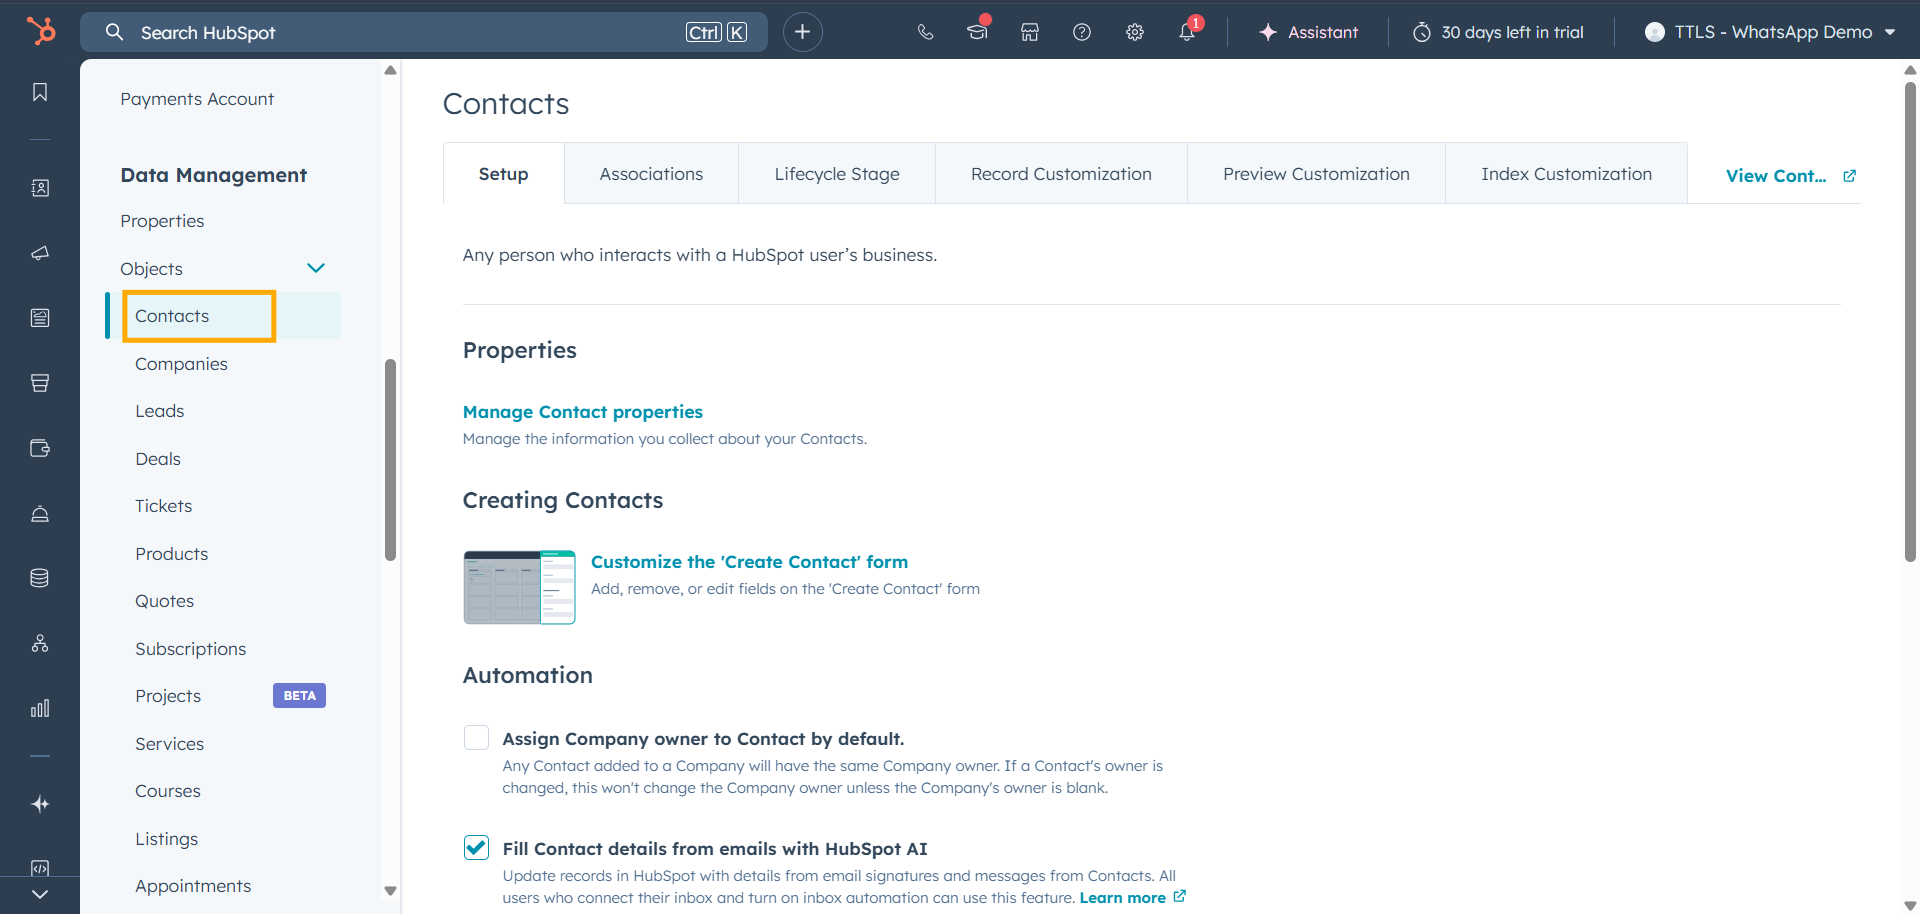
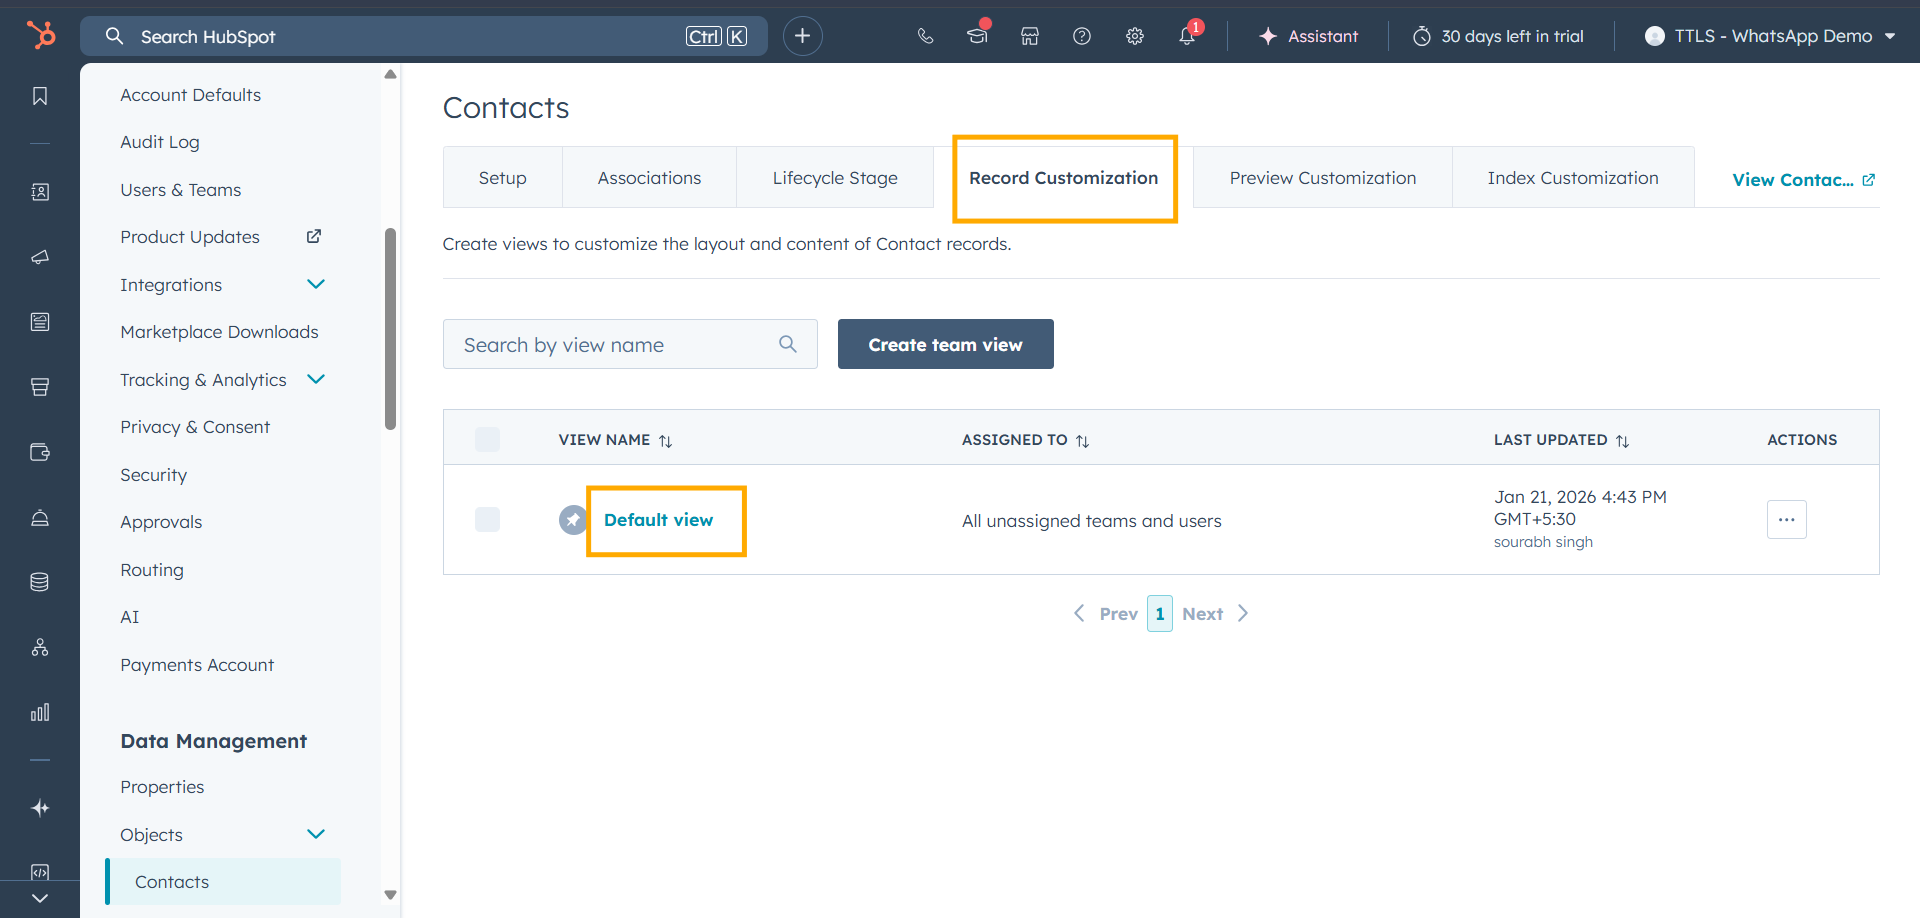
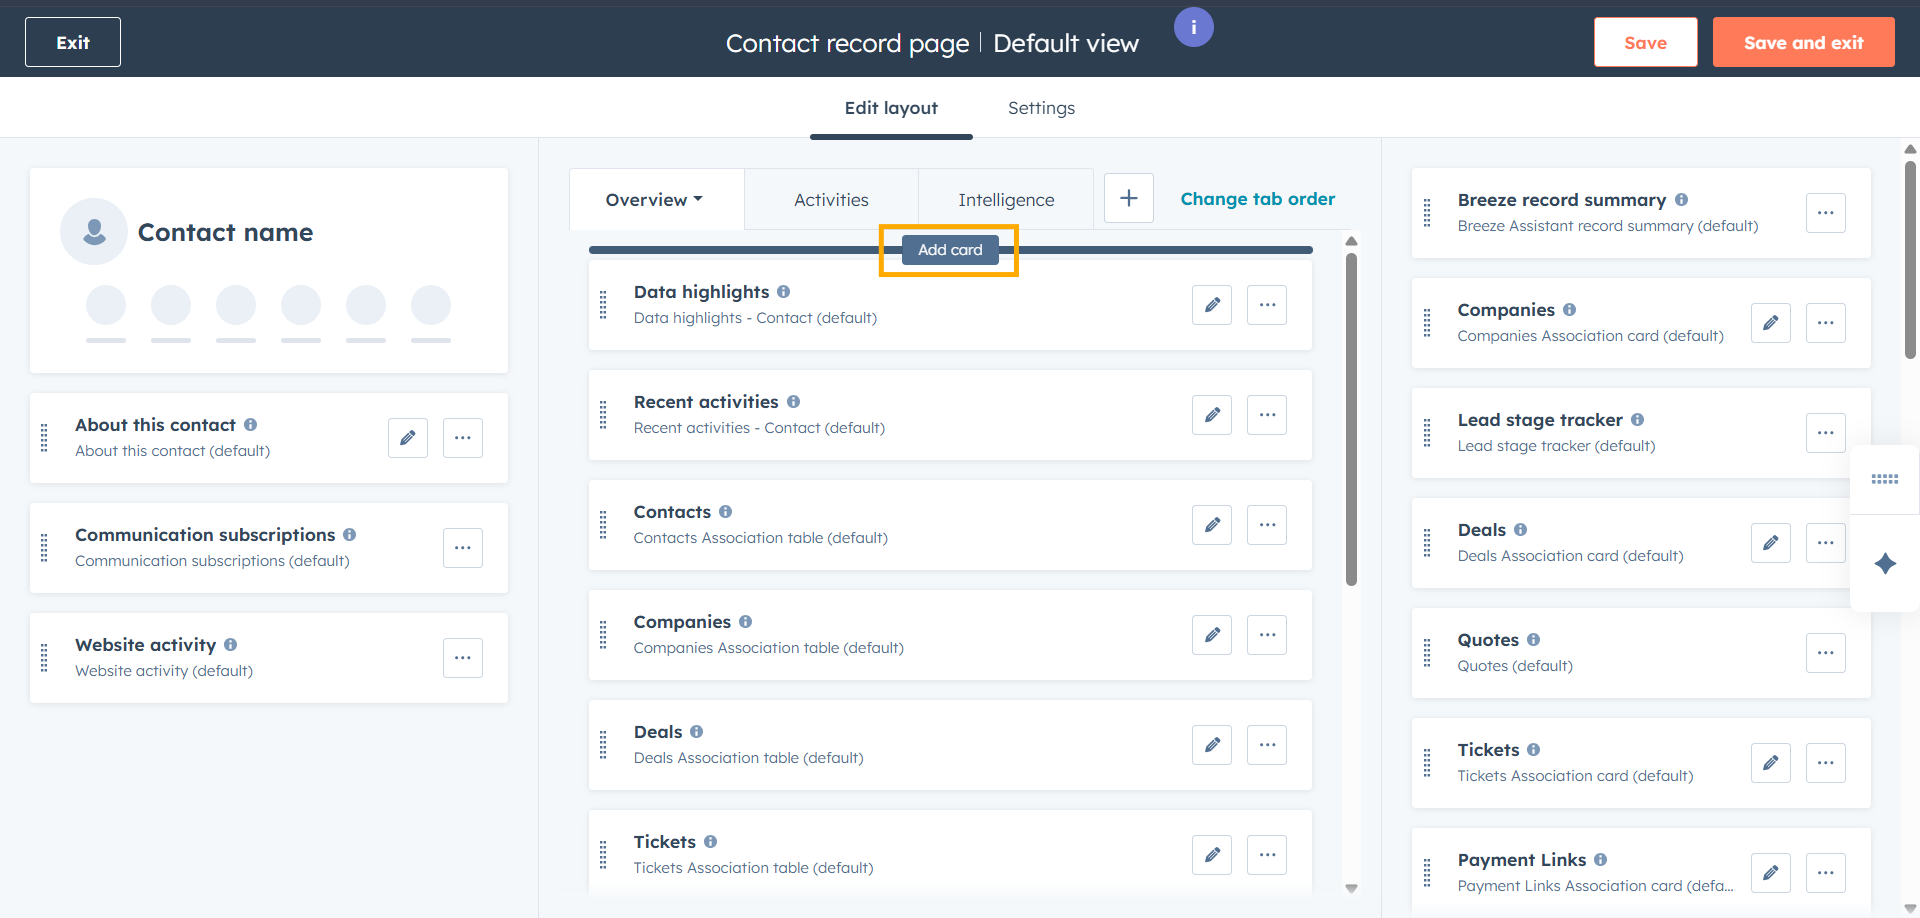
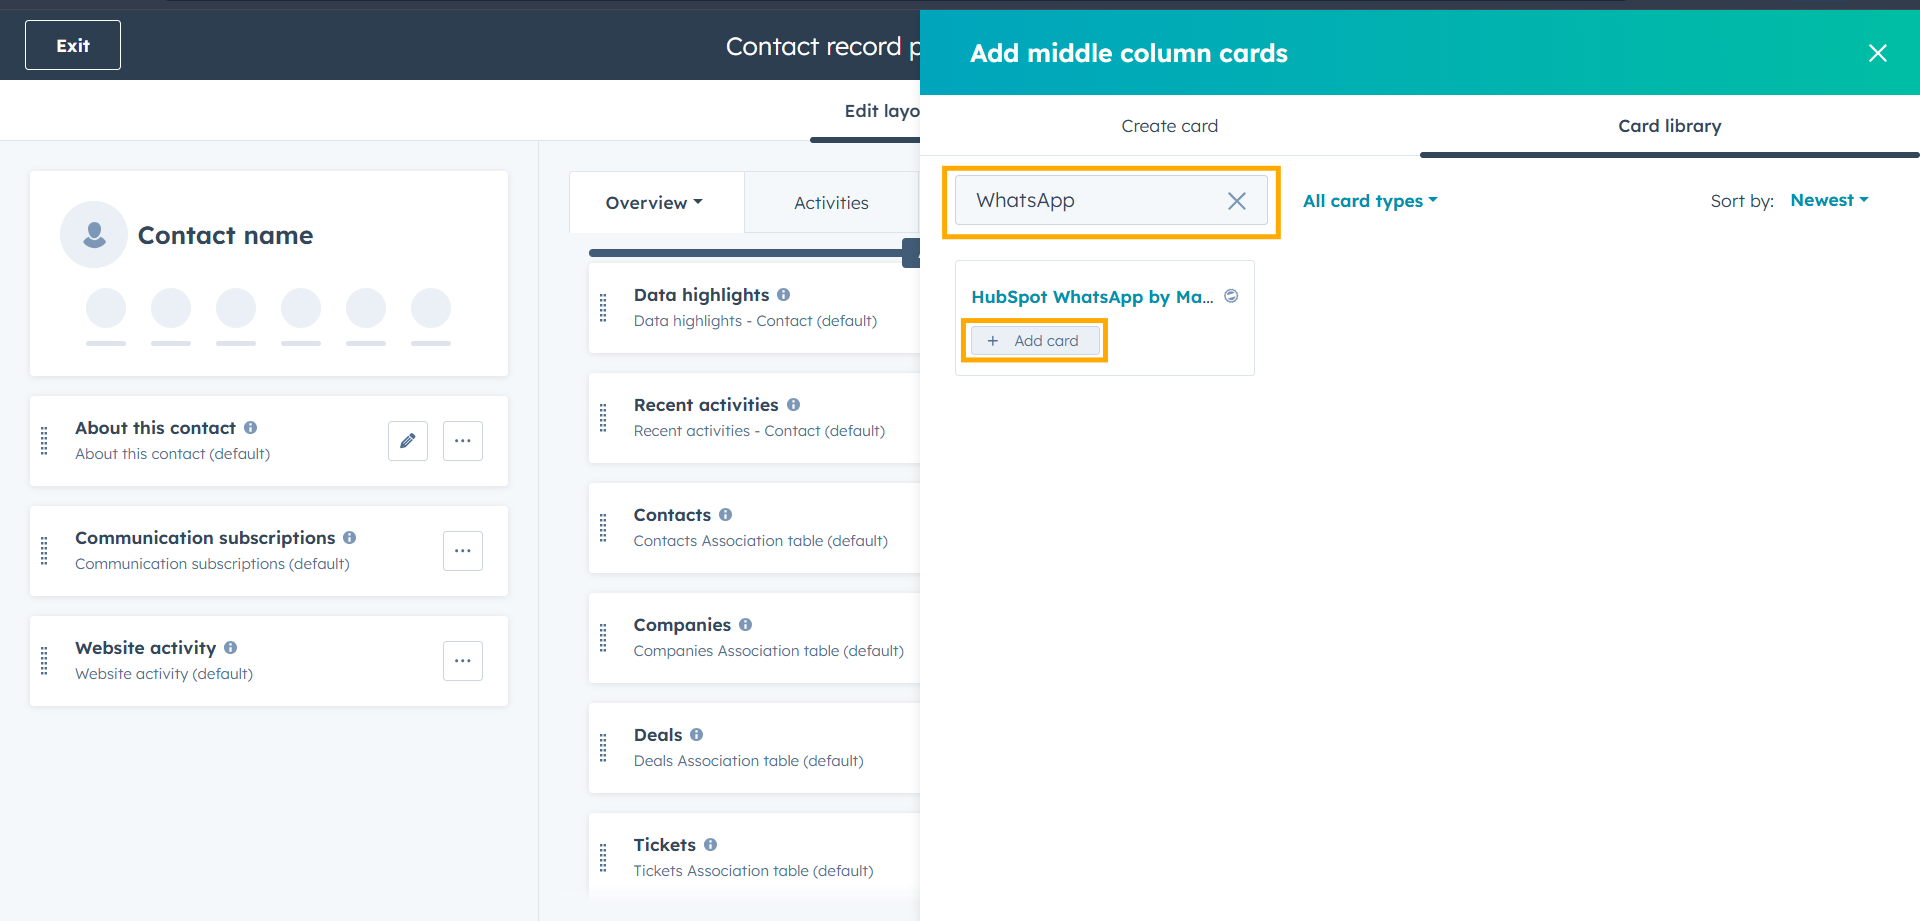
17.HubSpot App Card
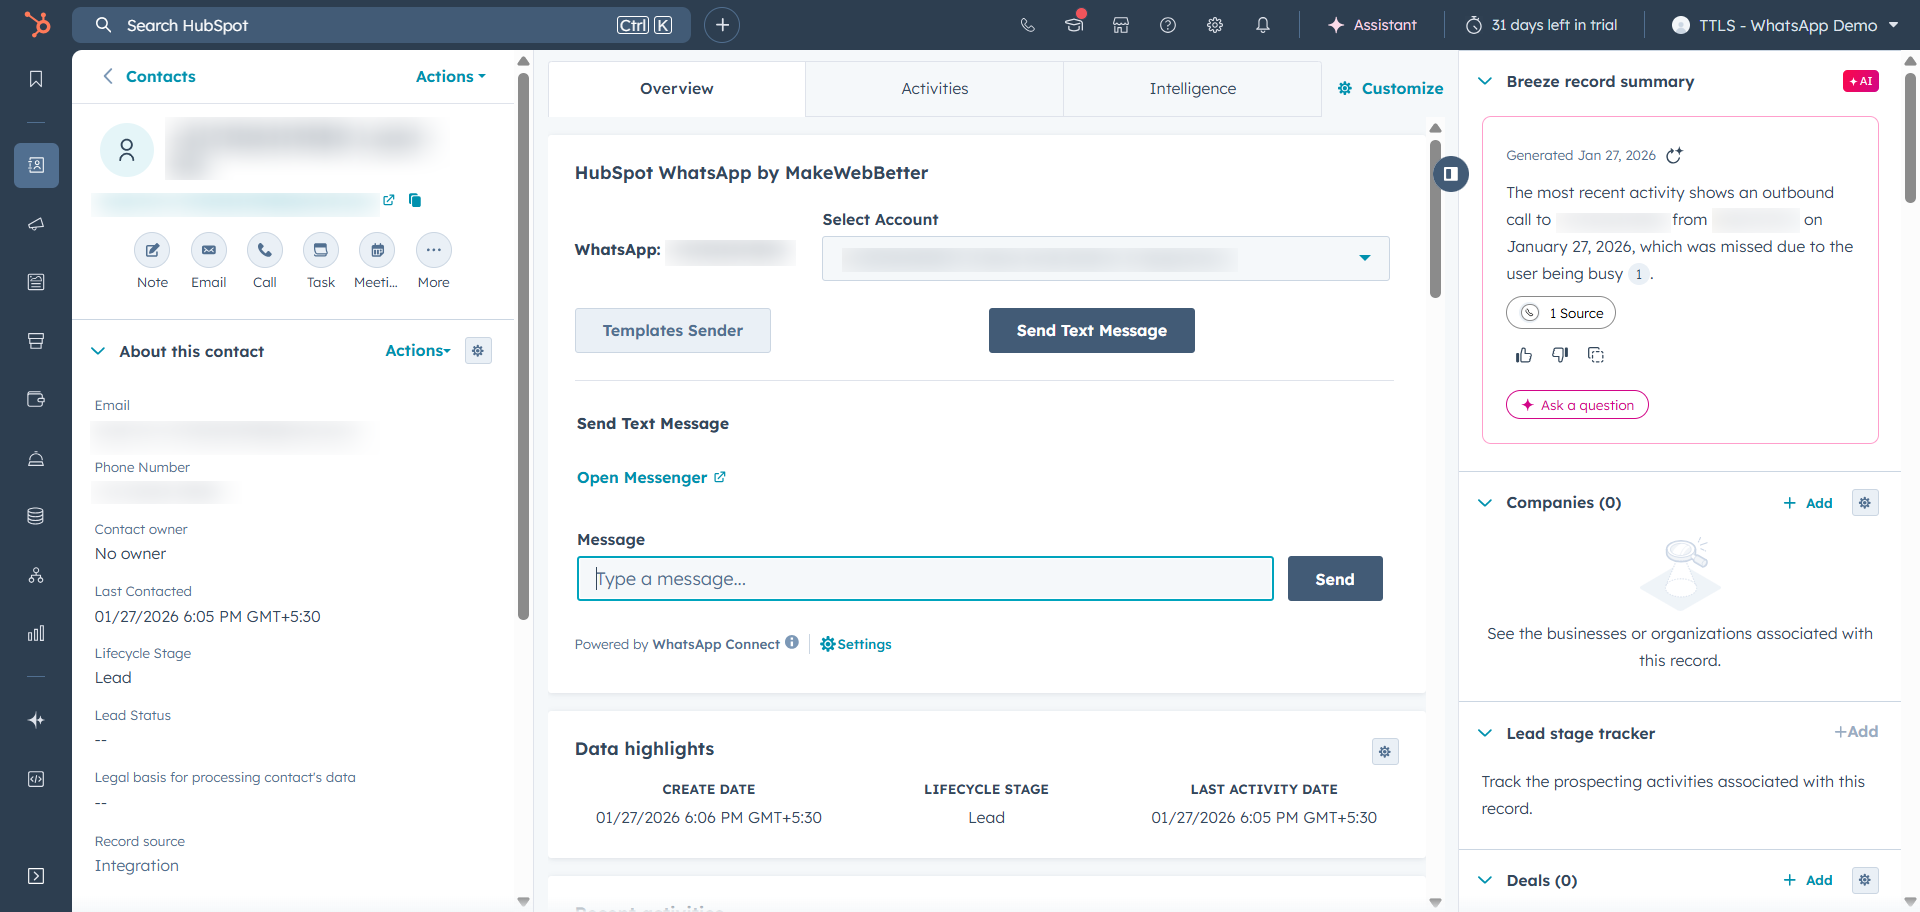
17.1.Configure WhatsApp Connect App Card
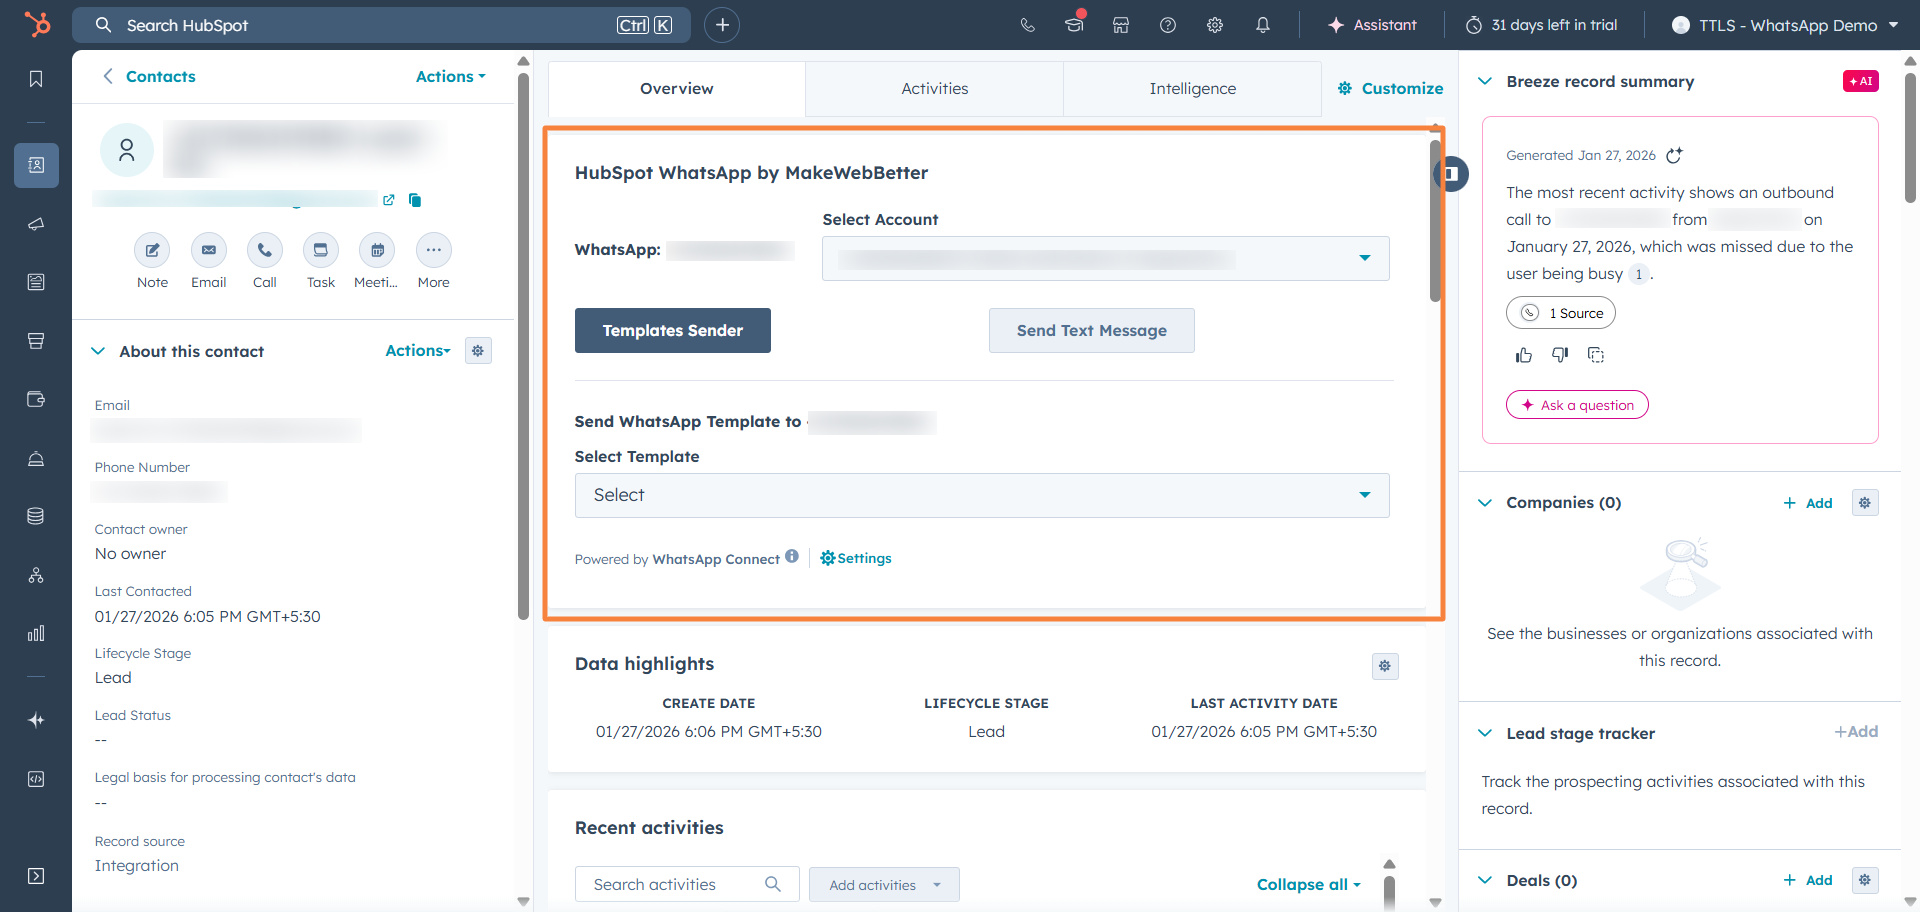
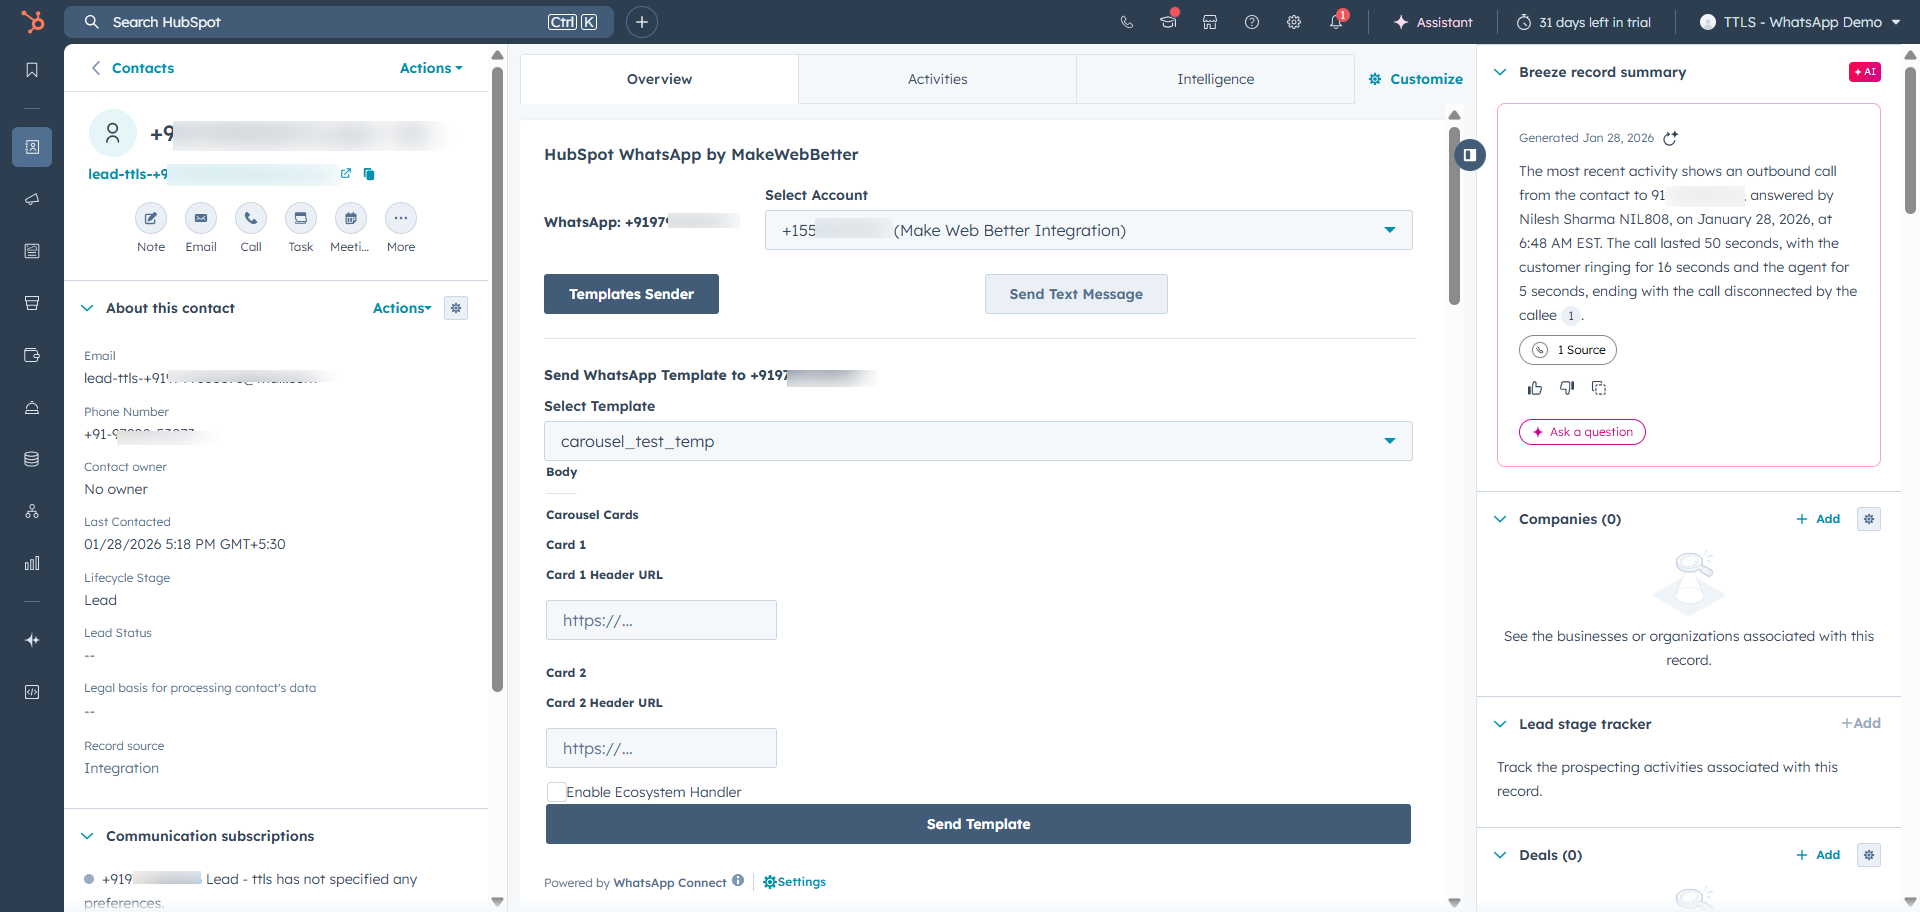
17.2.Templates Sender
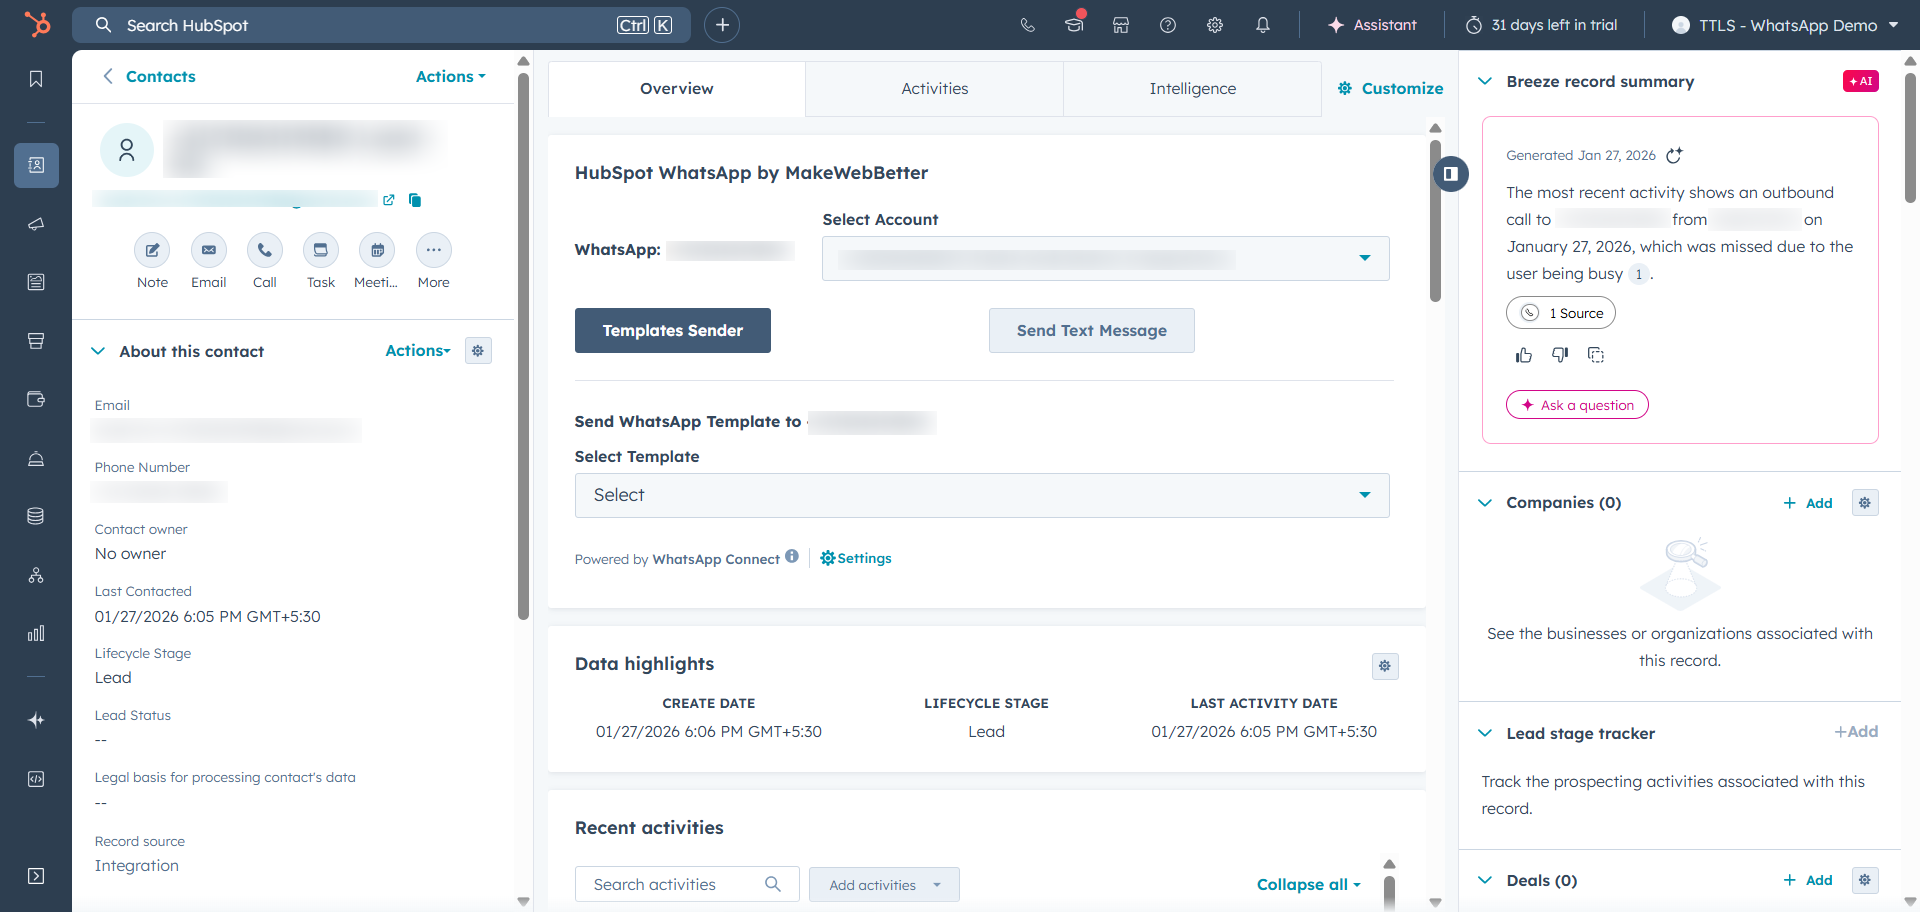
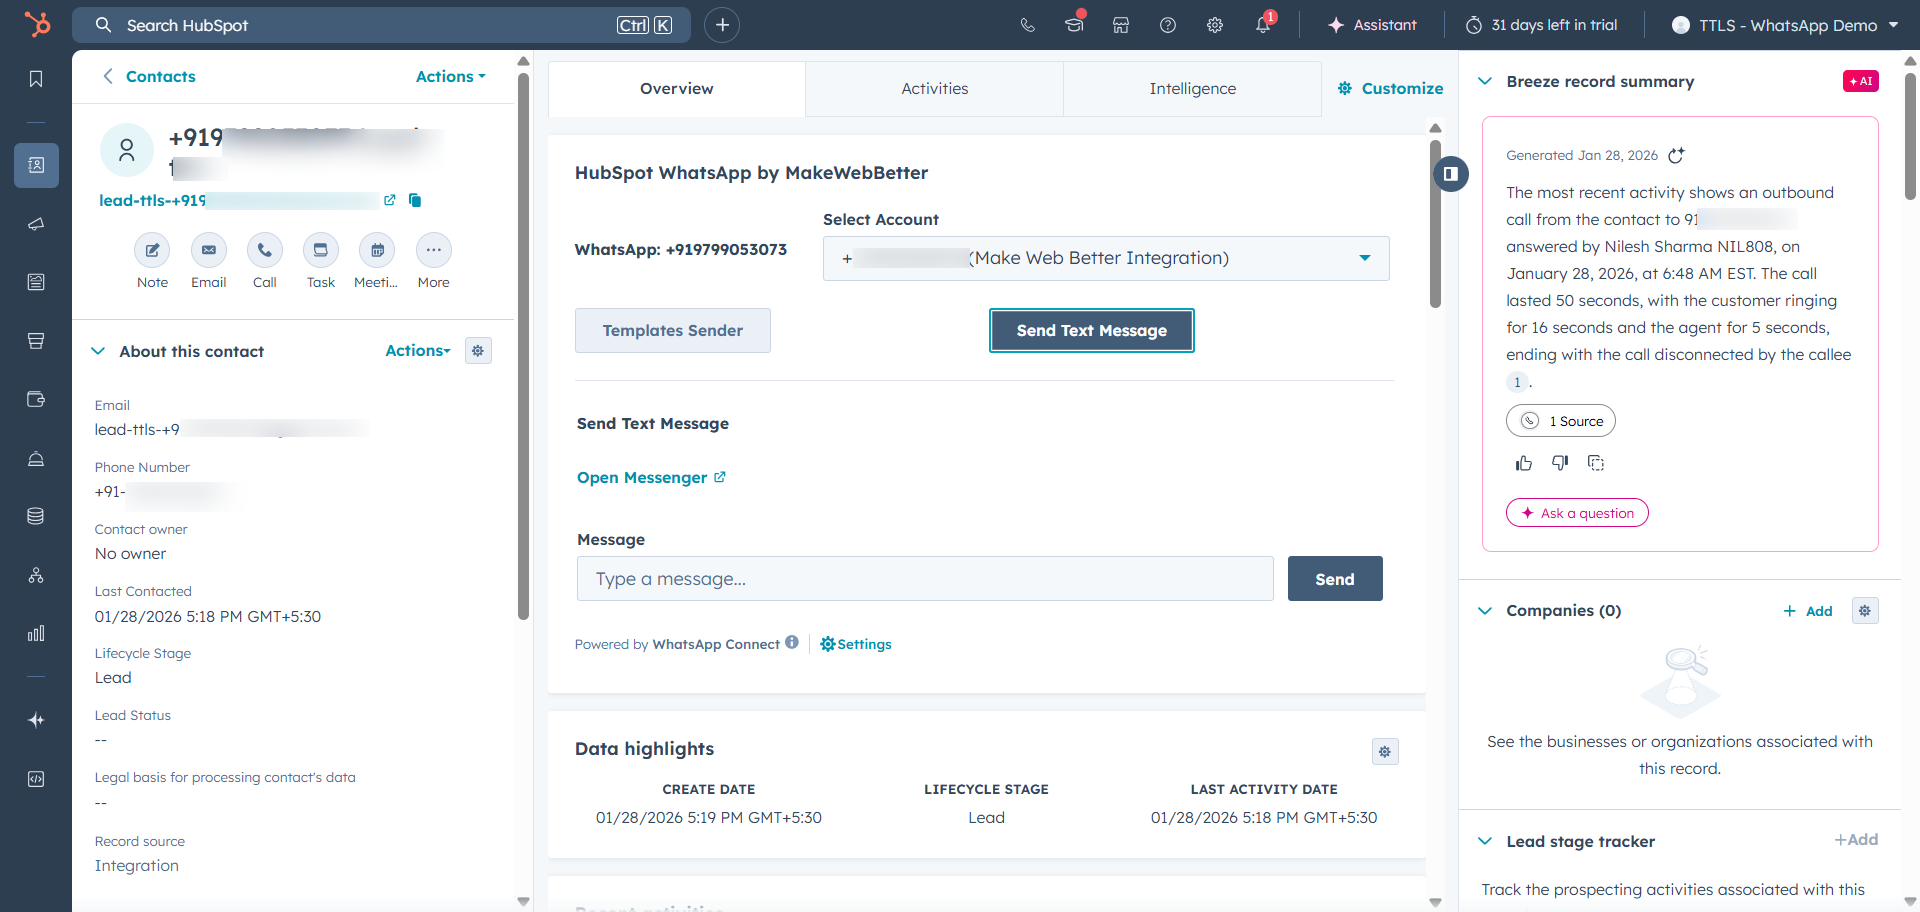
17.3.Send Text Message
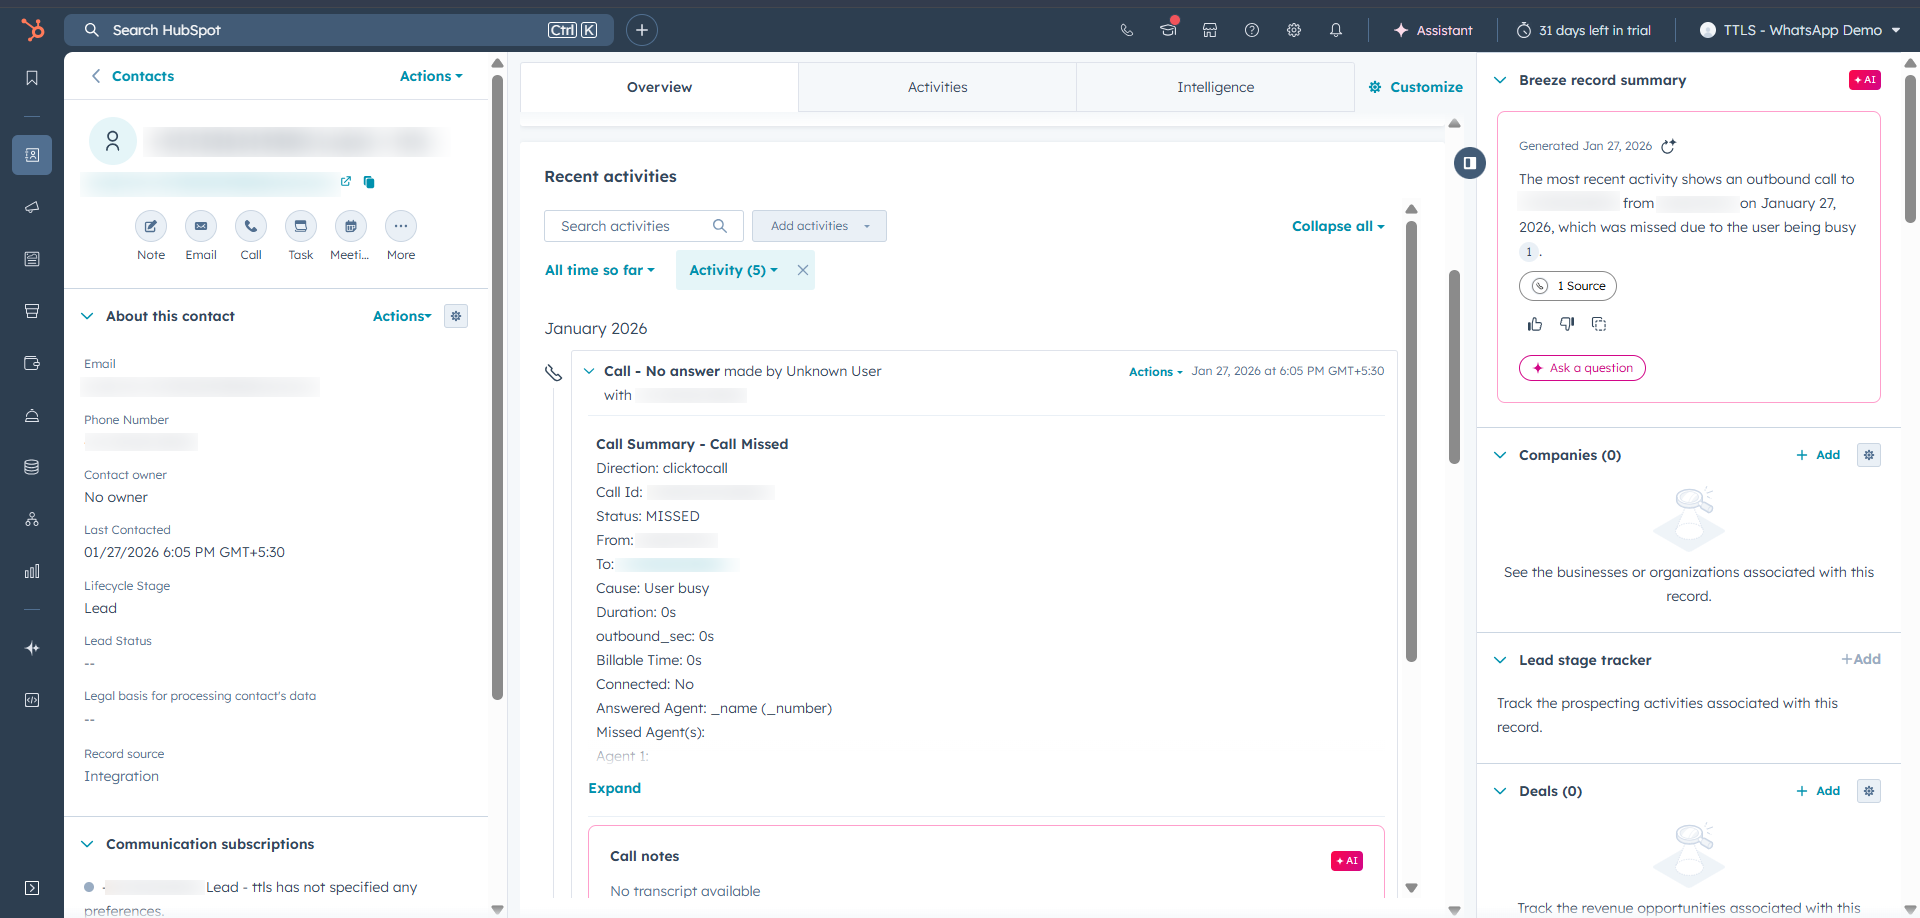
18.Tracking in HubSpot
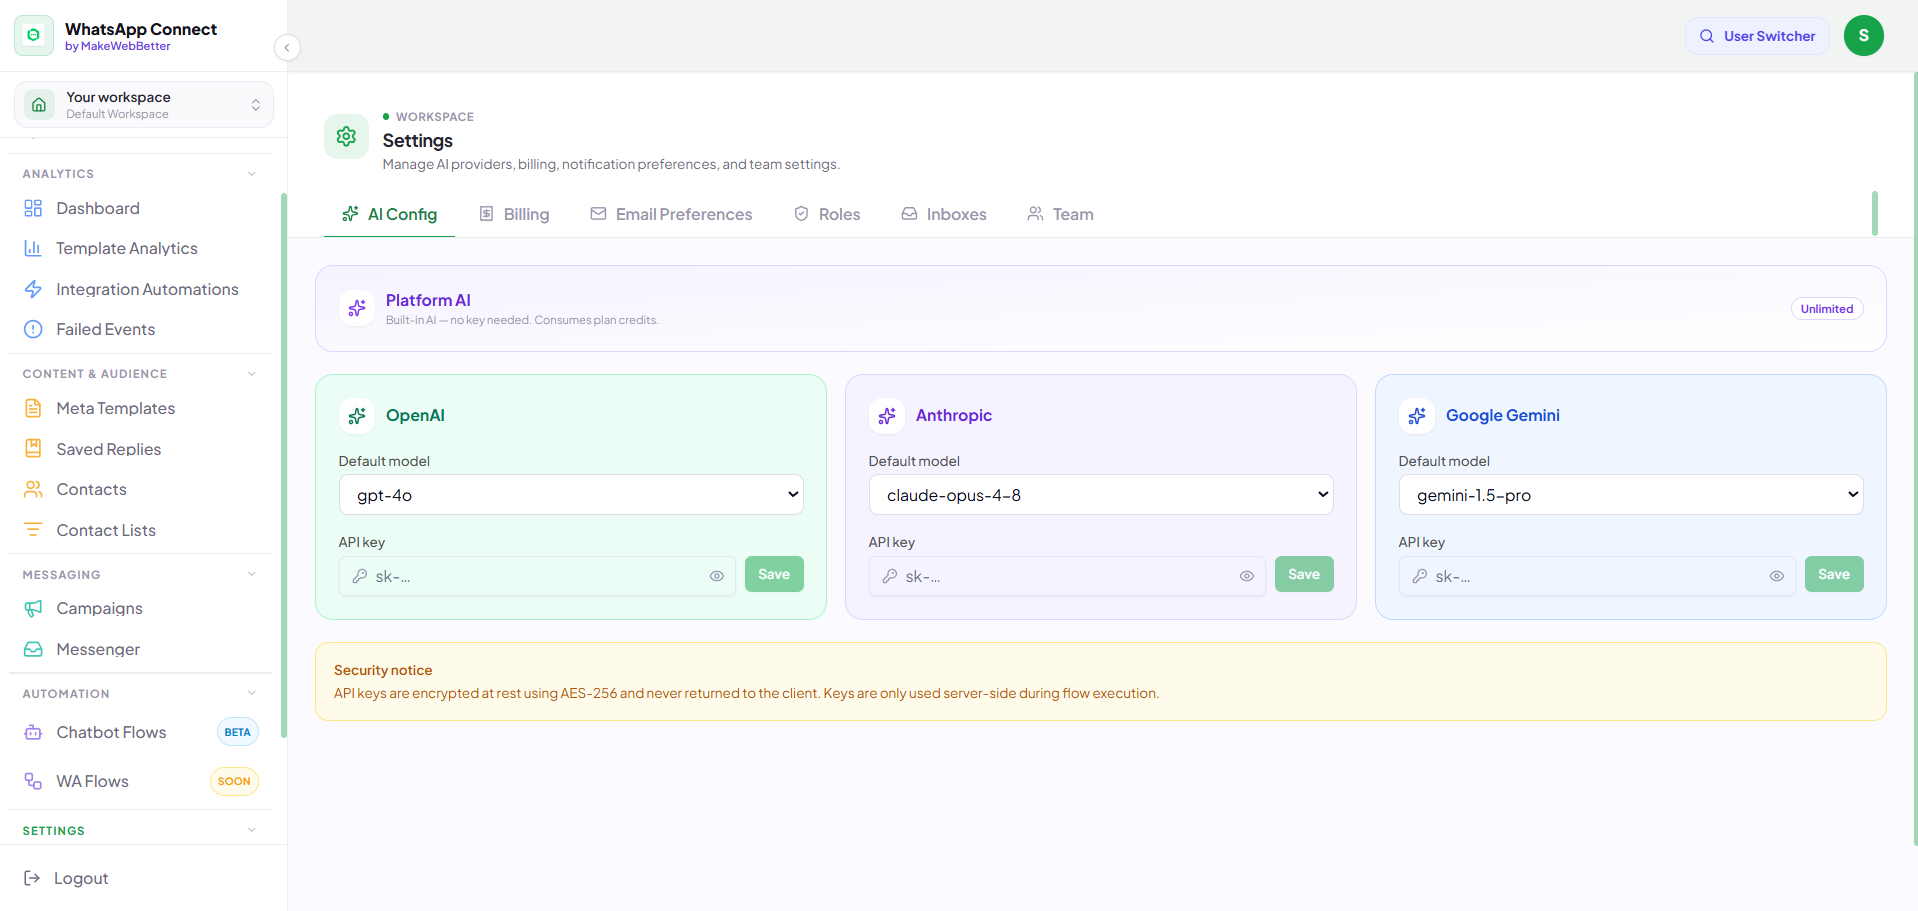
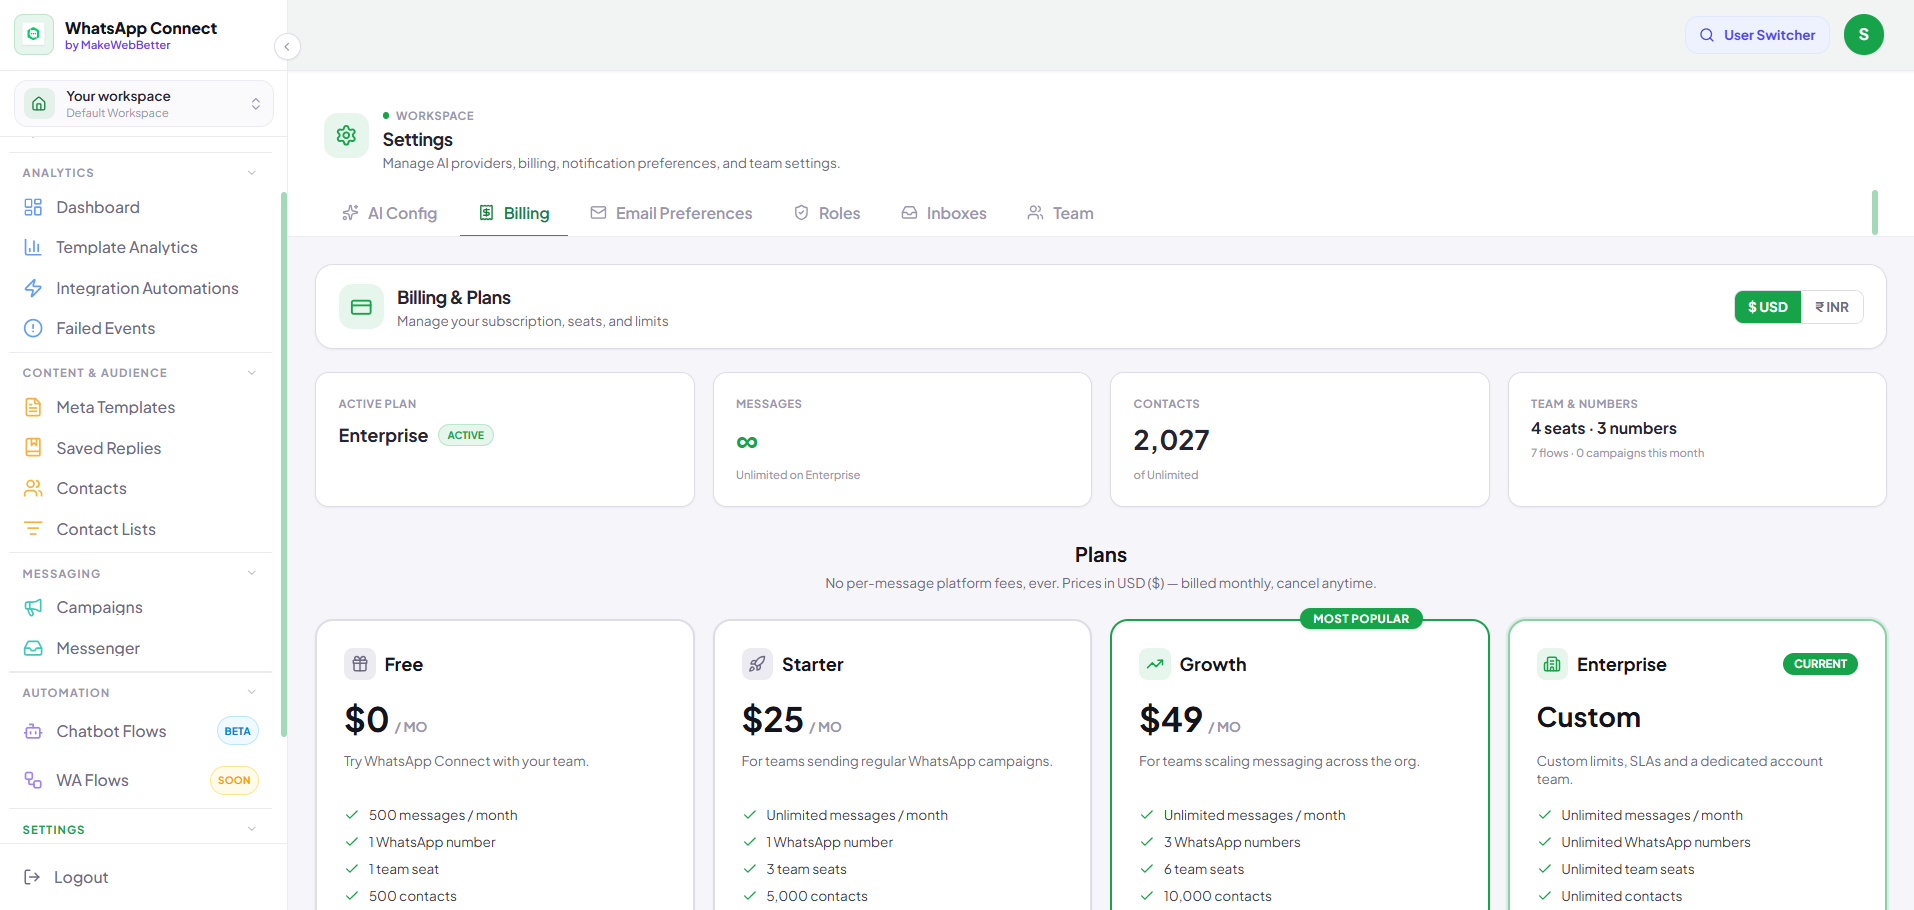
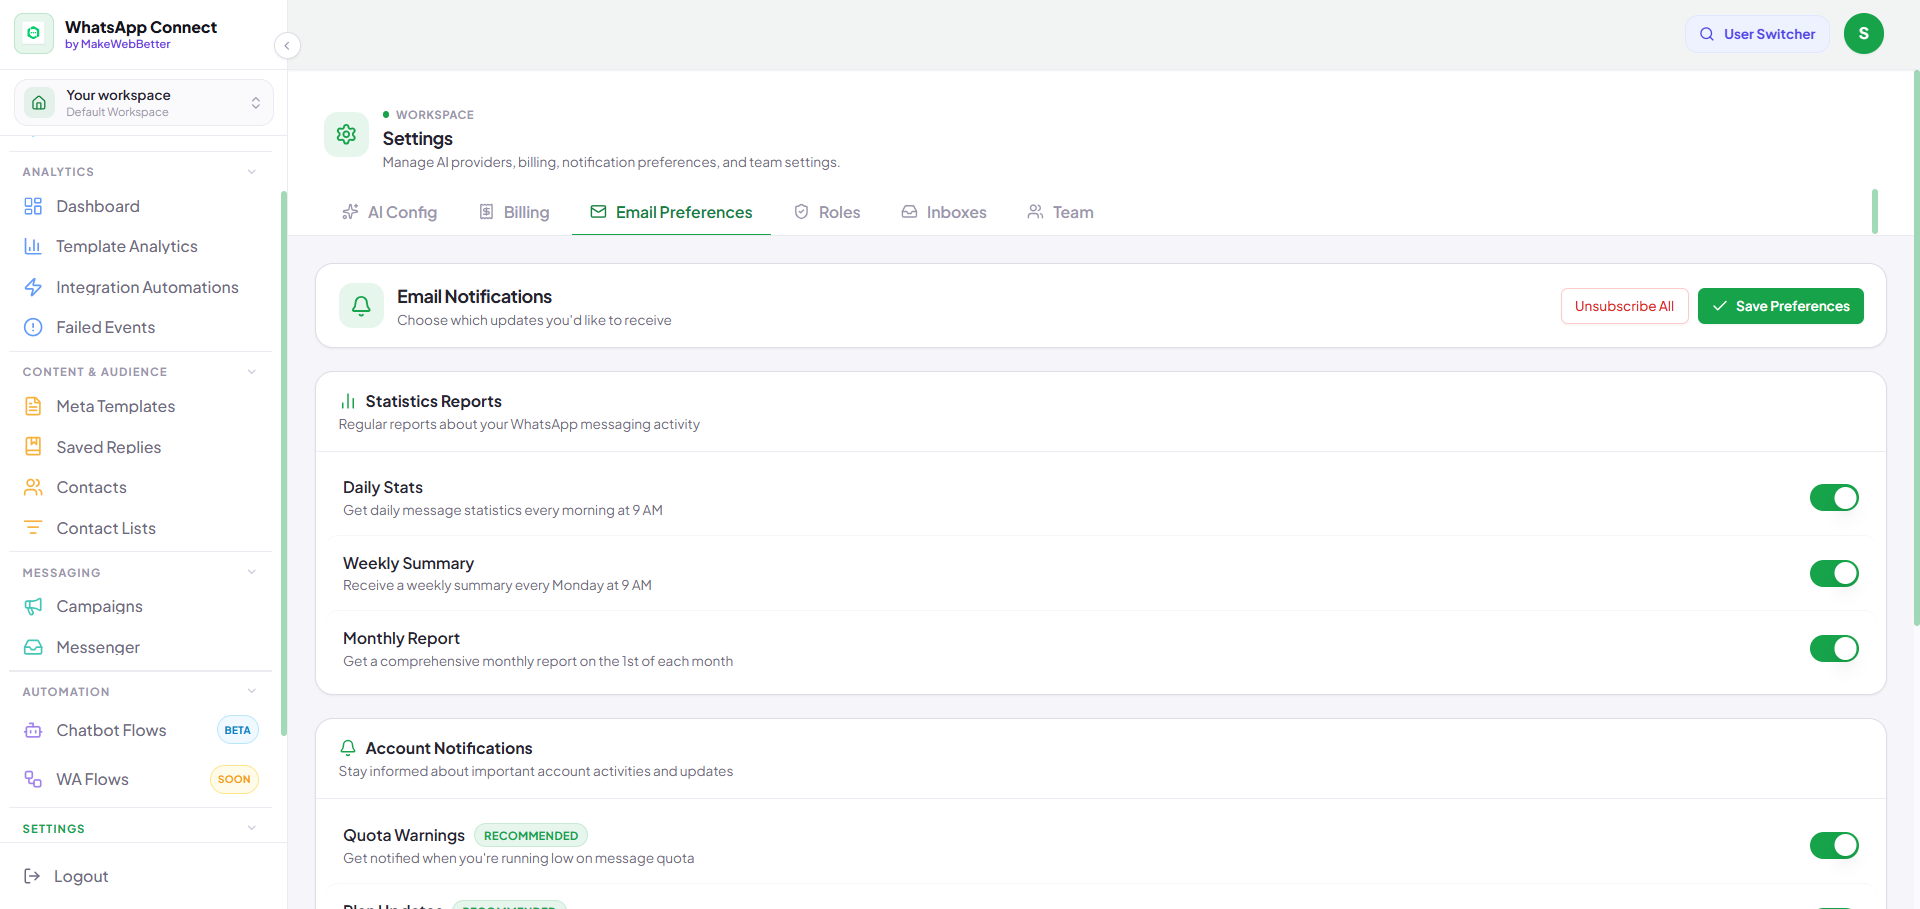
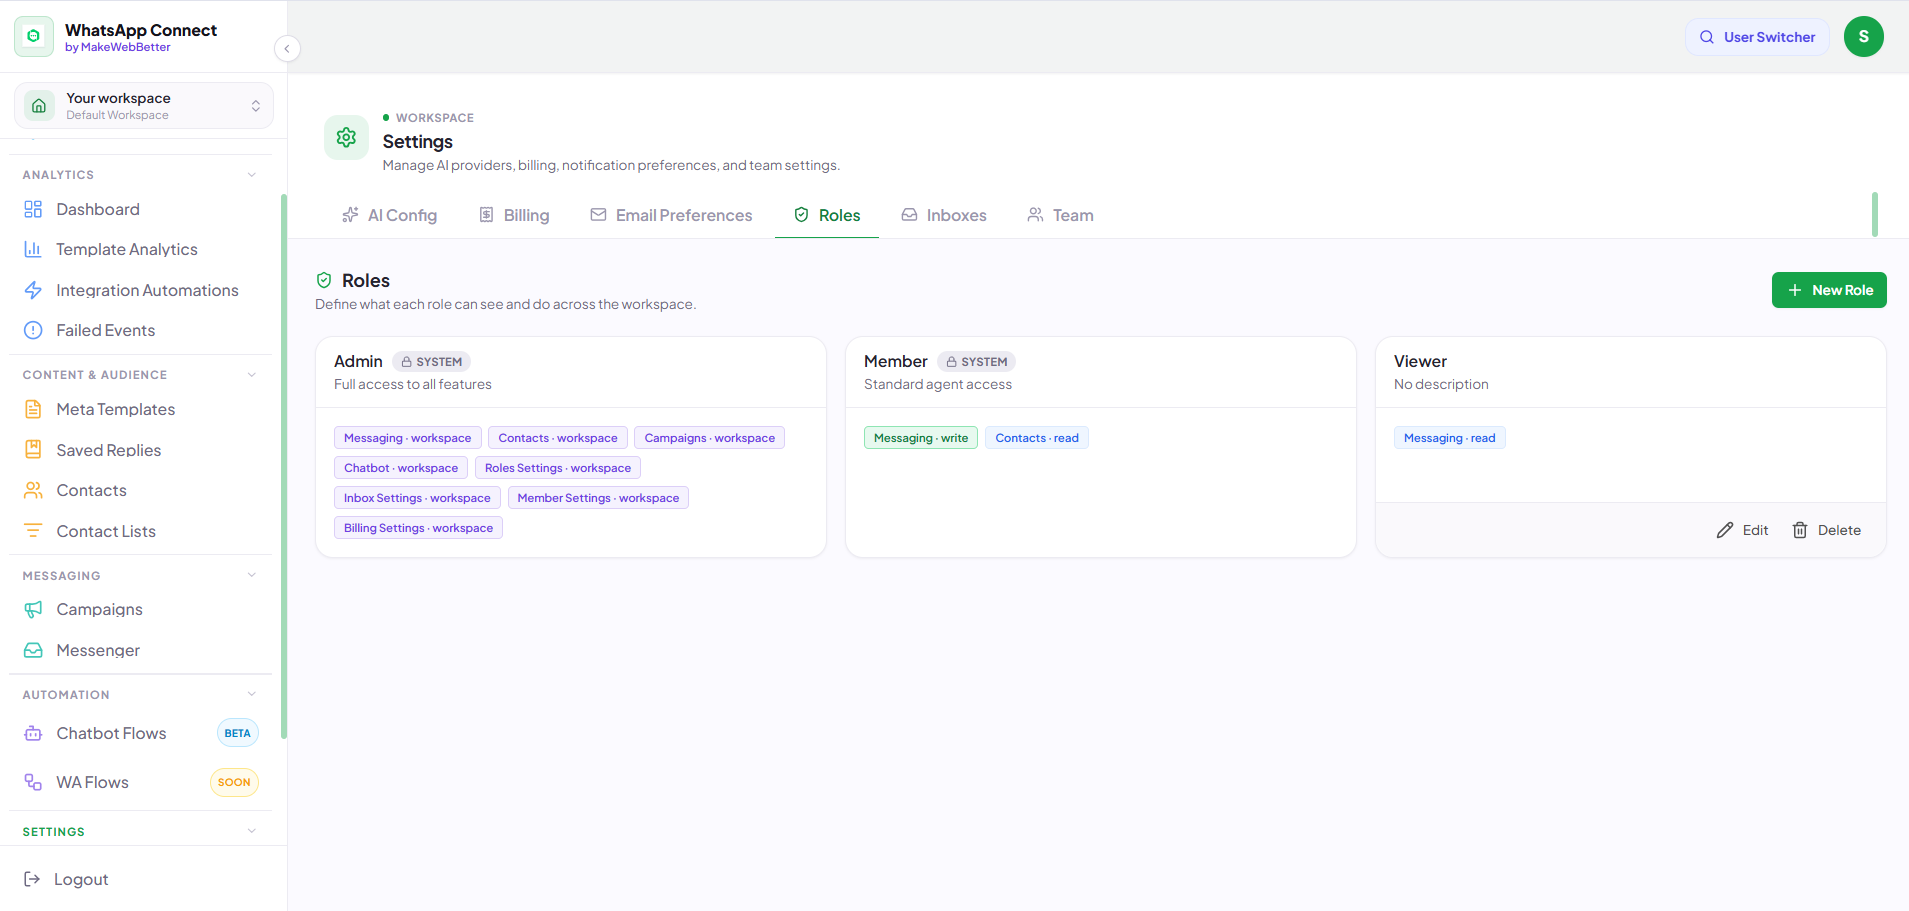
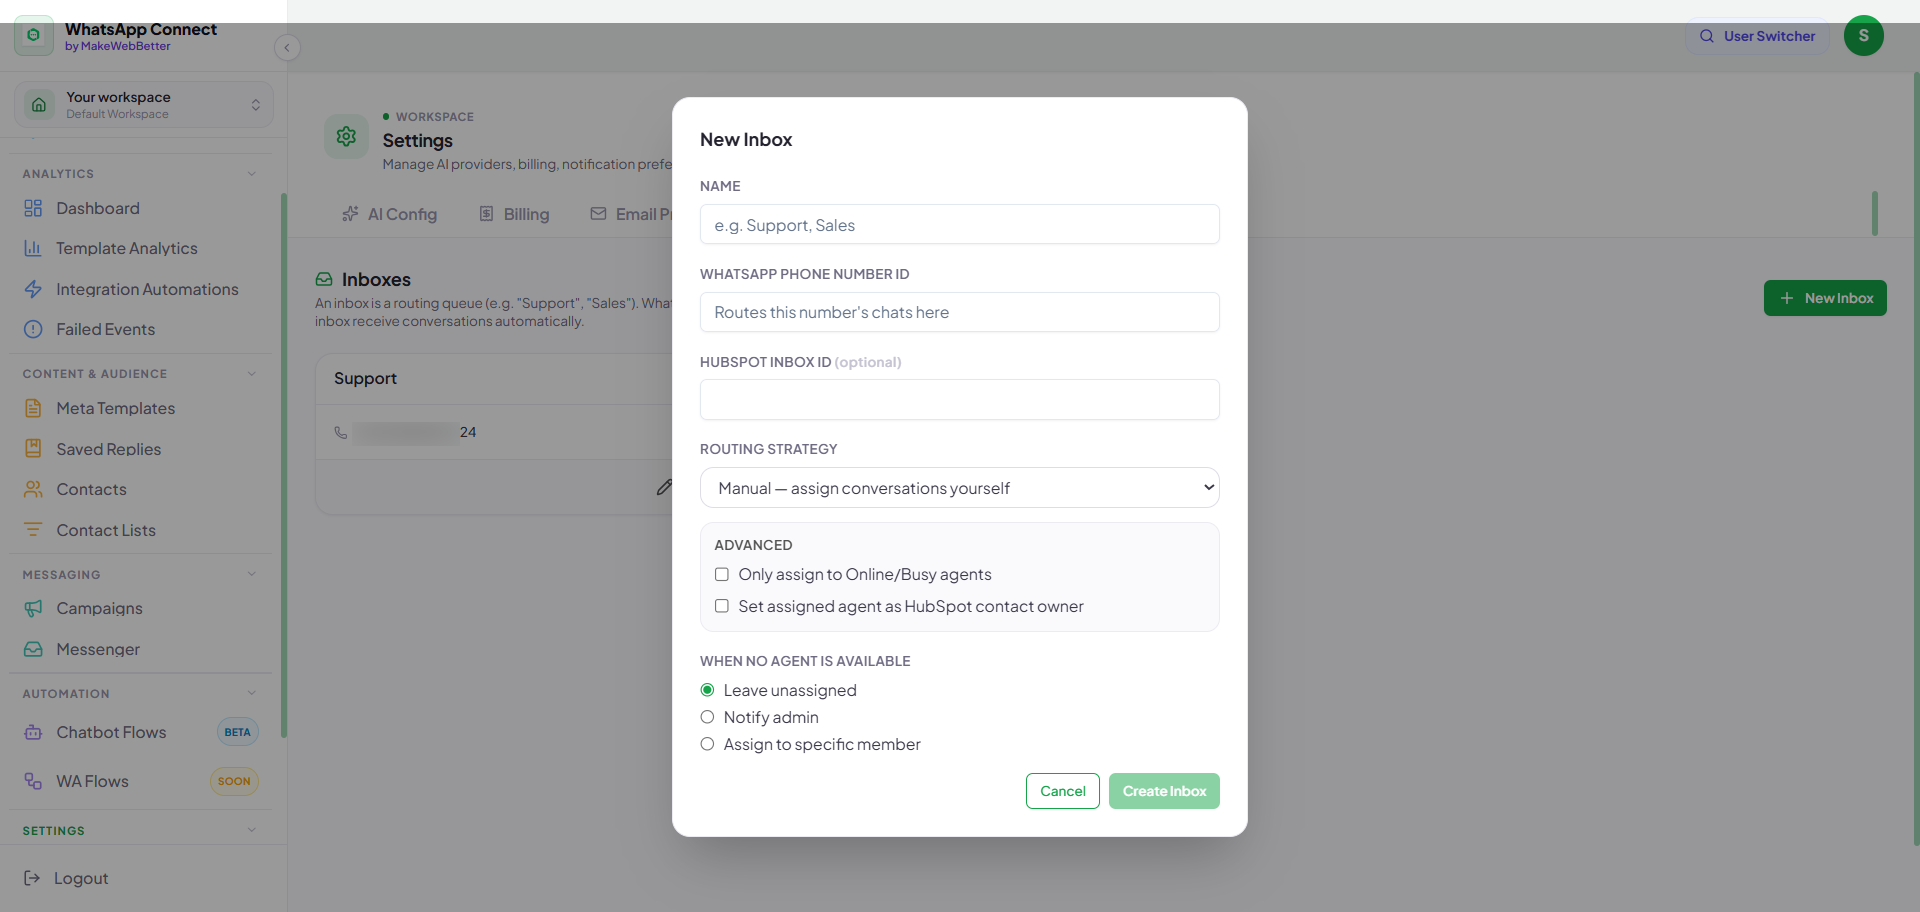
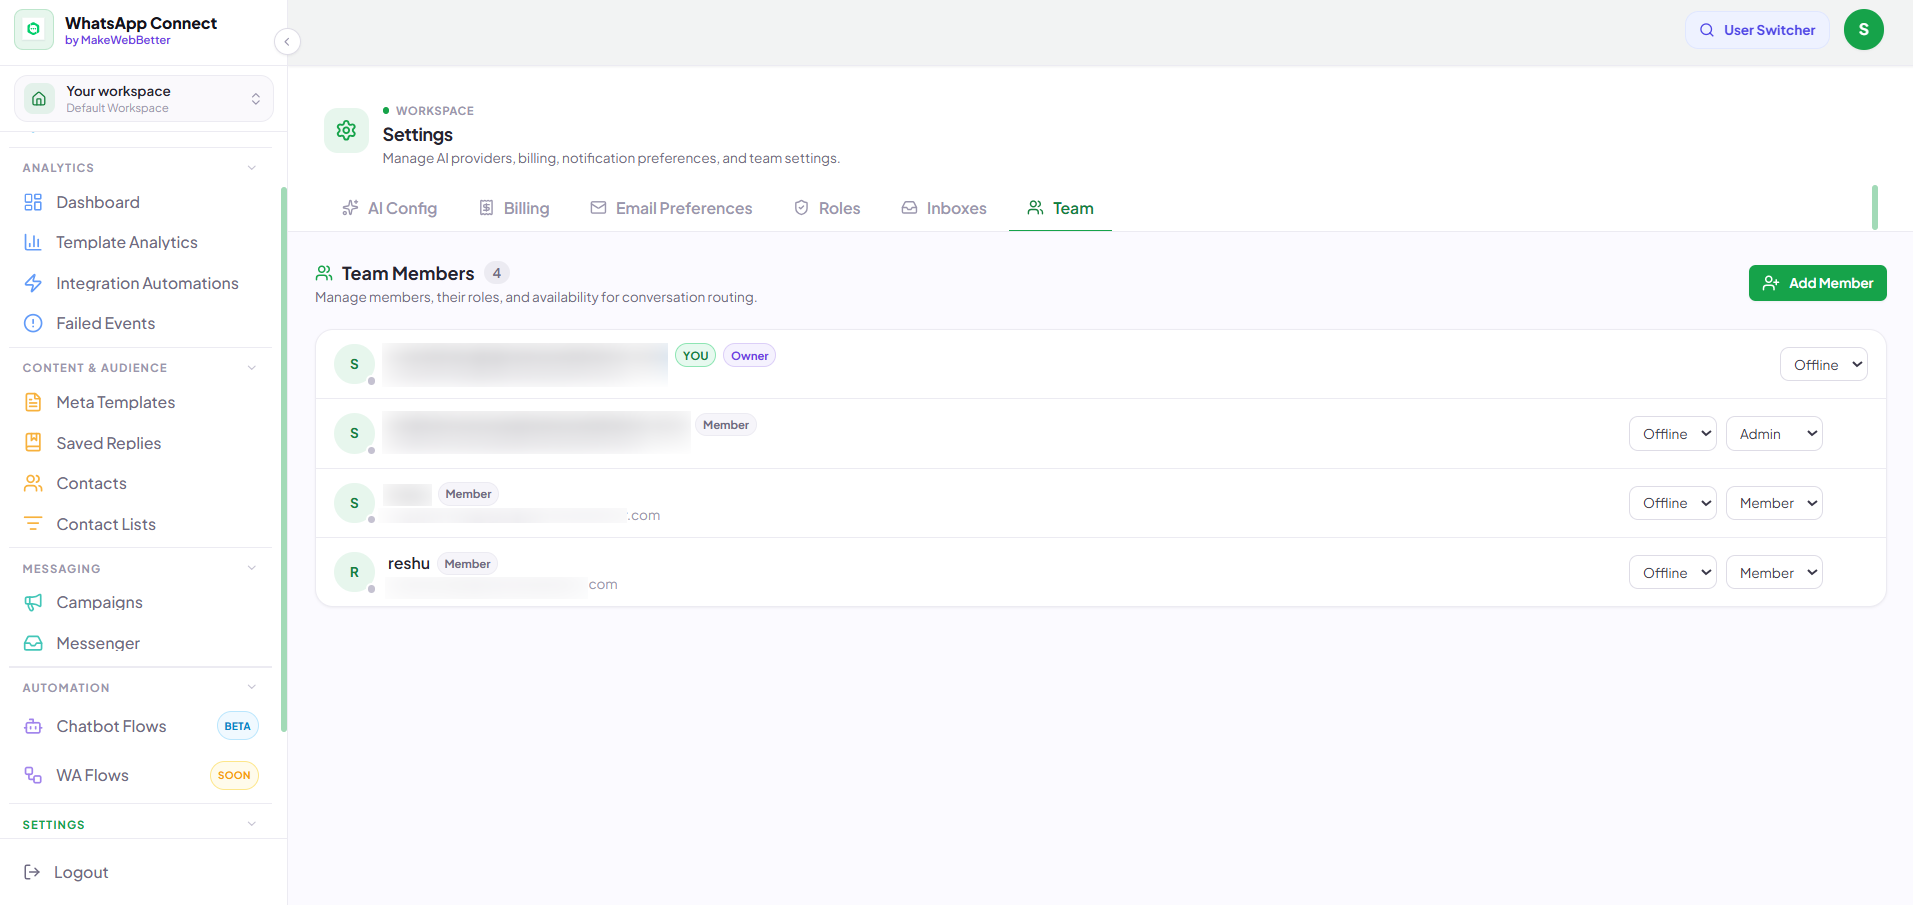
19.Settings

WhatsApp Connect by MakeWebBetter is a tool to bypass the complexities of the WhatsApp API and integration. It primarily offers HubSpot WhatsApp integration, a dedicated messaging layer, a Meta template builder, and a WhatsApp AI chatbot builder.
This WhatsApp CRM tool aims for an improved WhatsApp Business experience alongside AI, context awareness, personalisation, and automation.
With the HubSpot WhatsApp integration, you can manage conversations with your contacts, send one-to-one messages, and broadcast to segments within the app or in HubSpot.
Moreover, the tool goes beyond basic WhatsApp integration with WhatsApp Business analytics, LLM integration, a campaign builder, and failure management with an auto-retry mechanism.