
1.Overview
- 100% drag and drop DIY theme
- Multiple theme settings with easy customization
- Perfect to get you started with HubSpot
- Mobile-first approach
- Fully responsive
- High page speed
2.Theme Components
A HubSpot theme has the following components that you can use to create a page according to your design requirements:
- Modules: Modules are objects that you can interchange on website pages. Simply select any module from the library on the left panel, and drop it where you want. These modules add different functionality to your page defining the look and feel of your website. The infinity theme has 28 modules.
- Templates: Templates are sample layouts of different pages that you might use directly for your website. They are significant assets that help you save time. You can simply replace the demo text with your content and you are ready to publish your website pages.
- Global Settings: The global settings on your website pages affect all of your assets. For example, if you make modifications to a global setting, those changes will appear on every page.
If you have any questions before or after reading the documentation, please contact us.
2.1.How To Create a Page?
You can create a website page, landing page, or blog page using the Infinity theme. For creating a page using:
- Log in to your HubSpot portal > Navigate to Marketing > Select Website/Landing Pages > Website Pages/Blog
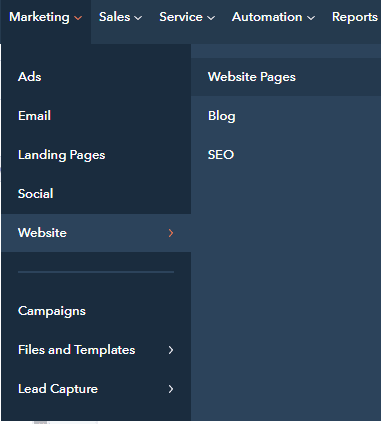
- Locate the ‘create’ option on the right side of the screen > Select an option from Website pages/Landing Pages/Blog post.
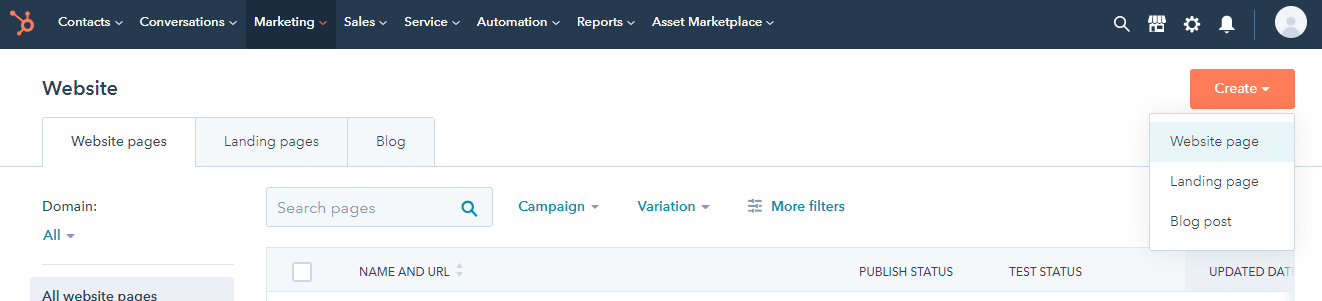
- Name the page(required) > Select Infinity theme (change if other theme selected by going to edit option) > Select any template from the dropdown (for example, about us, career page, etc) and proceed

- Add/remove modules according to your requirements > Edit content > Publish the page. You will need to add a page title before publishing a page on your HubSpot CMS website.
2.2.How To Edit Global Style?
As mentioned above, global modules change all the properties you edit on every page used. After creating a page, you can edit the global style uniformly. To edit global style on website pages,
- From your HubSpot portal go to Create page/Edit page option
- From the left panel, go to the edit page panel. There are 3 options available, Add, Content, and Theme.
- Click on the theme option > Select edit theme settings. From this option, you can easily make changes to the global colors, global fonts, typography, buttons, spacing, website header, footer, forms, tables, blog settings, and system page settings

2.3.How To Edit Theme Settings?
The edit theme settings option enables you to make changes in the theme settings. Just follow these steps and continue:
- Create page/Edit page > Navigate to Edit page panel > Theme > Edit theme settings
The edit theme settings have the following options:
- Global colors– Change primary color, secondary color, body background, and heading.
- Global fonts- Change the heading font and body font, and both of its colors respectively.
- Typography– Change the font line height of H1, H2, H3, etc. body, and links on the desktop and mobile view.
- Buttons– Change button text, spacing, corner, style of dark or light outlined buttons, etc.
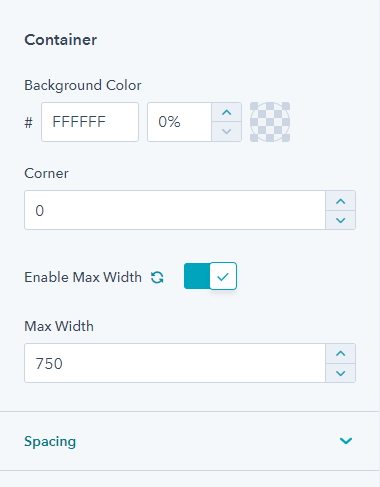
- Spacing– Change vertical spacing, maximum content width,
- Website header- Change box-shadow, background, and menu
- Footer– Change style of text, menu, heading
- Forms– Change styles of title, label, help text, fields, forms, and error messages.
- Tables- Change table header, body, footer, and text styles.
- Blog settings– Enable a sidebar, enable topics, display popular posts, and enable a subscription form on the sidebar. Moreover, for the blog post, you can show/hide the author’s name, timestamp, tags, related posts, change the border radius of images, etc.
- System page settings– Change error page settings, password prompt, email unsubscribe, etc.
Press Apply changes after changing these settings.
2.4.How To Edit Global Modules?
There are 2 global modules in the Infinity theme, Website header, and Website footer. To edit website footer/header:
- Create a page or edit a page > Navigate to Edit page panel > Select Theme > Click edit theme settings
- Scroll to the website header or website footer option > edit settings
For both header and footer, you can enable/disable box-shadow, set the first & second shadow color, and decide on the background color. Additionally, you can change the mobile & desktop text font of the menu on the header, the hover color, and edit drop-downs.
Please Note: Publishing the changes on these modules will take effect on all your pages so be sure while doing any modifications.
2.5.How To Change Blog Templates?
Blog templates are for your blogs. You can create a template for blog listings and blog detailed pages. For changing the blog page template follow these steps:
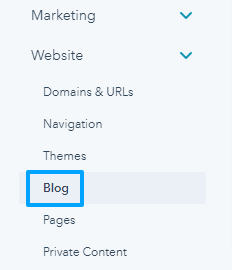
- Log in to your HubSpot account > Go to settings > on the left side panel, scroll down to marketing > under marketing select blog
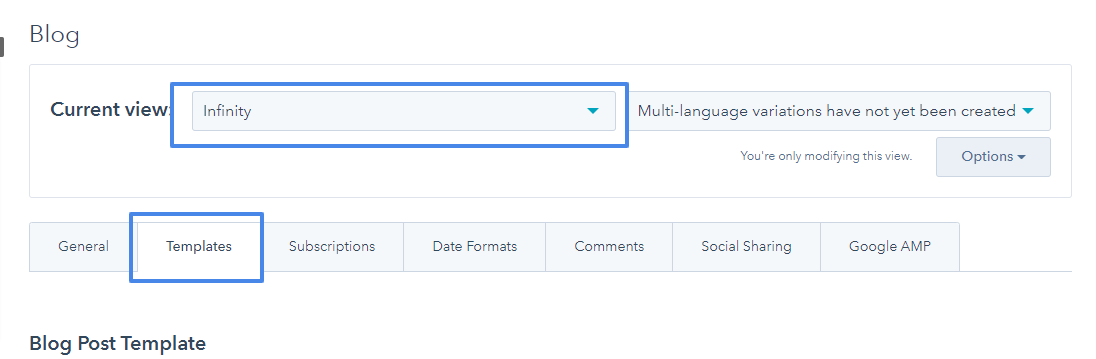
- Go to the template option from the top > Select infinity from the current view option > Now edit the template if you want to make changes to the blog template.
2.6.How To Change System Templates?
To change the system template,
Log in to your HubSpot account > Go to settings > on the left side panel, scroll down to website > under marketing select pages
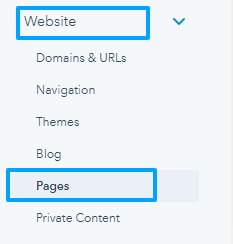
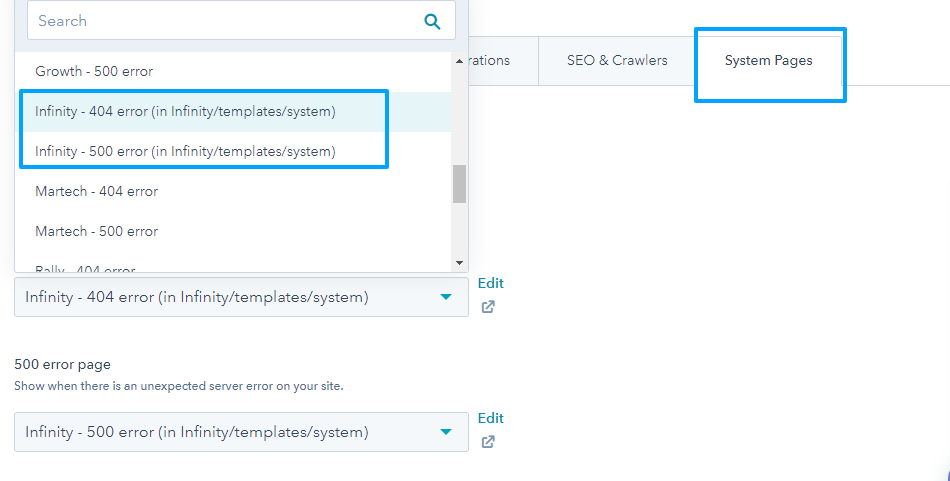
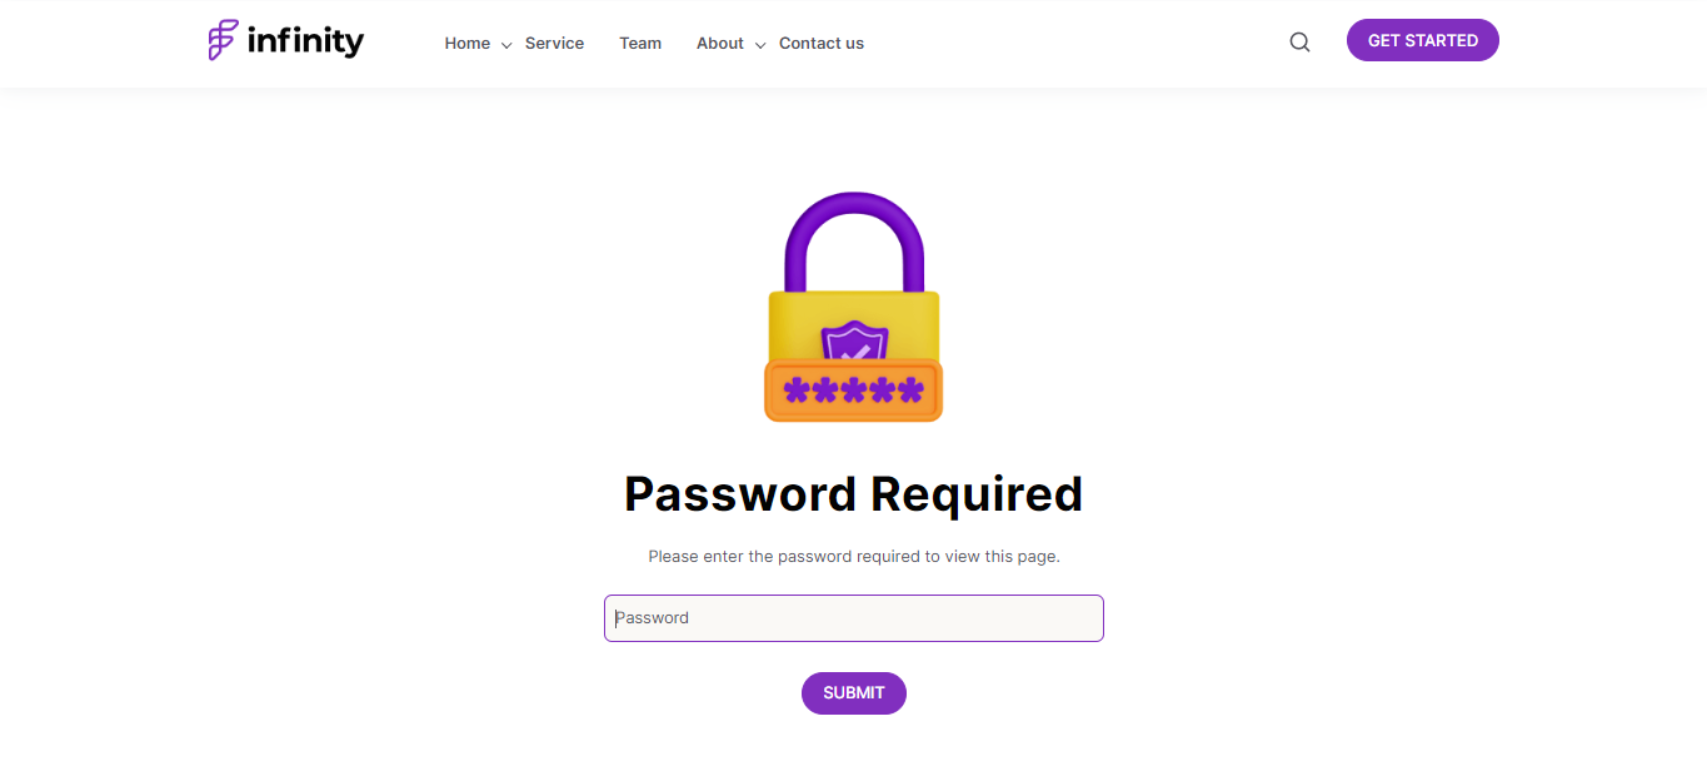
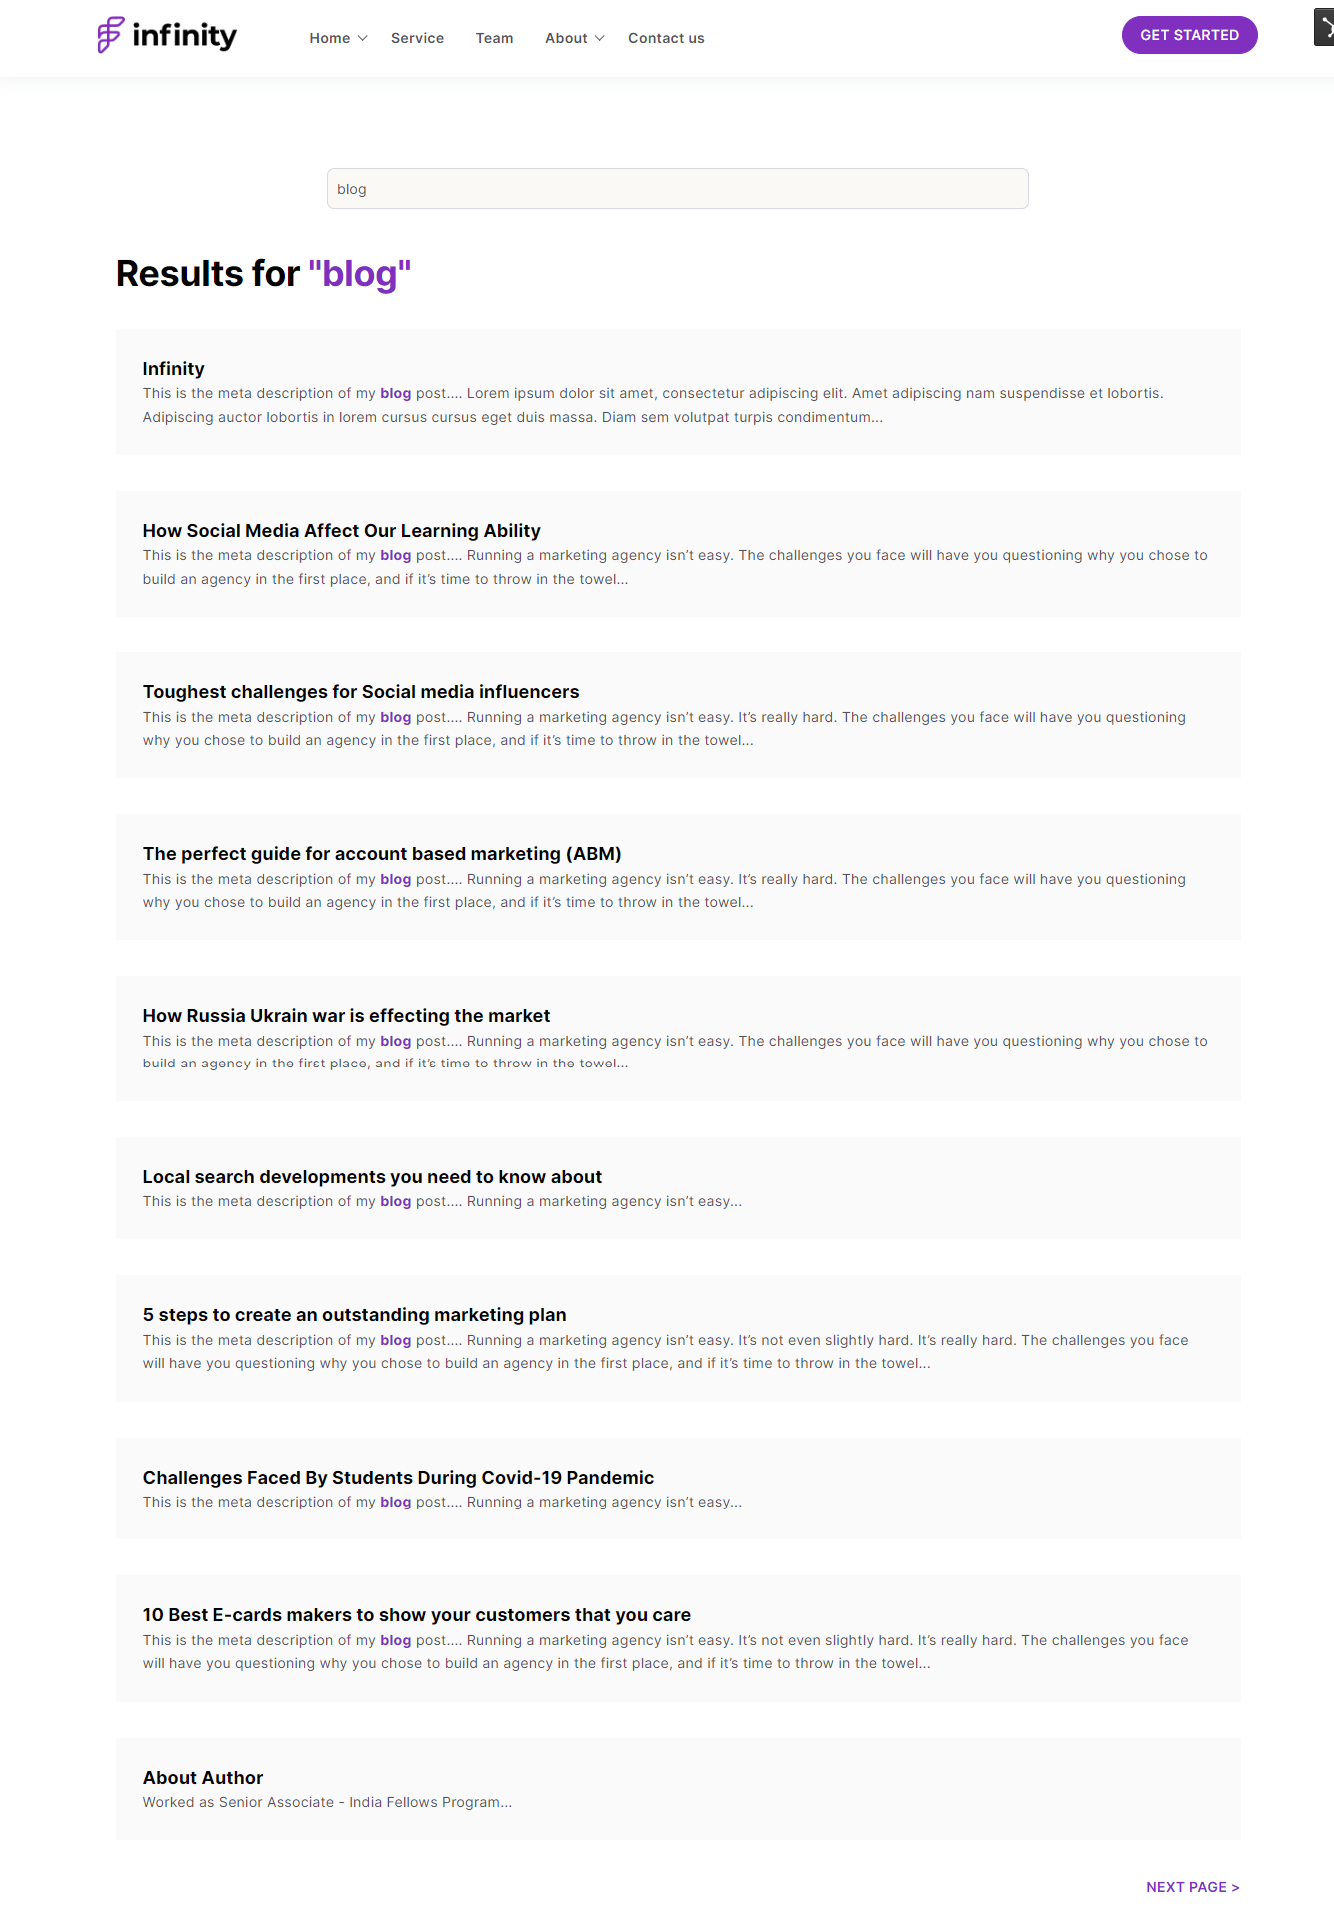
- Select the System Pages section > Set a template for the system pages after clicking it. Choose the infinity theme system template and then save settings.
You can set the templates by following the similar steps:
- 404 Error Page
- 500 Error Page
- Password Prompt Page
- Search Result Page
2.7.How To Change Email Templates?
For changing the email template:
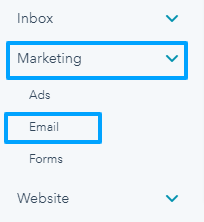
- Log in to your HubSpot account > Go to settings > on the left side panel, scroll down to marketing > under marketing select email
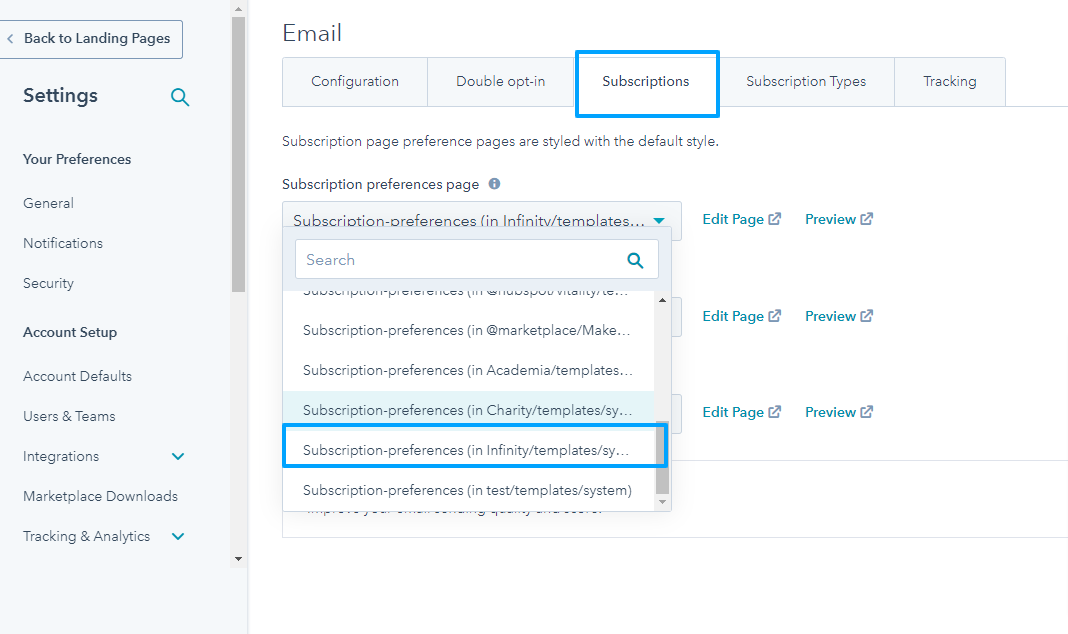
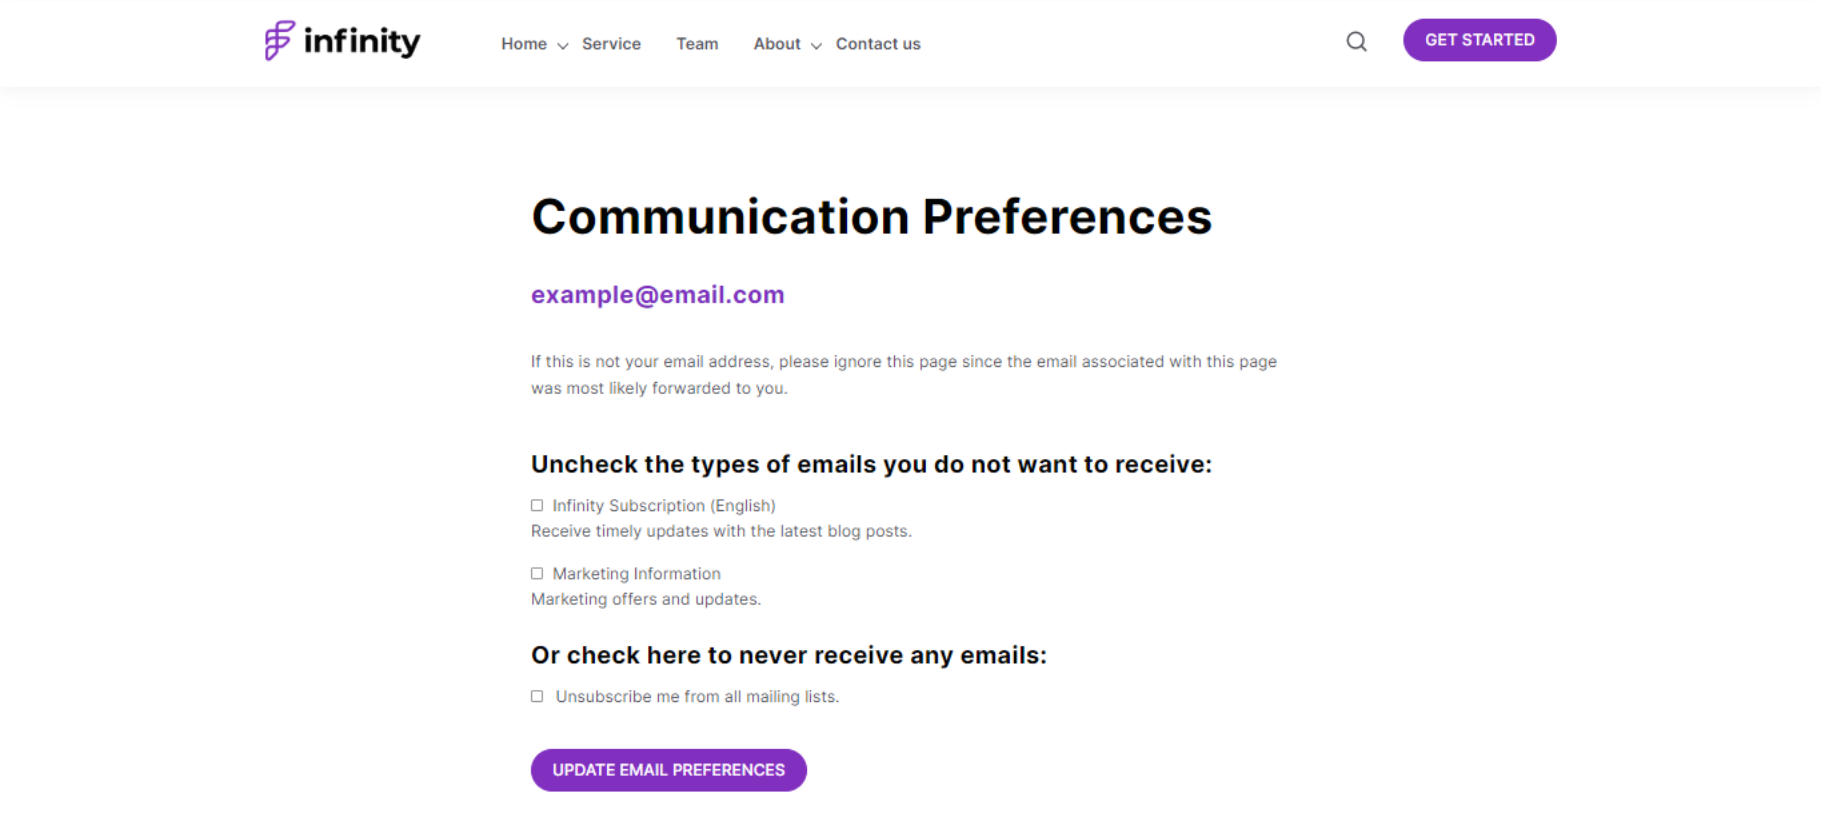
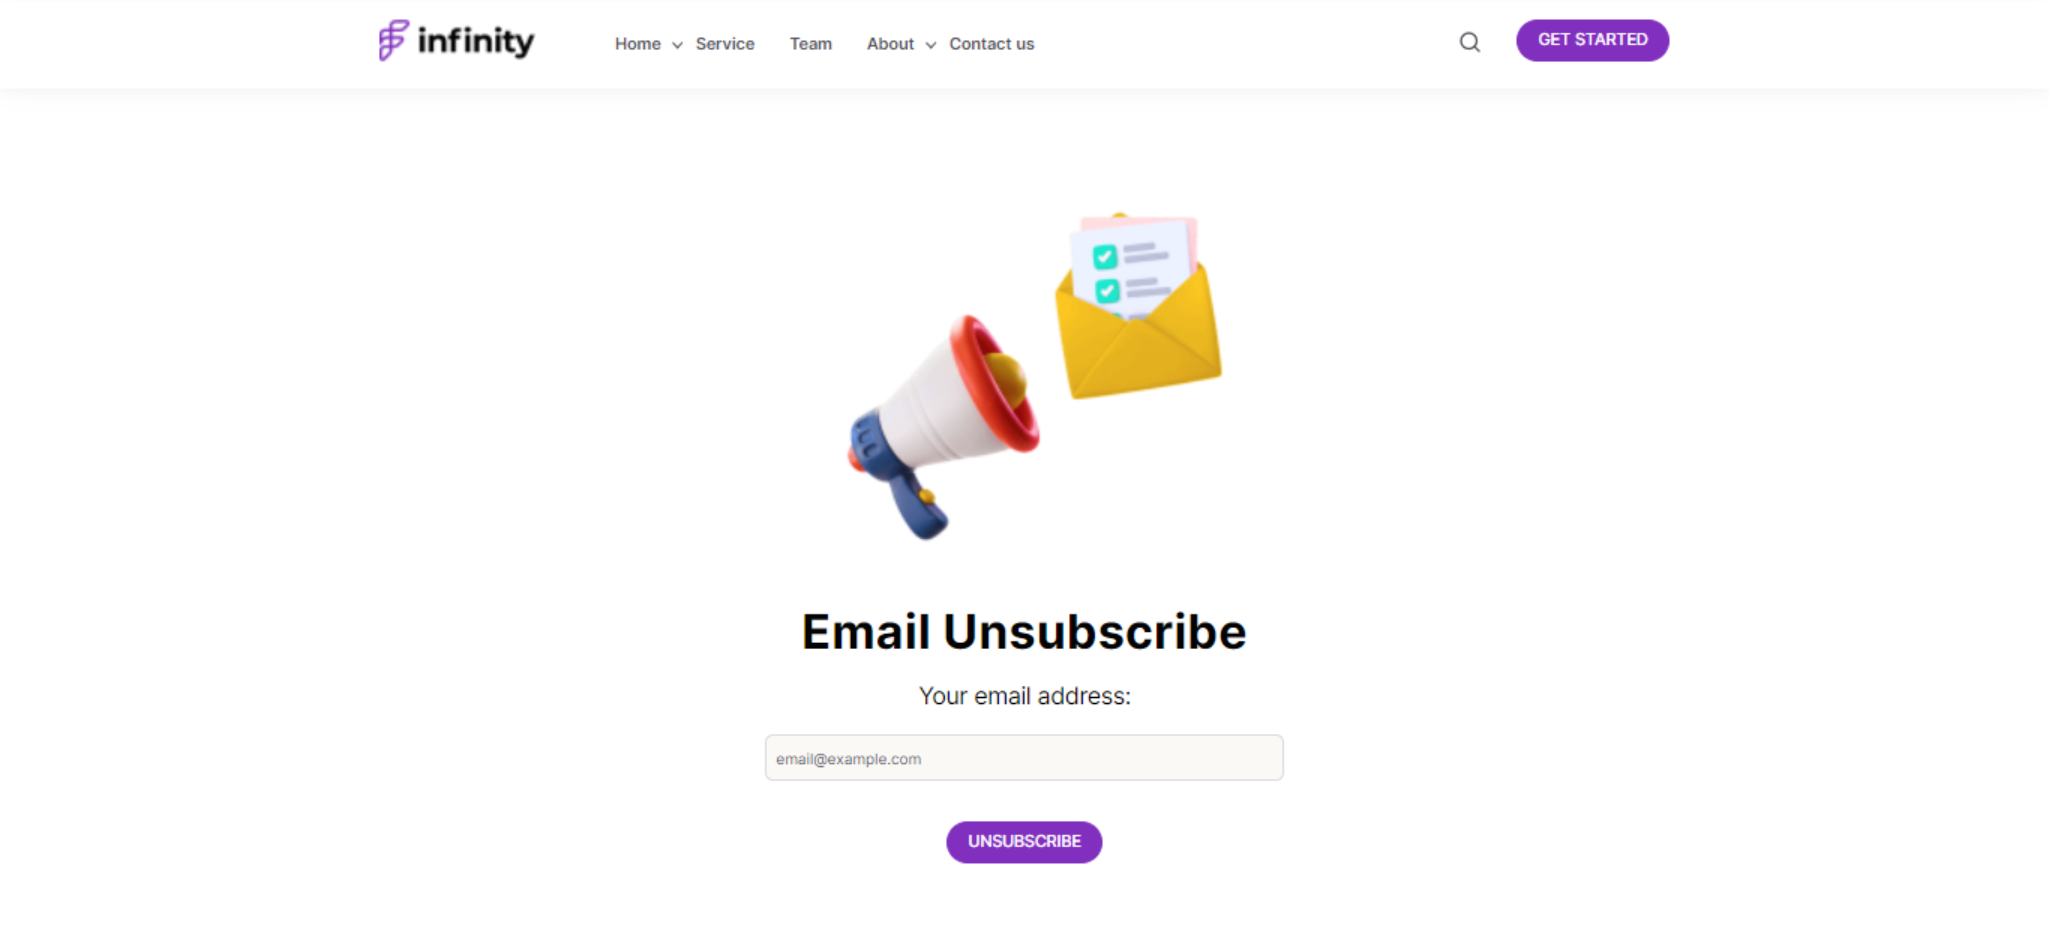
- Select the Subscriptions section > Set a template for the subscription preference page from the dropdown. Choose infinity theme subscription template and then save settings.
2.8.How To Work With Reusable Sections?
Reusable sections, as the name suggests, are section templates that you can directly use in place of modules. To use them:
After creating/editing a page hover over any of the modules > Locate and press the plus icon> Choose from the list of reusable sections > Publish changes.
The following reusable sections are available for your use:
- Two Column Video Text
- Two Column Image Text
- Two Column Video And Content Section
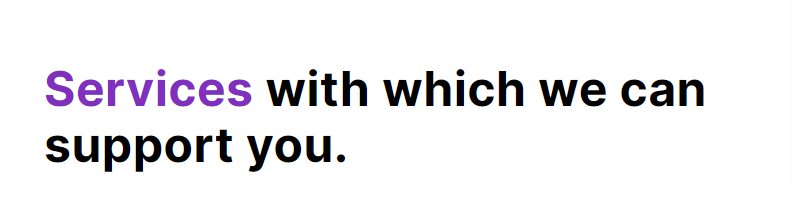
- Services Section
- Two Column Content And Team Section
- Two Col0umn Counter And Content Section
- Two Column Content And Form Section
- Two Column Content And Image
- Call To Action
3.Modules Library In Infinity Theme
Now we shall take an overview of the modules present in the infinity HubSpot theme. Here are a few things you should know before working with HubSpot theme modules:
- To change or use a module, you need to create/edit a page.
- Choose any module, drag it to wherever you want on the page, and drop it.
- Hover over any module on the page and a pencil icon appears on the right corner of the module. Select this icon to edit the content, links, or image on the modules.
- For deleting any module on the page, hover over the module and hit the delete icon.
The following are the modules present in the theme:
3.1.Banner
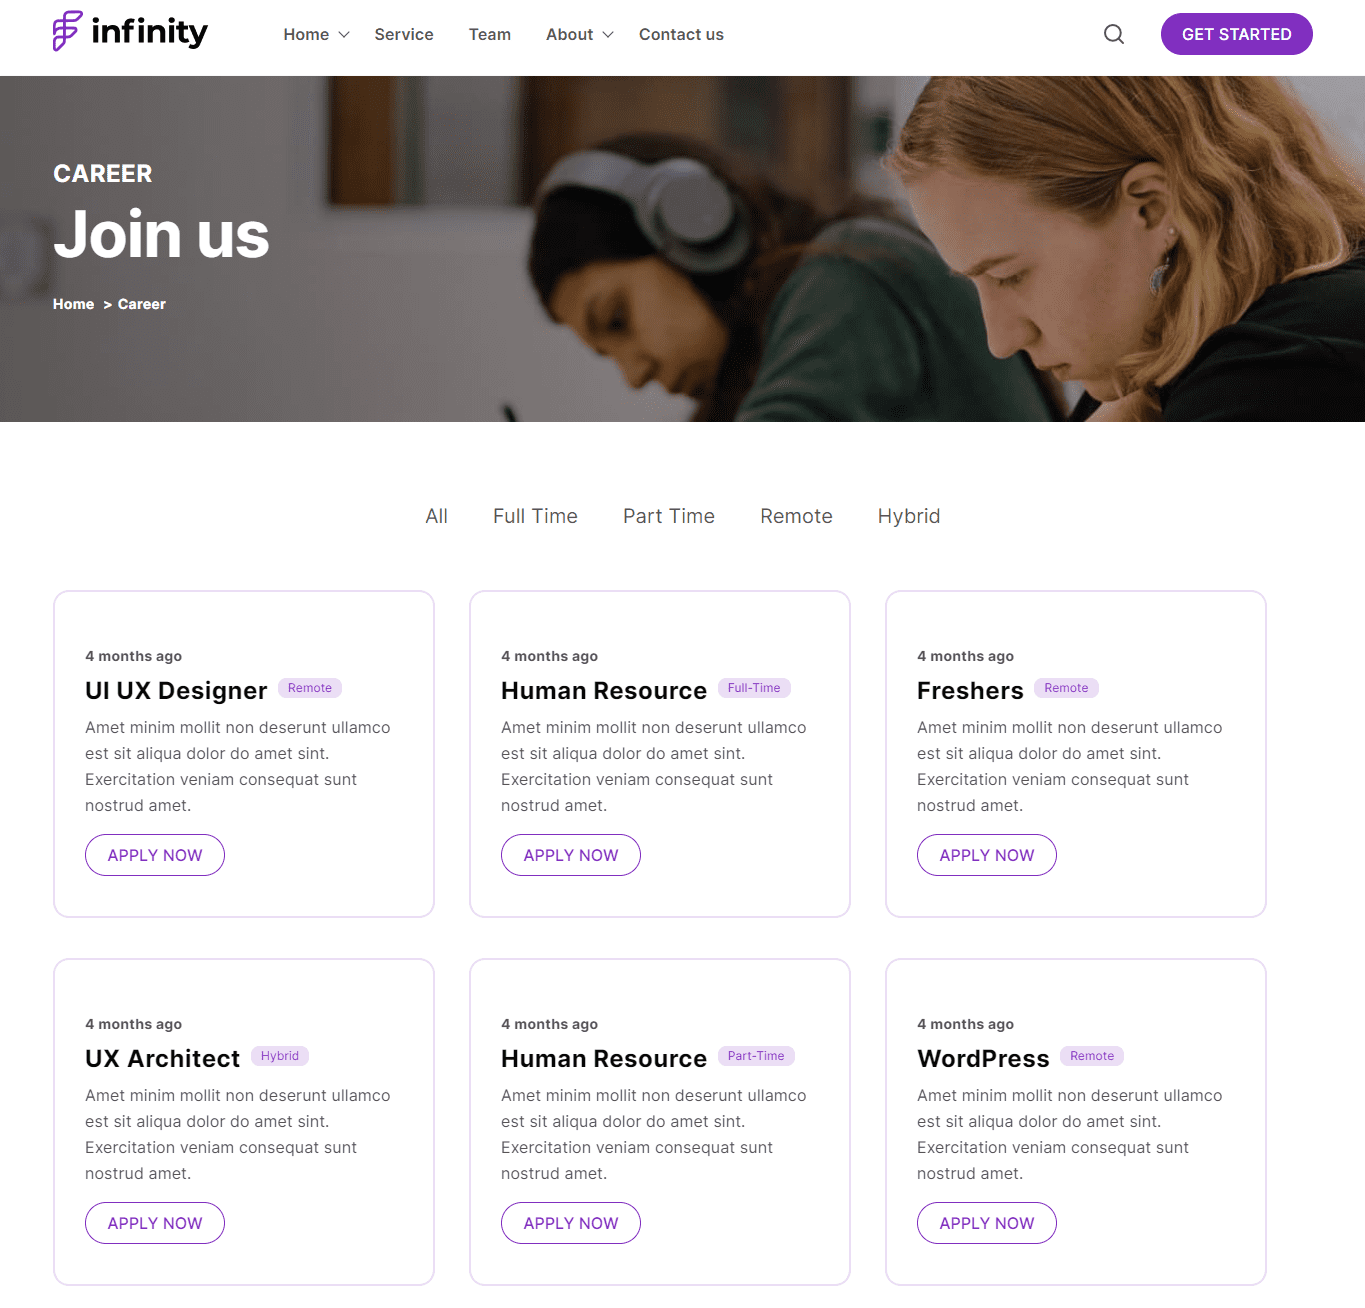
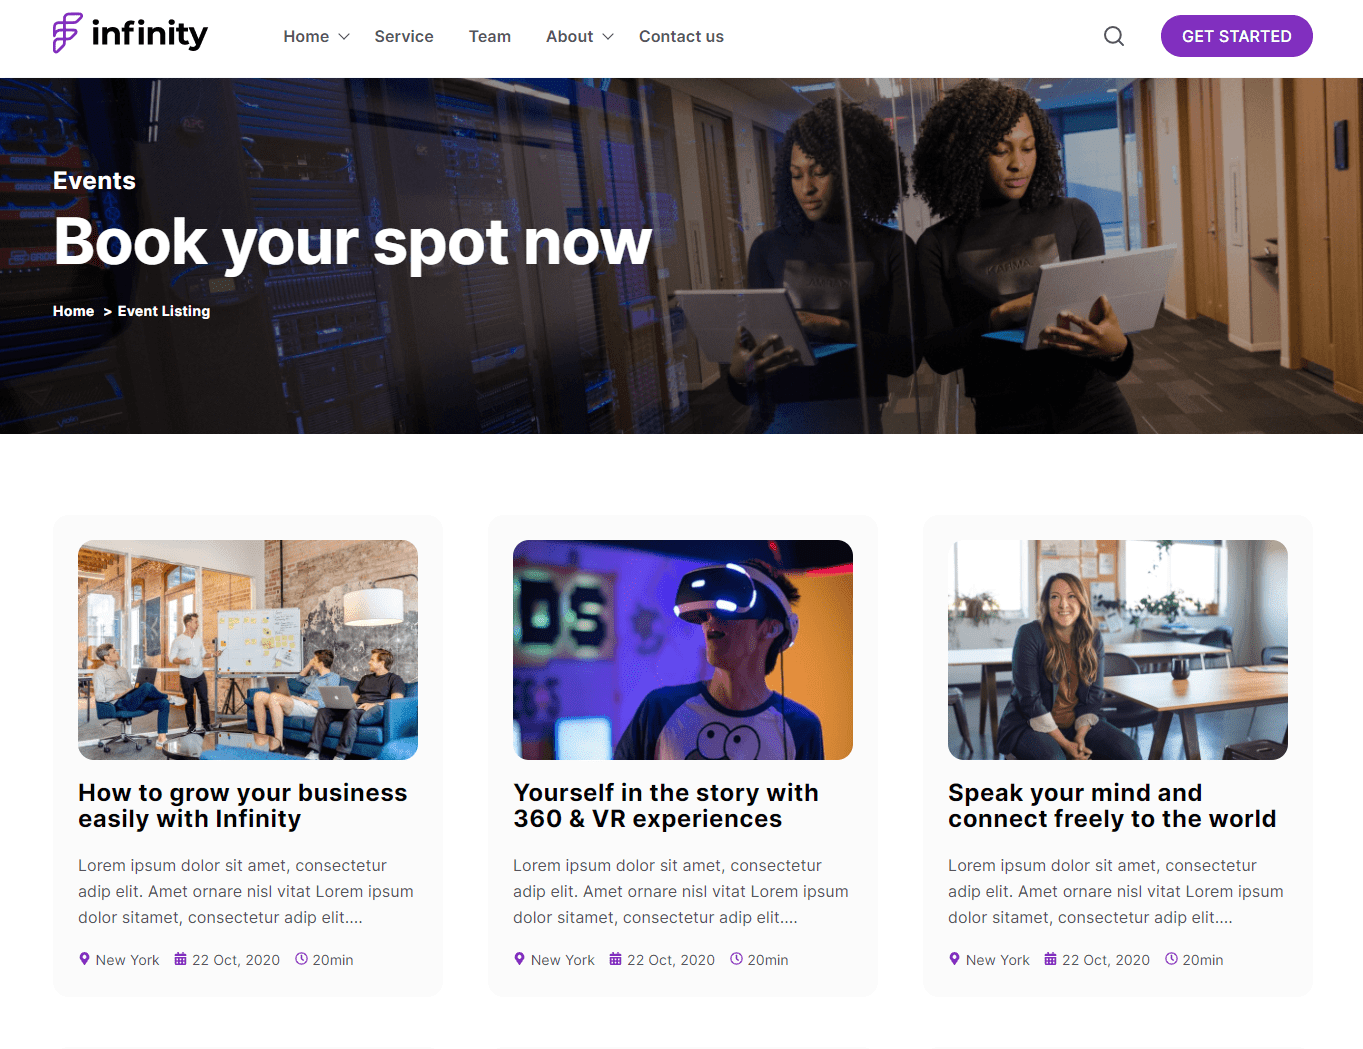
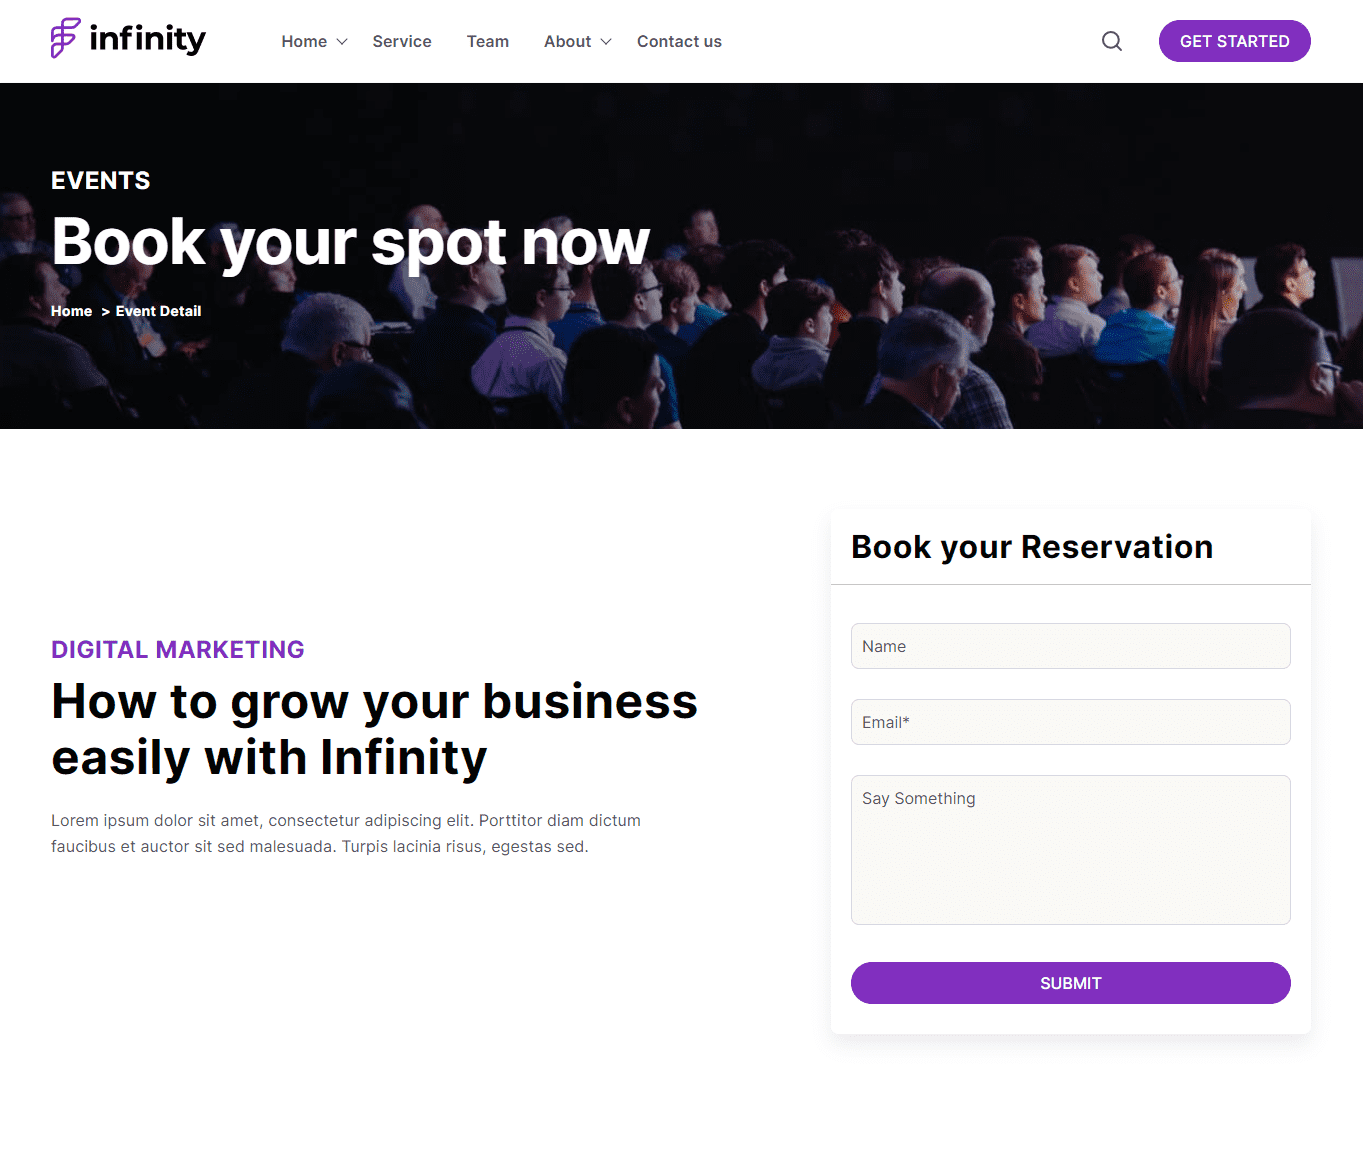
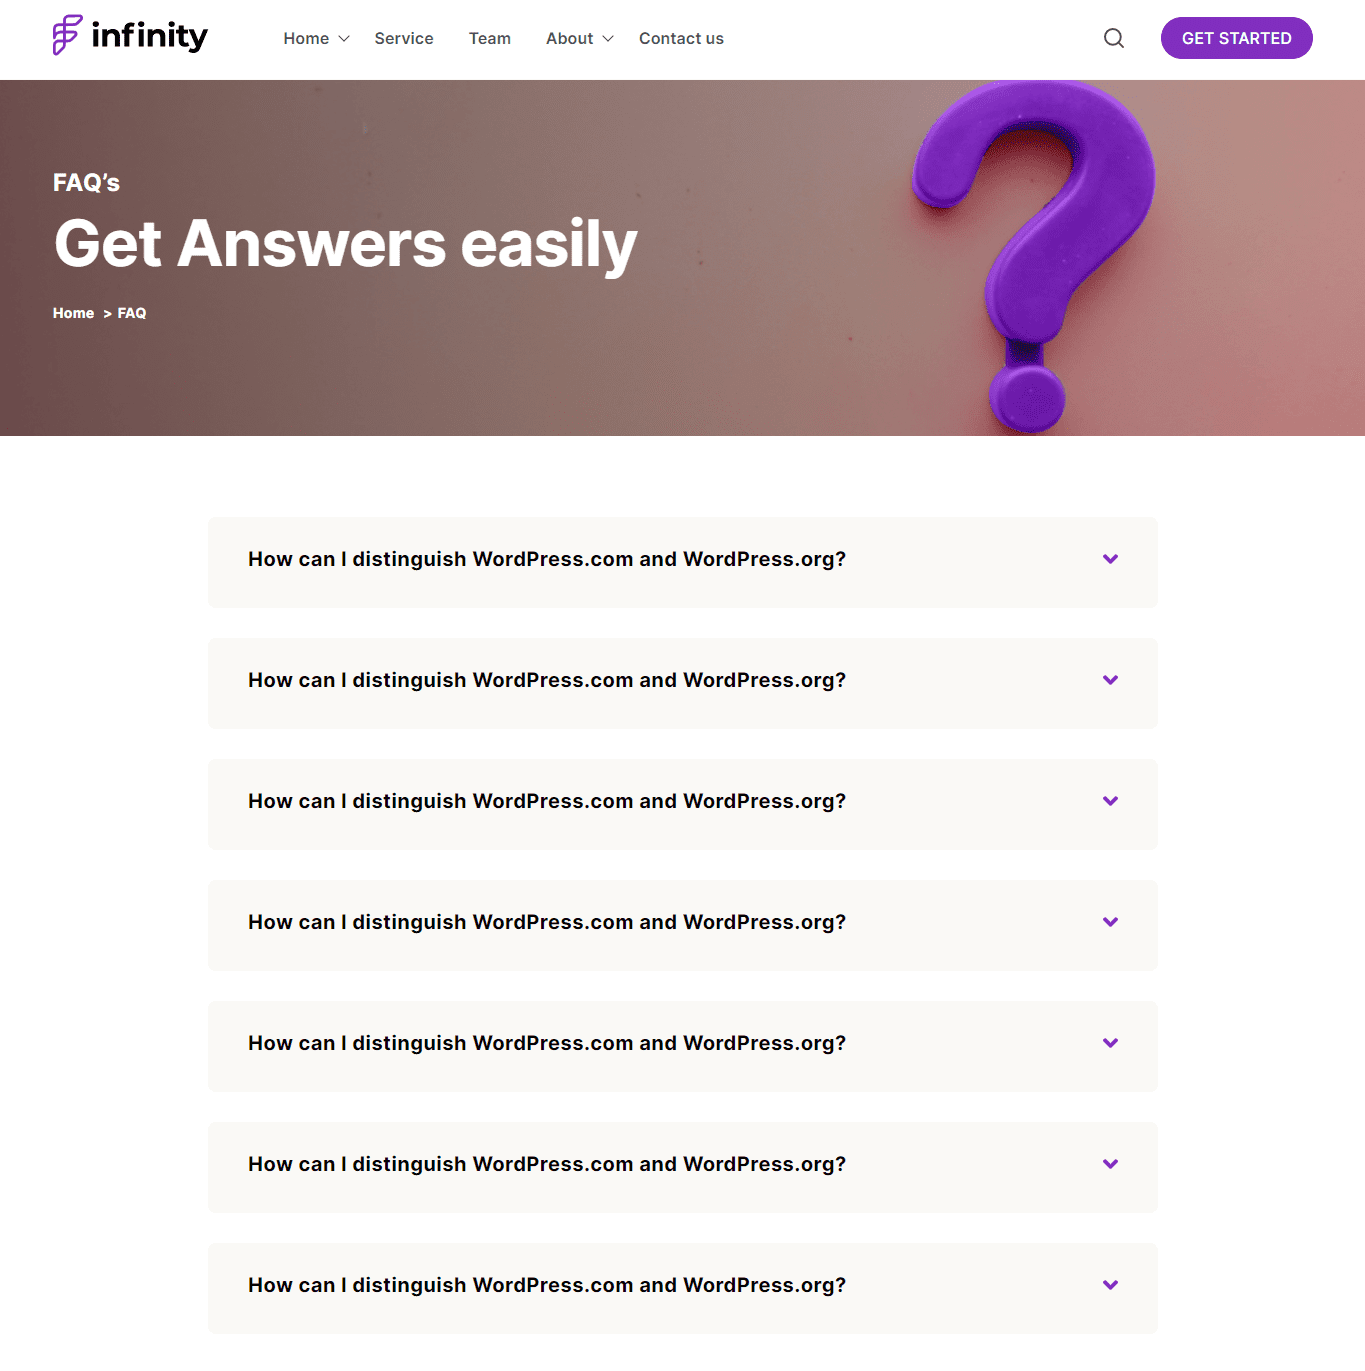
The banner module is one of the most important parts of your website page. The first thing that the users notice when they land at your website page. You can use it on your home page or about us page to inform the visitors about your marketing or other services.
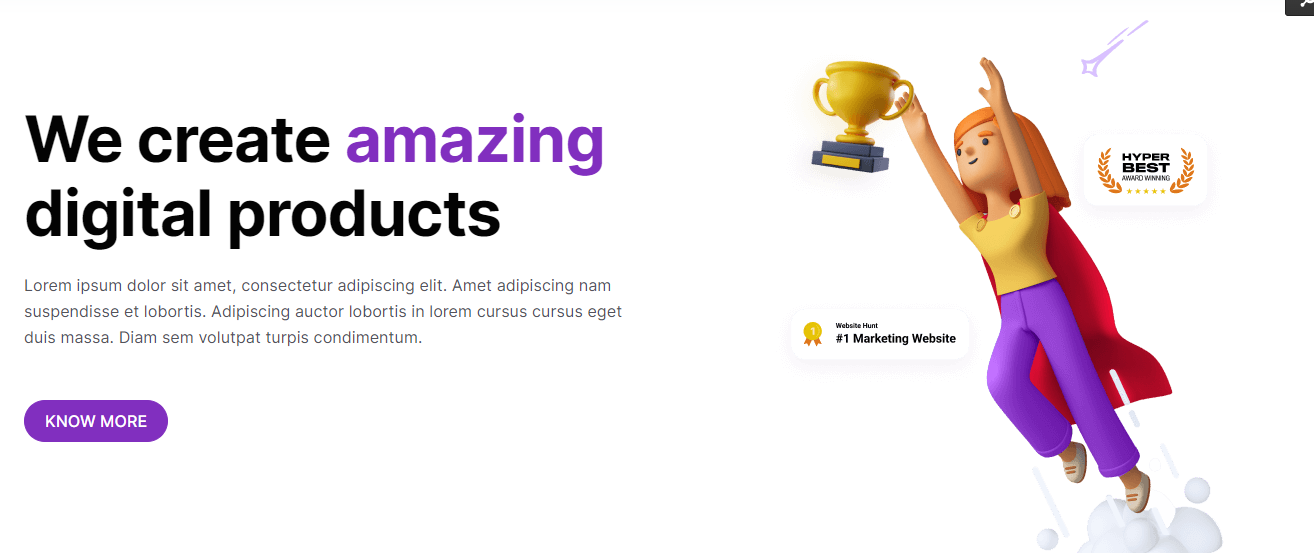
The infinity banner module allows you to edit its layout (select from the image background image, background color, and background with image), button or breadcrumb choice, content ( set mini title and enable primary button), and add or remove the banner image.
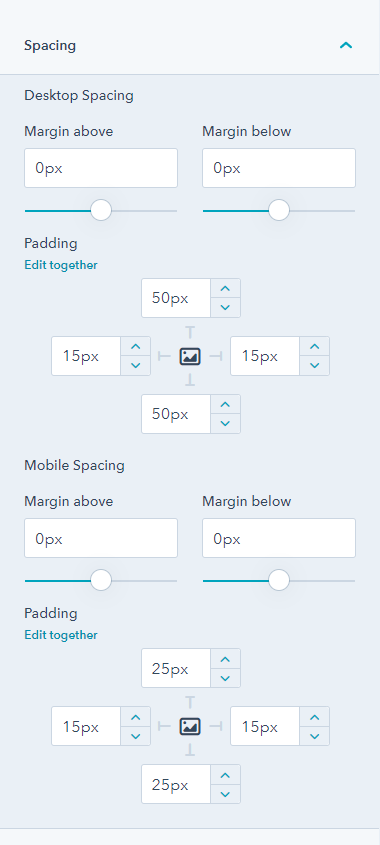
From the style tab, you can edit spacing ( margin above & below, padding), and set alignment for mobile & desktop, enable maximum width and overwrite content color.
3.2.Partners
As the name suggests, the partner module is great for displaying your partners on the landing pages and website pages. You must have worked with different brands. Here is a perfect module to help you out.

You add as many partners as you like and edit links for the same. Moreover, you can put up your partners’ logos, and their URLs, alt text, and image loading. The style tab will allow you to edit the desktop and mobile spacing, and padding.
3.3.Title Content
The title content module allows you to add a title on any page. There is an option to add a mini title, edit content, and add primary & secondary buttons.

From its style tab, you can edit the container, i.e background color, corner, enable maximum width, and content (desktop and mobile spacing & padding).
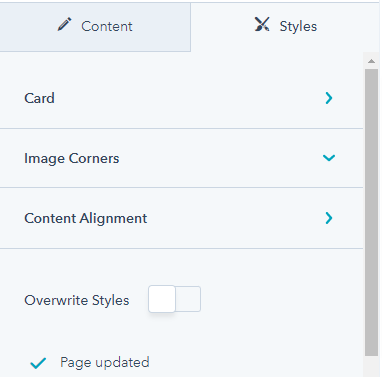
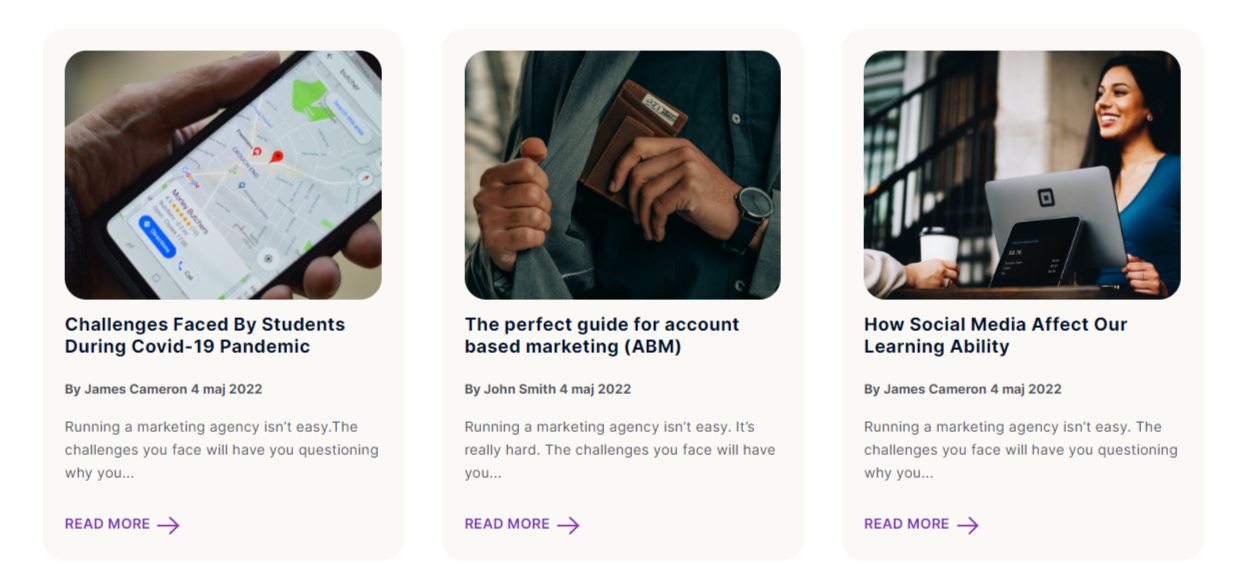
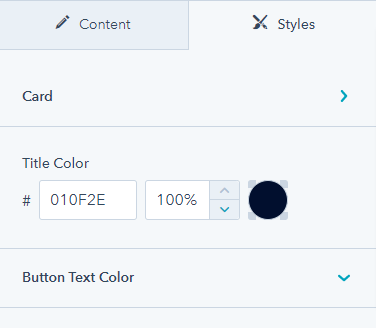
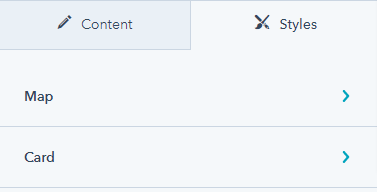
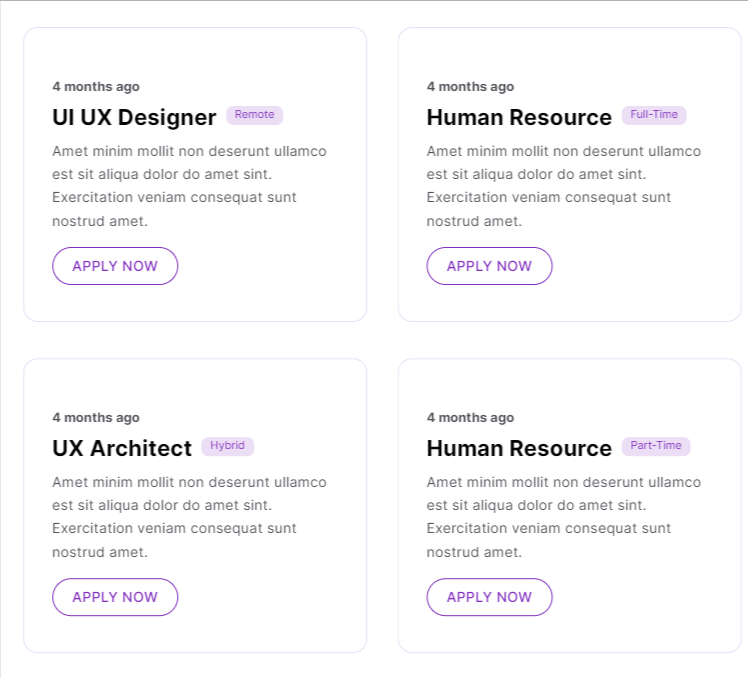
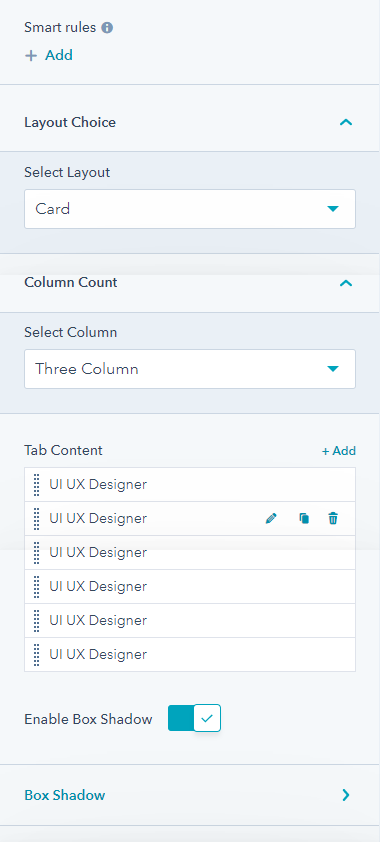
3.4.Card
The card module is for displaying cards on your website page along with some content and a featured image. Adjust the settings and add multiple cards on your landing pages.
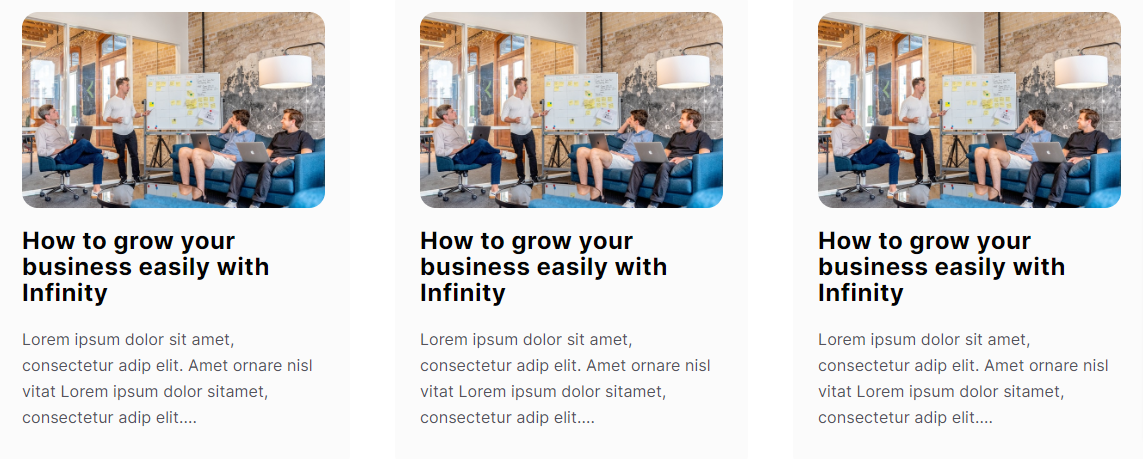
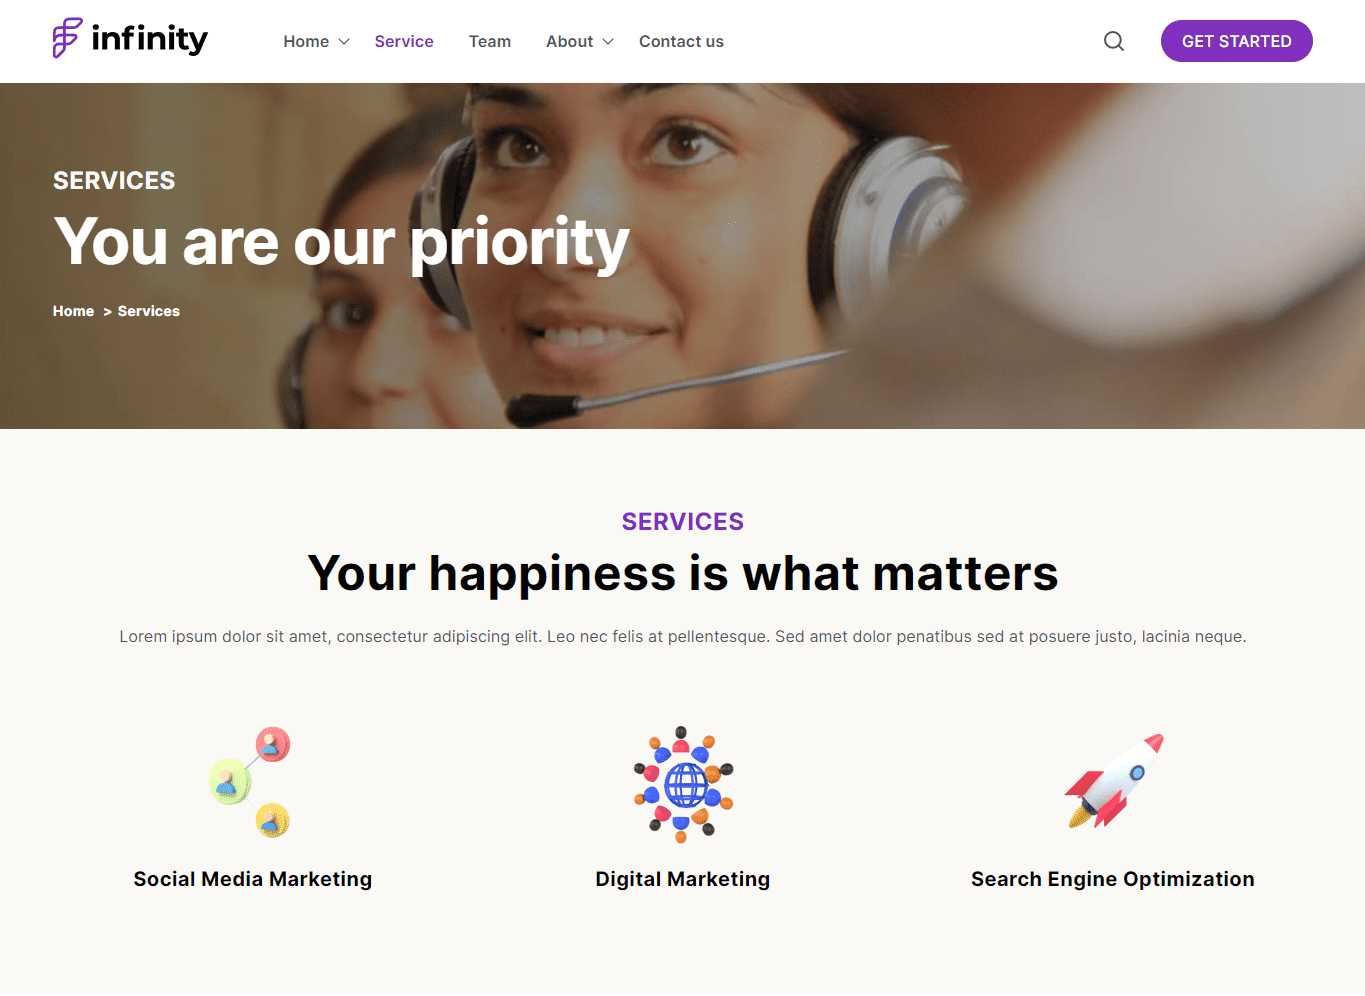
You can change the column layout to upto three columns, enable an icon box, add multiple cards, add images, headlines, image loading, set links, add icon box, and content. Under the style tab you can edit cards, image corner radius, set content alignment, and overwrite style.
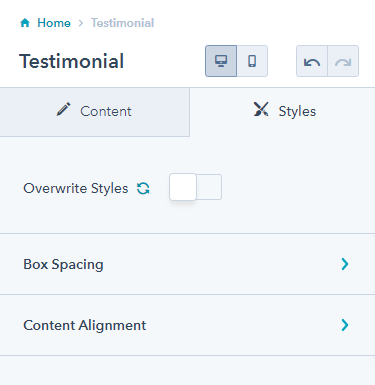
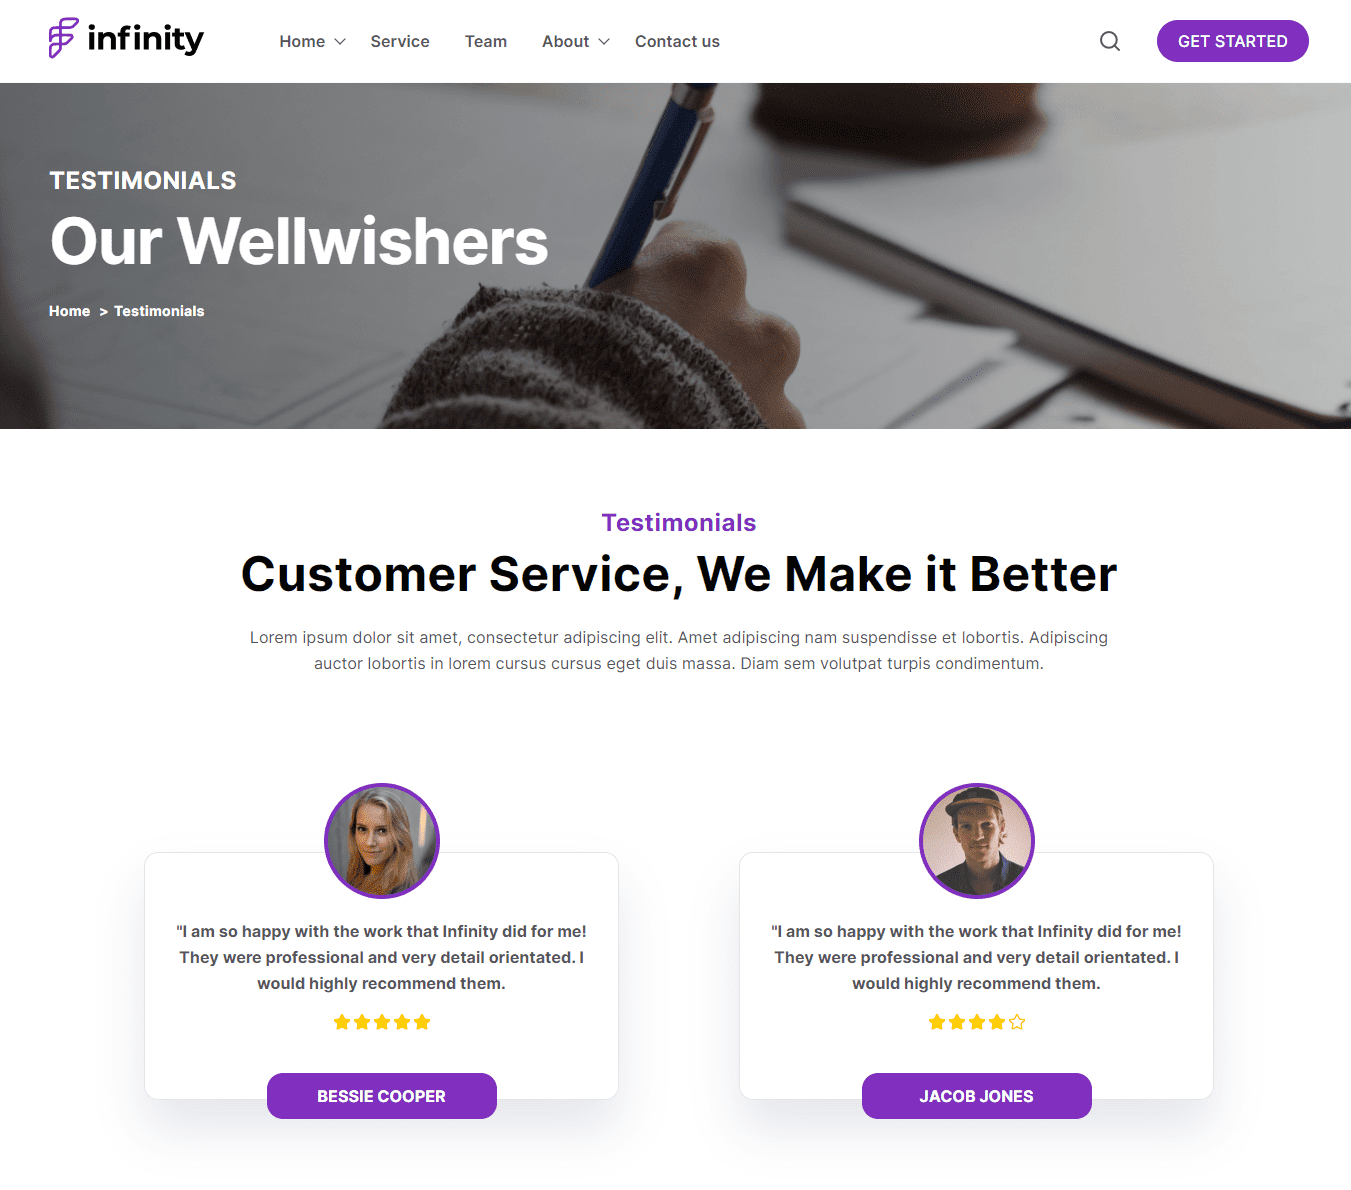
3.5.Testimonial
The testimonial module can be used to display various testimonials on your landing page.
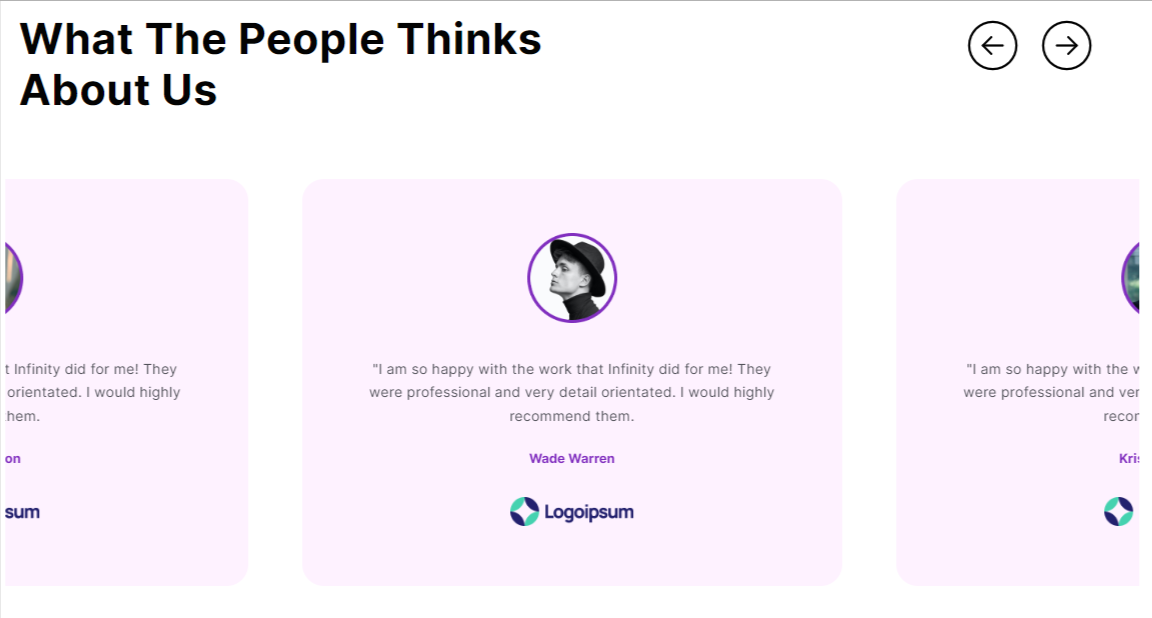
You can choose layout ( slider & card), set section title, add multiple testimonial cards, change slider arrow images, and add alt text.
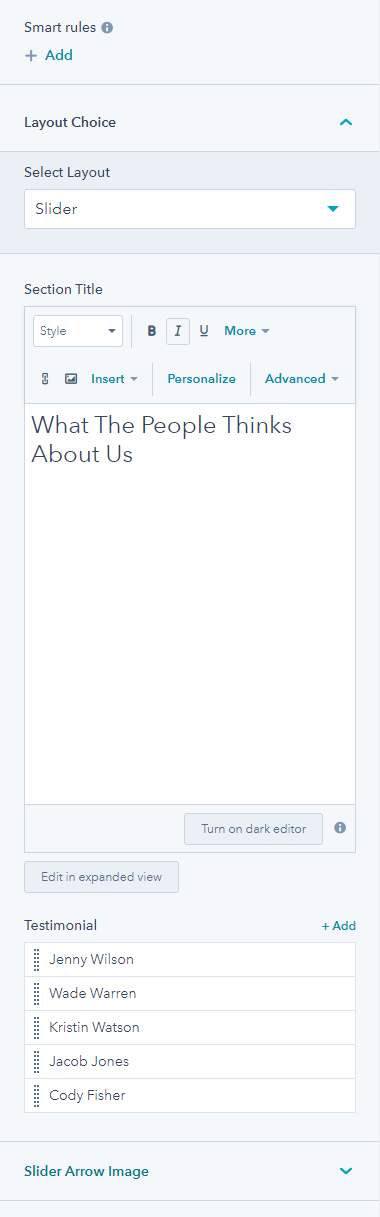
From its style tab you can edit box spacing ( for desktop & mobile), overwrite styles, and content alignment.
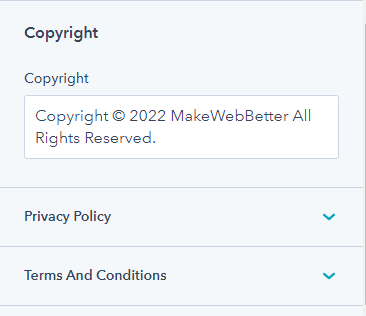
3.6.Copyright
The copyright module can be used on the footer to show your copyright text along with the privacy policy and terms and conditions text and links. You can edit this from the global content editor.

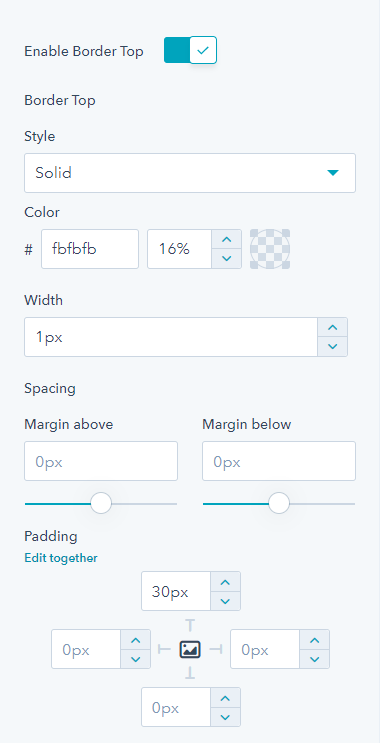
From the style tab of the copyright module, you can enable border-top, and edit the style, color & width of the border-top, spacing ( margin above & below), and padding.
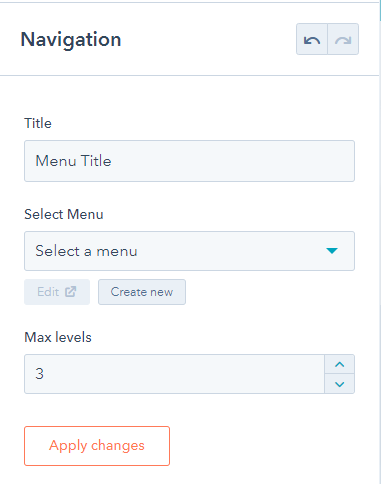
3.7.Navigation
The navigation module can be edited from the global content editor. You can edit the menu title. Select a menu or create and set maximum levels.
3.8.Header Toggler
Drag and drop the header above the menu component for best results. You can select an icon or image for the toggle open and close option.
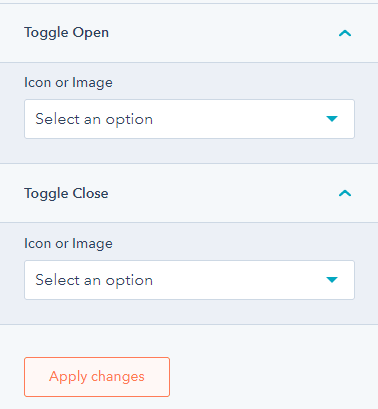
From the style tab of the header module, you can adjust spacing and padding.

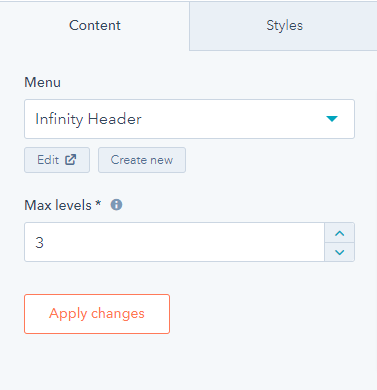
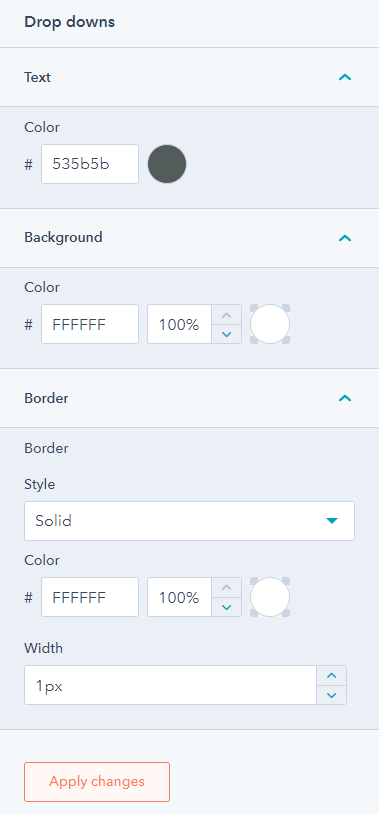
3.9.Menu
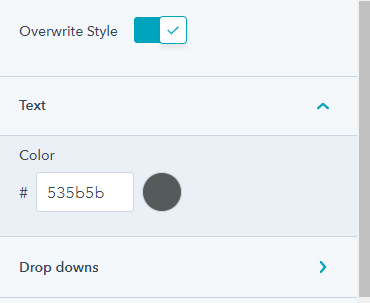
The menu is also a global module. You can apply maximum levels. It determines the number of menu tree children that can be expanded in the menu.
The drop-down options have multiple options like text color, background color, border style, and color, width, etc.
The drop-down options have multiple options like text color, background color, border style, and color, width, etc.
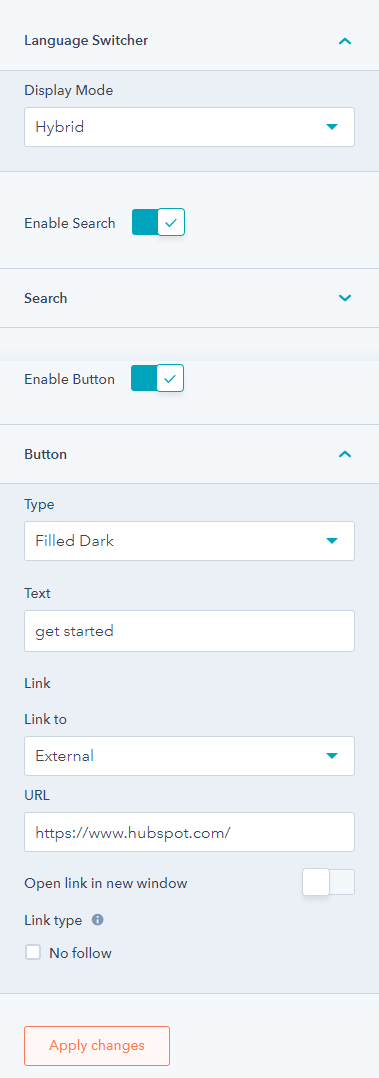
3.10.Header Controls
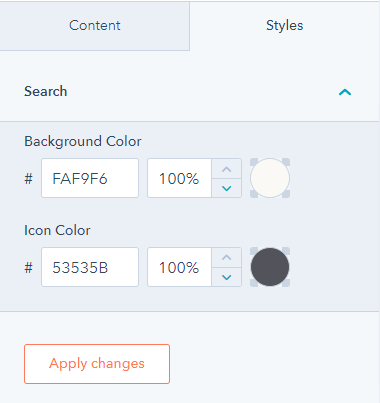
The header control module allows the user to enable a search option, select the display mode of the language switcher (localized, PageLang, hybrid), and button type, link, and text on the website header.
From the style tab, you can edit the search background color and icon color.
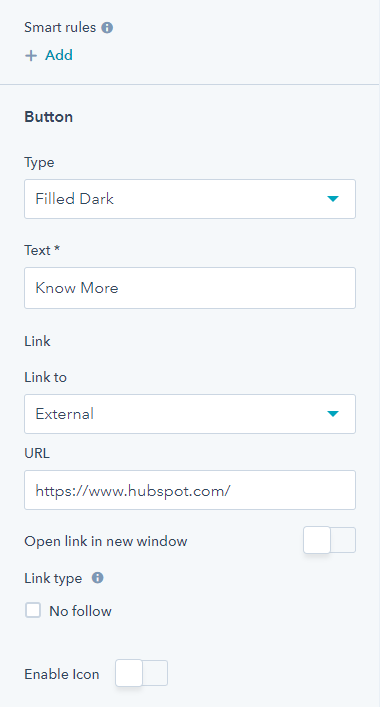
3.11.Customizable Button
The button module can be added anywhere for directing the user to another page. You can easily edit your text, add links, enable icons, etc.

3.12.Icon Box
The icon box adds boxes with icons on your website pages.
You can add multiple icon/image boxes, set layout ( compact or card), select upto three columns, and enable box-shadow.
3.13.Video Popup
Using the video module, you can add a video to your website or landing pages. These are very easy to work with and increase the engagement rate of your page.

You can edit a video poster ( replace/remove a poster, alt text, poster size, maximum size), icon/content ( set icon over image or content over image), change the play icon, and add the desired video link.
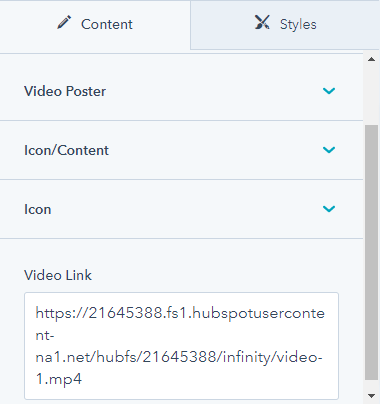
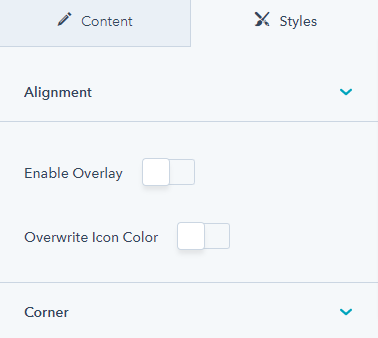
From the style tab you may enable overlay or overwrite icon color, and also set the corner radius of the video as seen by the visitors.
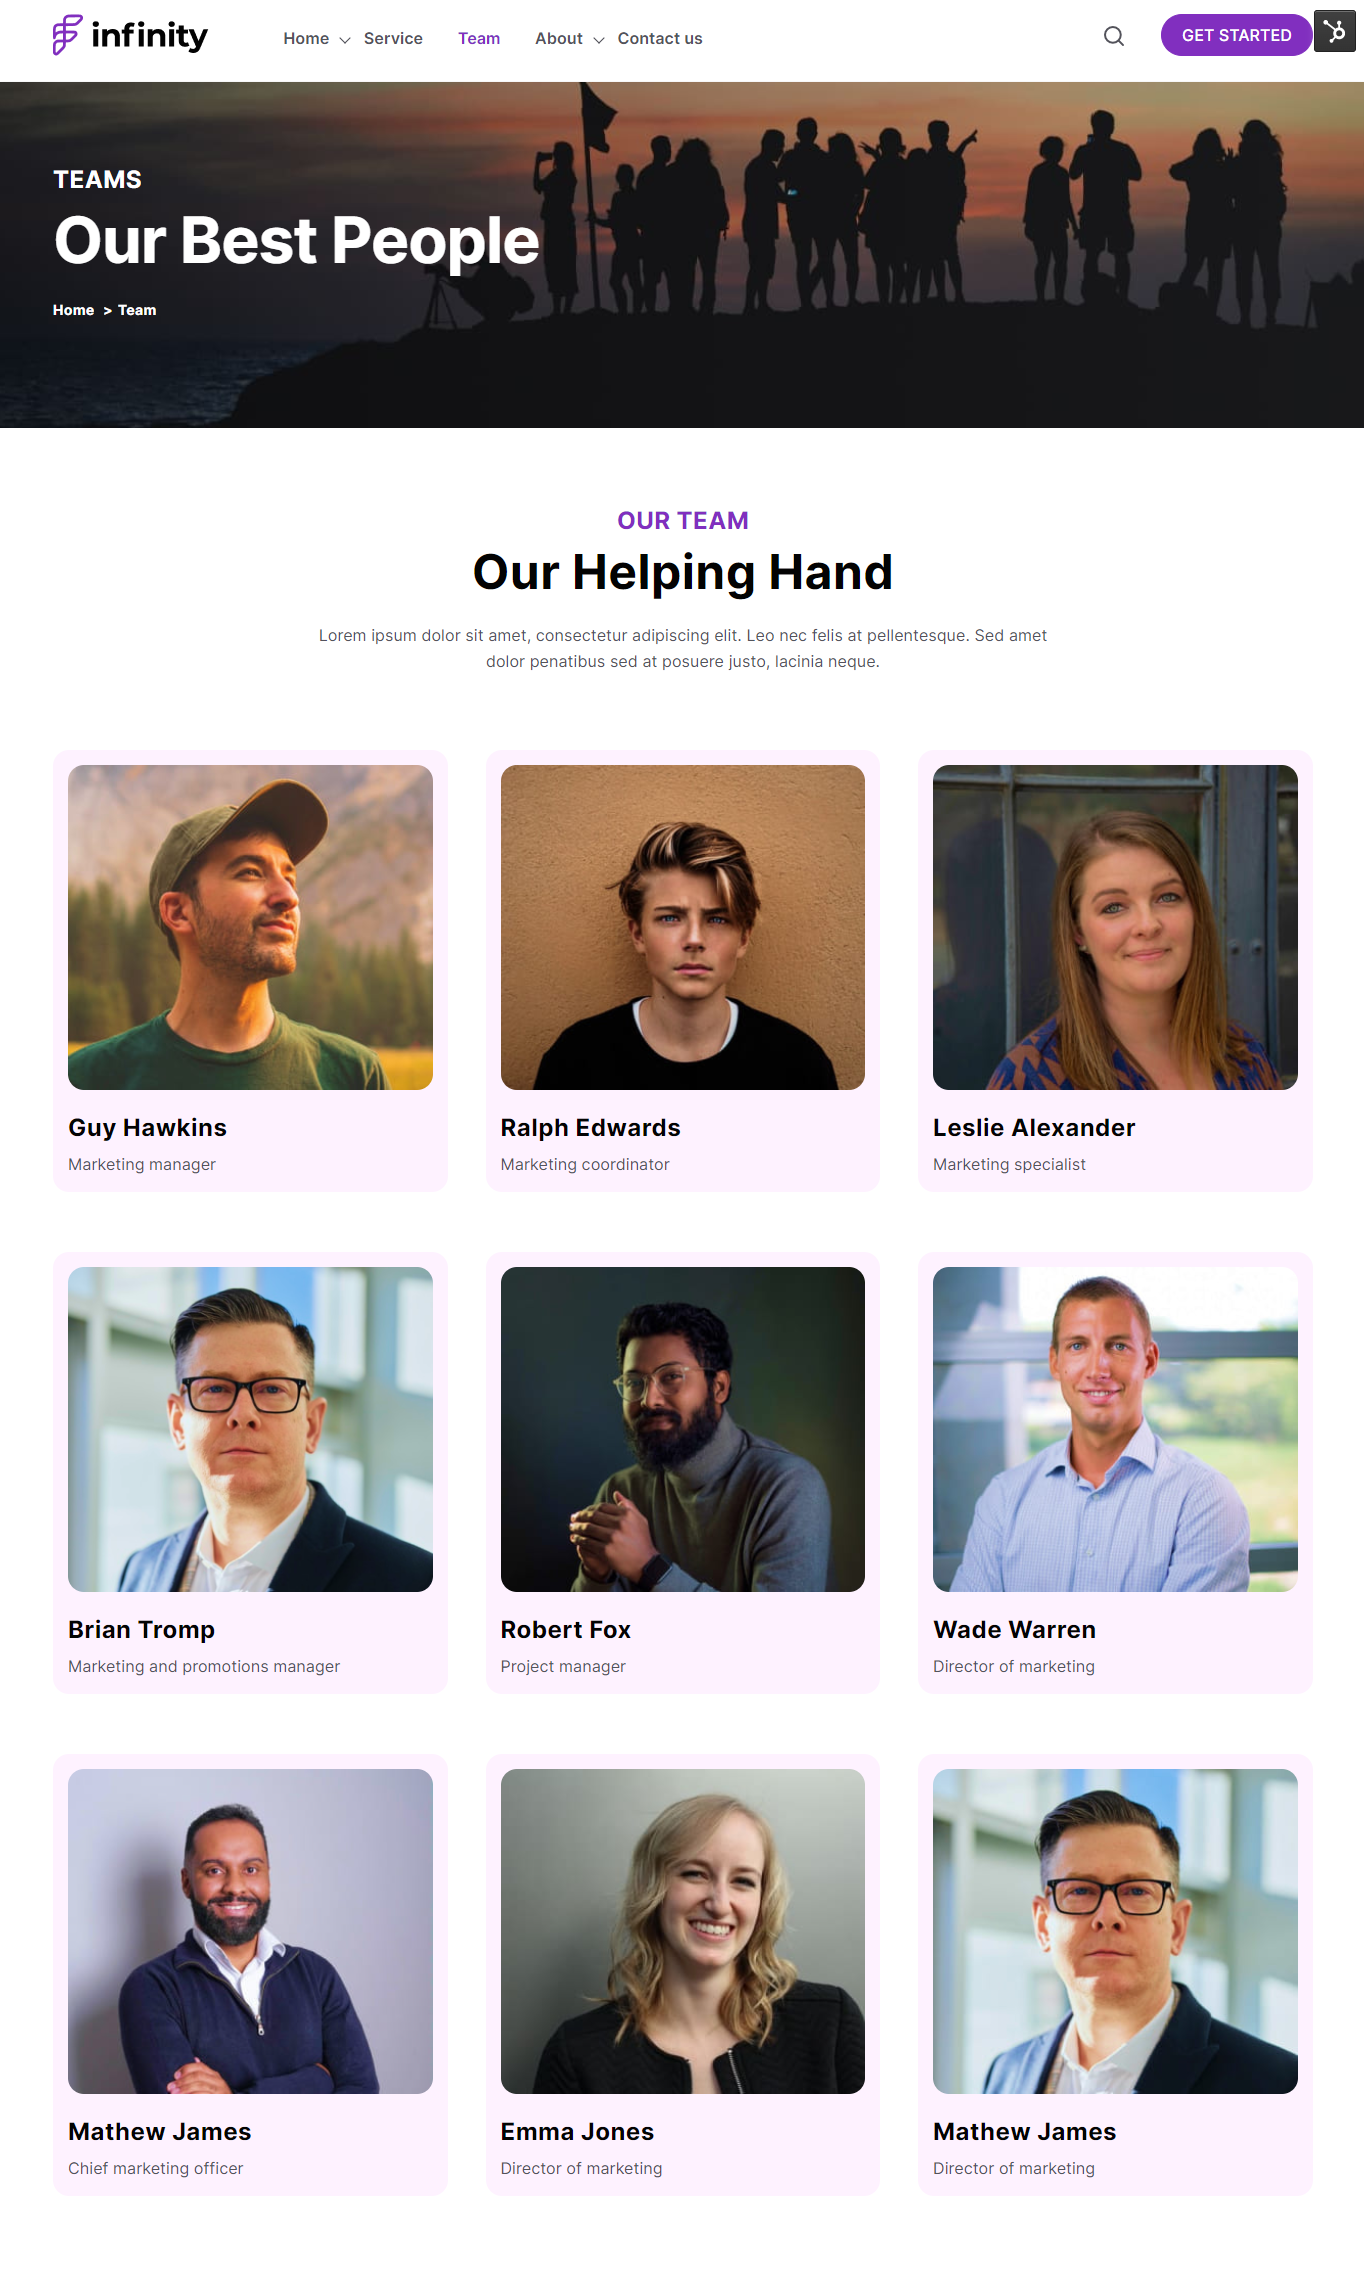
3.14.Team
If your team needs a highlight on your website page, you can use this module. You can set layout choices from a card, slider, or image, set column count, change the size of the image, add alt text, image loading and profile links, and designation of the team member.

From its style tab, you can set image alignment, image corners, card background color, border radius, and spacing.
3.15.Custom Image
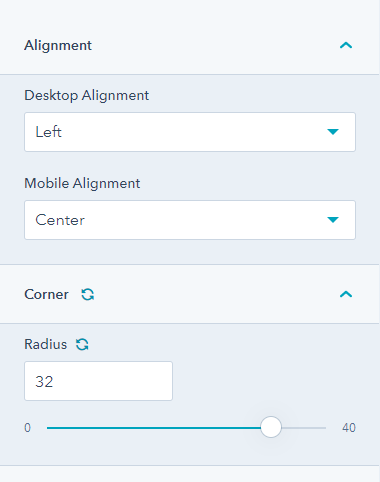
You can add any image to your website page using the custom image module. Other related settings for this module are desktop and mobile alignment, corner radius, alt text, size, image loading, and maximum image size.
3.16.Counter
You can add a multi-column section to your page using the counter module.

Add up to three columns, edit links, and add images, content, the maximum width of the container, card width, desktop and mobile alignment, spacing, and background color ( from the style tab).
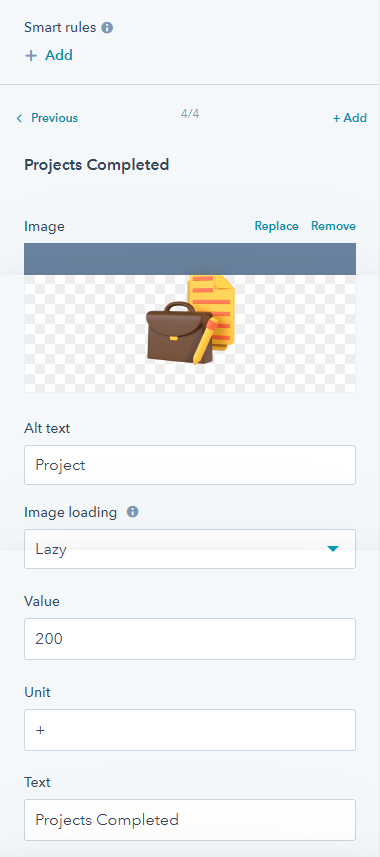
The style tab will help you in setting the alignment and image corners.
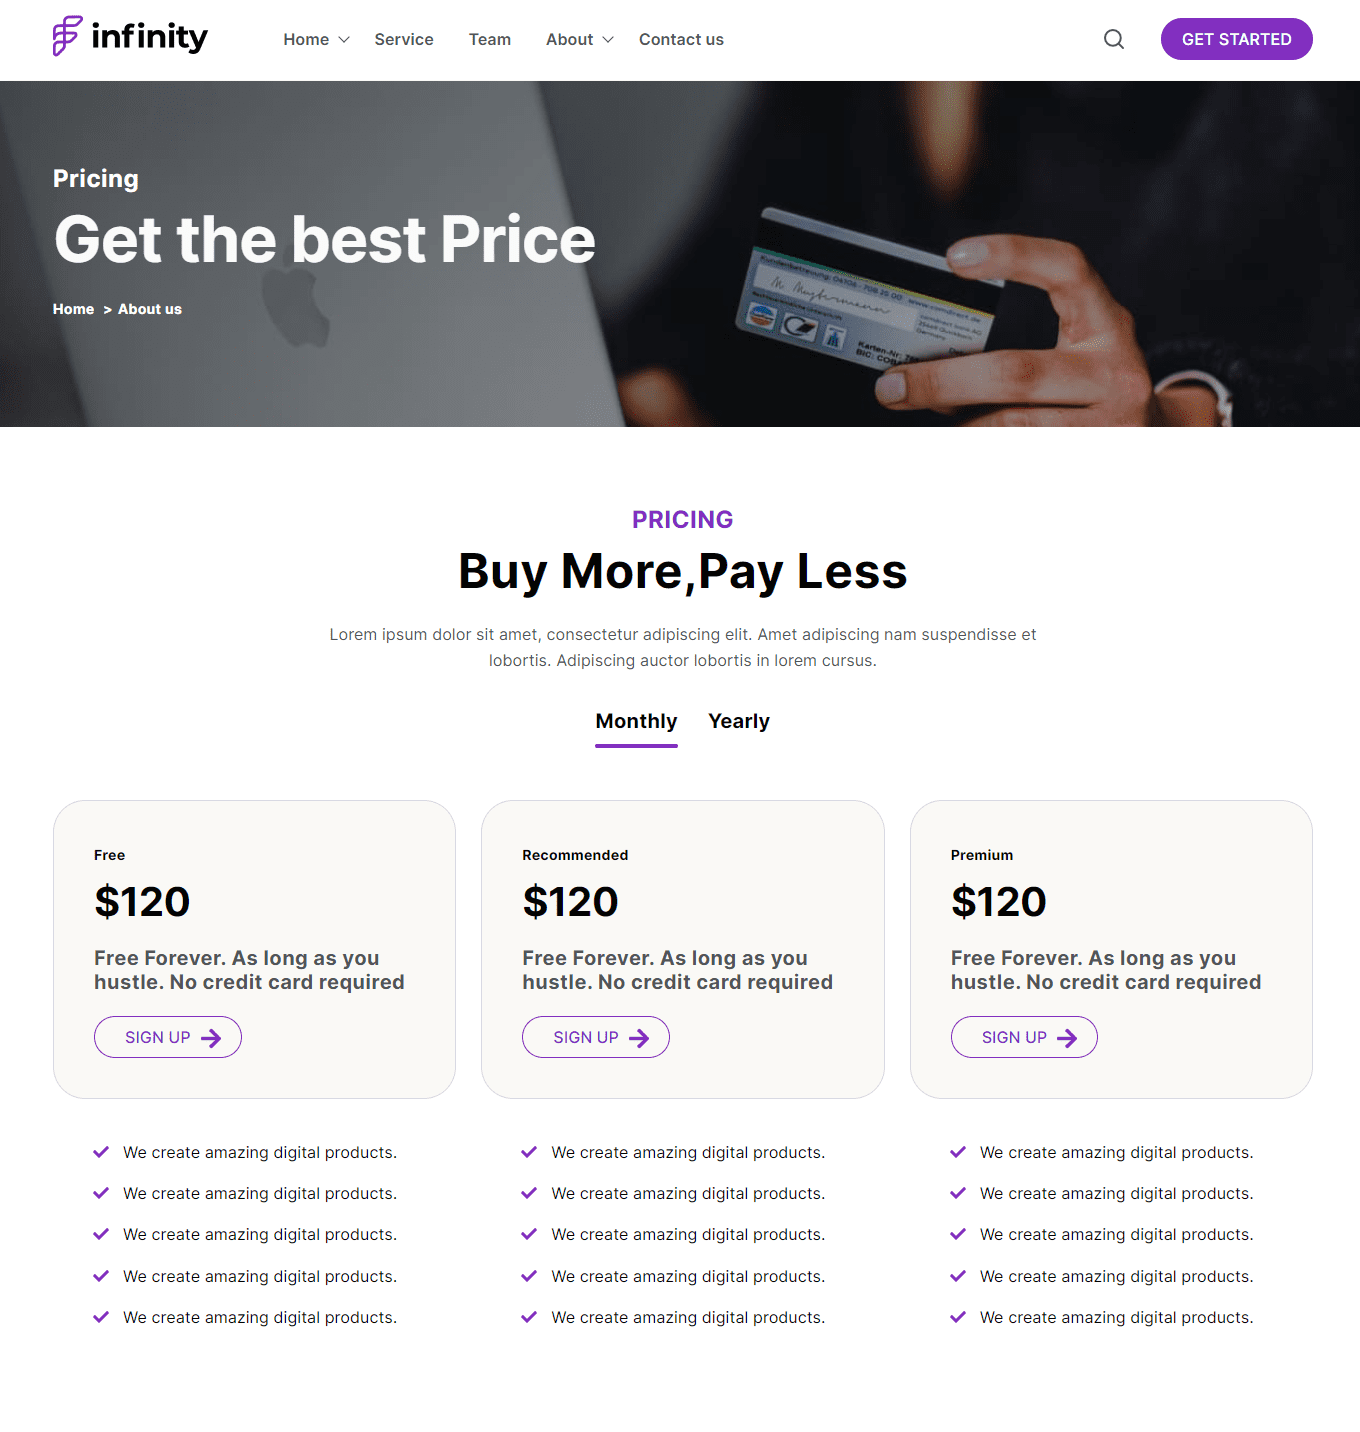
3.18.Pricing Card
The pricing card module can be used to display your service pricing details on your landing pages.
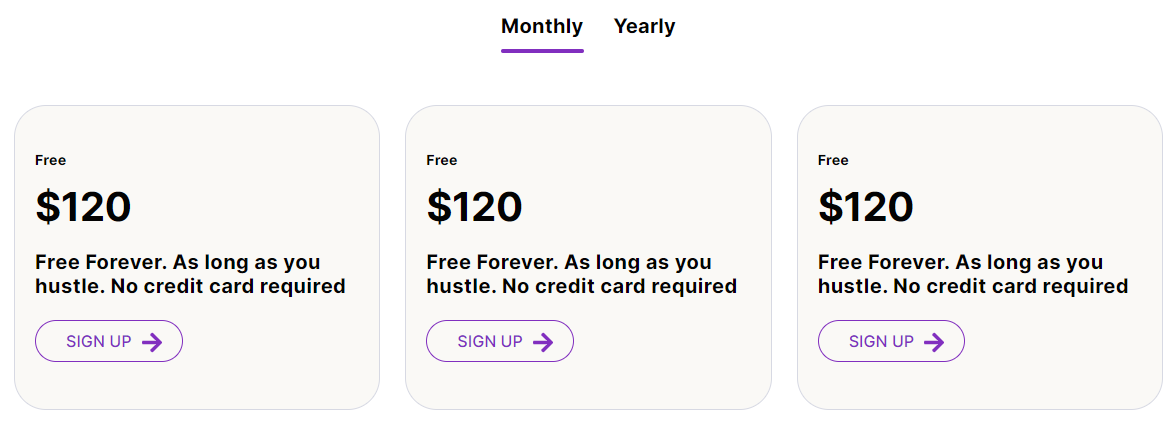
You can add multiple tabs, add descriptions, mini title, button, list, and price, and enable box-shadow from the content settings. From the style tab, you can edit the tab font, background color, overwrite style, alignment, active card background color, and border color.
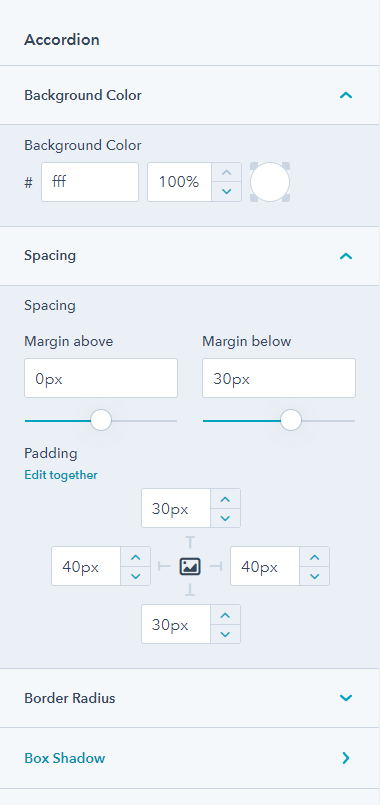
3.19.Accordion
The accordion module can help you create a section to add FAQs or a large piece of content users can toggle to show or hide.
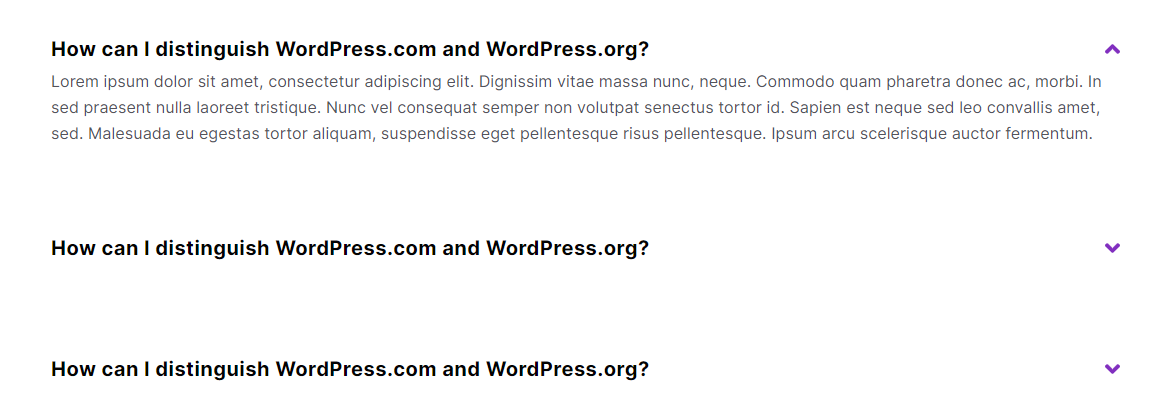
You can choose the position of the icon from the right or left, add multiple questions, add content, title, and opening, and closing icon. From the style tab, you can edit the accordion background color, spacing, border-radius, and box-shadow.
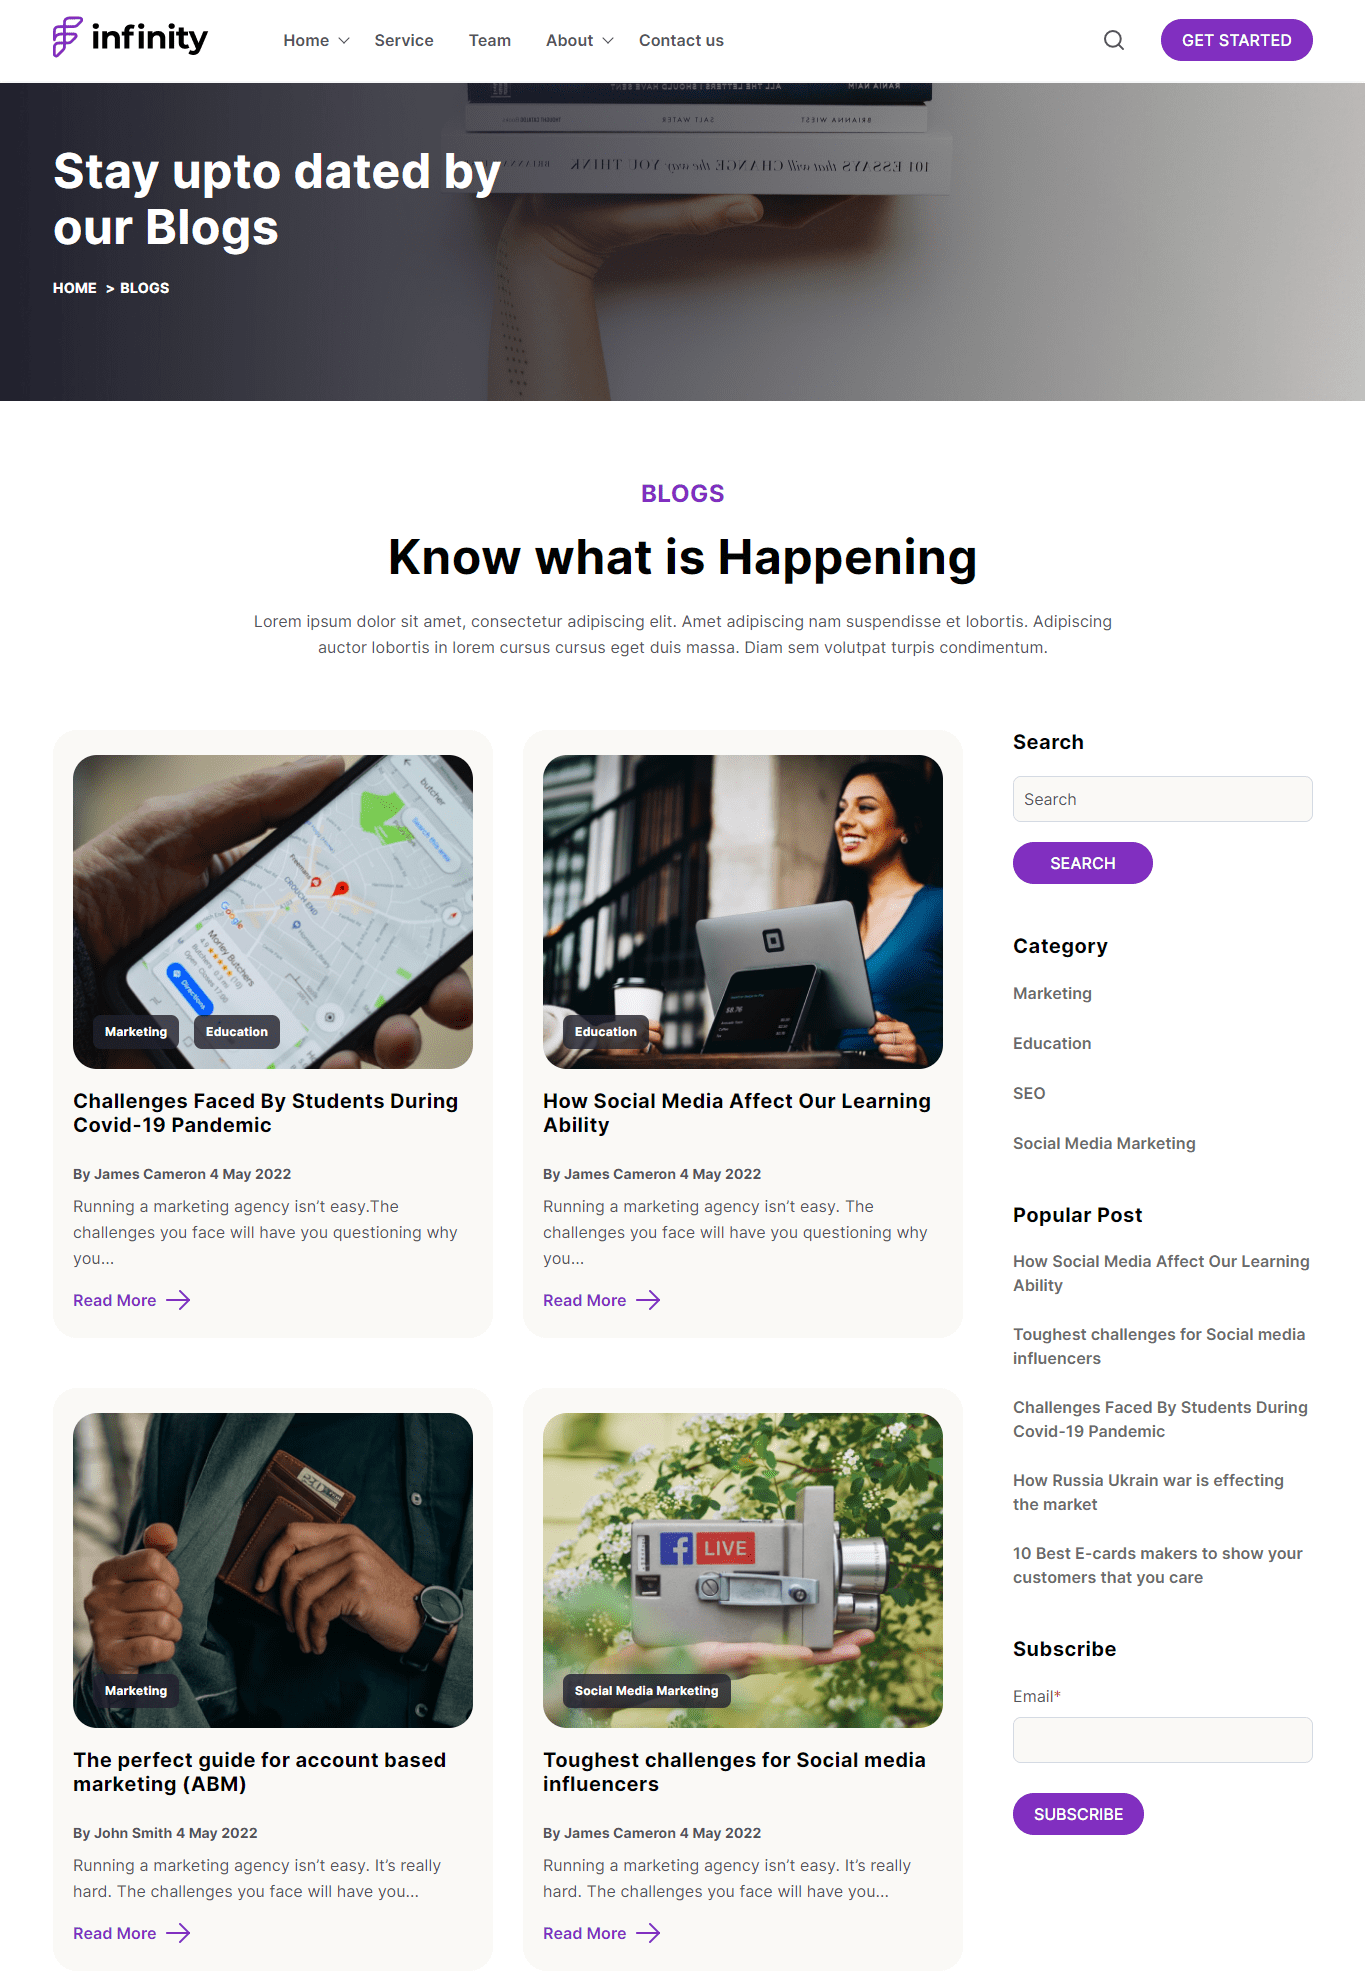
3.20.Blog Grid
The blog grid module helps you to add blogs to your website in a grid format.
You can select all the blogs you want to display and set the button text. Other settings along with style tab include box-shadow, background color, corner radius,
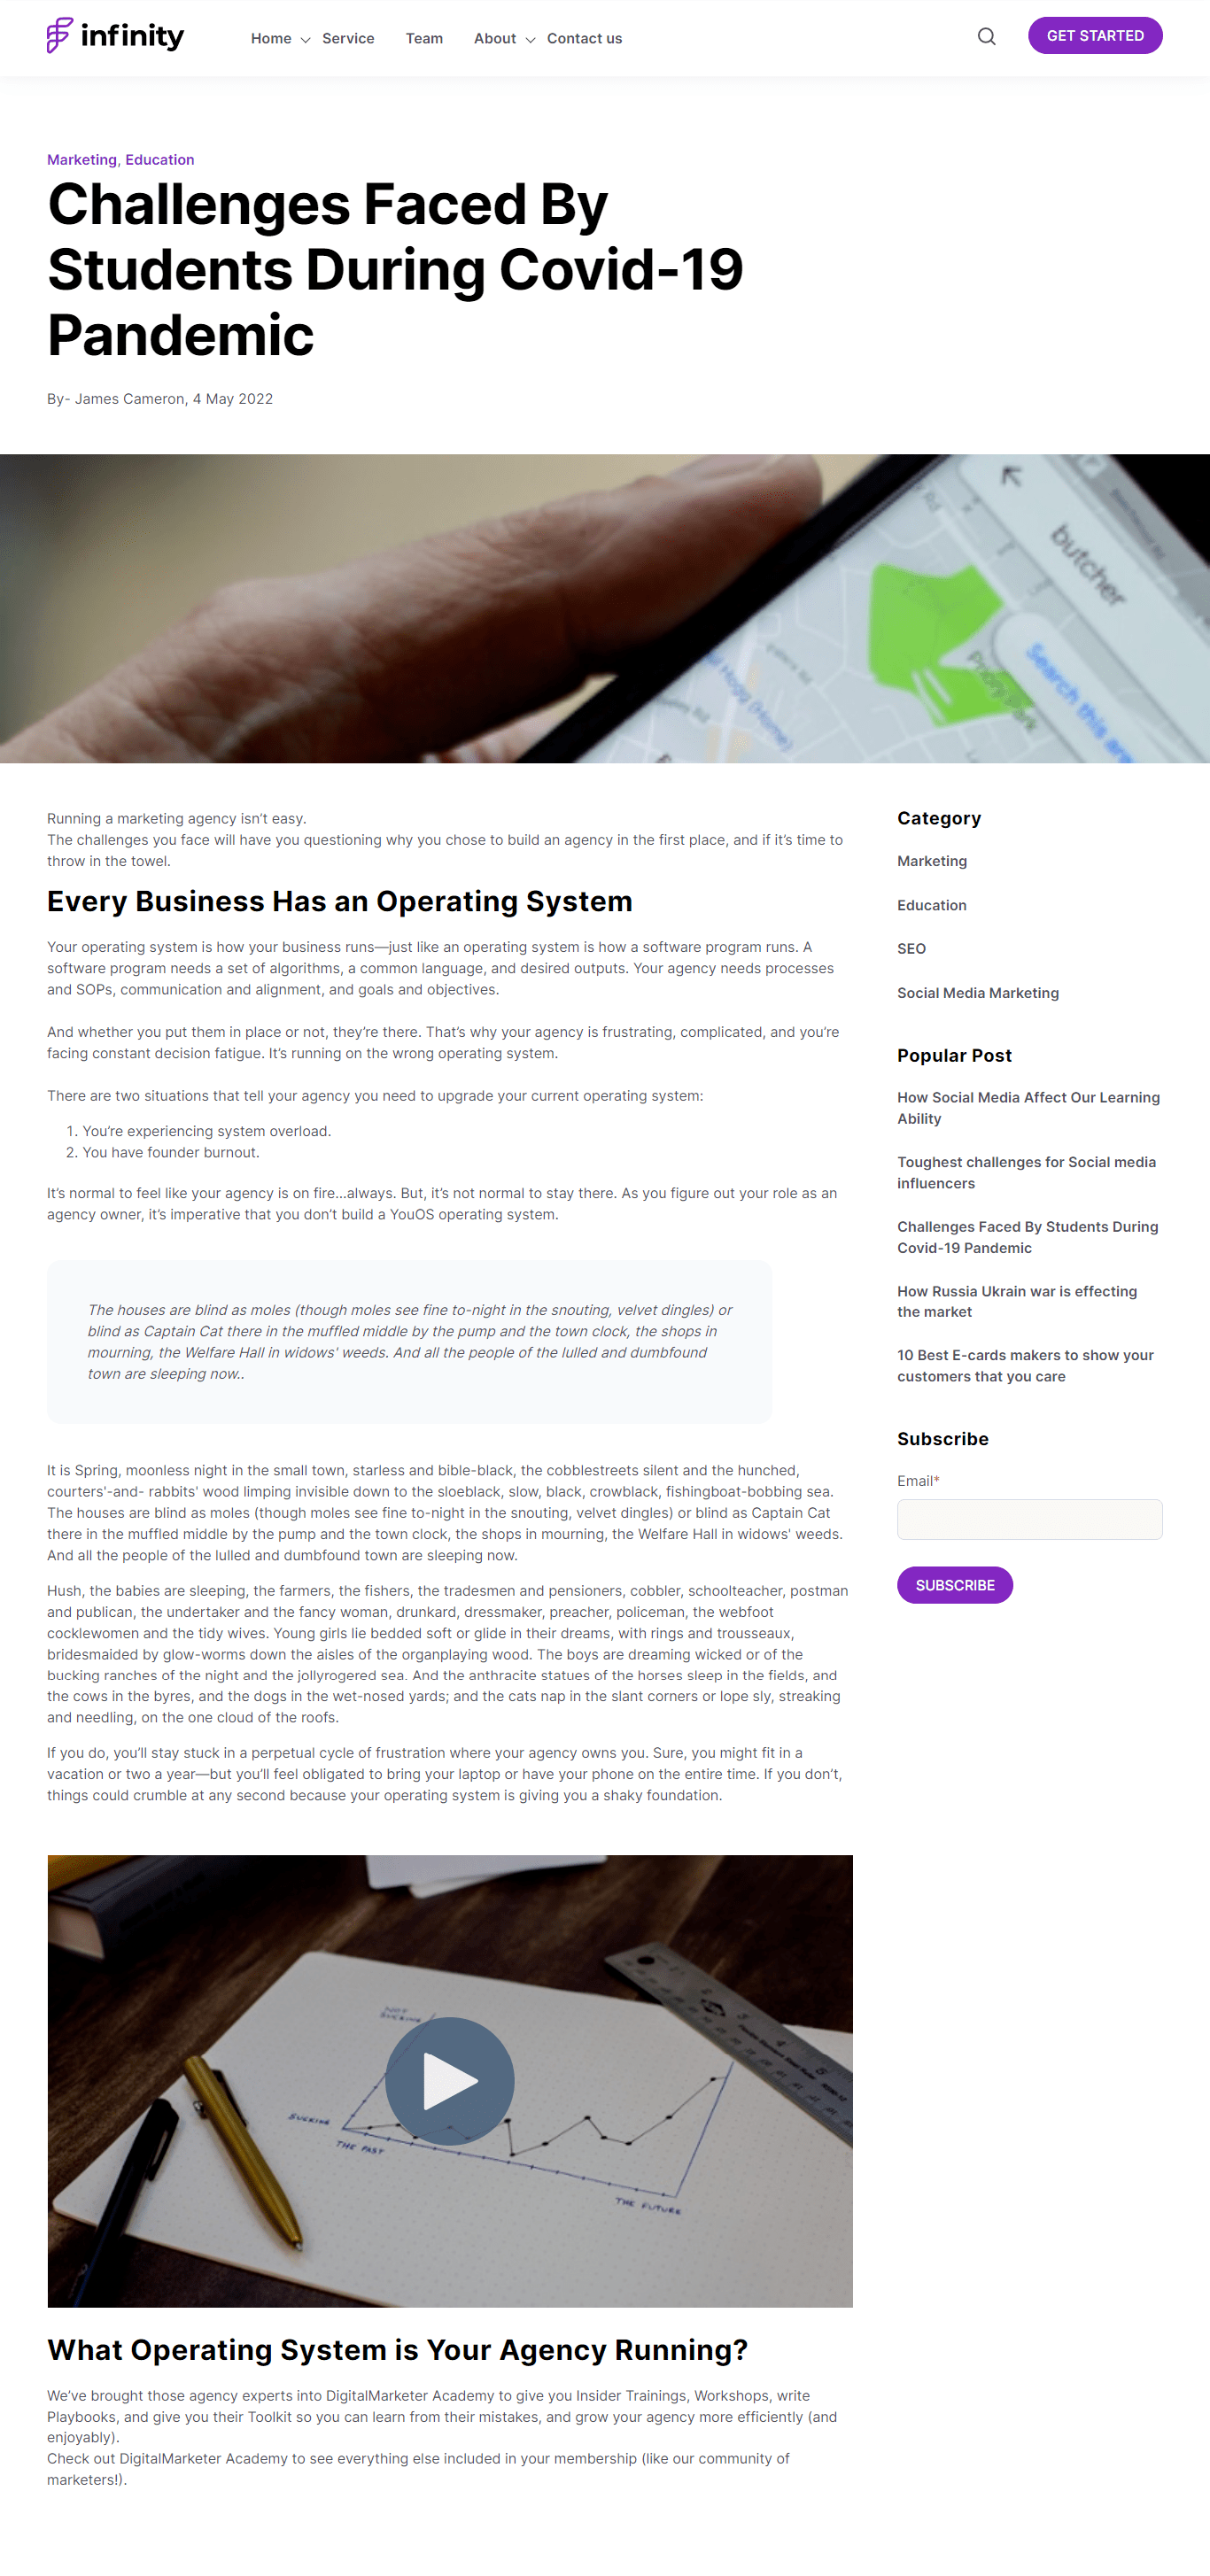
3.21.Blog Listing
For changing blog listings, you have to go to the settings option on your HubSpot portal. Navigate to website > click blog > go to templates. From the current view, select the infinity theme. Now select the blog listing page and click on the edit page to continue editing the existing blog template.

You can set the number of posts per listing page, show summaries on the listing page, and use featured images in listing summaries.

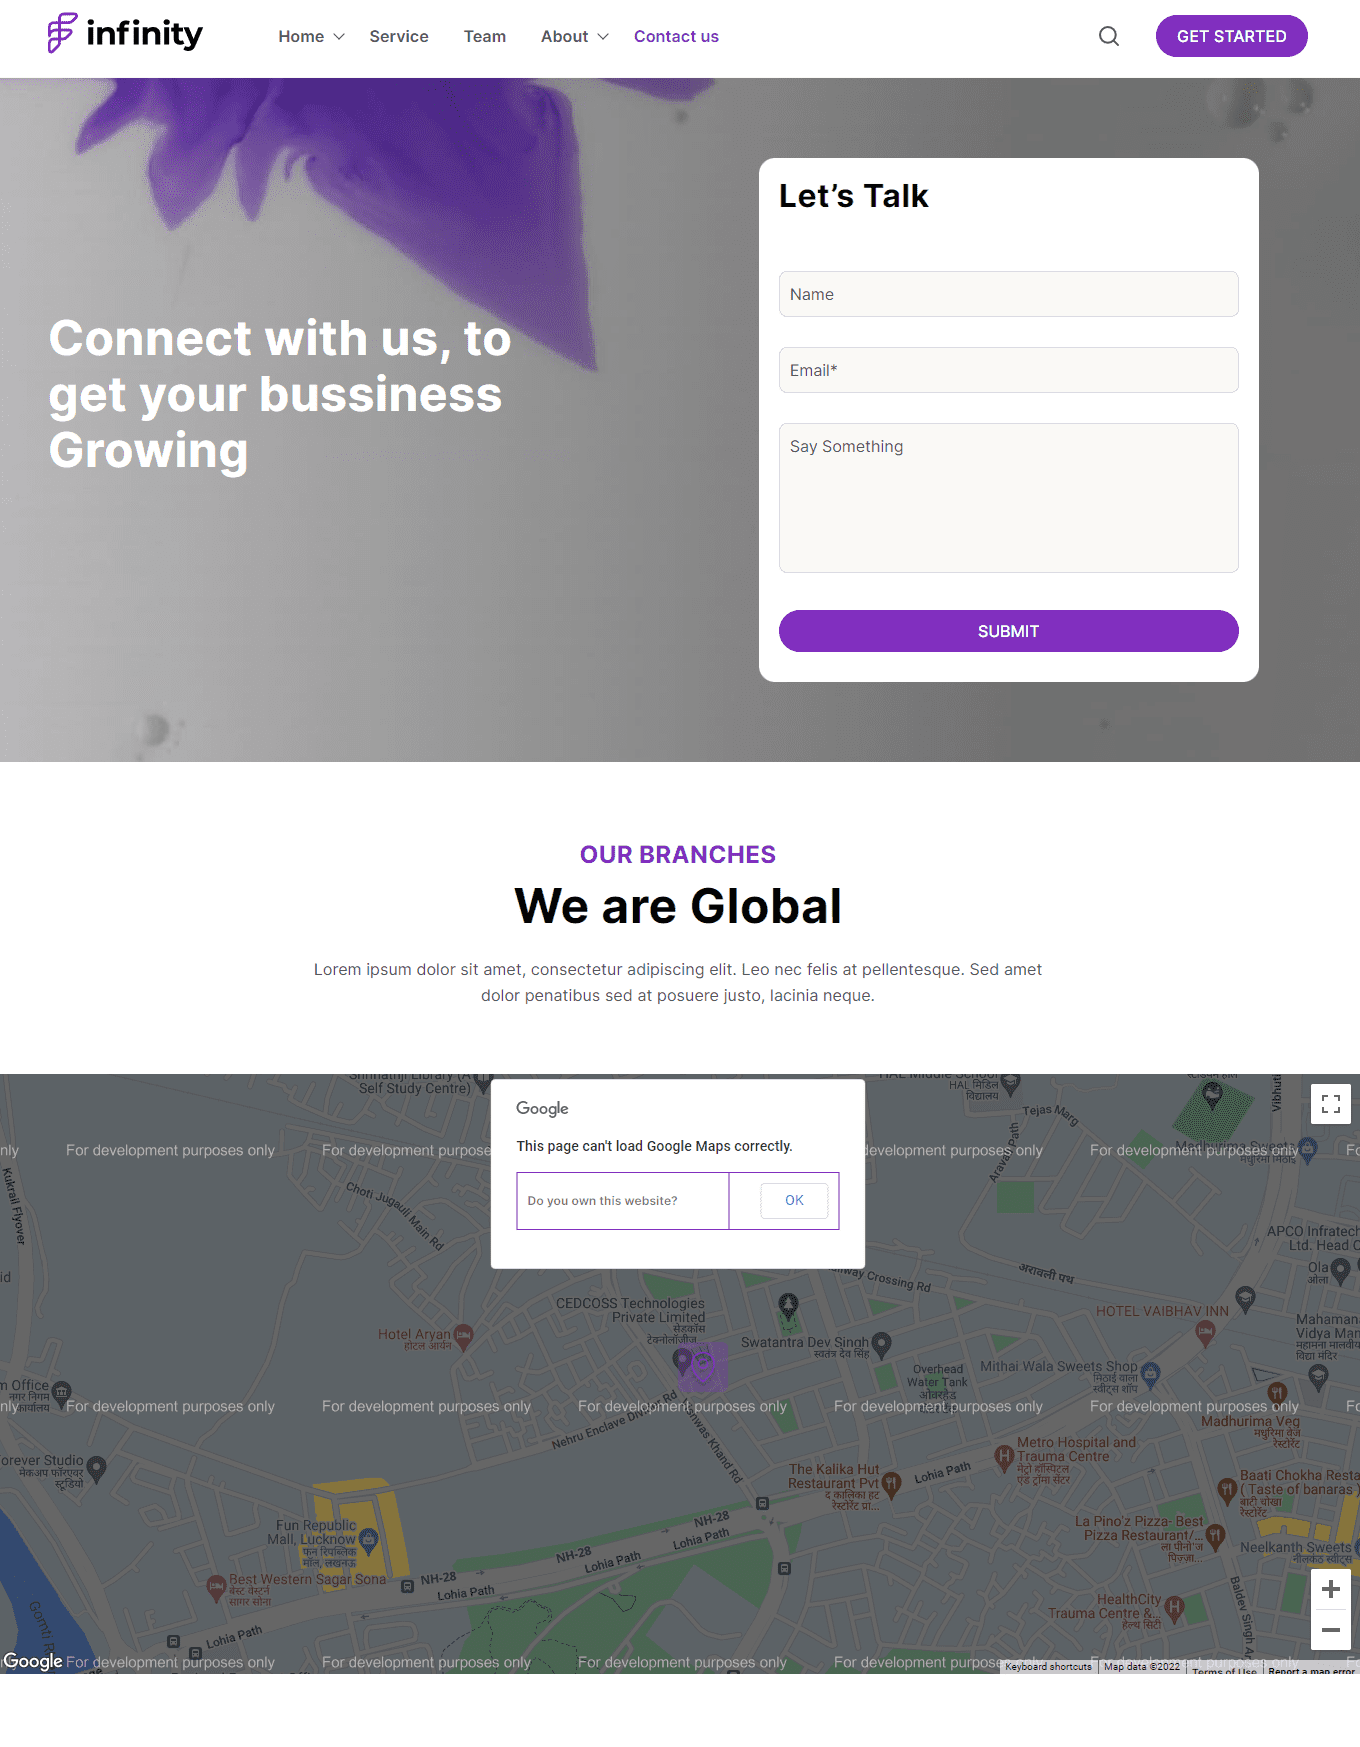
3.22.Map
The map module will add a virtual map to your website. You can
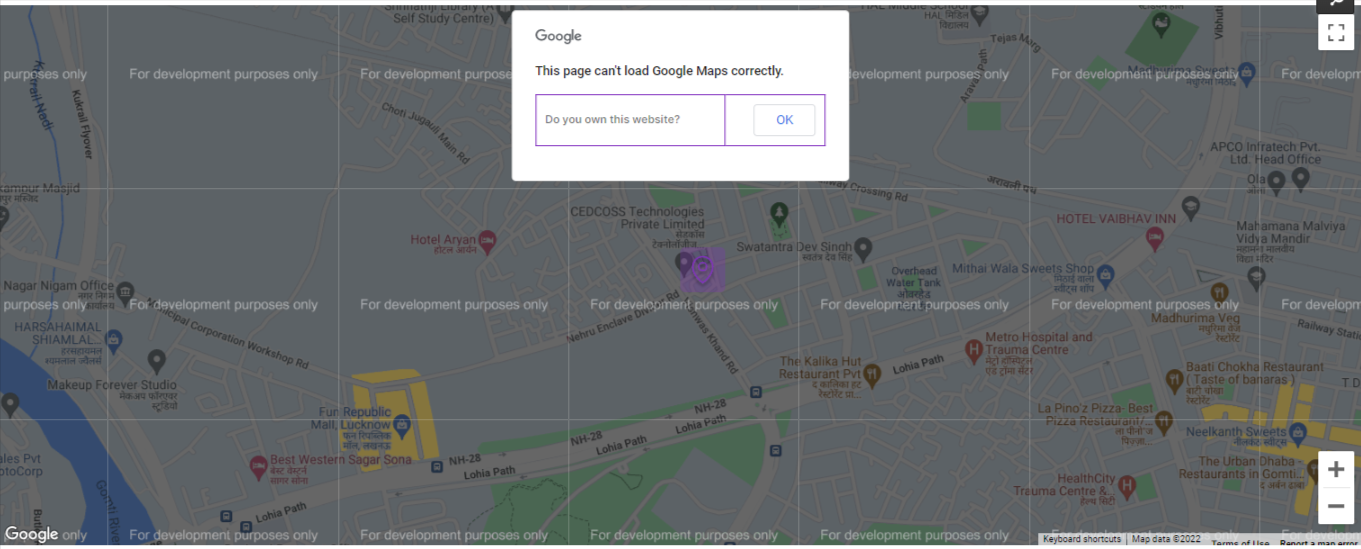
Map module settings include map API, Map JSON, Map zoom level, center latitude, and longitude. From its style tab, you can edit the corners and height of the map.
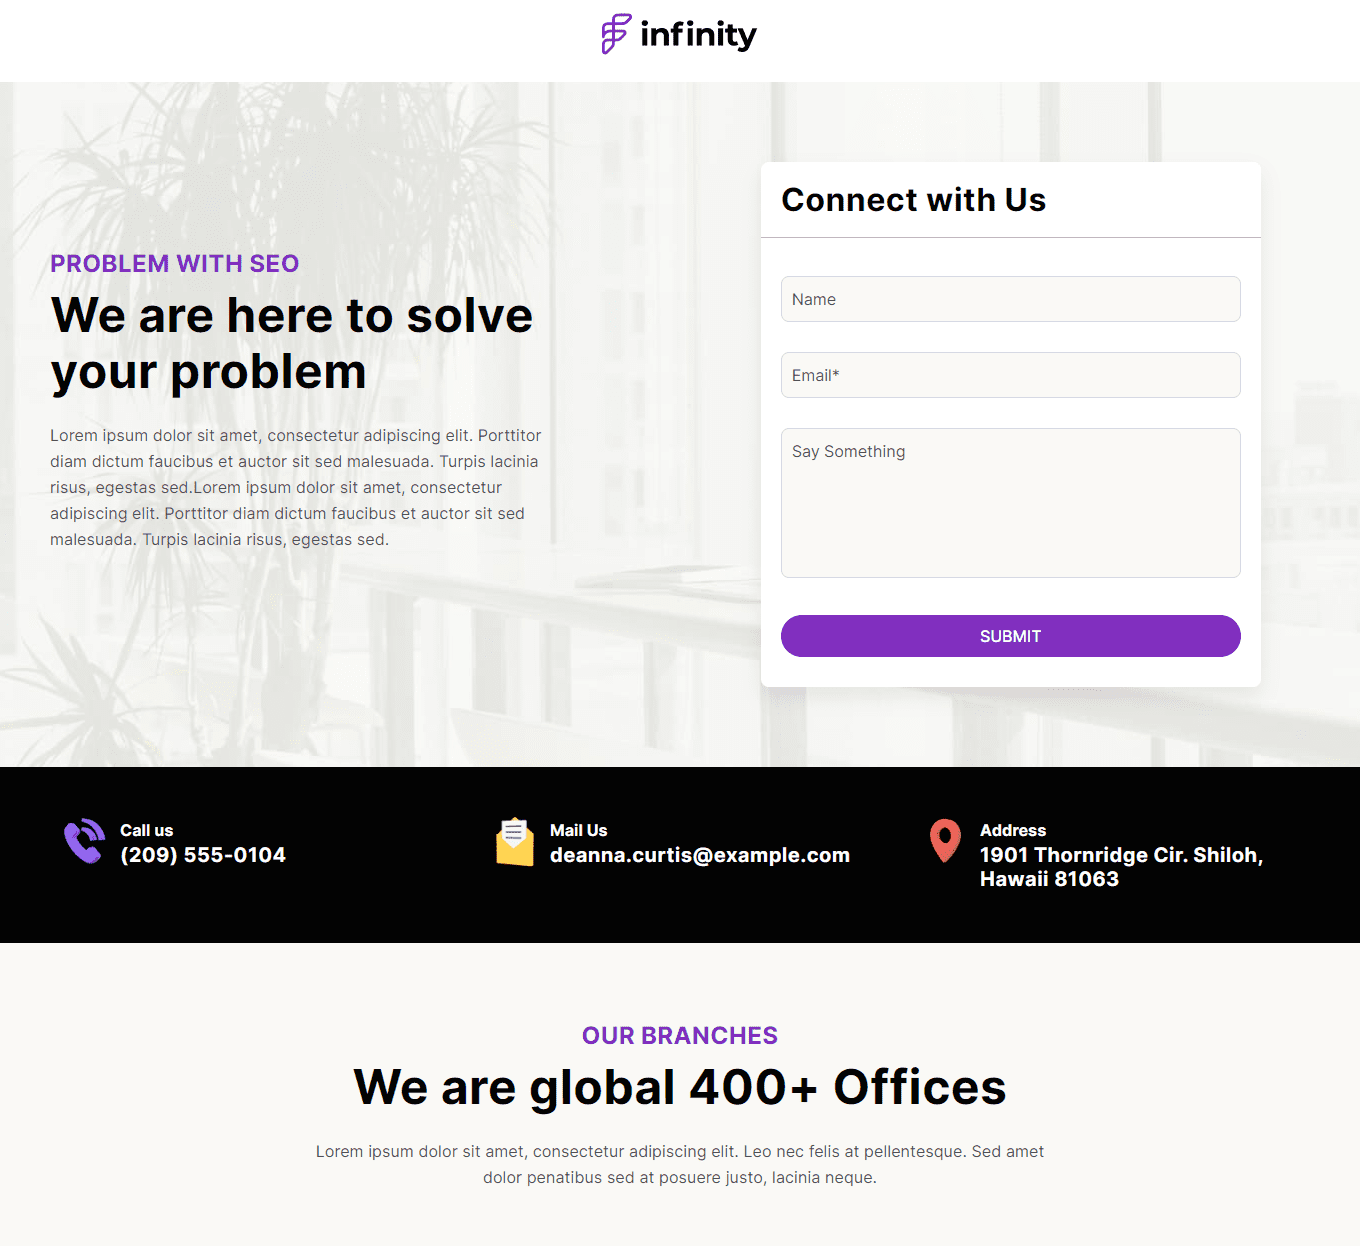
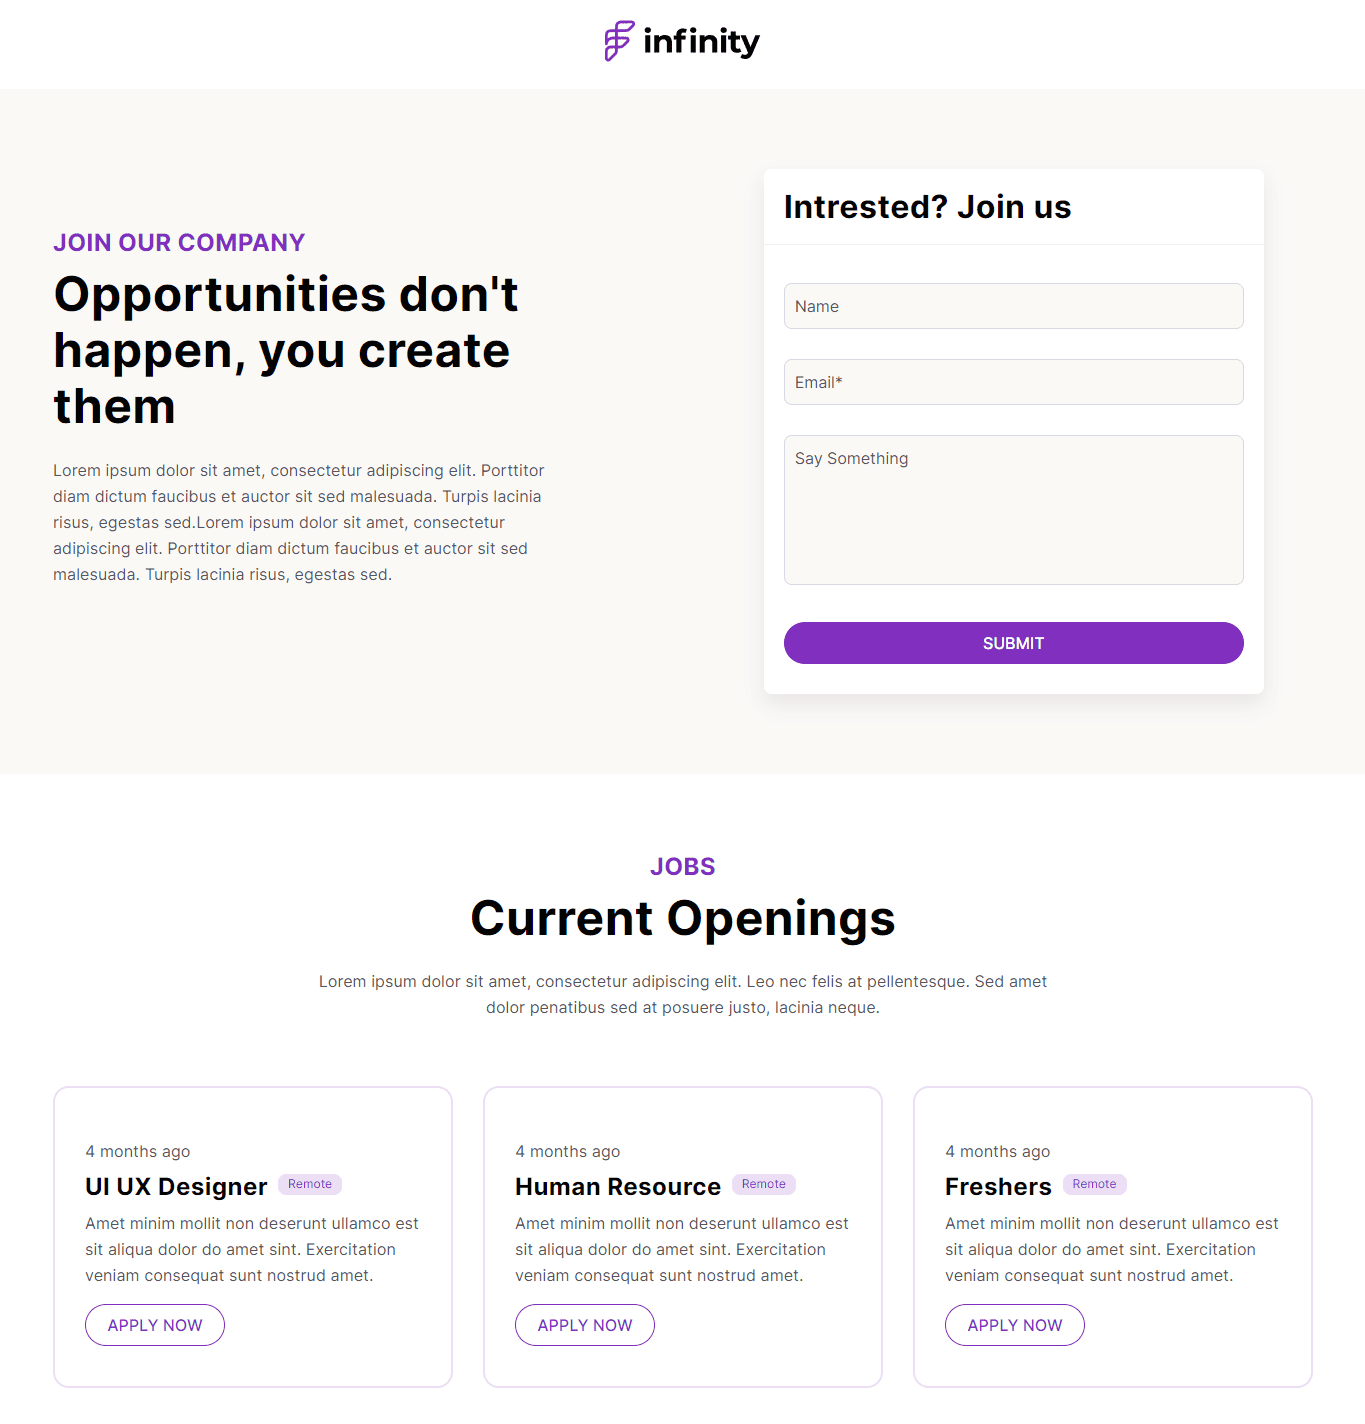
3.23.Custom Form
Add a contact form on your website page using this module. Customize and use any existing form on your HubSpot CMS. You have form layout choices from single field form ( button at bottom or side button) or multiple field forms, enable form box-shadow, set form field title, overwrite button, and enable input field box-shadow. You can select any form or create a new form too.
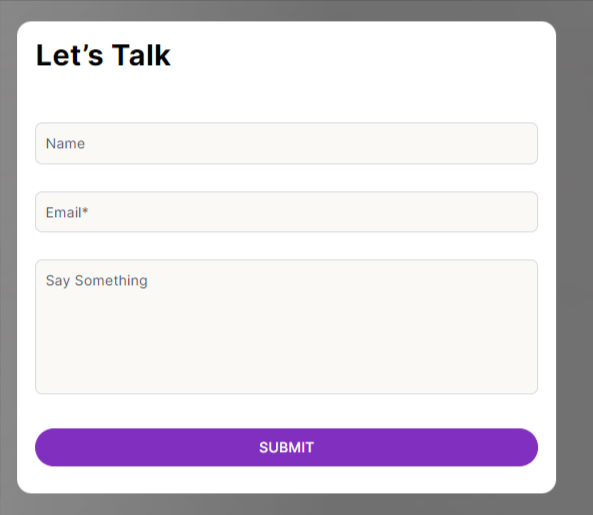
From its style tab, you can edit form title ( color, border-bottom, alignment), enable/disable form background color, enable/disable form max-width, desktop/mobile form spacing, input field background color and border, overwrite radius ( form corers), and enable/disable bottom full width.

3.24.Why Us
The why us module allows you to add the reason for visitors to choose you. You can add multiple icons/image boxes, and enable/disable the arrow.
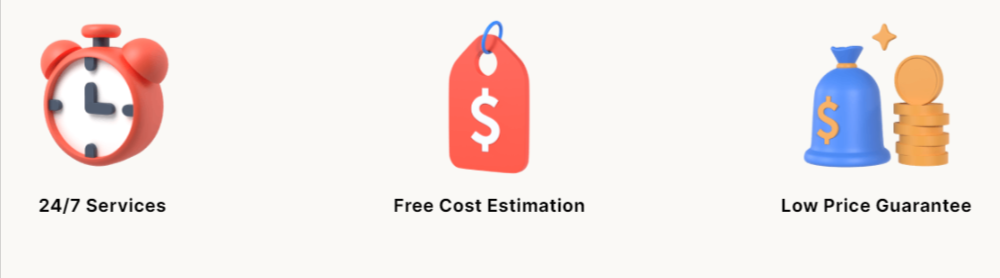
From its style tab, you can edit spacing, set alignment for mobile & desktop, and text color.
3.25.Listing Layouts
The listing layout module enables the display of assorted items in the listing form. By default, all items are listed. But, the initial filter setting will allow users to set the initial filter only for a single category at a time. You have a column count option, layout choice, edit tab content like adding title and button, enable box-shadow, select box shade, etc.
From its style tab, you can change the card, content, and content alignment.
3.26.Logo
Add your company logo anywhere on the page with the logo module. You can enable/disable the custom logo, override the default logo, and set the default logo for all domains. You can also control its visibility from the style tab.
3.27.Spacer
The spacer module adds white space to the website and landing pages. Just search it from the theme module list and drag and drop it to your desired location.
3.28.Gallery
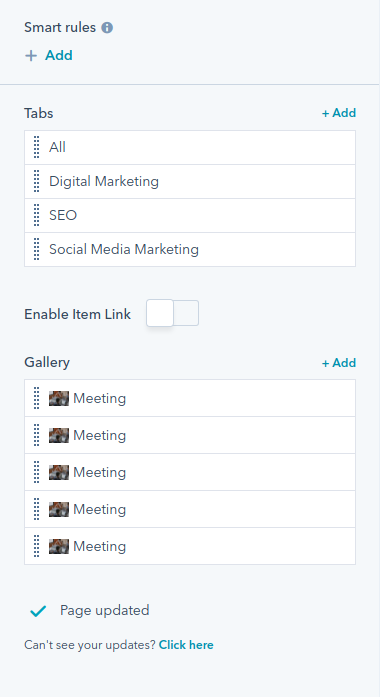
The gallery module allows you to add multiple tabs, enable item links, set tab name, and tab ID and set border-radius according to your requirements. You can also set it as an initial filter. By default, all items are listed. But, the initial filter setting will allow users to set the initial filter only for a single category at a time.

You can add as many tabs you like and alter the image maximum size, image loading, etc. as you wish.
4.Template Library In Infinity Theme
The infinity theme has a list of ready-made templates for your business. Just while creating a new page select one from the template and edit content according to your business and you’re ready to publish.
4.1.Homepage
There are 3 variants of the homepage in the Infinity theme.
- Homepage 1 – Digital Marketing
2. Homepage 2 – Social Media Marketing

3. Homepage 3 – Search Engine Optimization

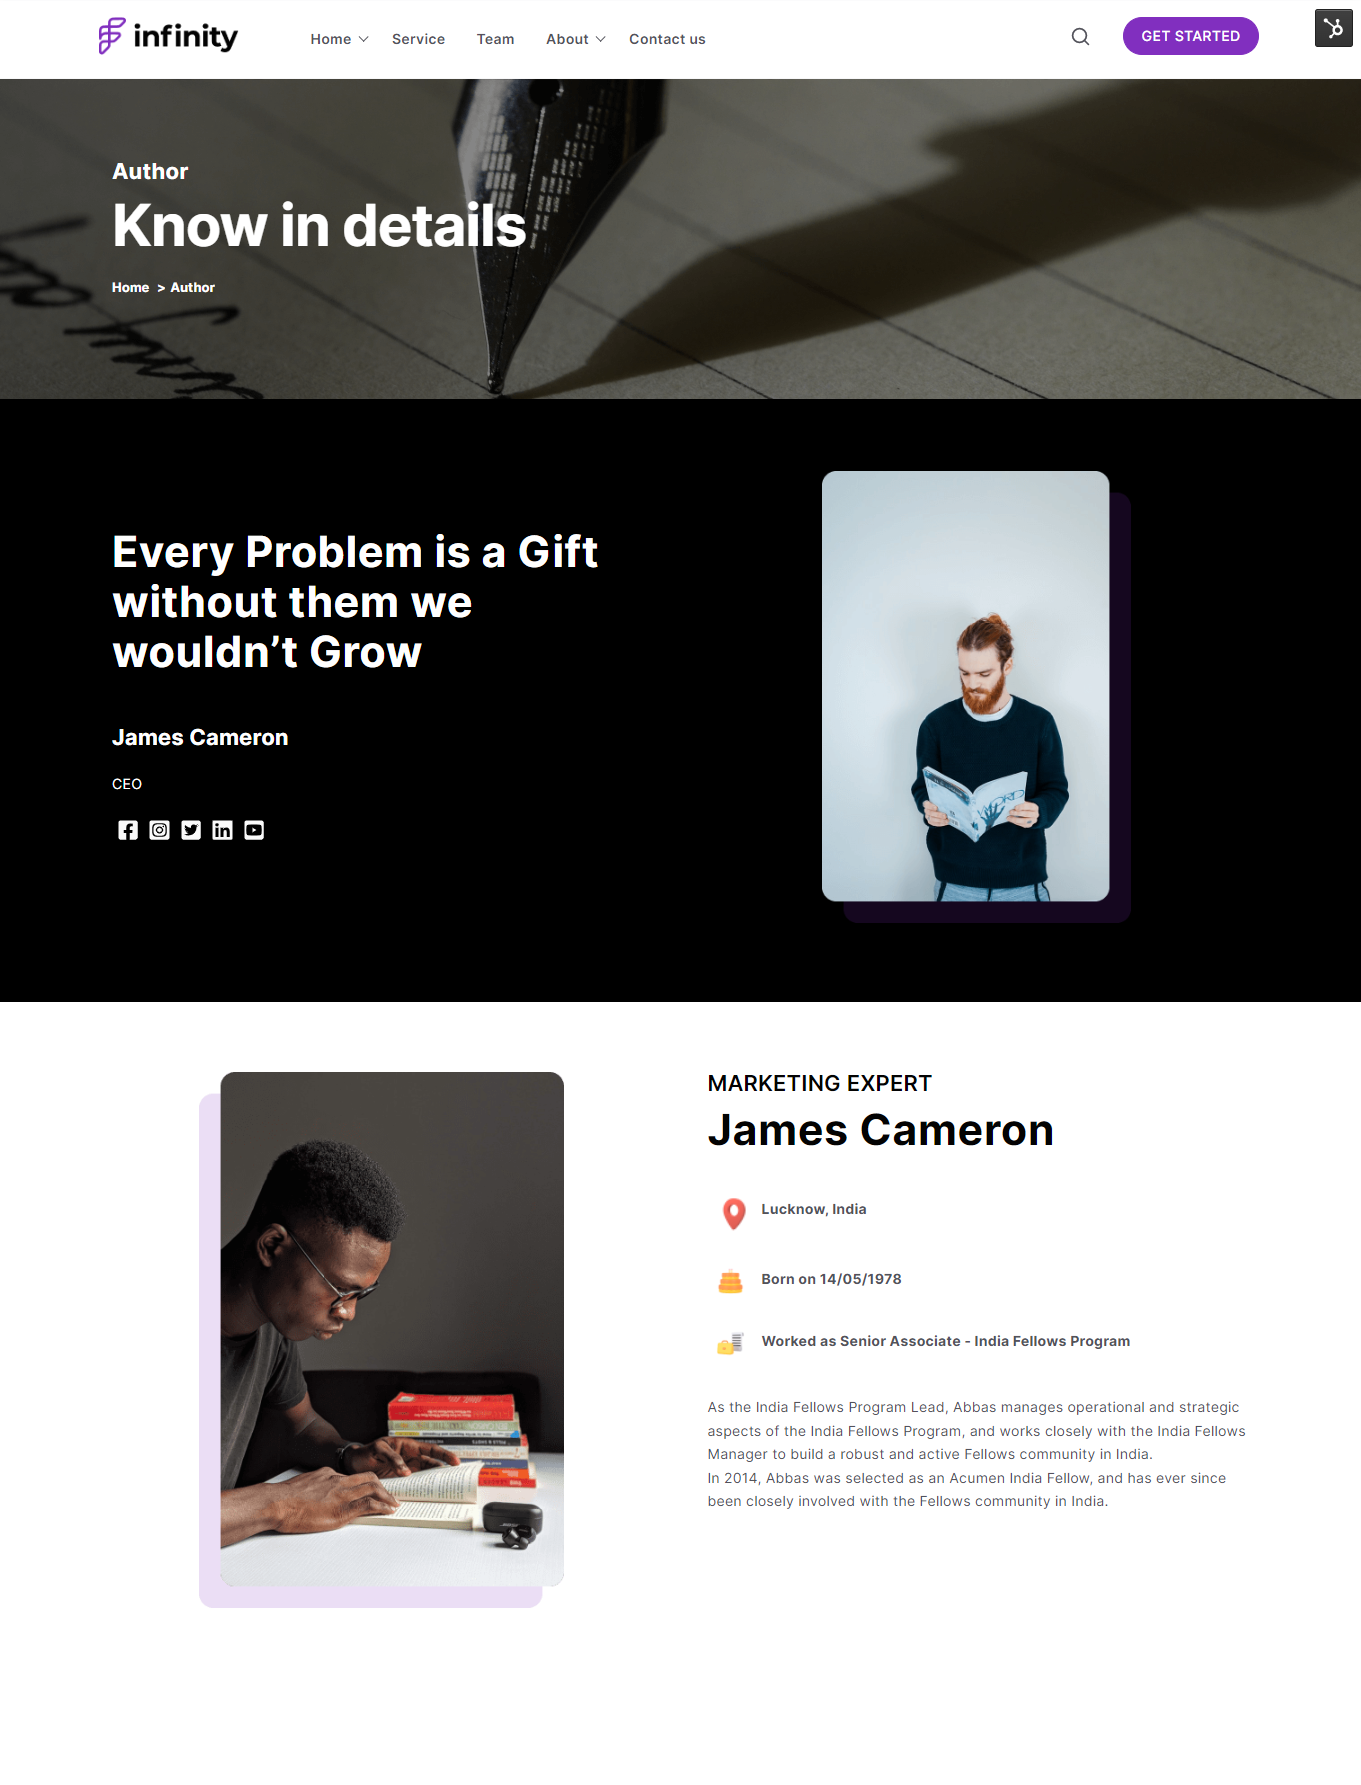
4.2.About Us
- About – Company

- About – Author
4.3.Pricing
4.4.Blog Listing
4.5.Blog Detail
4.6.Services
4.7.Testimonial
4.8.Contact Us
4.9.Teams
4.10.Career
4.11.Event Listing
4.12.Event Detail
4.13.FAQ
4.14.Portfolio

4.15.Product Landing Page
4.16.Career Landing Page
5.System Pages
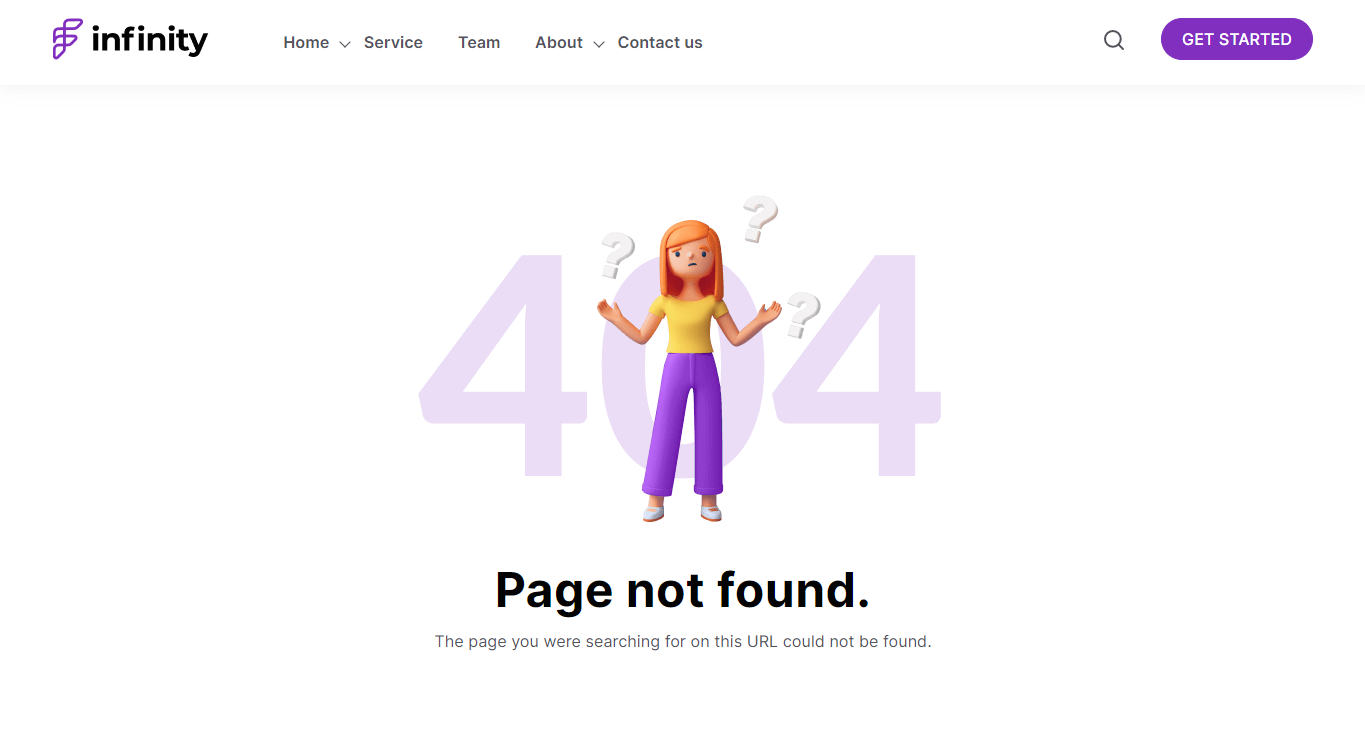
5.1.Error 404
5.2.Error 500

5.3.Email Subscription Confirmation
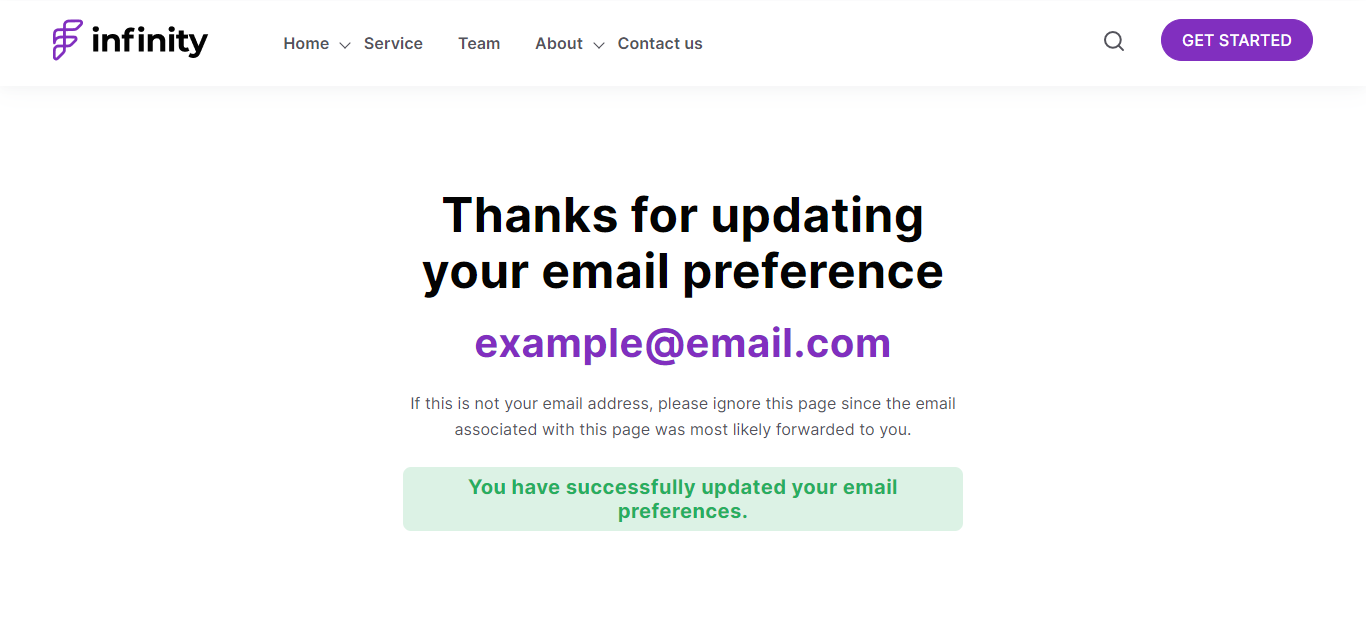
5.4.Email Subscription Preferences
5.5.Email Unsubscribe
5.6.Password Prompt
5.7.Search Results
3.17.Social Follow
The social follow module allows you to add your social platforms like Twitter, Instagram, Facebook, and LinkedIn on your website pages, header, or footer.
You can replace/remove social icons, change icon size and icon color, and add your social links, and icons. From the style tab, you can enable background color, change border radius, and set desktop and mobile alignment.