
1.Overview
- Agentic & AI-Assisted Automation: Build workflows where AI can evaluate context, recommend or execute decisions, and adapt execution paths dynamically—while maintaining human-defined controls.
- MCP-Powered Action Layer: Expose workflows as AI-callable actions, enabling AI-assisted execution of approved automations across connected systems.
- No-Code Workflow Orchestration: Design and manage workflows using a visual builder with support for advanced logic, approvals, routing, and data transformations.
- Native HubSpot Logic: Use deep HubSpot triggers and actions to build CRM-centric automations that stay aligned within HubSpot’s data model.
- 400+ App Connectors and Growing: Connect HubSpot with a wide range of business applications using prebuilt integrations.
- Enterprise-Ready Reliability: Secure credential handling, execution logs, retries, auditability, and role-based access controls for production-grade automation.
1.1.Key Terminology
Before you begin going through the documentation, here’s a brief explanation of the key terms that you will come across. This is to help you understand the usage of our app as clearly as possible.
- Workflow: A workflow is a sequence of steps that automate a process across one or more apps.
- Trigger: A trigger is the event that starts a workflow, such as a new record being created or a scheduled time being reached.
- Action: An action is a task performed by the workflow after it starts, such as updating a record, sending a message, or creating a task.
- Connector: A connector represents an app or platform (like HubSpot or Slack) that can be used in workflows. Connectors make triggers and actions available.
- Connection: A connection is an authenticated link between MakeWebBetter Connect and an external app, allowing workflows and AI to access that app securely.
- Run: A run is a single instance of a workflow being executed. Each time a workflow runs, it creates one run. Agentic AI: Agentic AI refers to AI that can evaluate context, make decisions, and execute actions dynamically instead of following fixed rules.
- MCP (Model Context Protocol): MCP is a system that allows AI to safely execute real actions across connected tools within defined permissions.
- MCP Server: An MCP Server defines what tools and actions AI is allowed to access and use during execution.
- Todo: A todo is a task created by a workflow that requires human intervention, such as review or approval, before automation continues.
2.Set Up MakeWebBetter Connect

You can sign up in just a few simple steps.
- Choose how to sign up: You can either continue with your Google account or sign up using your email.
- Fill in your details: Enter your first name, last name, and email address, then create a secure password.
- Create your account: Click the Sign Up button to get started.
- Verify your email: Check your inbox and click the verification link that is sent to you.
Once your email is verified, you’ll be automatically redirected to the Home page onboarding screen, where you can explore the platform and learn how everything works.
3.Dashboard
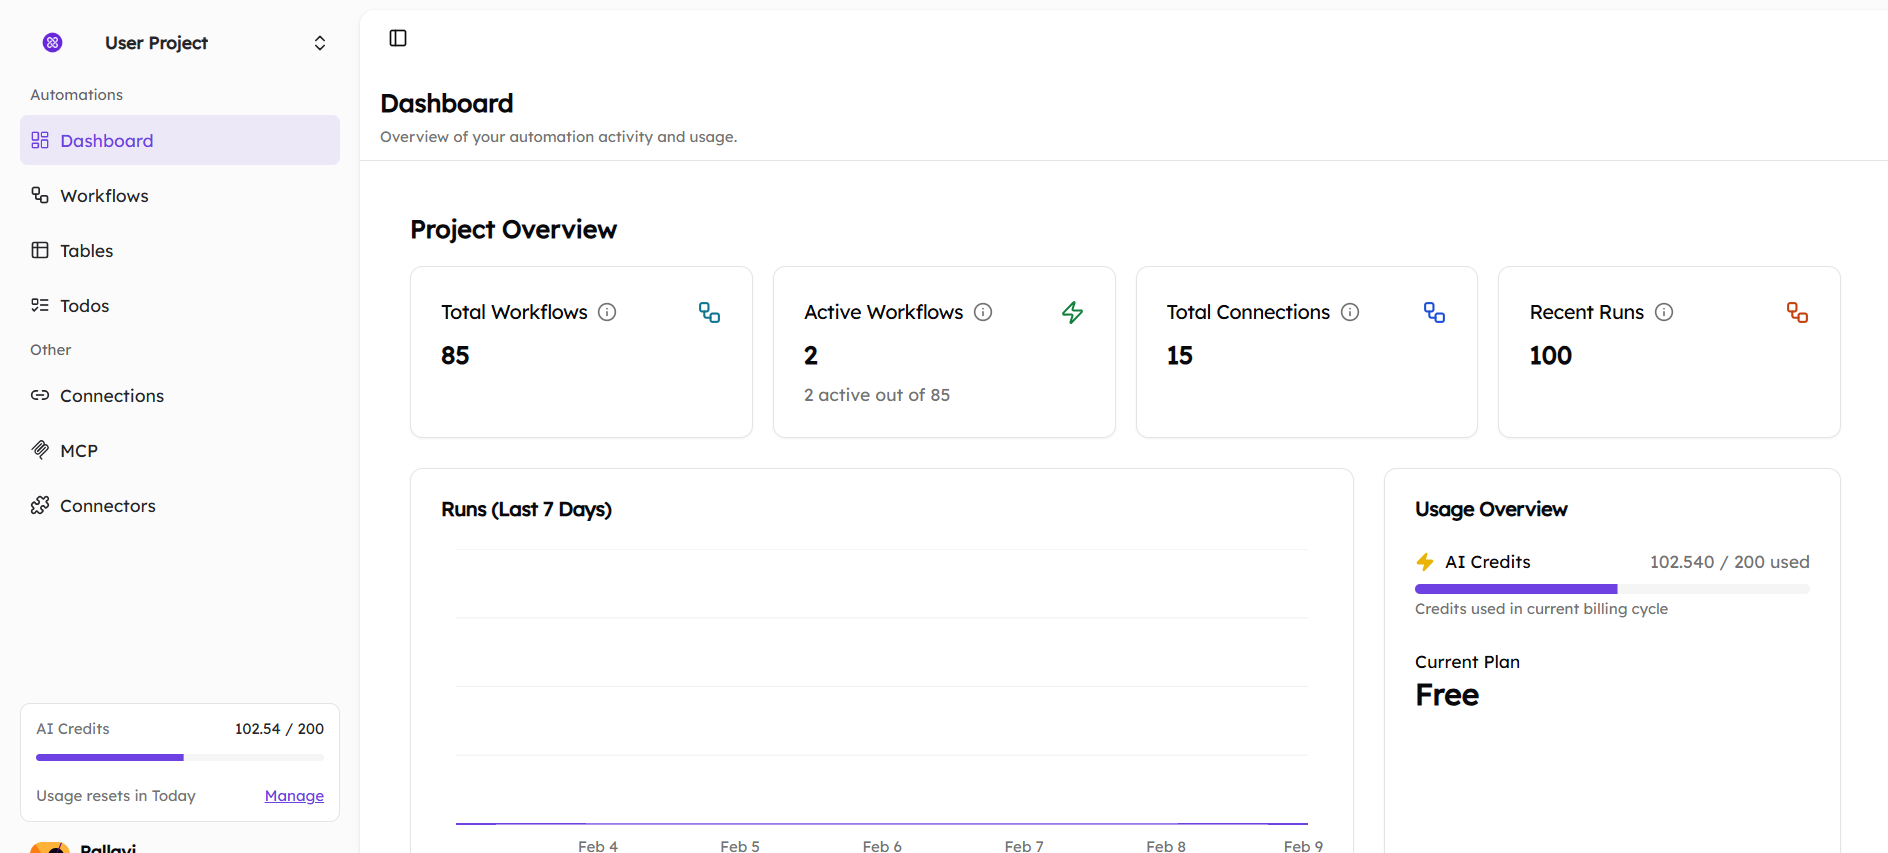
The Dashboard in MakeWebBetter Connect provides a quick overview of your project’s automation activity and usage. It helps you understand what’s running, how your workflows are performing, and how your resources are being used, all from one place.
At the top of the dashboard, you’ll see a summary of key metrics:
- Total Workflows: Total number of workflows created in the project
- Active Workflows: Number of workflows currently running
- Total Connections: Number of apps connected to the project
- Recent Runs: Total workflow executions over a recent period

Runs (Last 7 Days)
This section shows a visual chart of workflow executions over the past 7 days. It helps you:
- Track automation activity over time
- Identify spikes or drops in workflow runs
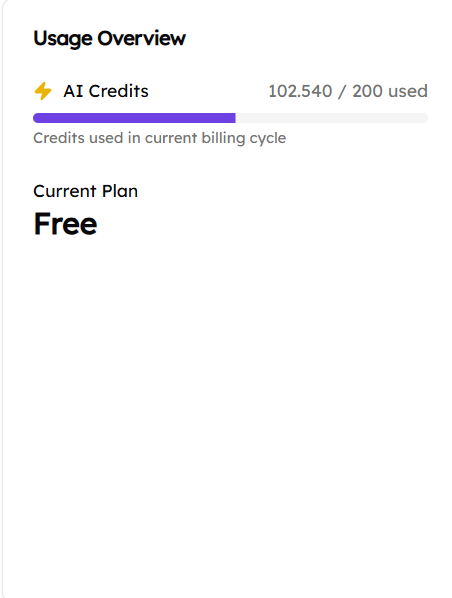
Usage Overview
The Usage Overview section displays:
- AI Credits used in the current billing cycle
- Your current plan
This helps you monitor resource usage and stay aware of plan limits.
4.Workflows
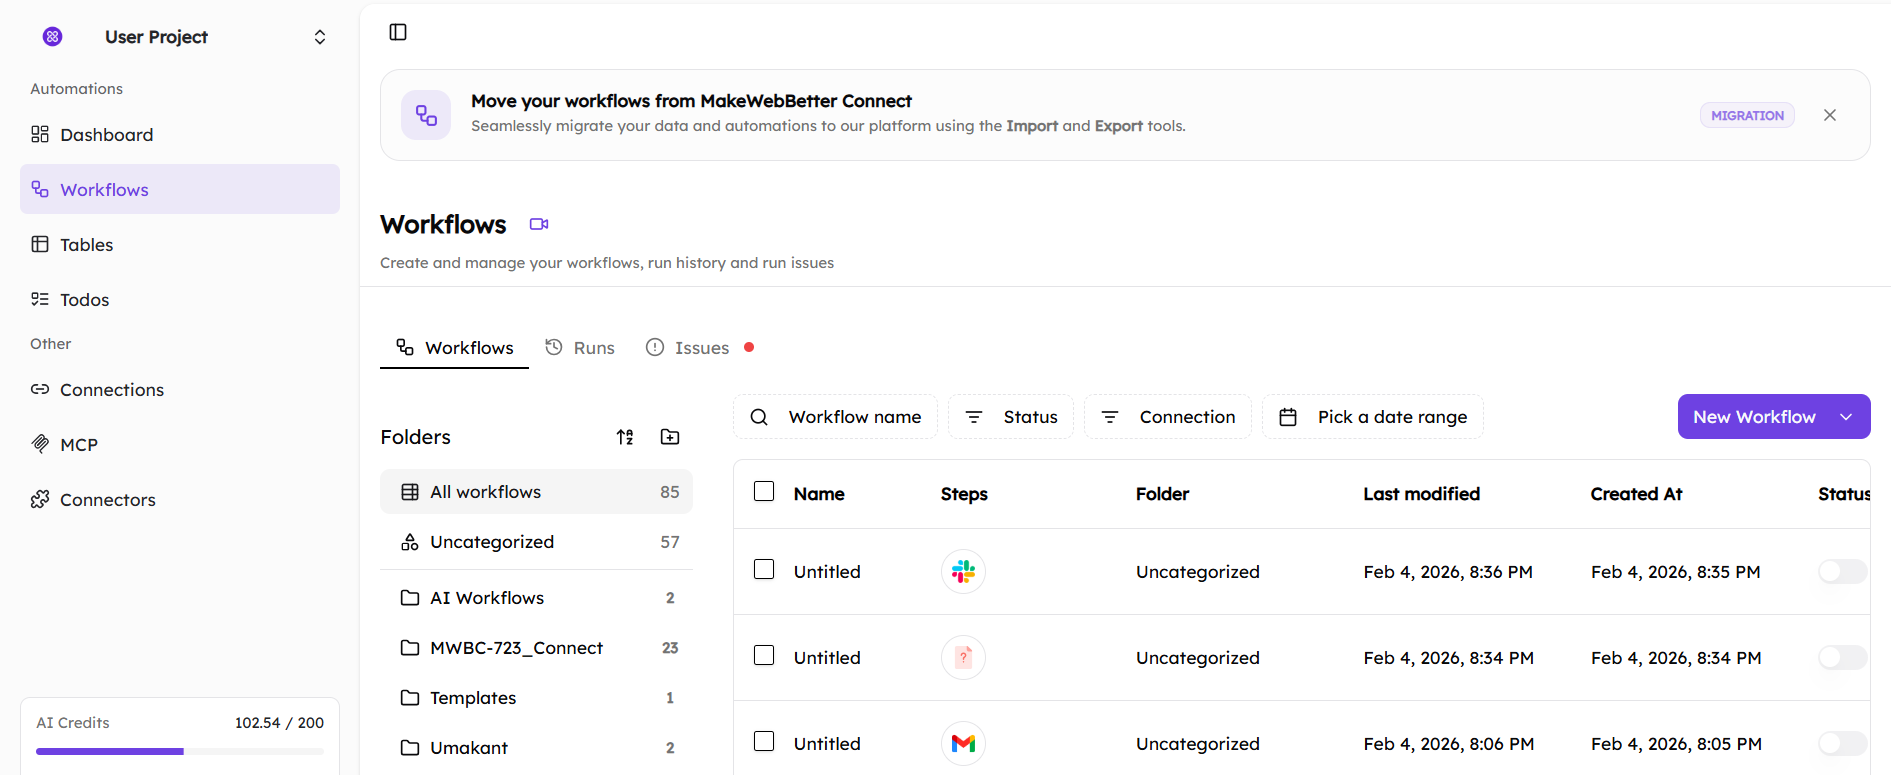
MakeWebBetter Connect allows users to create workflows by connecting apps and platforms using multiple authentication mechanisms when configuring triggers and actions.
Workflows are created using a no-code visual workflow builder, which supports both building workflows from scratch and using prebuilt workflow templates. These workflows enable centralized app integration and automated data synchronization across multiple platforms.
The platform includes free, ready-made workflow templates designed to connect commonly used applications without writing code. Additional templates are unlocked automatically as app connectors are configured, allowing users to activate automation between connected apps with minimal setup.
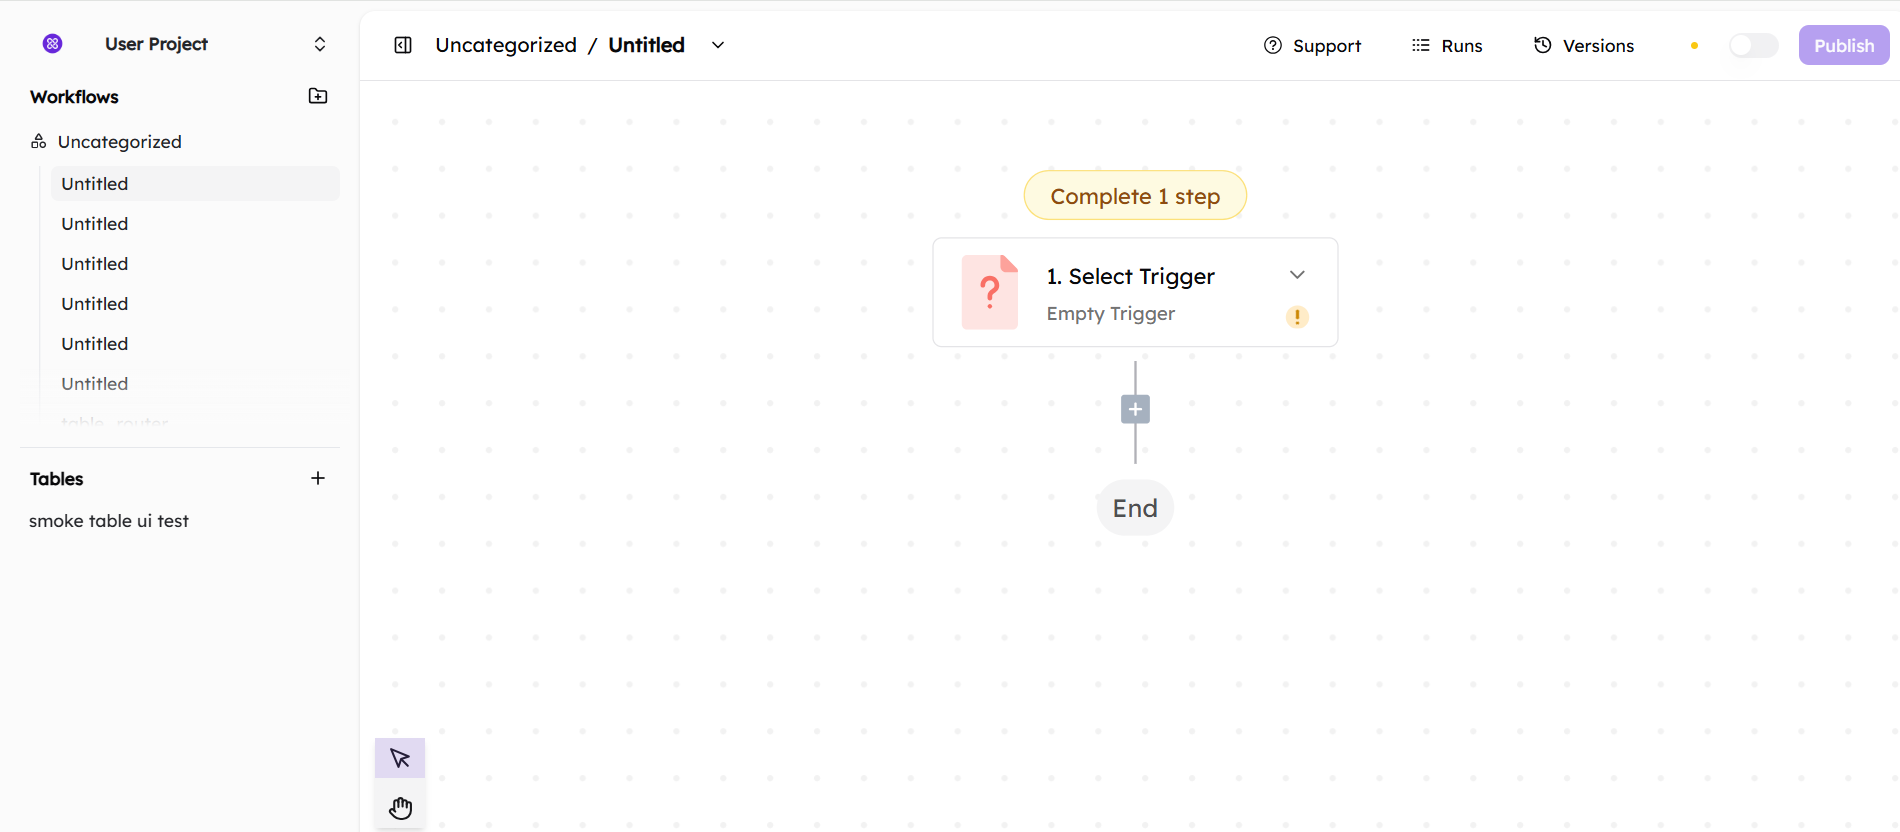
To create a workflow:
- Navigate to Workflows from the left-side navigation menu to view the workflow list.
- Click New Workflow to build a workflow from scratch or select a template.
- Select a workflow to open it in the workflow editor, where it can be configured or updated.
Each workflow includes management options accessible via the ellipsis (three-dot) menu, allowing users to:
- Move workflows to folders
- Duplicate workflows
- Export workflows
- Delete workflows
This structure ensures workflows are easy to create, manage, and scale as automation needs grow.
4.1.Create New Workflow
If you do not want to import an existing workflow file, MakeWebBetter Connect gives you the option to create a new workflow. This can be done via two methods:
- By creating a new workflow from scratch
- By using a pre-built workflow template
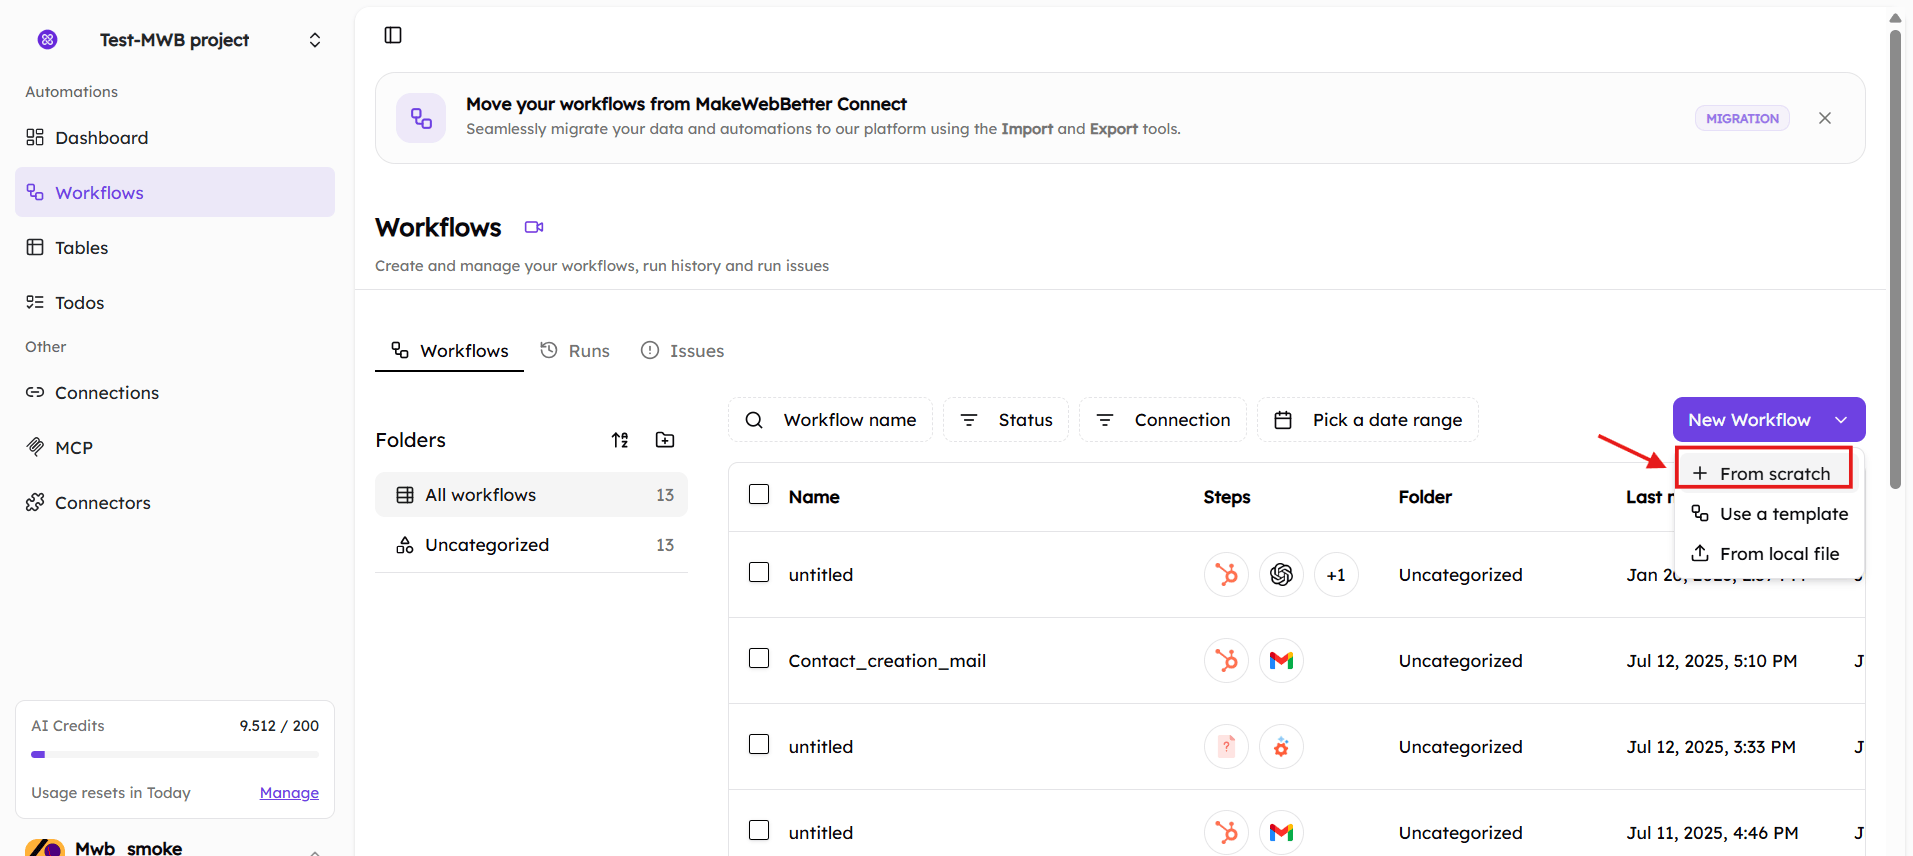
4.1.1.Create New Workflow from Scratch
To build a new workflow from scratch in MakeWebBetter Connect, you’ll have to click on the ‘New Workflow’ dropdown on the right again and choose the ‘From Scratch’ option.
Now, building a workflow from scratch in MakeWebBetter Connect gives you complete control over triggers, actions, and AI-driven decision logic across connected platforms.
Here’s a step-by-step guide on how to create a workflow from scratch in MakeWebBetter Connect 2.0:
Step 1: Go to Dashboard → Workflows → Create Workflow, then choose Create from Scratch.
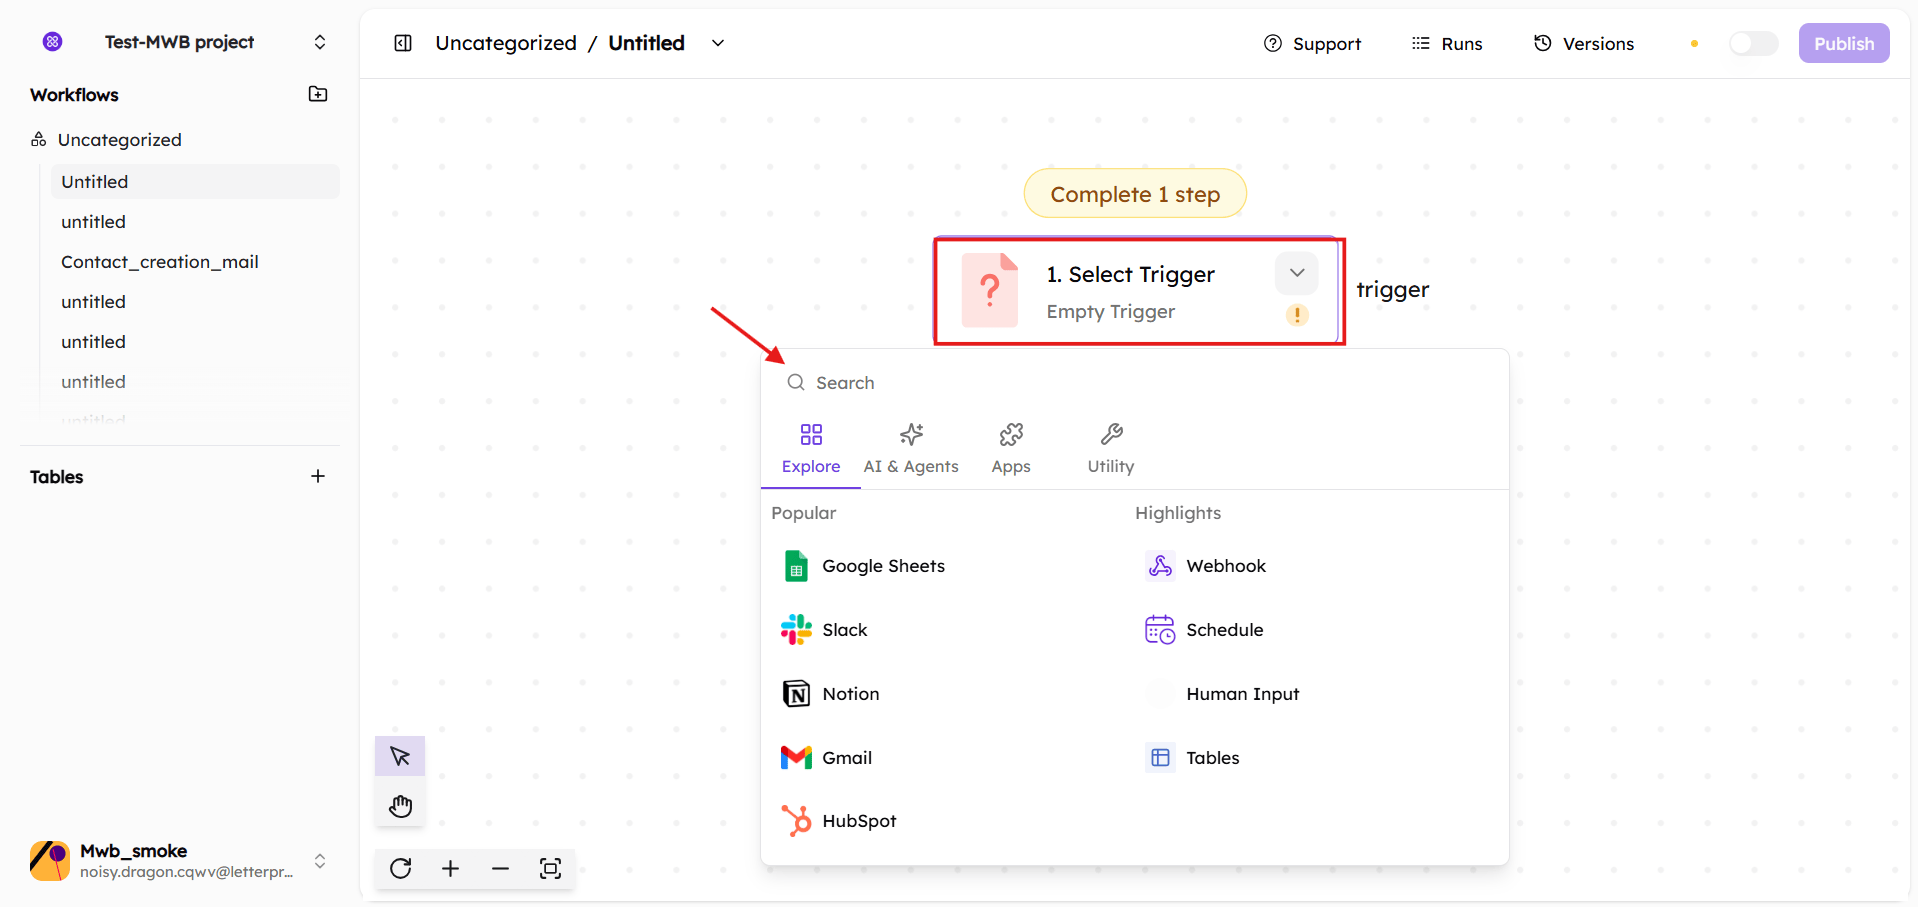
Step 2: Add Trigger
- Choose a Trigger based on your requirement.
- Create or select a Connection.
- Map all required trigger fields.
- Save the configuration.
Step 3: Add Action
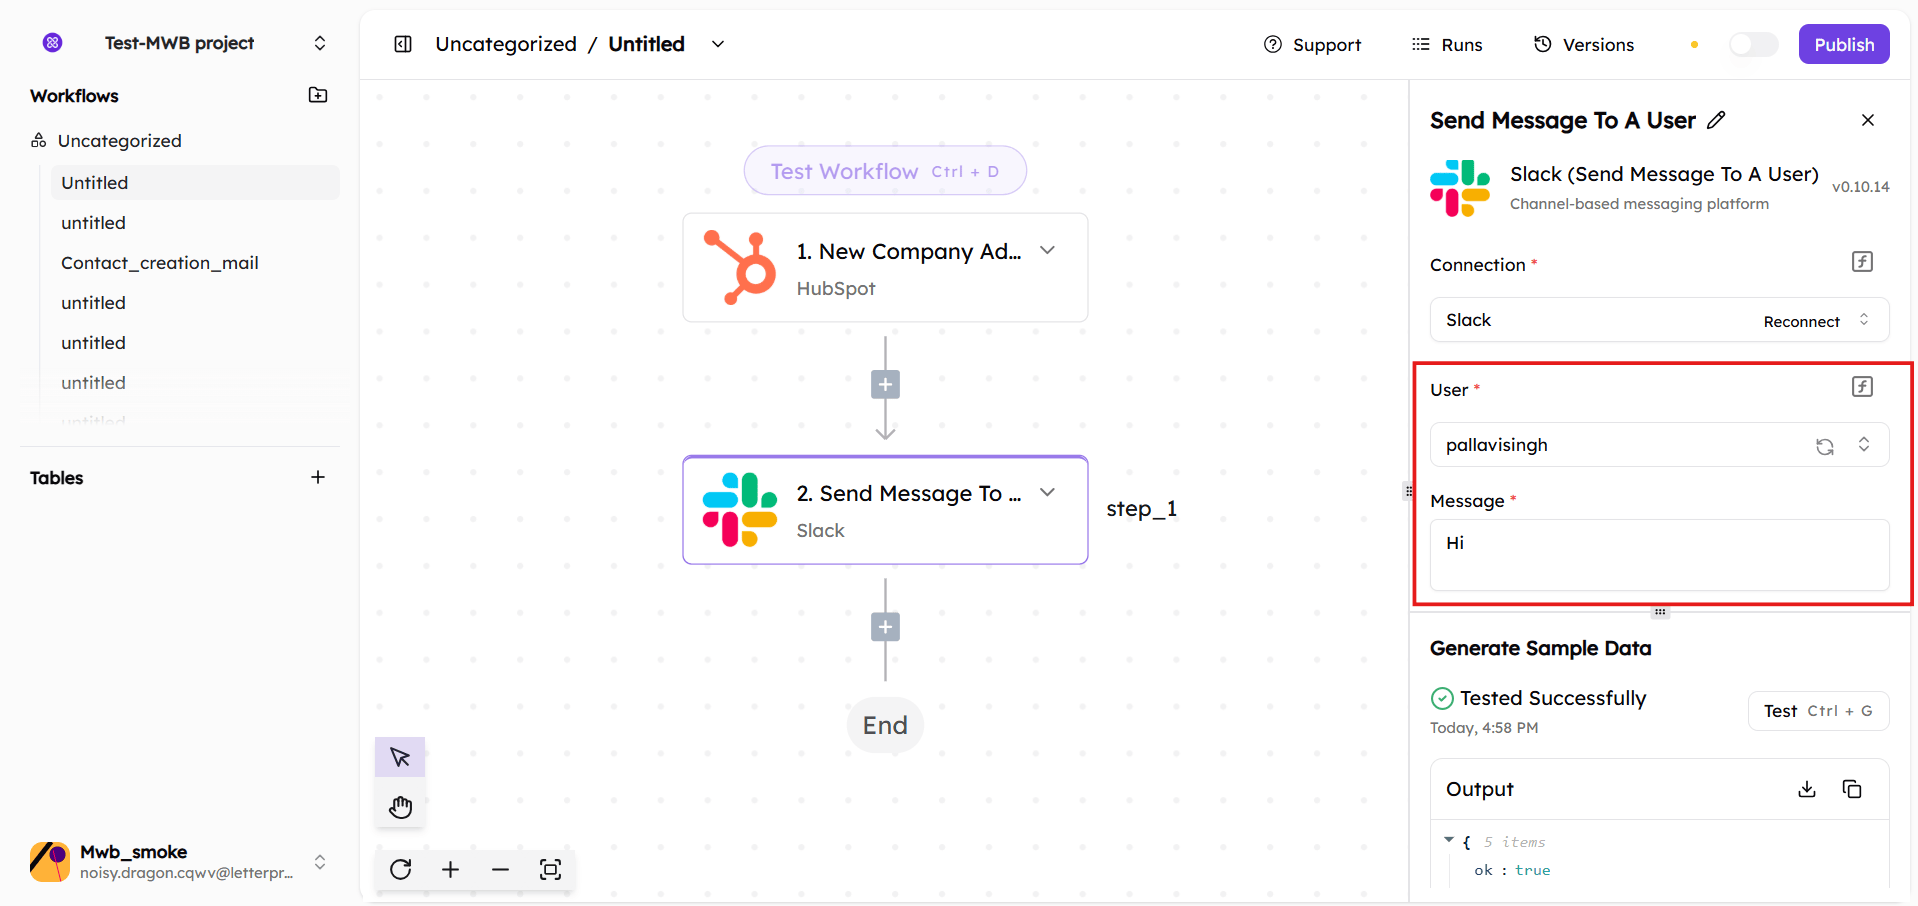
- Click Add Action.
- Select the action as per the requirement.
- Create or select the required Connection.
- Map all required fields for the action step.
Step 4: Test the Workflow
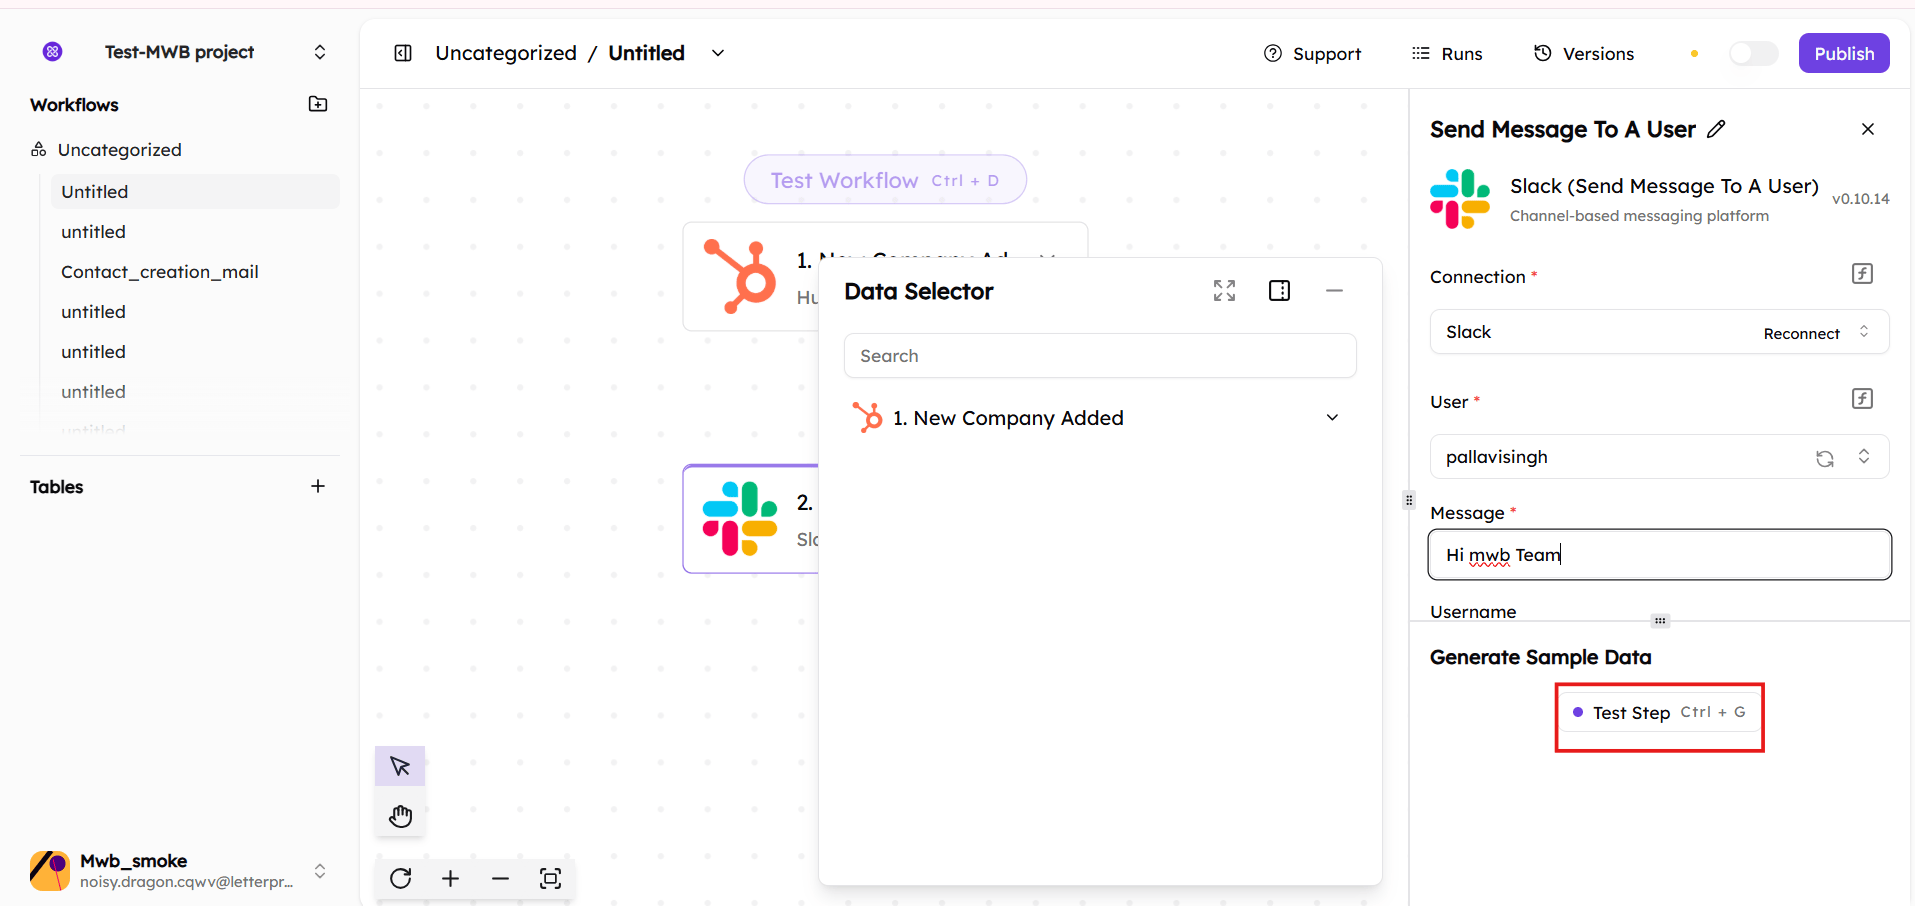
Run Test Step.
- If it fails, fix mappings or errors and re-test.
- If it passes, continue.
Step 5: Publish & Verify
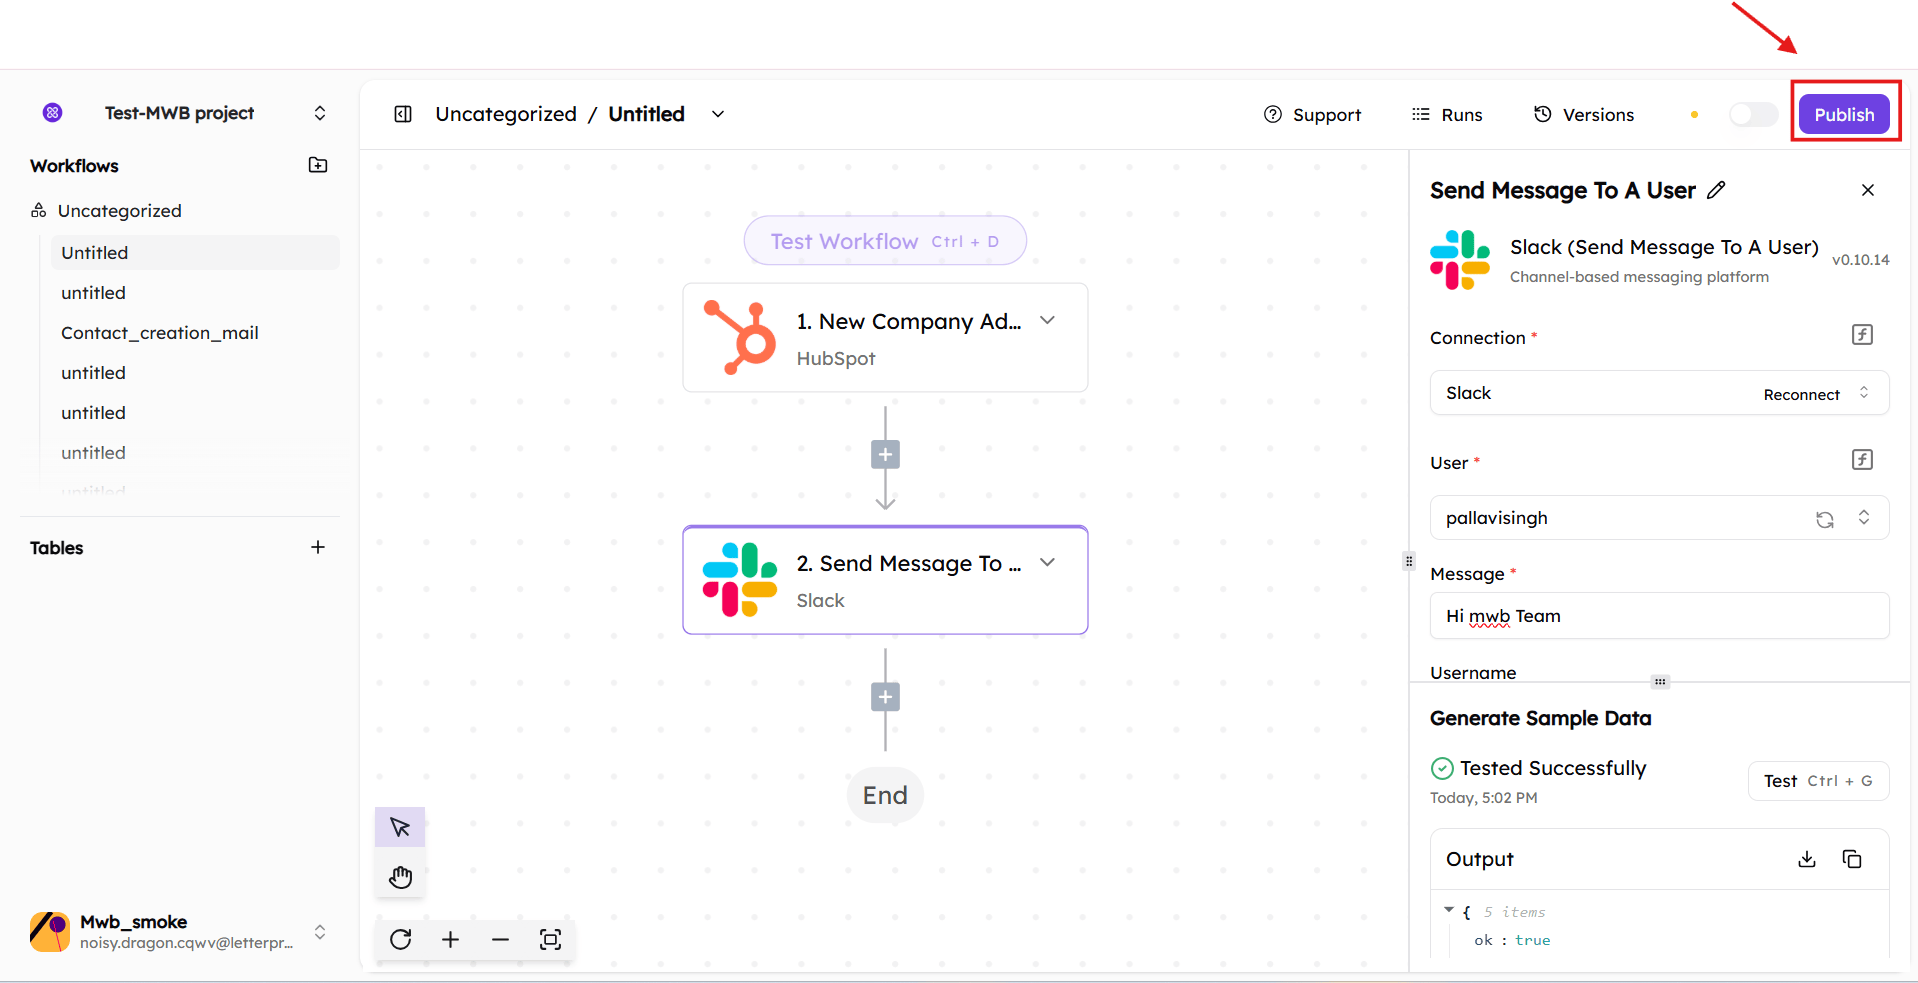
Publish the workflow, perform the trigger externally, and confirm success in Runs History.
- Webhooks run instantly
- Polling triggers may take up to 10 minutes
With the recent updates, in addition to syncing data, workflows can now include AI-assisted actions such as sending notifications, follow-ups, or internal alerts via email, SMS, WhatsApp, or other connected tools. In addition, AI agents can evaluate context and decide when and how actions should be executed, rather than relying only on static rules.
Key Workflow Components:
- App triggers and actions (core and app-specific events)
- Agentic AI steps that evaluate conditions and guide execution
- Notifications, updates, and cross-platform actions
Triggers and actions are accessed through app connectors, which can be set up while creating the workflow. To start, click Create a workflow from scratch from the app home to open the workflow builder directly.
4.1.2.Use a Template
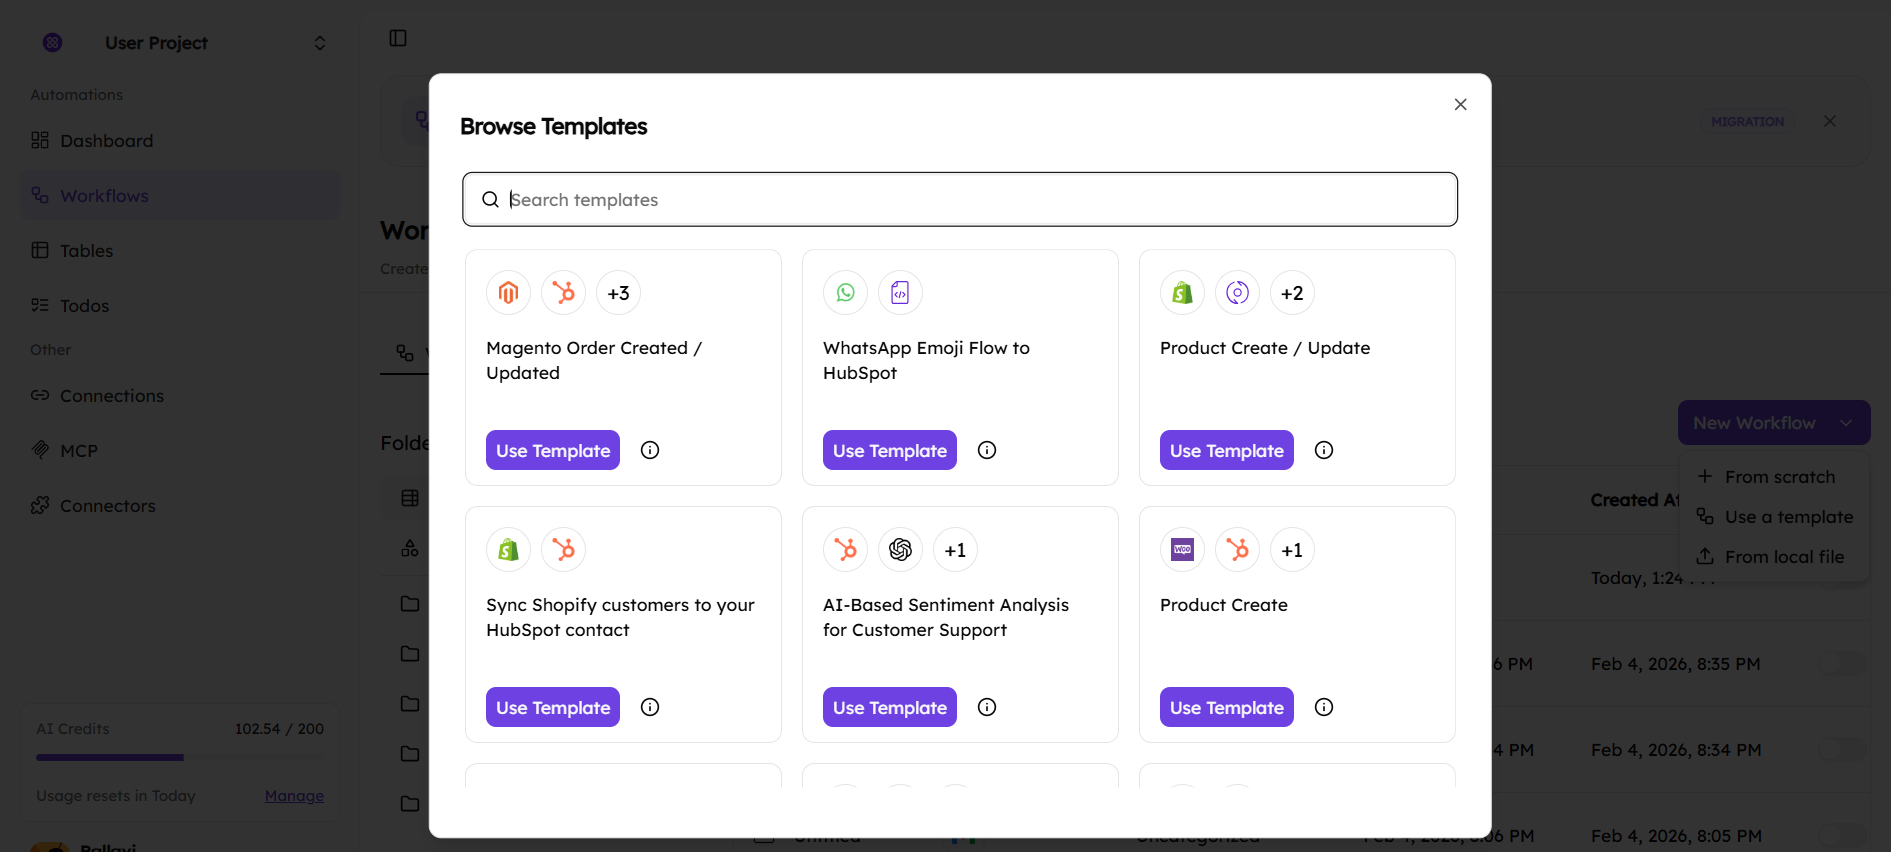
If you want to use a pre-built template for your workflow, MakeWebBetter Connect gives you the option to choose from existing templates. To avail this option, you have to click on the ‘New Workflow’ dropdown again and select the ‘Use a Template’ option.
From there, you can pick the desired workflow template from the provided list. Additionally, each of the pre-built workflow templates comes with predefined triggers and actions, which can be expanded or customized as and when required.
4.1.2.Import Existing Workflow
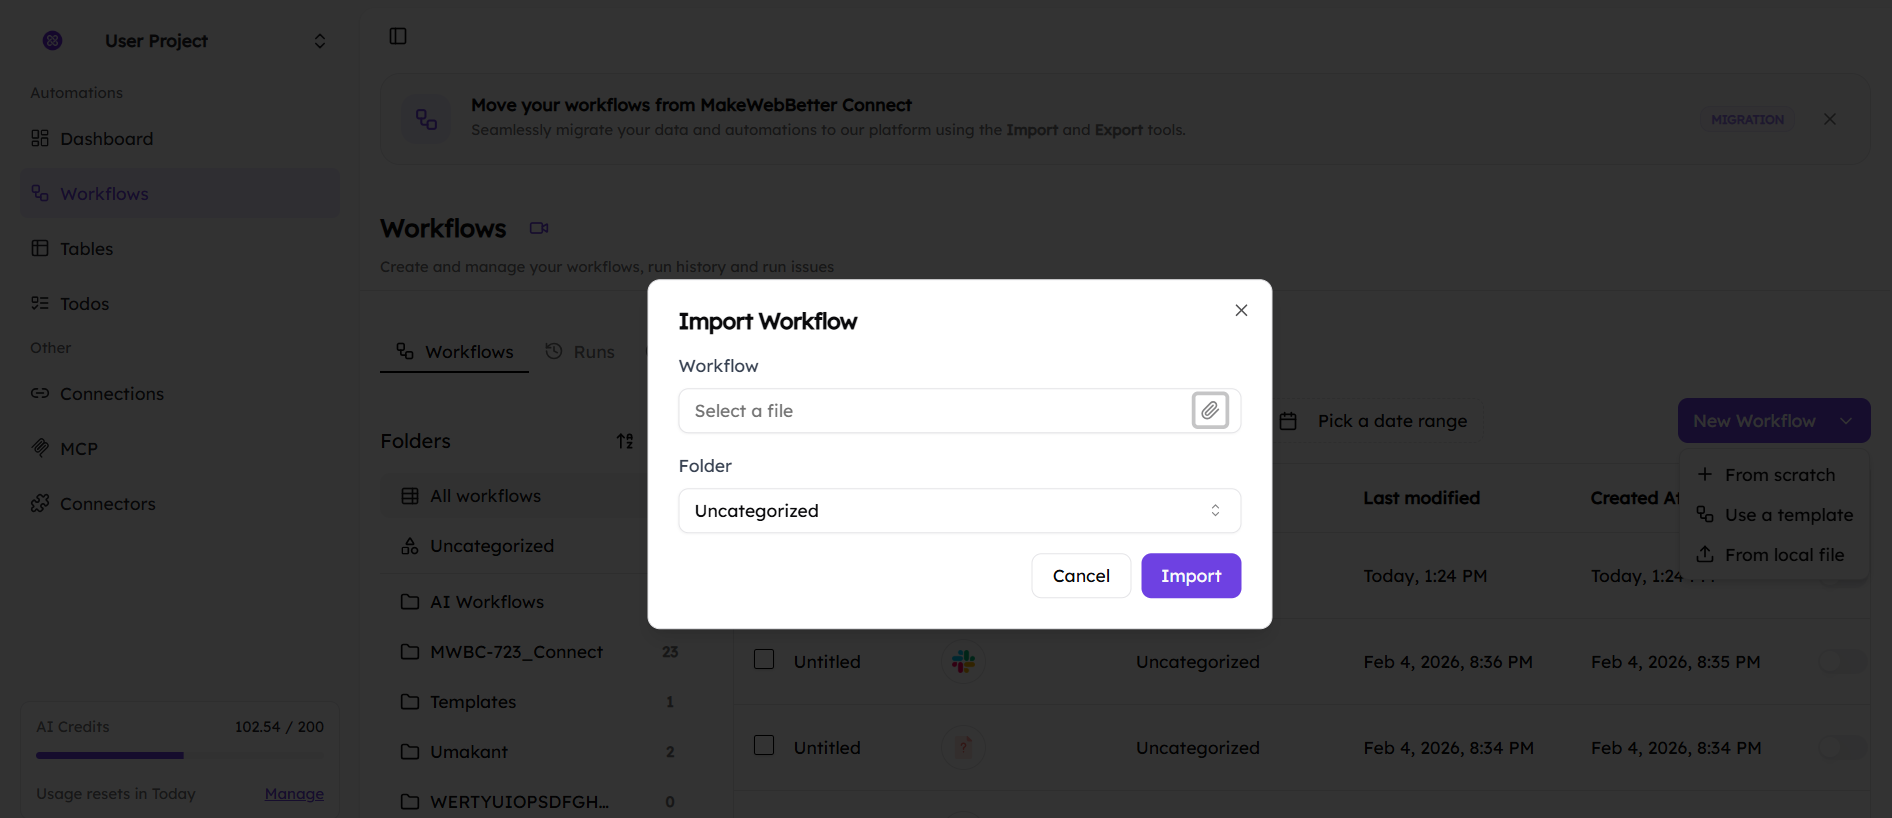
When you navigate to the Workflows section, you can find the option to Import Workflow by clicking on the ‘New Workflow’ dropdown on the right and selecting the ‘From Local File’ option.
Once you reach here, you can browse to find the required workflow from your device or drag and drop the workflow file to import it. Remember, to import a local workflow file from your system, you need to ensure that it is in the JSON format that MakeWebBetter Connect understands.
4.1.3.Runs
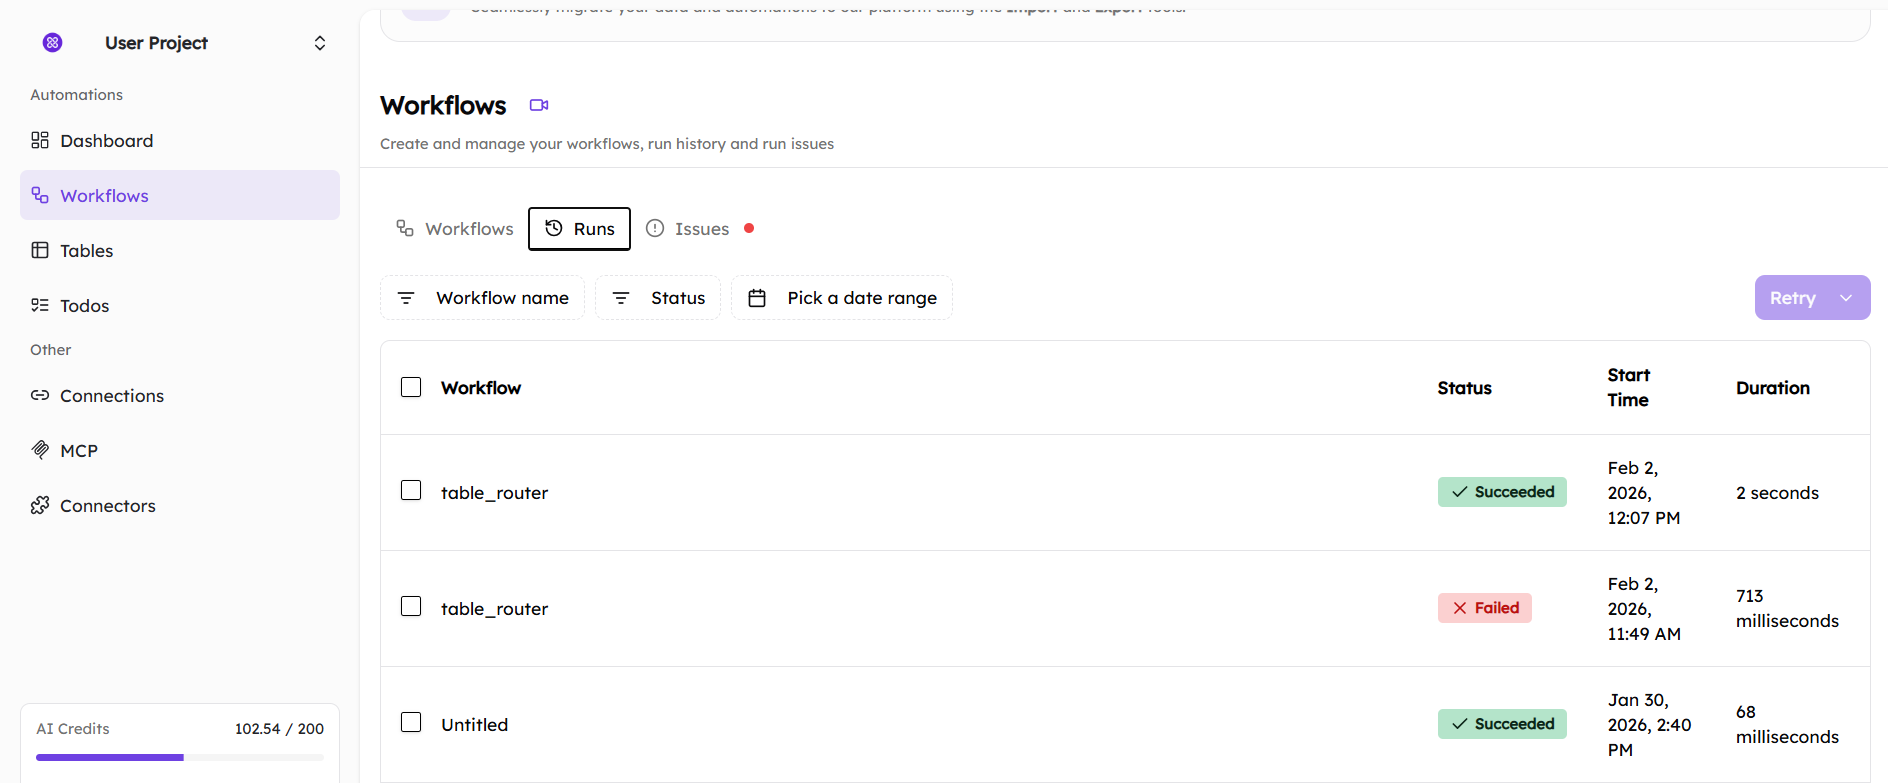
Runs are simply records of when a workflow runs. Every time a workflow starts and stops, it creates one run. In other words, each run shows one time the system tried to carry out a workflow, whether it finished successfully or not.
All the runs pertaining to your published workflows are displayed in this section. The details of these runs would include: workflow name, status (successful/failed), started at (run date), and duration (time taken by the system to process the workflow).
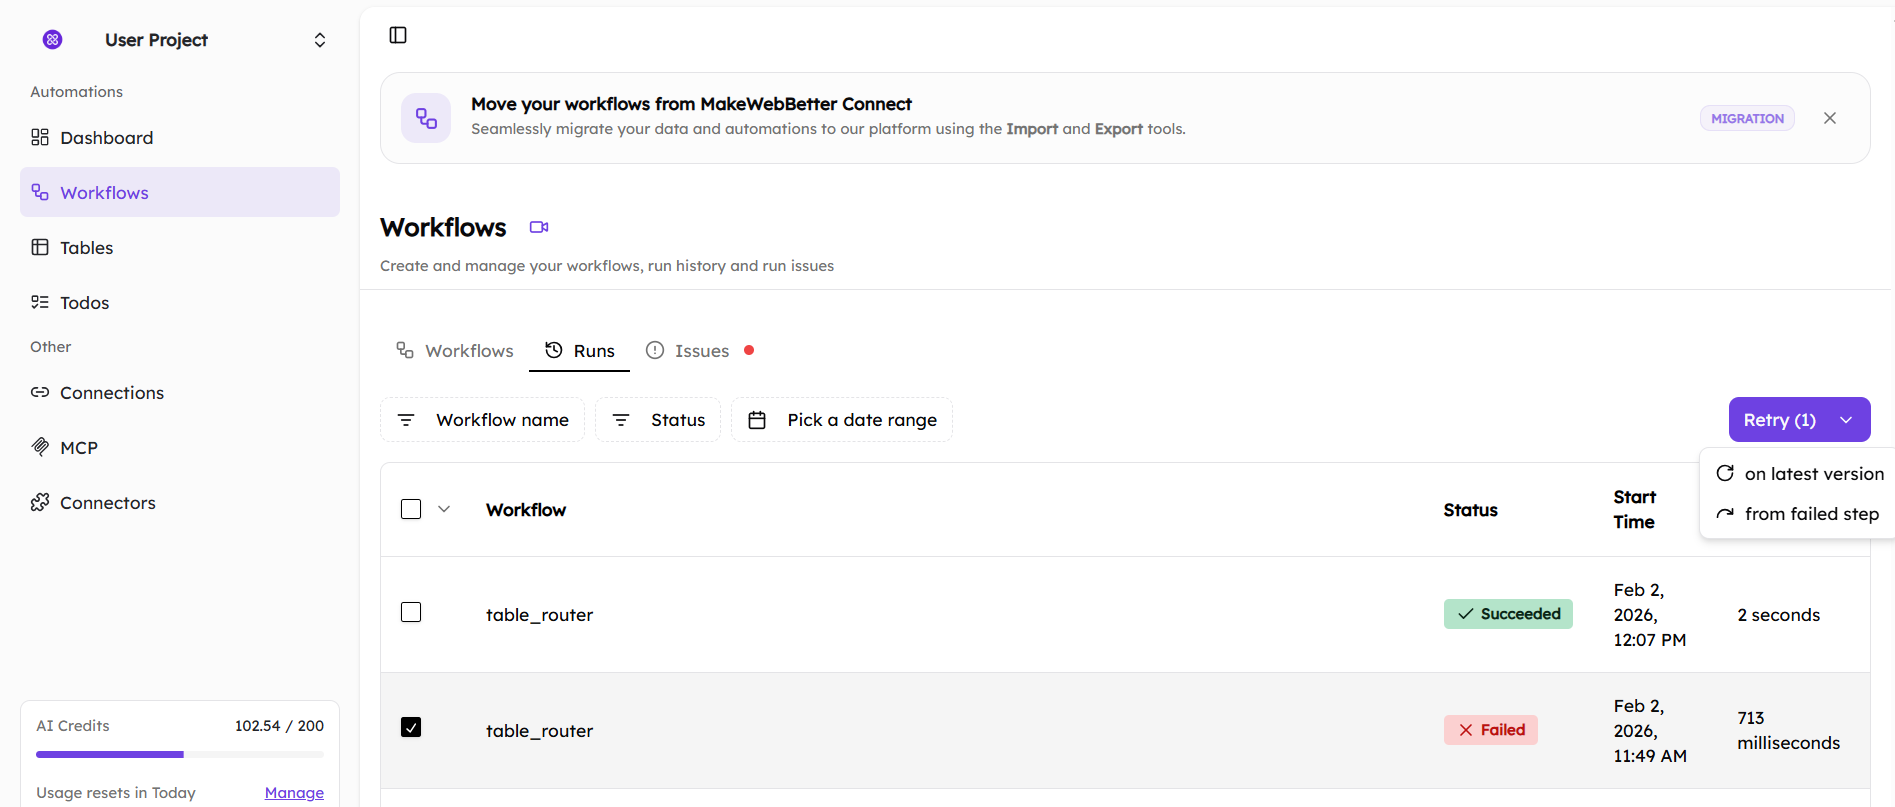
From here, you can see the status of your workflows and ‘Retry’ runs on your failed workflows by selecting a workflow and clicking on the ‘Retry’ dropdown on the right.
The updated version of Connect gives you the option to either retry the run on the latest version or from the exact step where it failed.
4.1.4.Issues
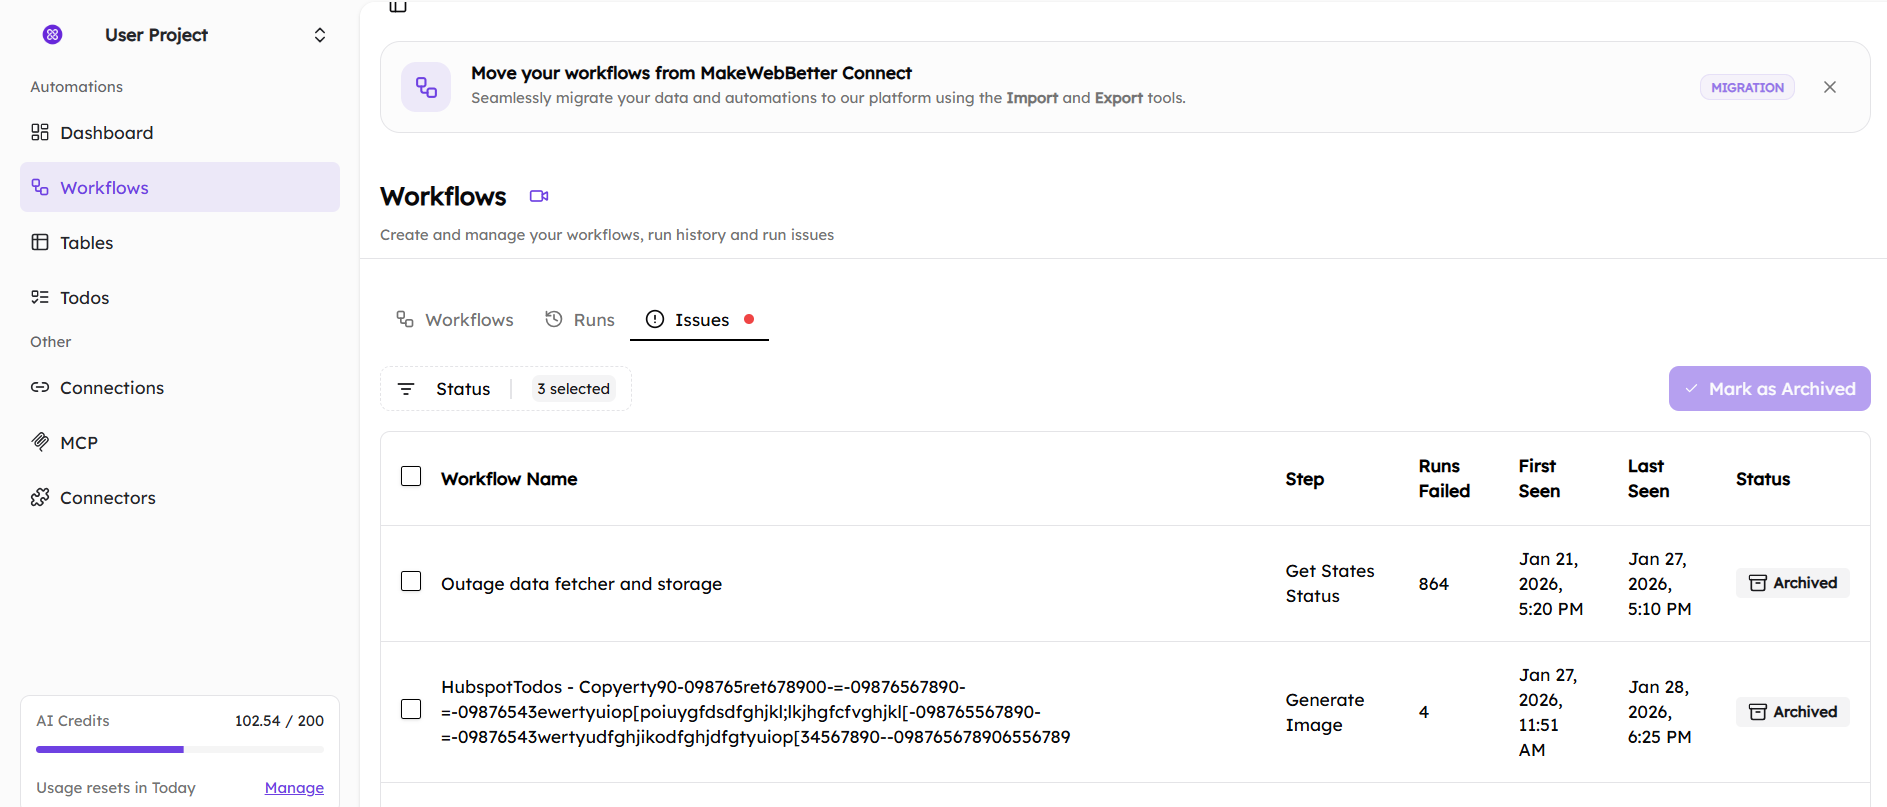
In the ‘Issues’ section within workflows, all failed runs of workflows are logged with information on the exact step they failed, the number of unsuccessful runs, the first seen status of the workflow, the last seen status of the workflow, and its current status.
Notably, as the failed runs are logged in this section, an email is sent to the registered user who ran the workflow to notify them about the unsuccessful run.
5.Tables
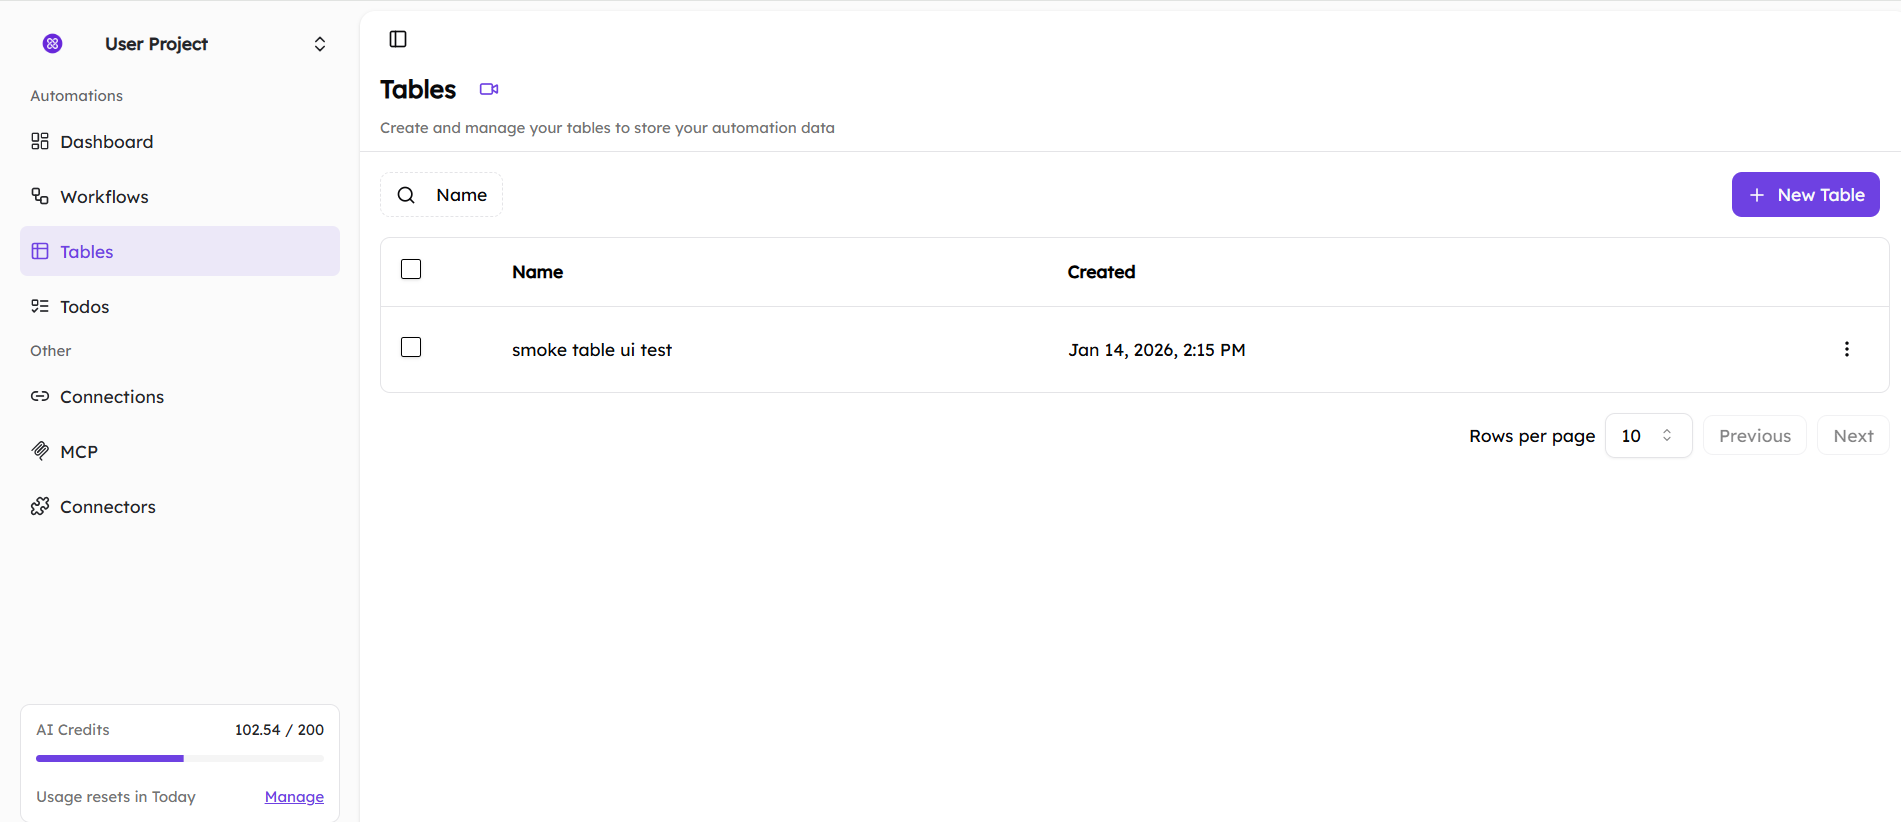
‘Tables’ is a new built-in feature in MakeWebBetter Connect, which is aimed at providing a lightweight and native data source within the automation platform.
These tables are like simple databases you can create–featuring rows and columns–that your workflows can use to store, retrieve, update, and manage structured data. It eliminates the need to depend on external spreadsheets and databases like Google Sheets and Excel.
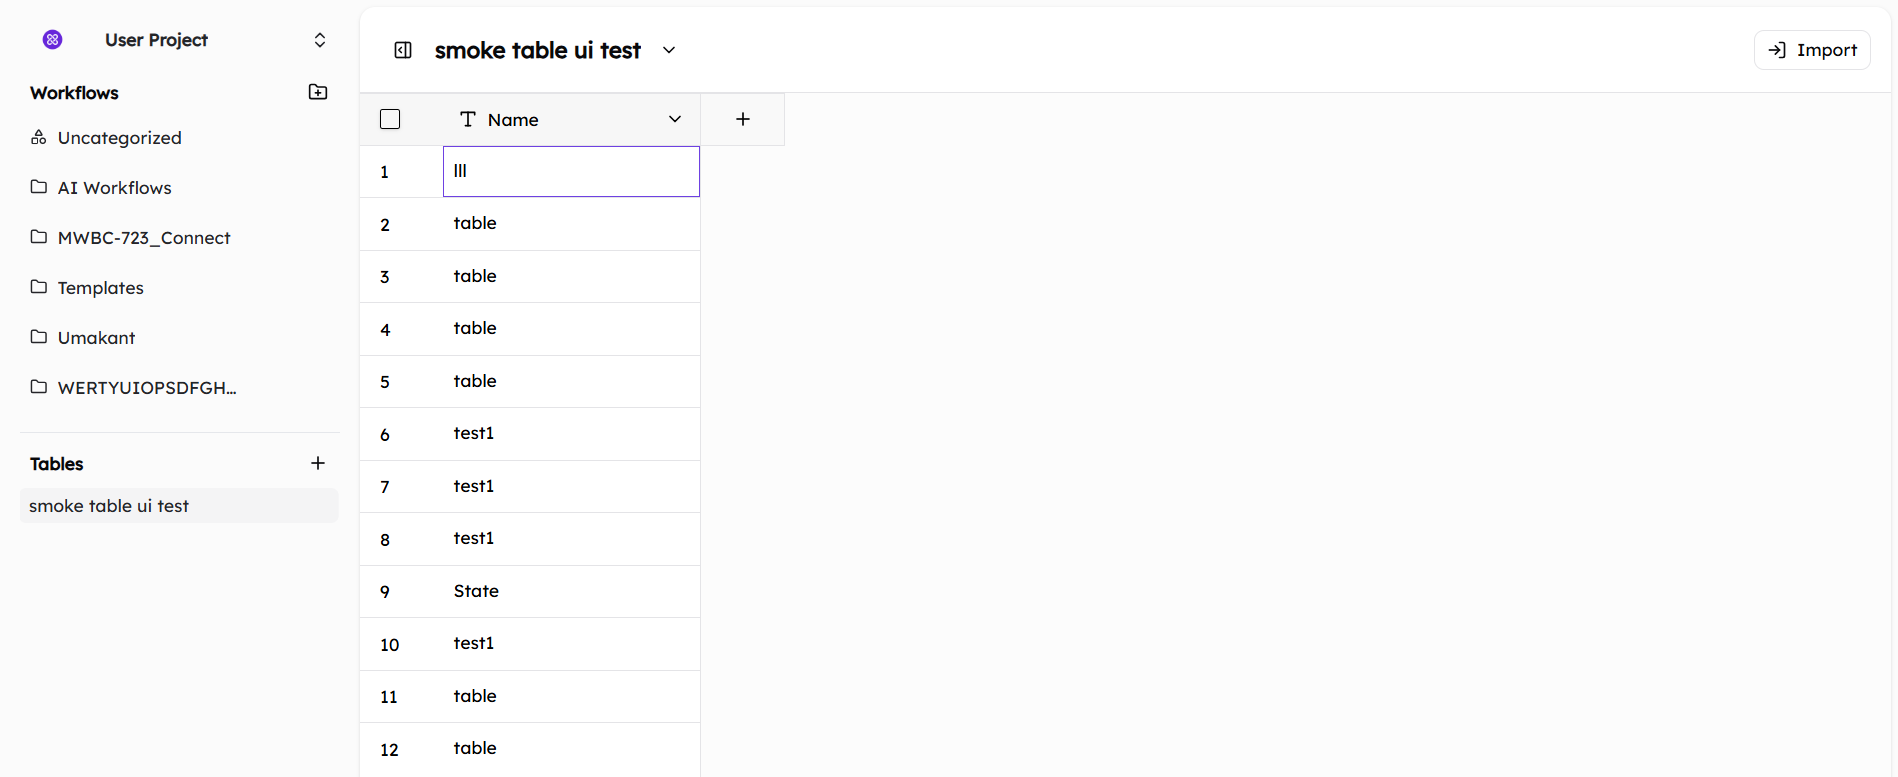
By clicking on the ‘New Table’ option on the right, you can create a new table from scratch and upload all the relevant data for your workflows on the platform.
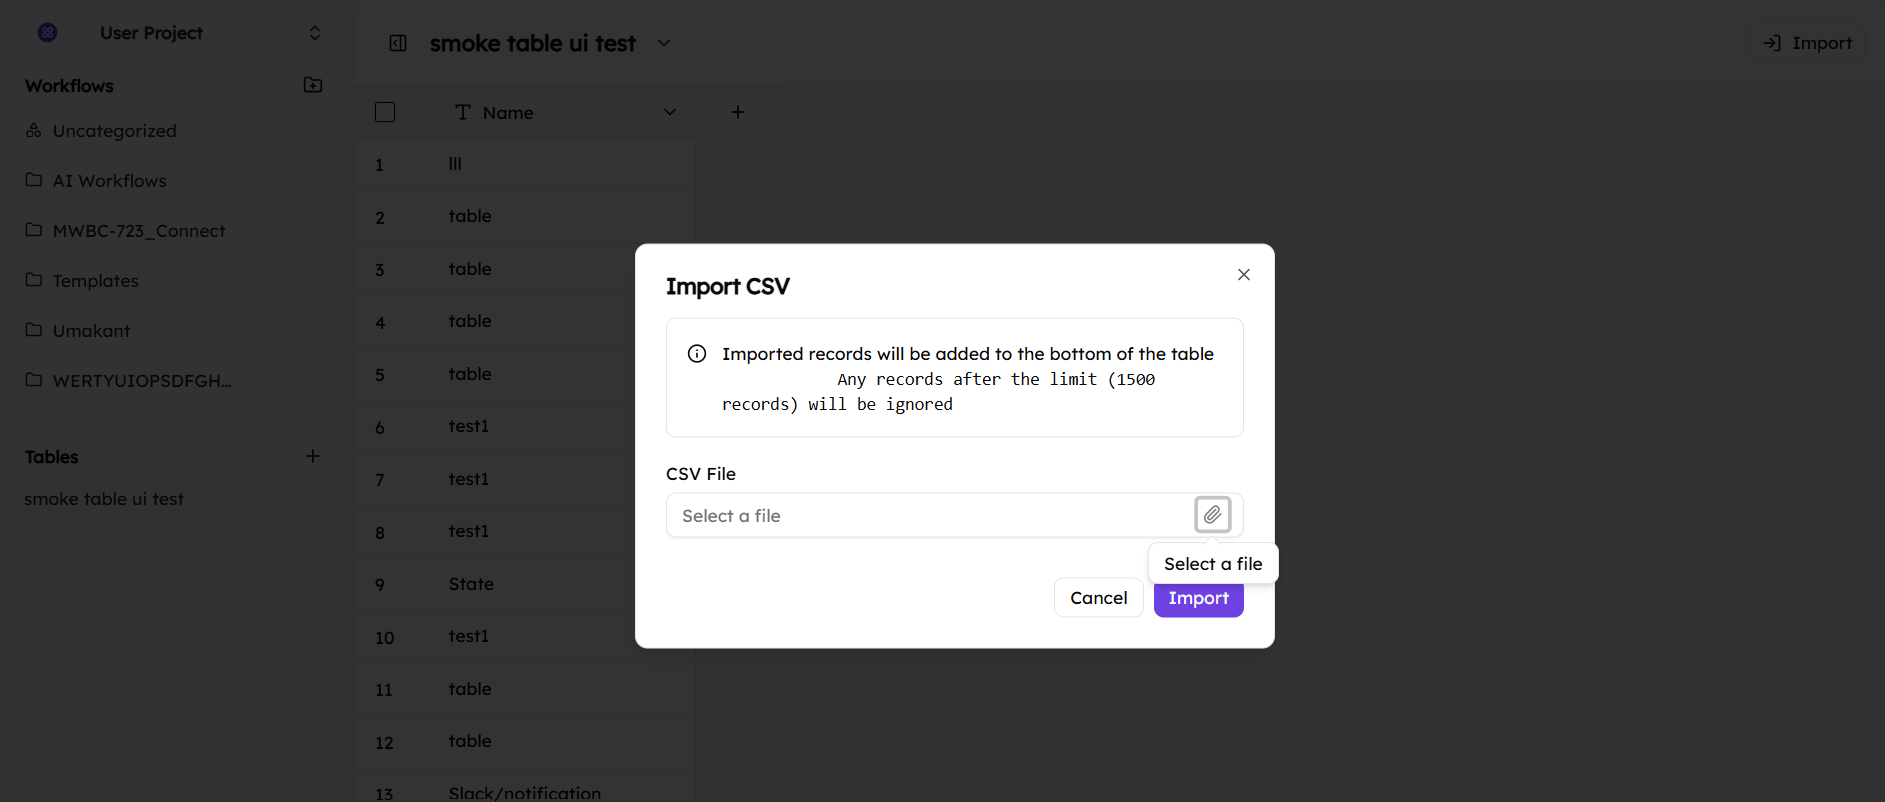
Alternatively, you can choose to import an external spreadsheet by clicking on the ‘Import’ option on the top right. Notably, you have to ensure that the table you want to import onto the platform is in the CSV format.
6.Todos
Todos is a new feature in MakeWebBetter Connect that enables human intervention within automated workflows. While building a workflow, users can add steps that create tasks (todos) requiring manual action or approval before automation continues.
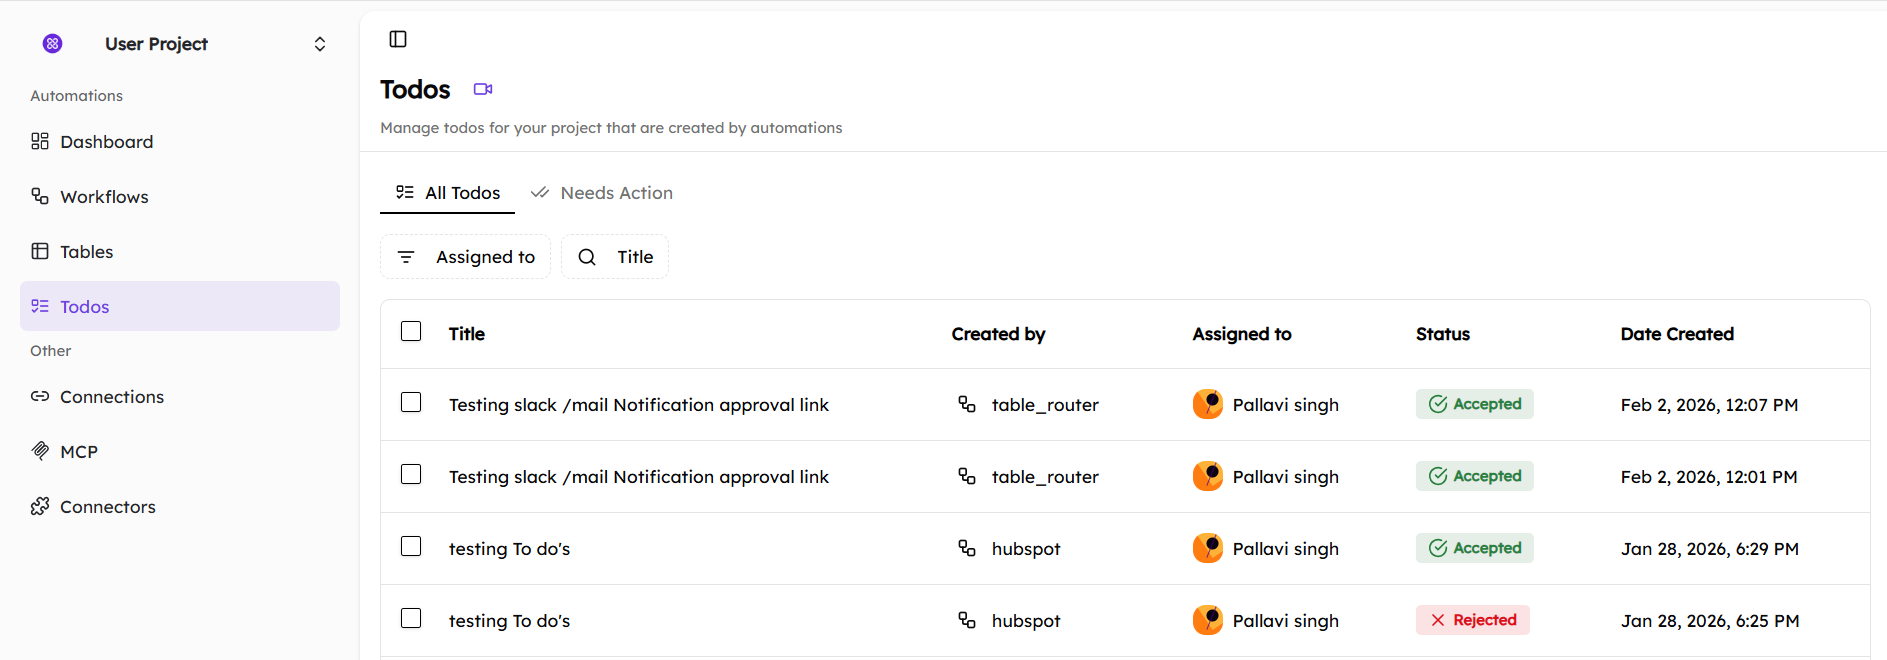
When a workflow creates a todo, it appears in the Todos dashboard, which serves as a centralized view for managing all tasks generated by automations.
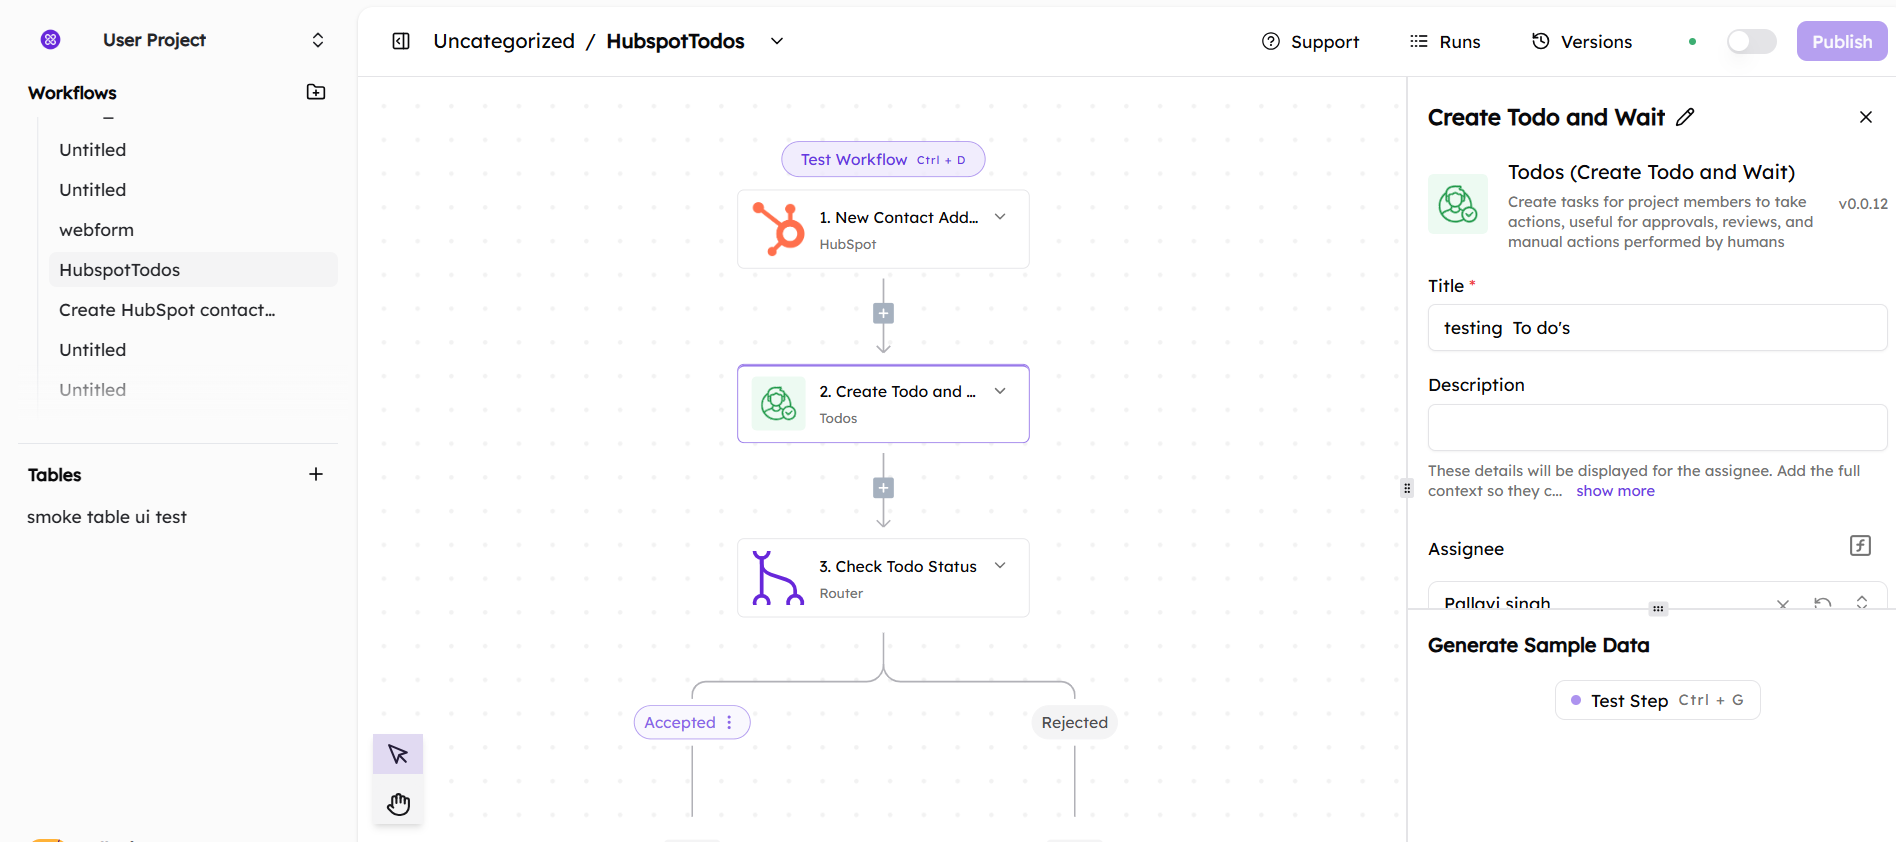
Settings Todos in Workflows:
In the visual workflow builder in MakeWebBetter Connect, click on the ‘+’ add step option, type ‘Todo’ in the search bar before clicking on the ‘Create Todo’ option.
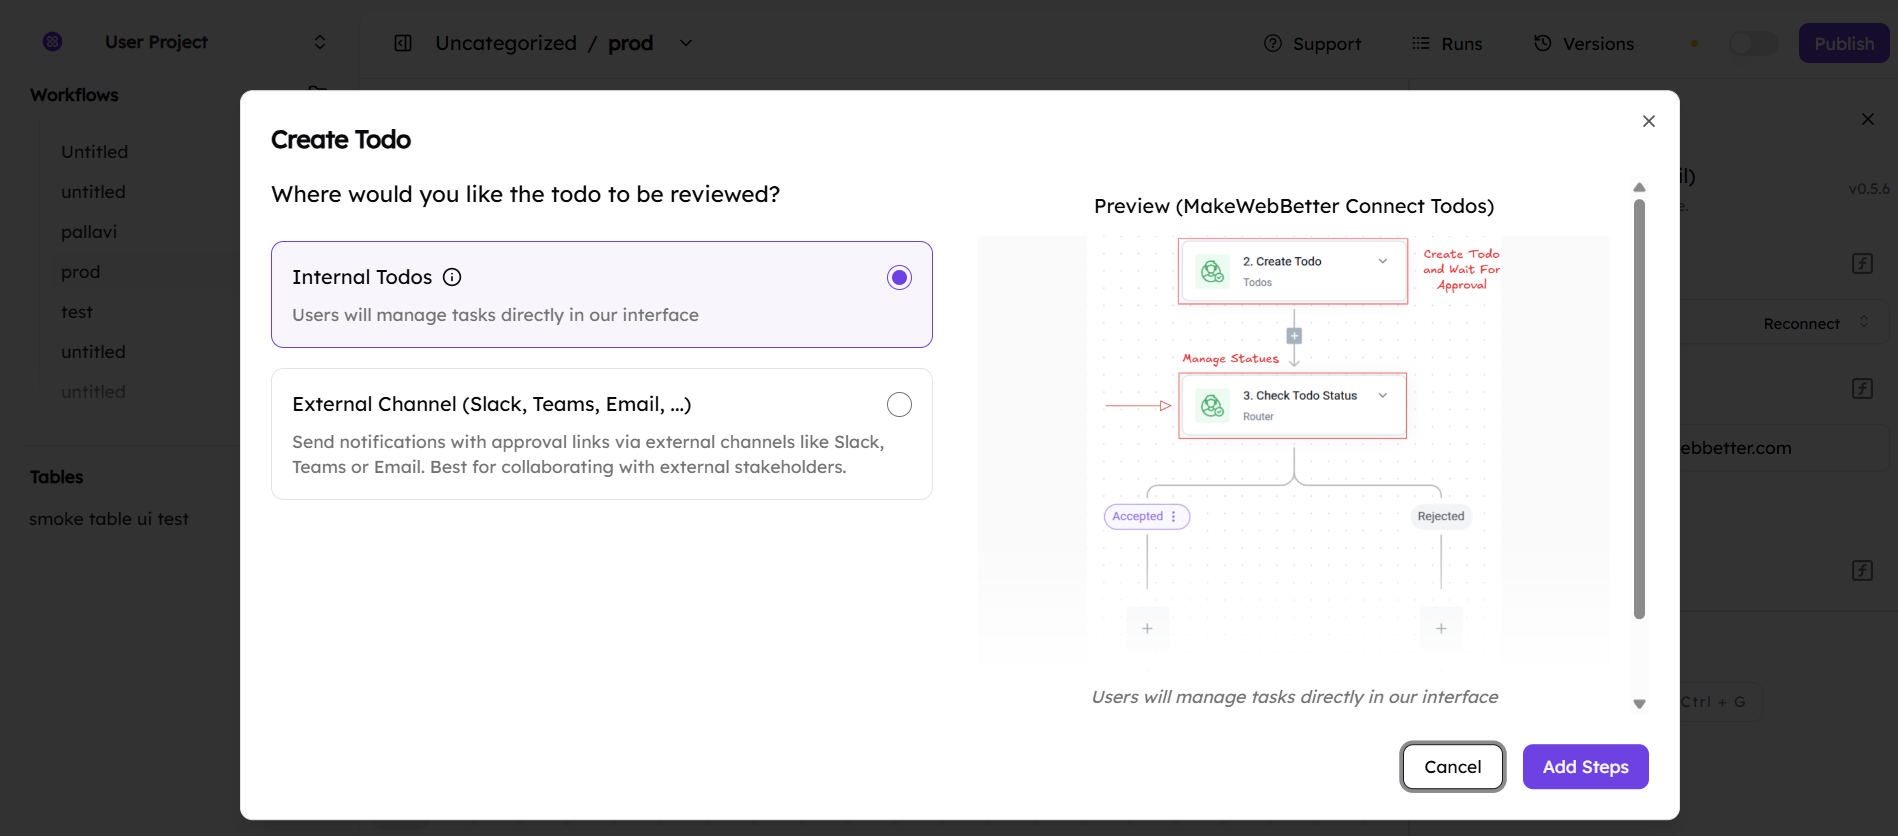
- Moving on, you will be given the option to choose if you want to create an ‘Internal’ todo or send notifications and approval links through external channels by clicking on ‘External Channel’.

- Once you pick the option you want, click on ‘Add Steps’, and move on to adding other details on the next screen, like the ‘Title’ of the Todo, its ‘Description’, and the specific user or team that you want to assign it to.
- You can also configure whether the workflow should pause and resume only after the task is completed or continue without pausing.
The Todos dashboard displays all workflow-generated tasks with details such as:
- Title
- Created by (workflow source)
- Assigned to (user or team)
- Status (example: needs action or completed)
- Date created
Users can filter todos by assignee or title and quickly identify tasks that need action.
‘Todos’ helps teams maintain control over critical steps while keeping workflows automated and efficient.
7.Connections
The Connections section in MakeWebBetter Connect manages all authenticated links between your project and external applications. Connections enable Agentic AI and MCP-powered workflows to securely access systems, evaluate context, and execute real actions across your tech stack.
This section replaces the earlier Apps section and serves as the foundation for reliable, AI-driven automation.
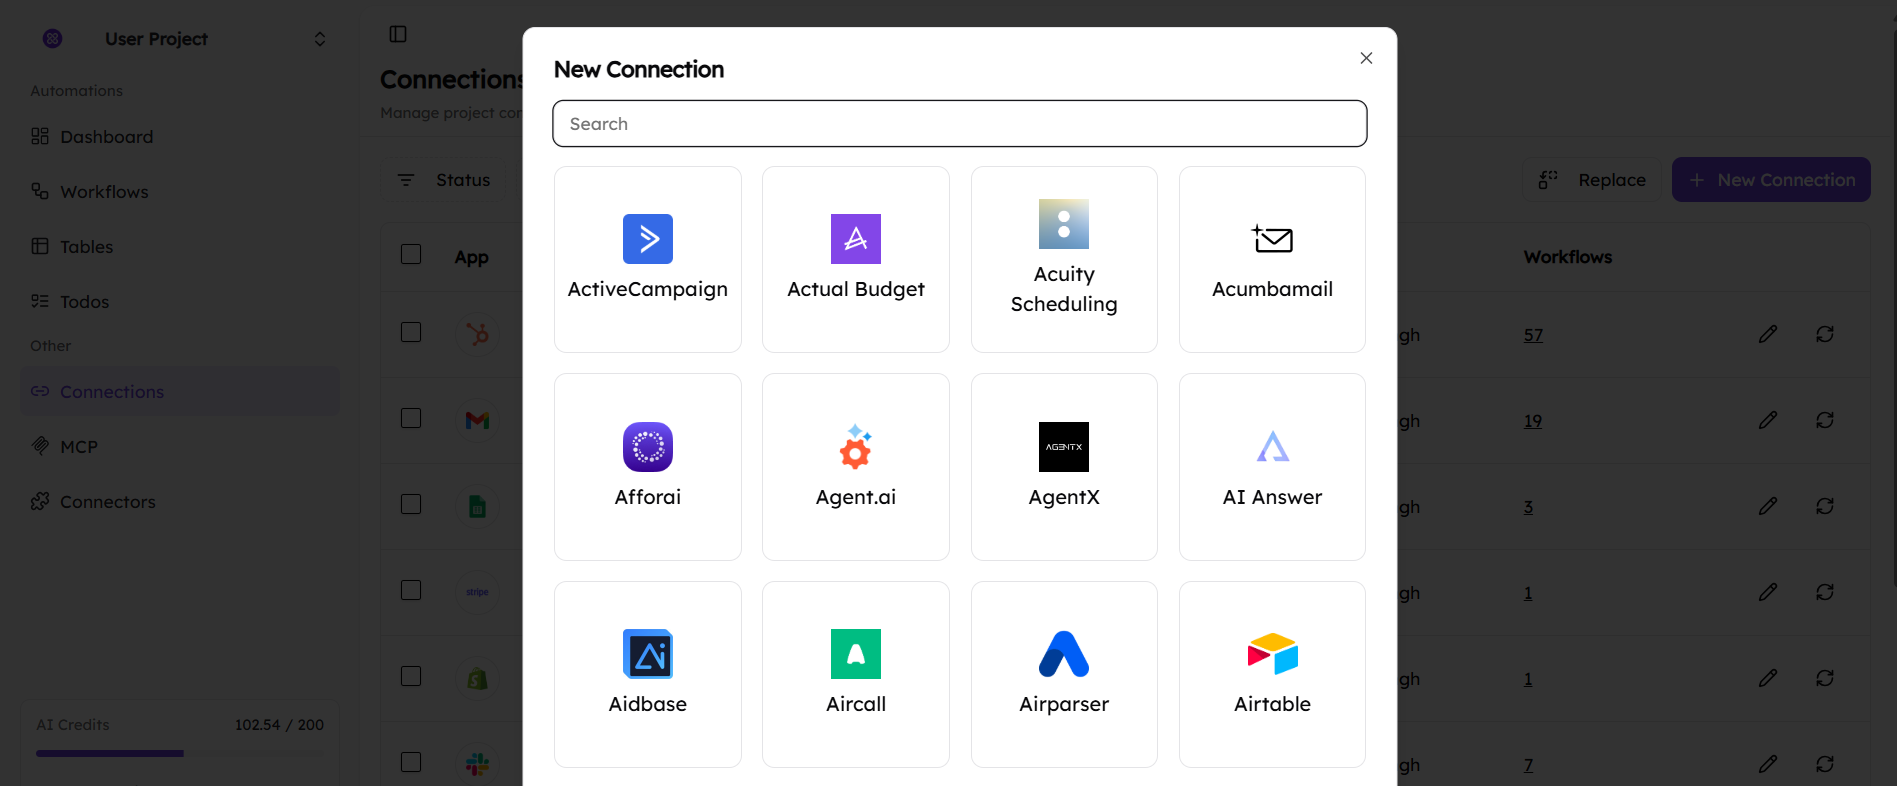
7.1.Creating Connections
In MakeWebBetter Connect, you can create connections using secure OAuth-based authentication or supported API-key methods or even Basic authentication.
You can create a connection:
- While building workflows (when selecting triggers, actions, or AI-executable steps), or
- Directly from the Connections page using New Connection
Once created, connections can be reused across workflows and exposed as MCP-enabled actions for AI agents (more on this later as you scroll down the document).
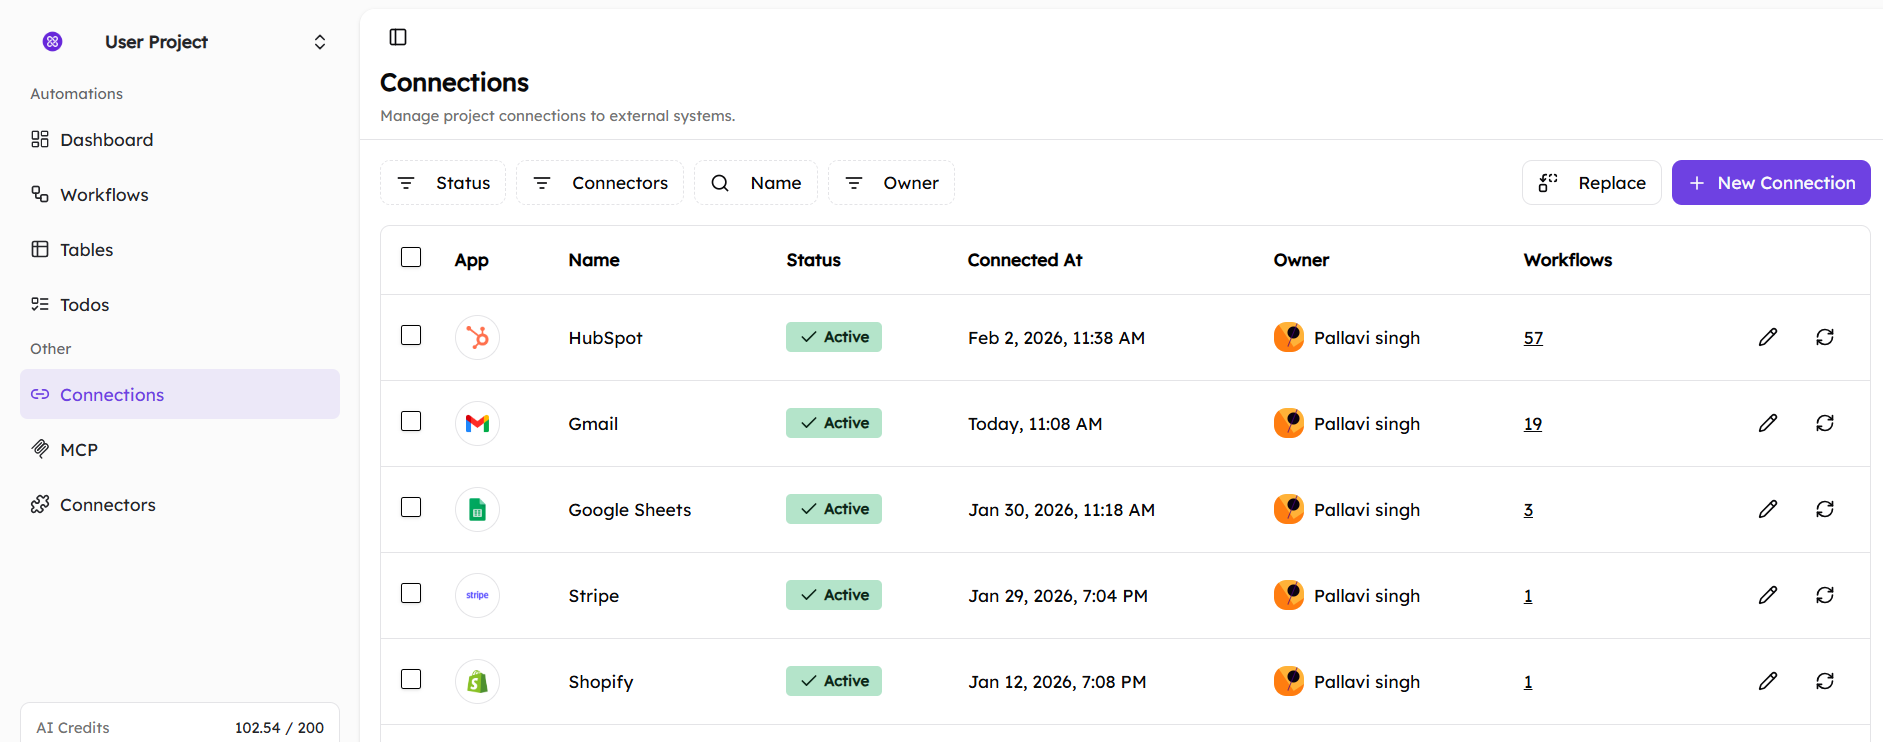
7.2.Viewing Connections
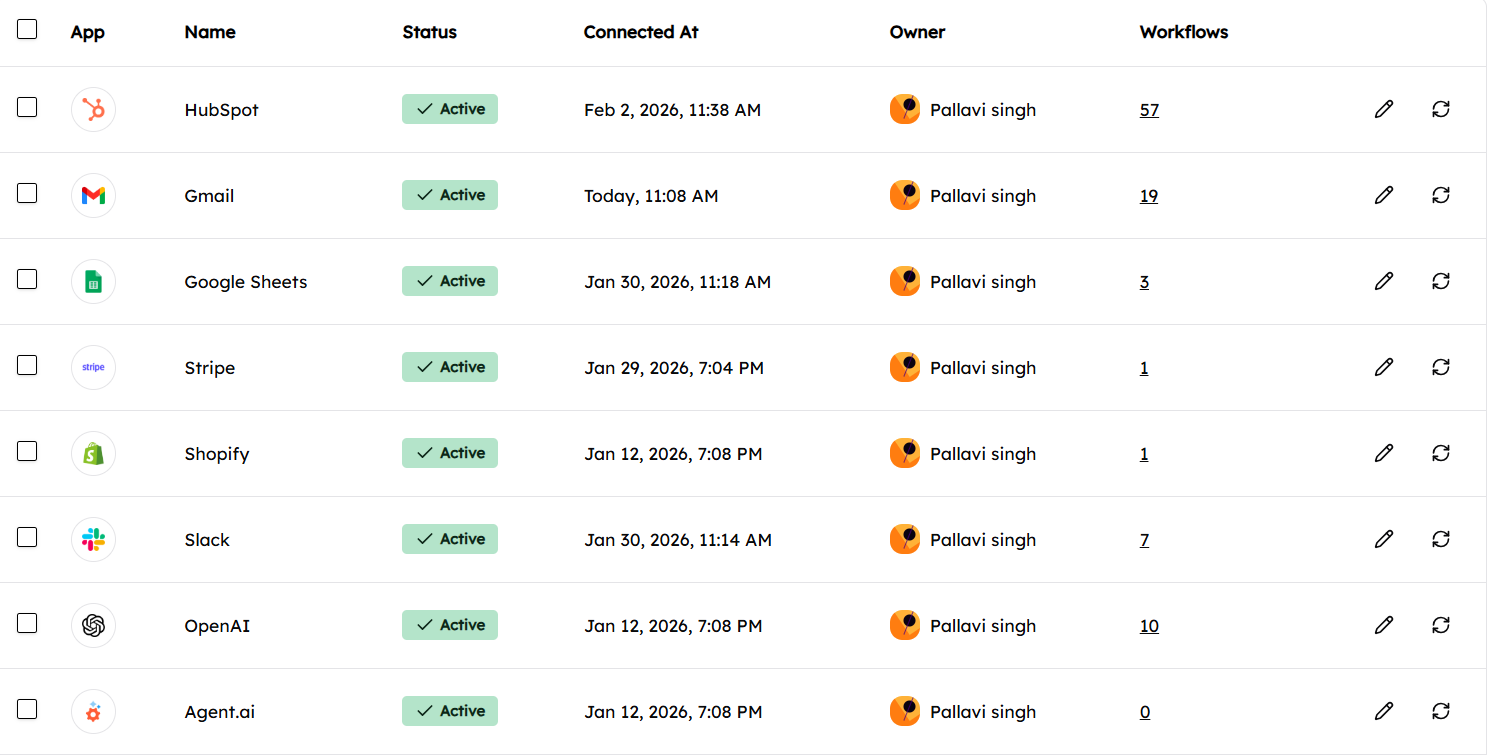
The Connections dashboard provides a centralized view of all connected systems, including:
- App (The connected platform, like HubSpot, Gmail, Slack, etc.)
- Status (Whether the connection is active or inactive)
- Owner (The user responsible for establishing the connection)
- Connected at (The exact time when the connection was established)
- Workflows (The number of workflows currently using the connection)
Filters such as Status, Connector, Name, and Owner help manage connections at scale.
7.3.Managing Connections
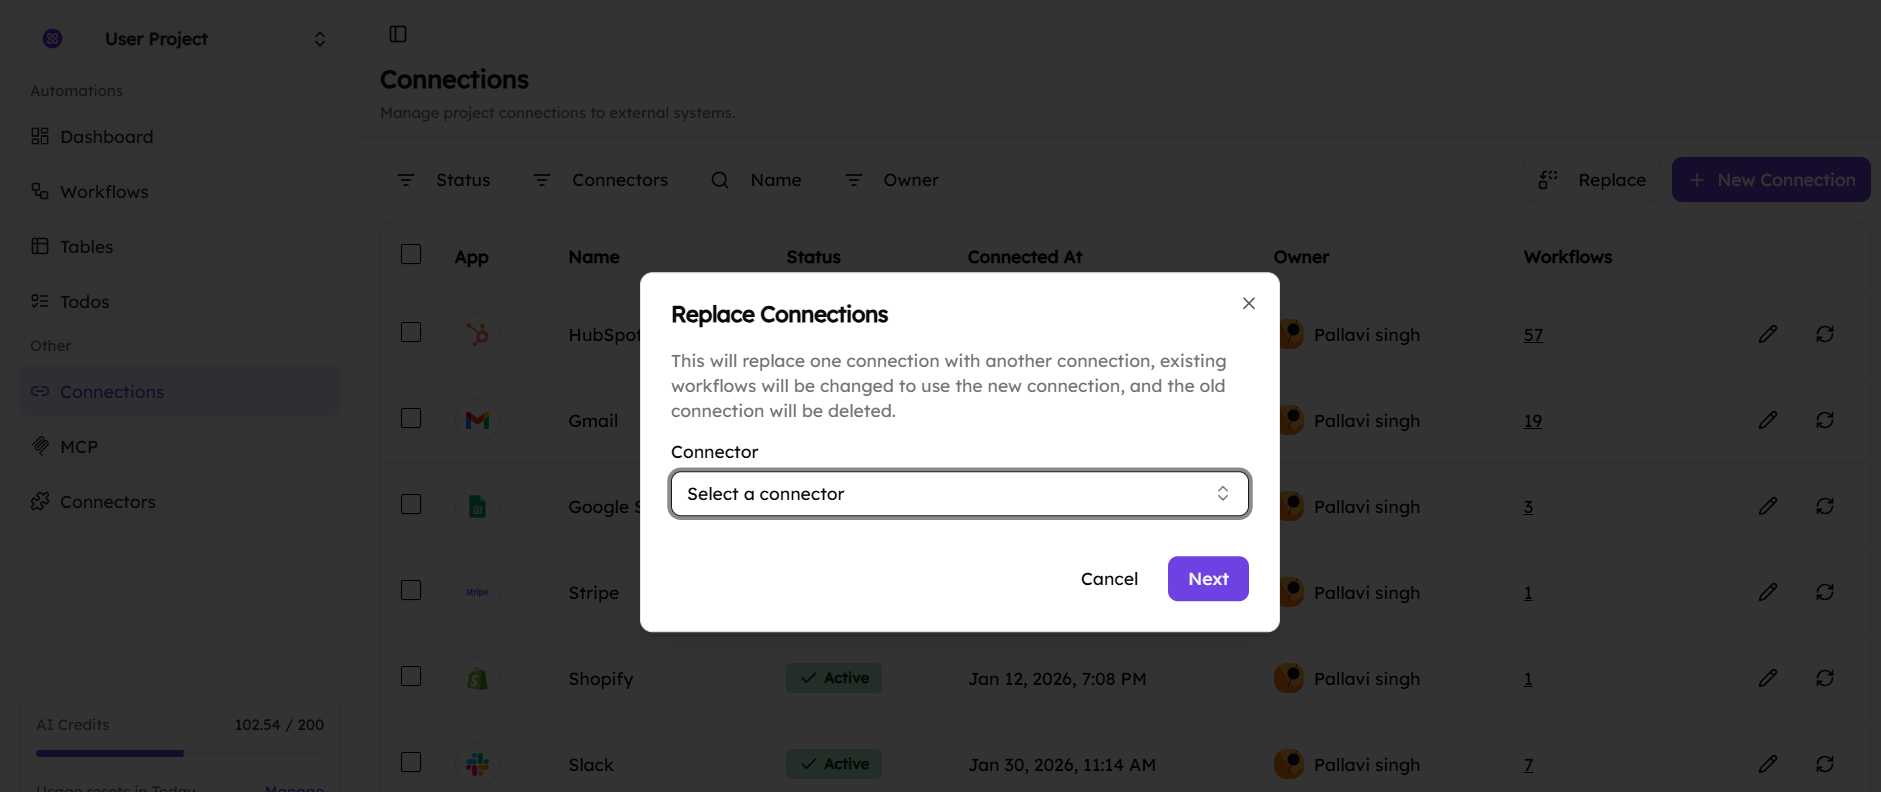
From the Connections page, users can:
- Edit or authorize connections
- Replace any one of the existing connections without breaking workflows
- Monitor how many workflows depend on each connection
If a connection becomes inactive, AI agents and workflows using it will pause or fail until access is restored.
8.MCP
The MCP Servers feature in MakeWebBetter Connect provides a secure execution layer that allows AI agents to perform real actions across your connected tools—only within the permissions you explicitly define.
These servers help control what AI can access and what actions it’s allowed to perform, making sure automation stays safe and predictable.
What problem do MCP Servers solve?
Traditional AI tools can analyze data, but they cannot safely:
- Take real actions across systems
- Respect role-based permissions
- Provide full auditability
MCP Servers bridge this gap by acting as a controlled gateway between AI and your tools—so AI can move from insight to execution without introducing risk.
When would you use MCP Servers?
- You want AI to execute real actions across your tools, not just analyze data
- You need AI to operate across multiple systems (for example, HubSpot, Slack, email)
- You want clear control over which tools AI can use and what it can change
- You need audit logs and traceability for AI-driven actions (for compliance, debugging, or review)
Some examples of the same include:
- AI detects a stalled deal and updates the record in HubSpot, then notifies the sales team in Slack.
- AI reviews incoming support requests and creates follow-up tasks only when certain conditions are met.
What MCP Servers do NOT do?
MCP Servers do not:
- Allow AI to act outside the tools you explicitly add
- Automatically modify data without a defined action
- Replace workflows or triggers you have configured
- Make irreversible changes without logging them
Every action executed through an MCP Server is:
-
- Explicit
- Logged
- Reviewable
In short, MCP Servers act as a safe execution layer that allows AI to move from insight to action, while keeping you in control of what the AI can do.
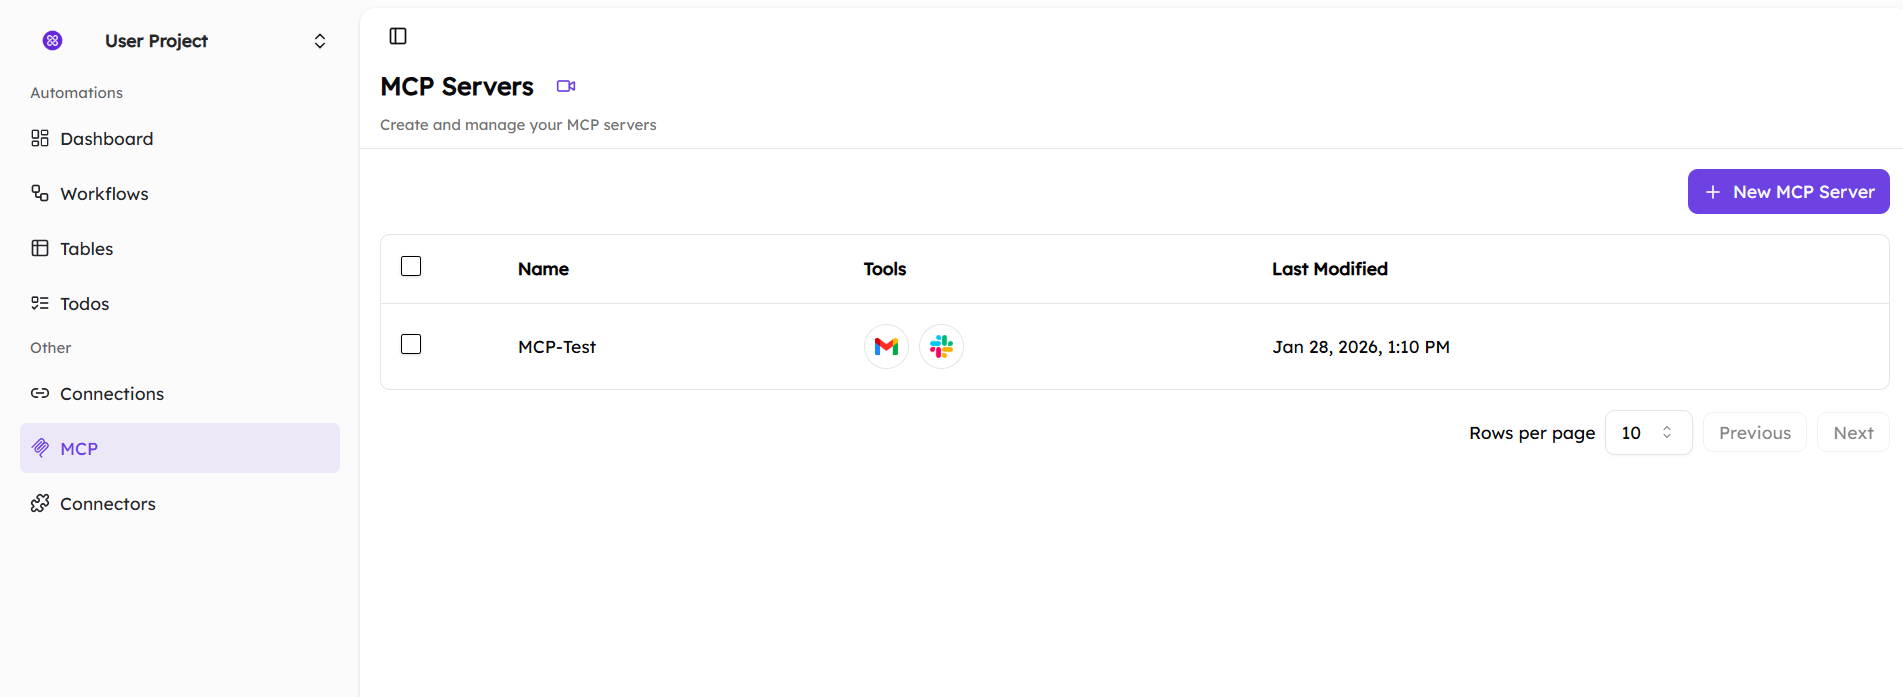
8.1.Creating MCP Server
Think of an MCP Server as a permission boundary: AI can only see and act through the tools you attach here. When you click New MCP Server, you are taken to the MCP Server configuration screen, where you can set up how AI will interact with your connected tools.
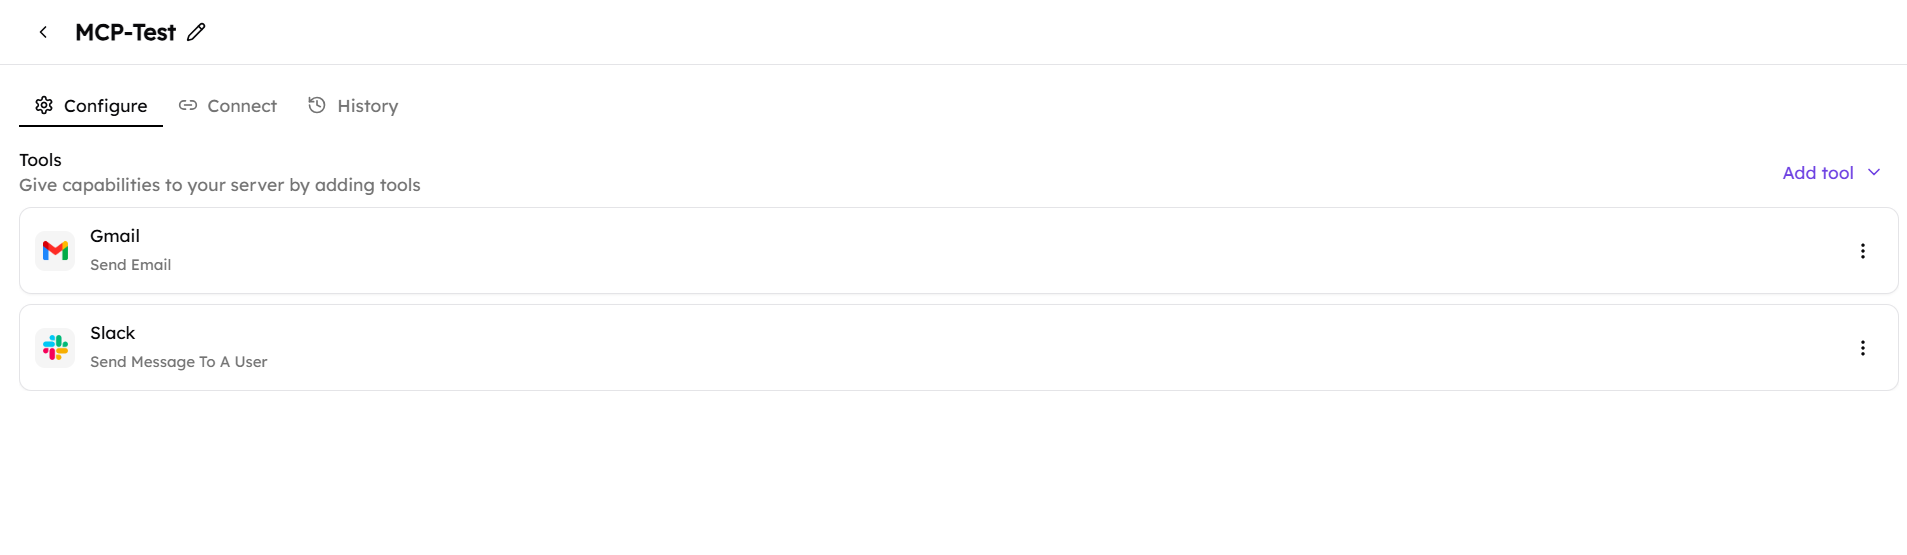
The Configure tab is where you define the MCP server’s capabilities.
- Click on ‘Add tool’ to attach tools or integrations that the AI can access
- Each added tool determines what actions the AI is allowed to perform
- You can rename the server at the top to easily identify its purpose, for example: “Sales AI – HubSpot + Slack”
Until tools are added, the server will display “No Tools Added Yet”.
8.2.Connect MCP Server
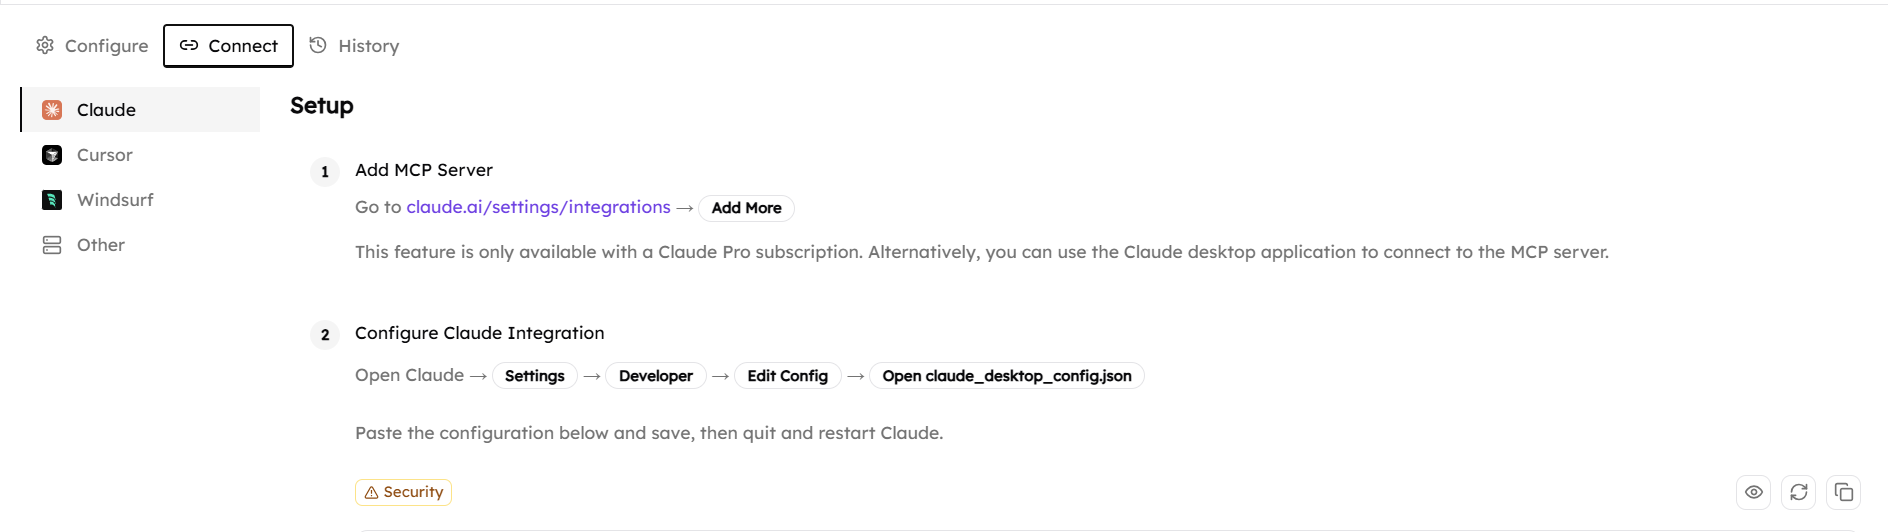
The Connect tab is used to link your MCP Server with external AI tools so they can access and use the server. Connecting an MCP Server authorizes the selected AI client to request actions, but execution still follows the permissions defined in the Configure tab.
From this section, you can select the AI client you want to connect to, such as Claude, Cursor, Windsurf, or other supported tools. Each option provides guided setup steps to complete the connection.
8.3.Connect MCP to Other AI Tools
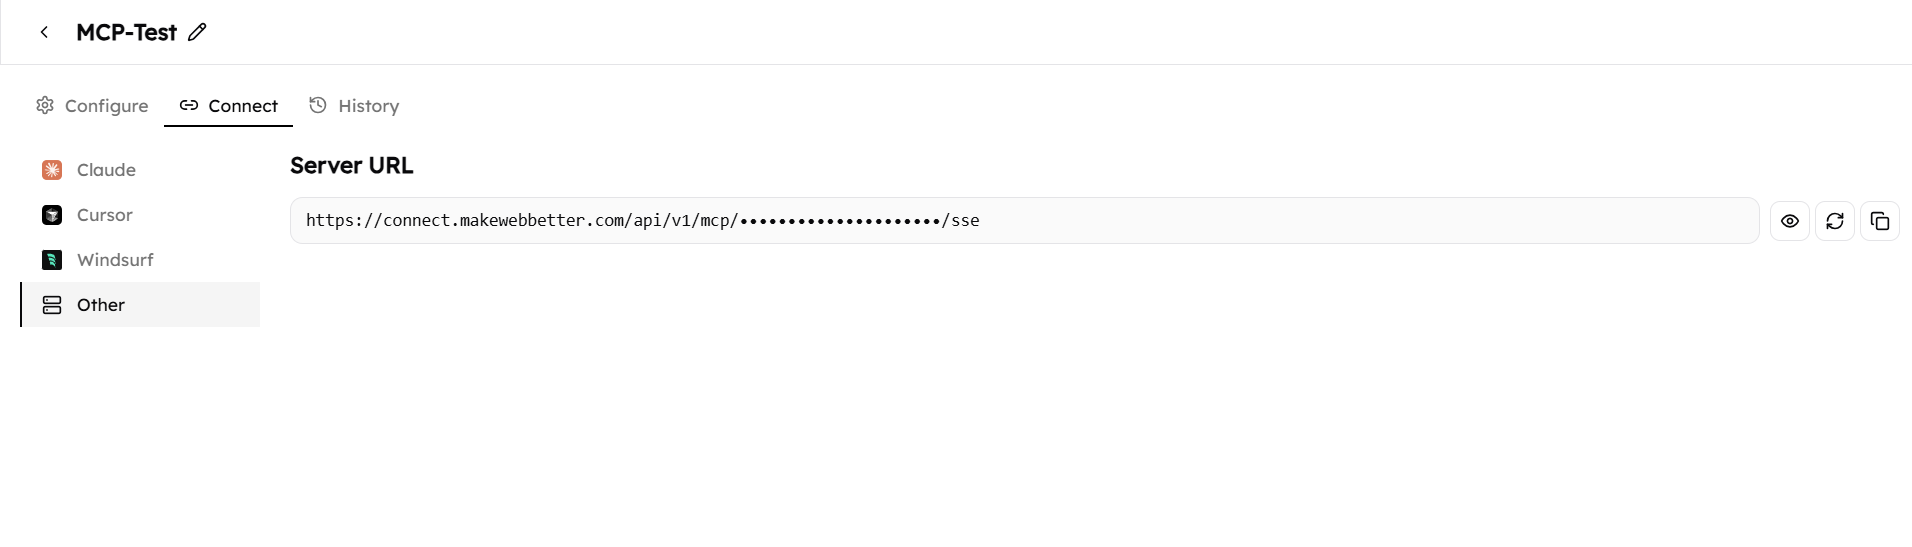
If you want to connect your MCP Server to an AI tool other than Claude, Cursor, or Windsurf, you can do so using the Server URL provided in the Connect tab.
To connect, follow these steps:
- Go to the Connect tab of your MCP Server
- Select ‘Other’ from the list of AI tools
- Copy the Server URL shown on the screen
- Paste this URL into the MCP or integration settings of the external AI tool
Once added, the AI tool can communicate with the MCP Server and access the tools you have configured, within the defined permissions.
Note: When connecting third-party AI tools, ensure you trust the AI client, as it will be able to request actions within the permissions you’ve defined for this MCP Server.
8.4.MCP Server History
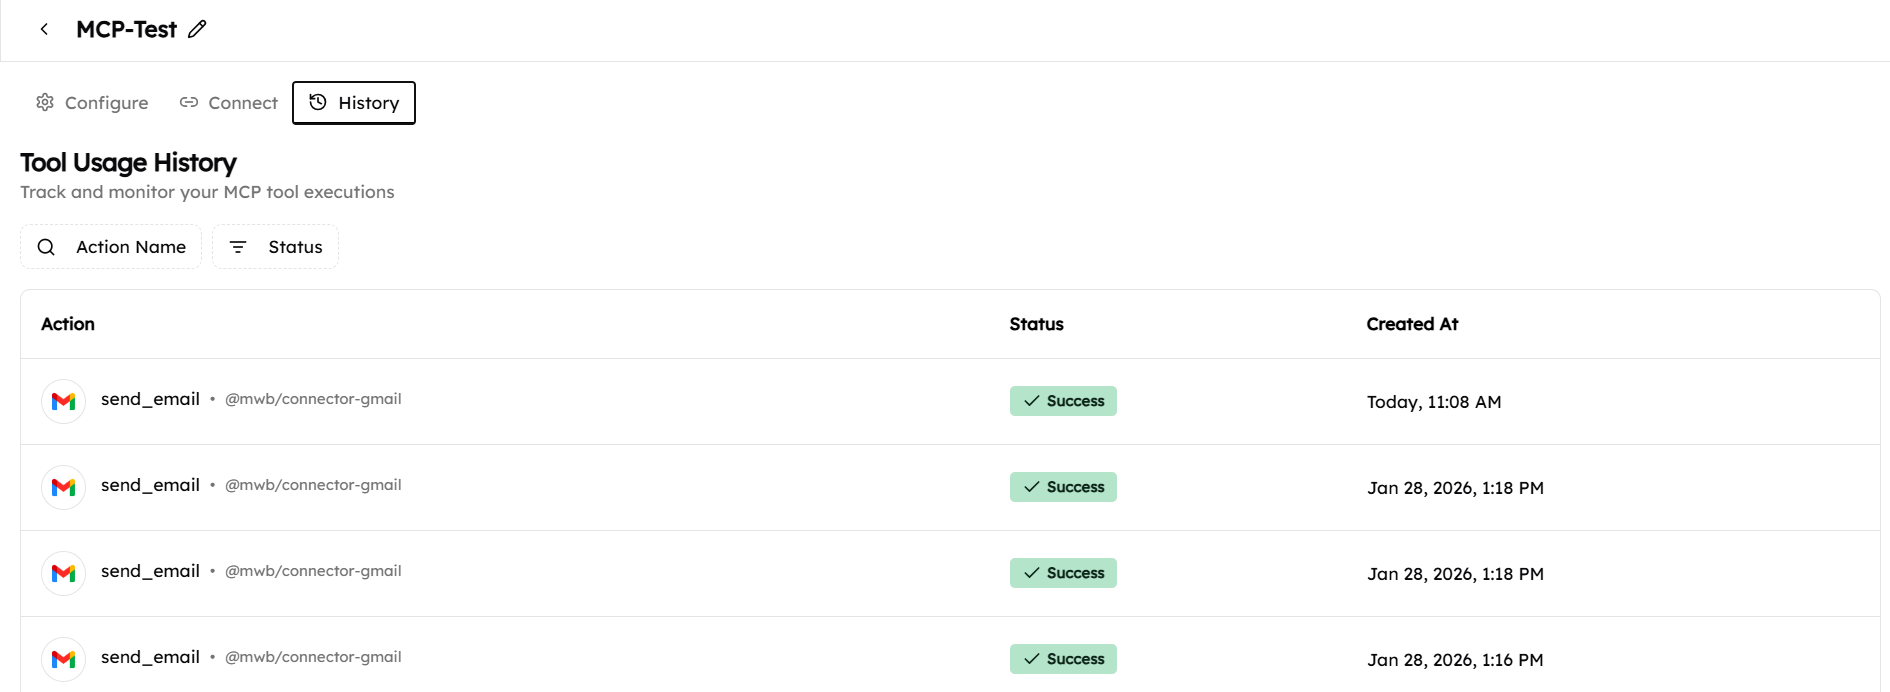
The History tab shows a record of all actions run through the MCP Server. It helps you see what actions were triggered, when they ran, and whether they were successful. It allows administrators to review, troubleshoot, and validate how AI is interacting with connected systems.
This view is useful for checking if AI-triggered actions are working as expected.
What you can check in this section?
- Action: The task or action that was executed (for example, sending an email)
- Status: Whether the action succeeded or failed
- Created At: The date and time the action was run
You can use the search and filter options to quickly find specific actions or review failed runs.
8.5.MCP Best Practices
- Create separate MCP Servers for different teams (Sales, Support, Ops)
- Start with read-only or limited actions and expand gradually
- Use descriptive server names
- Review MCP History regularly, especially after enabling new tools
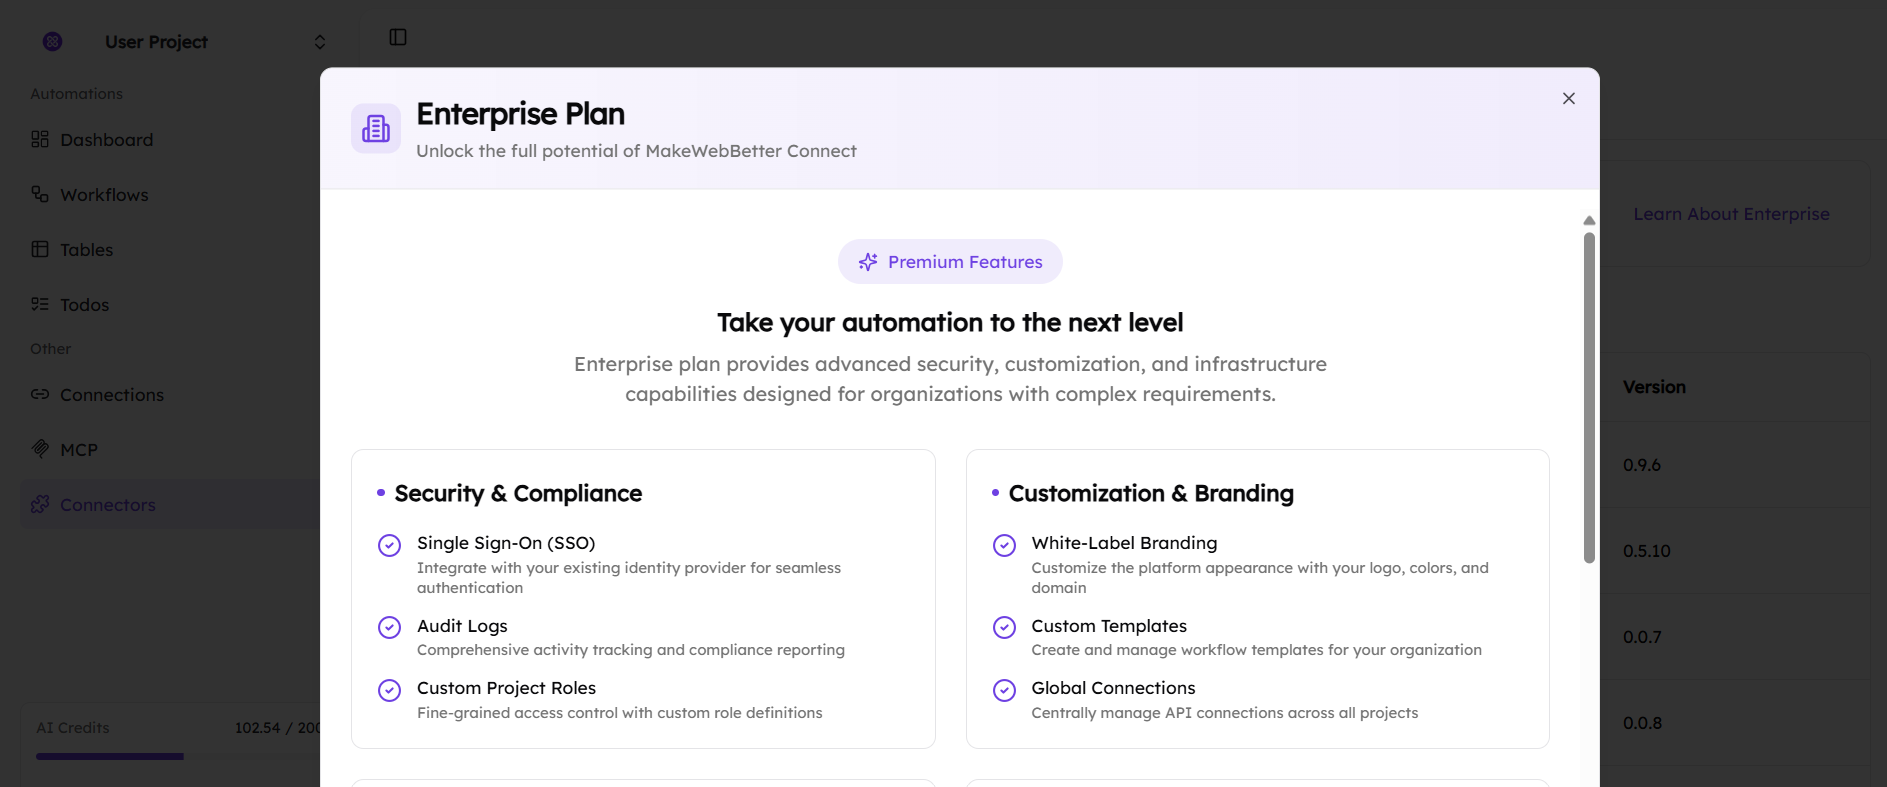
9.Connectors
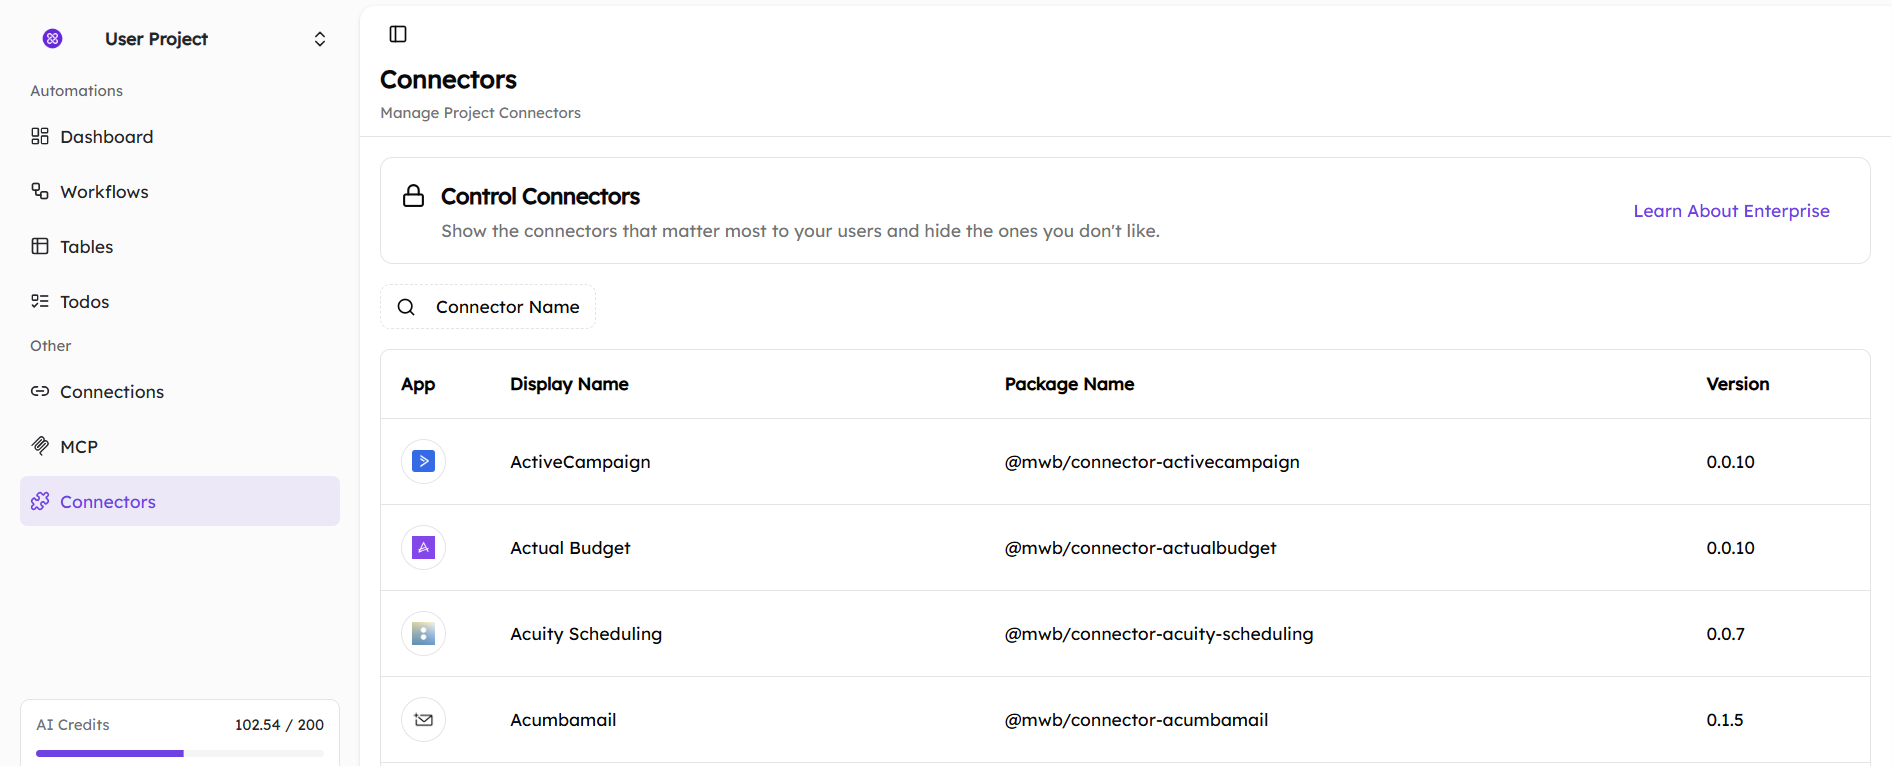
The Connectors section in MakeWebBetter Connect lets you manage all available app connectors for your project. Connectors define which applications can be used in workflows, connections, and MCP-powered actions.
This section replaces the earlier App Marketplace and provides more control over which integrations are visible and usable within your project.
What You Can Do Here?
From the Connectors page, you can:
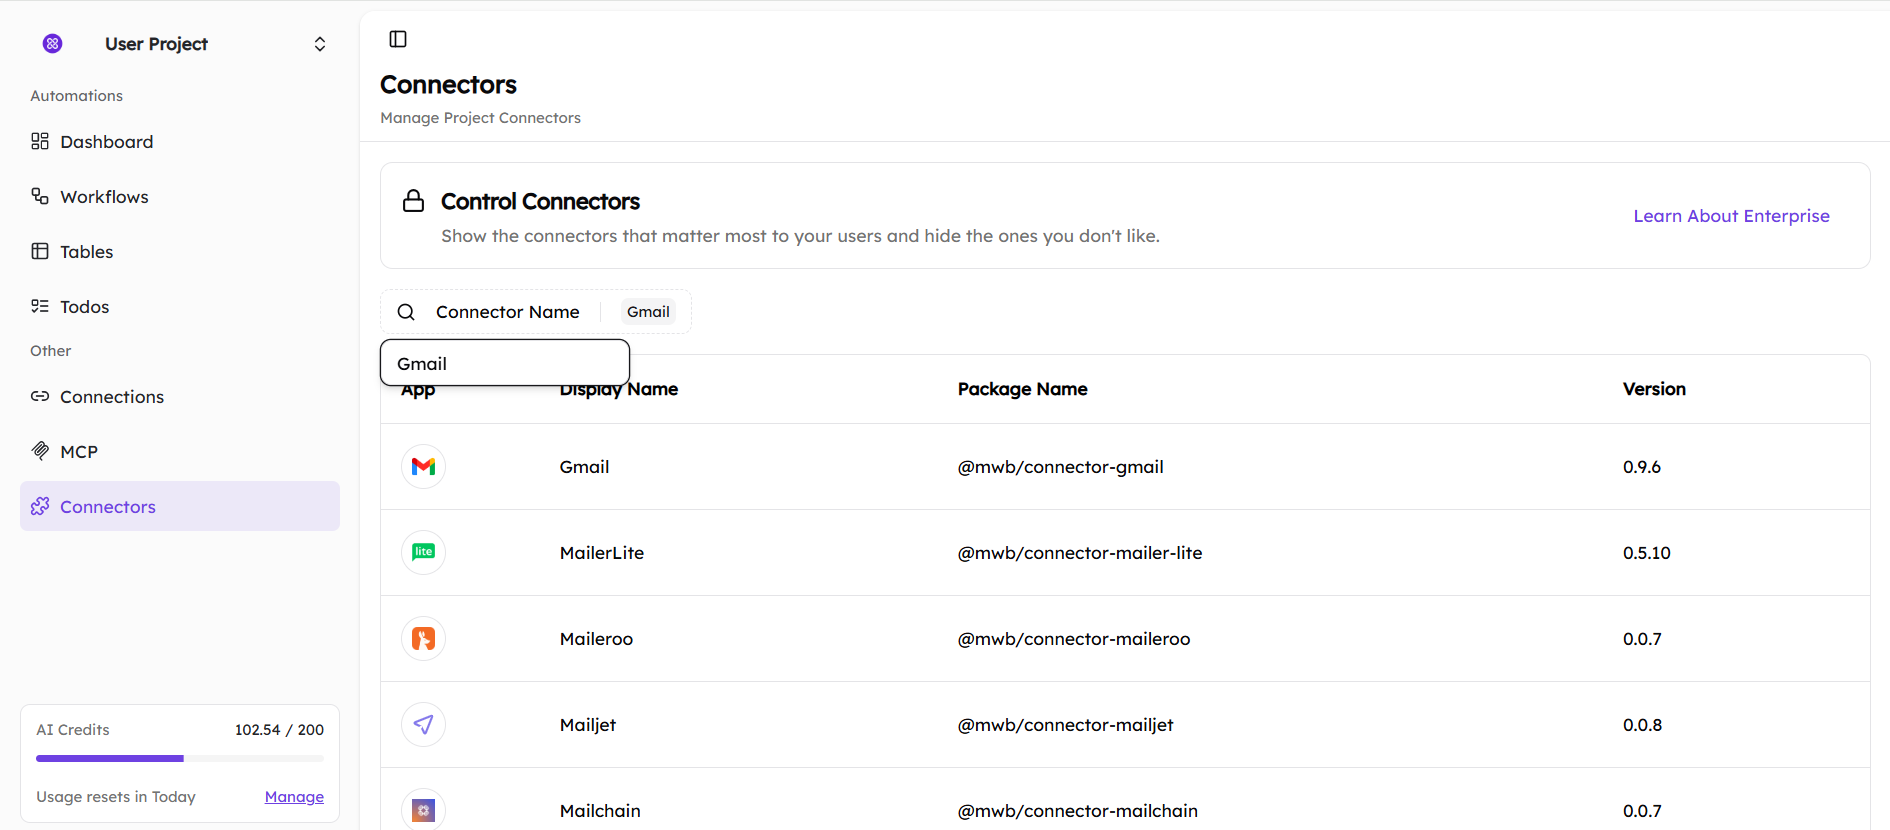
- Browse all available app connectors
- Search for connectors by name
- View connector details such as display name, package name, and version
Each connector represents a supported application that can be connected and used in workflows.
Controlling Connectors
The Control Connectors option allows you to manage which connectors are shown to users:
- Highlight the connectors most relevant to your use case
- Hide connectors you don’t want to use
This is especially useful for teams and enterprise environments where you want a focused, controlled set of integrations.
10.Account Settings

The Account Settings section lets you manage your personal account preferences and security settings in MakeWebBetter Connect.
From this screen, you can:
- View account details: See the email address associated with your account
- Theme: Choose your preferred theme or follow system settings. Apart from default system settings, you can opt for the ‘Light’ or ‘Dark’ theme.
- Password: Change your password or request a reset link
- Two-Factor Authentication (2FA): Enable or disable 2FA to add an extra layer of account security
- Delete Account: Permanently delete your account if required
Account Settings help you keep your profile secure and customize how you use the platform.
11.Check Active Sessions
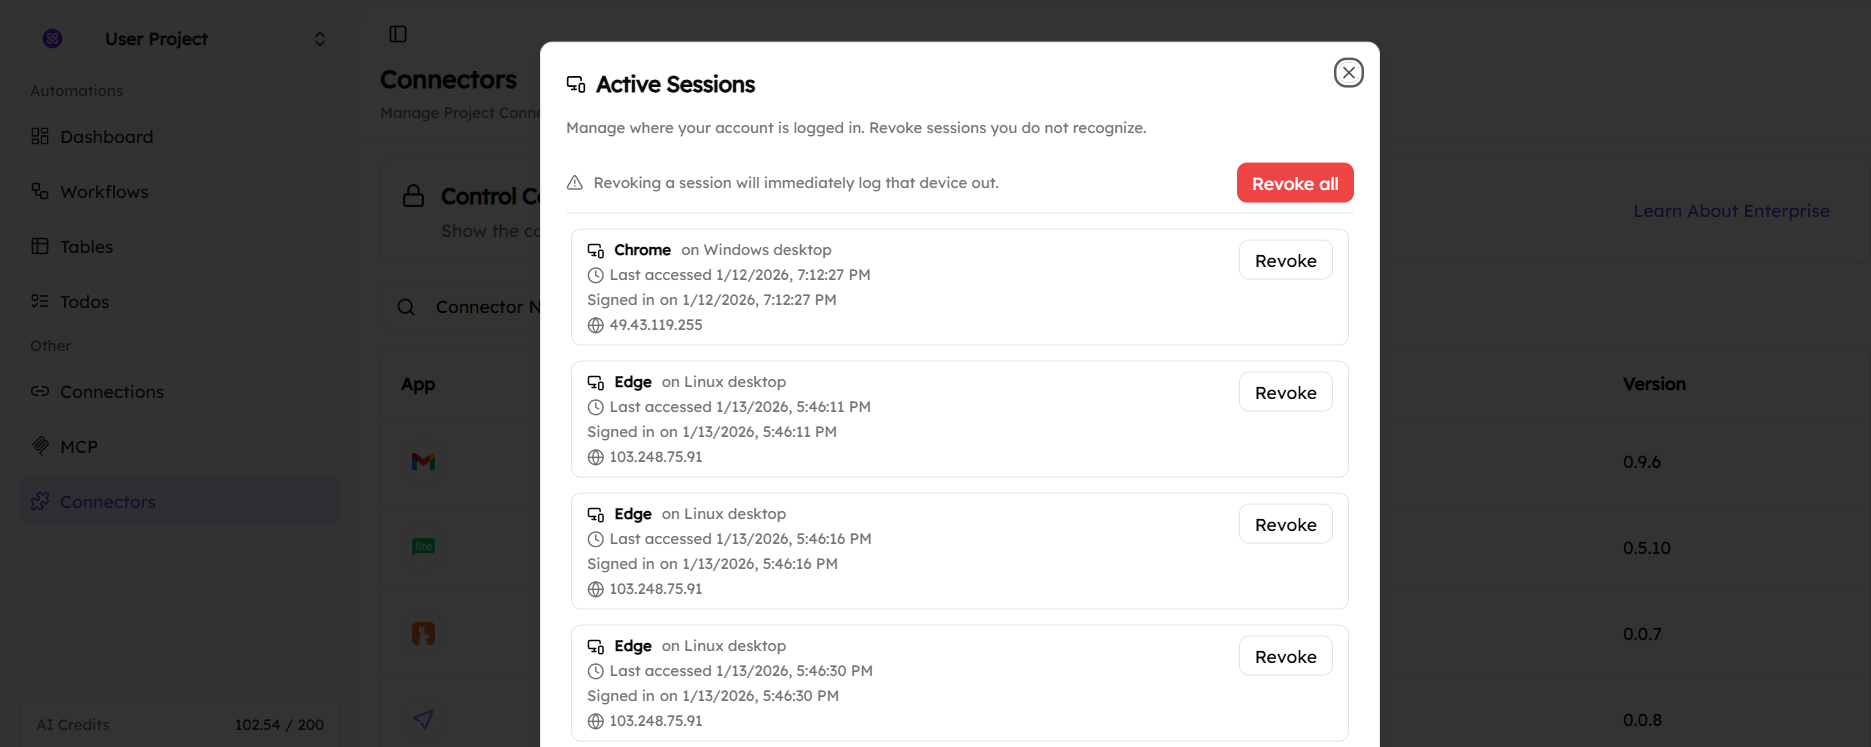
The Active Sessions section shows all devices and browsers where your account is currently logged in. It helps you monitor account access and quickly revoke sessions you don’t recognize.
In this section, you can:
- View active sessions with details such as browser, device, last access time, and IP address
- Revoke a specific session to immediately log that device out
- Use Revoke all to sign out from all active sessions at once
Revoking a session immediately ends access from that device, helping keep your account secure. The Active Sessions section gives you full visibility and control over where your account is being used.
12.Project Settings
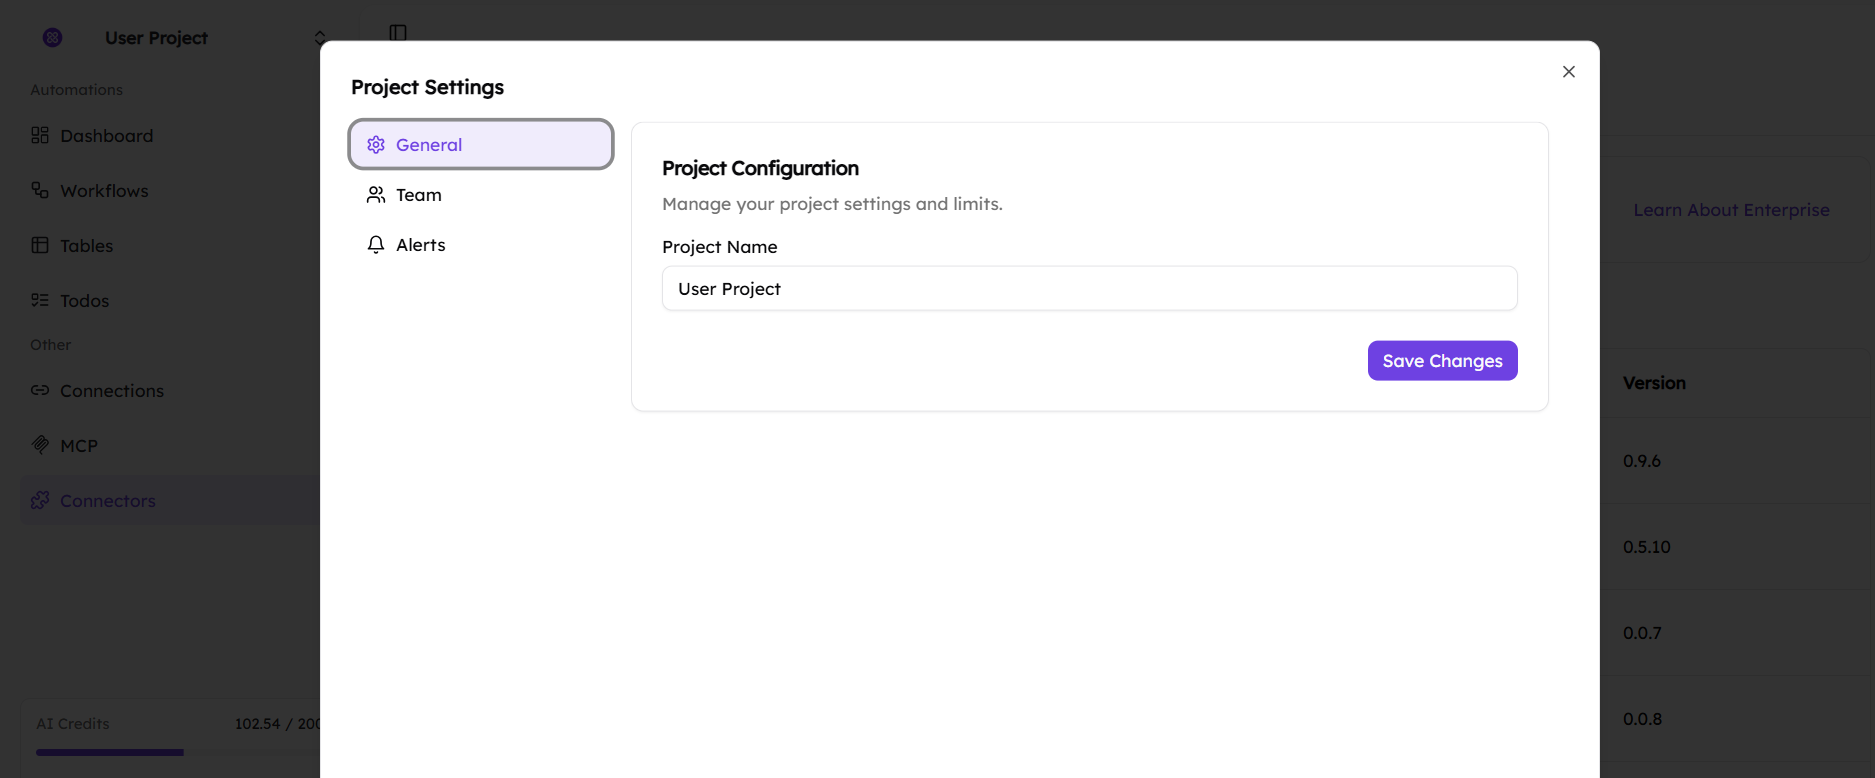
The Project Settings section allows you to manage configuration and access settings for your project.
The General tab is used to manage basic project details:
- Update the Project Name
- Save changes to apply updates across the project
12.1.‘Team’ Project Settings
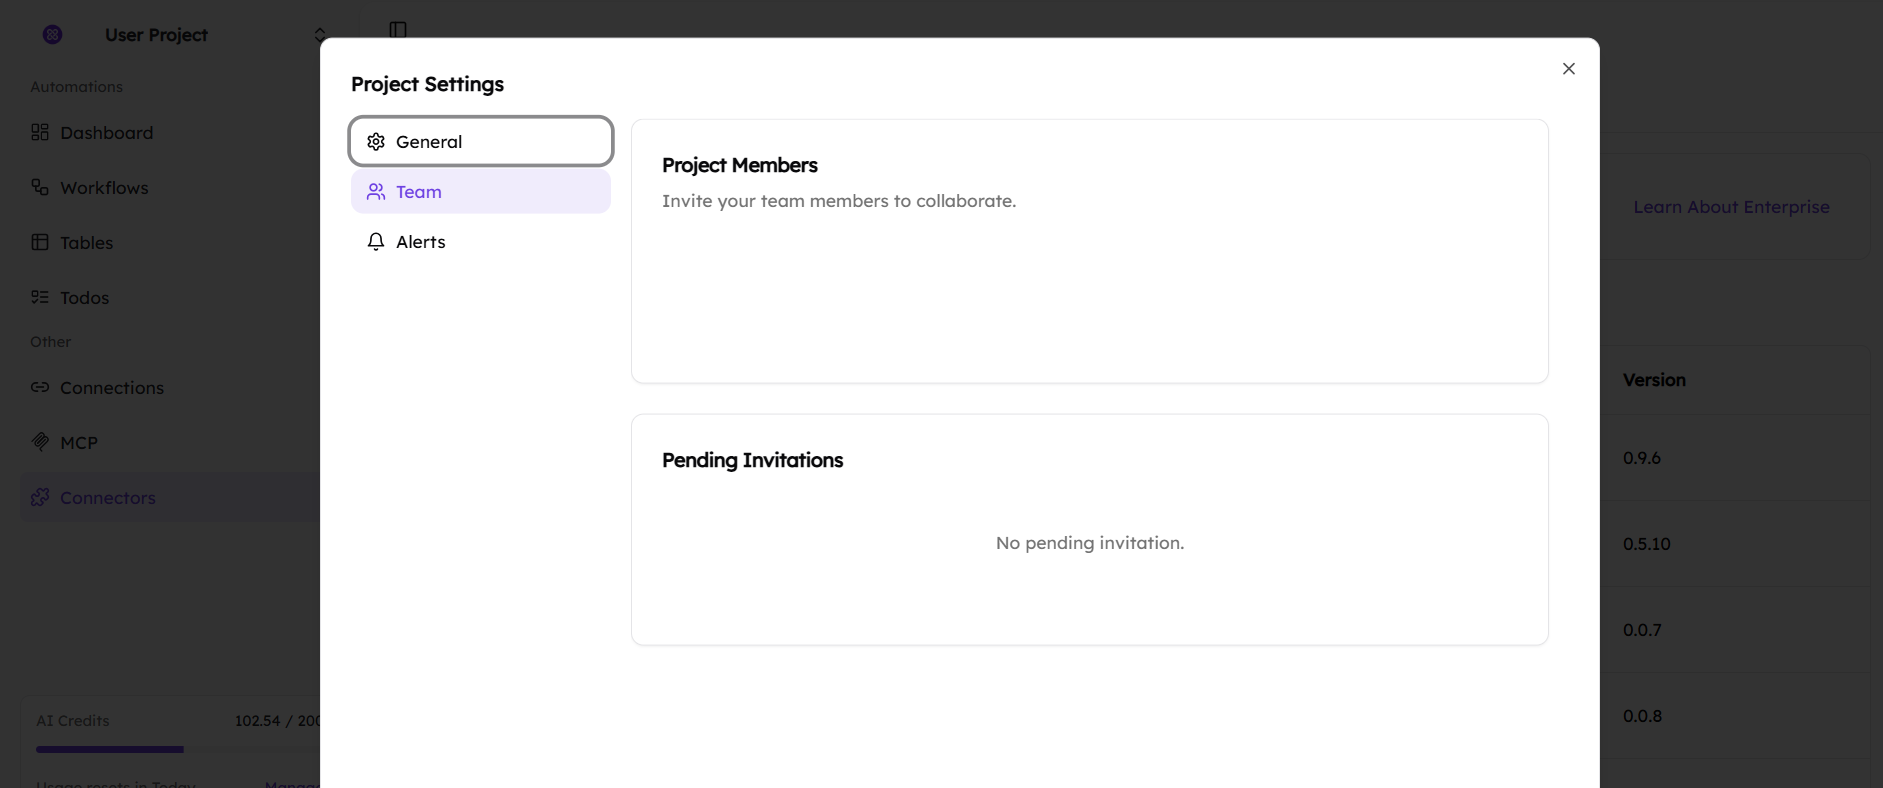
The Team tab lets you manage who has access to your project and collaborate with others.
From this section, you can:
- Invite team members to join the project
- View existing project members
- Track pending invitations and their status
The Team tab helps ensure the right people have access to collaborate on workflows and automations within the project.
12.2.Project Settings: ‘Alerts’
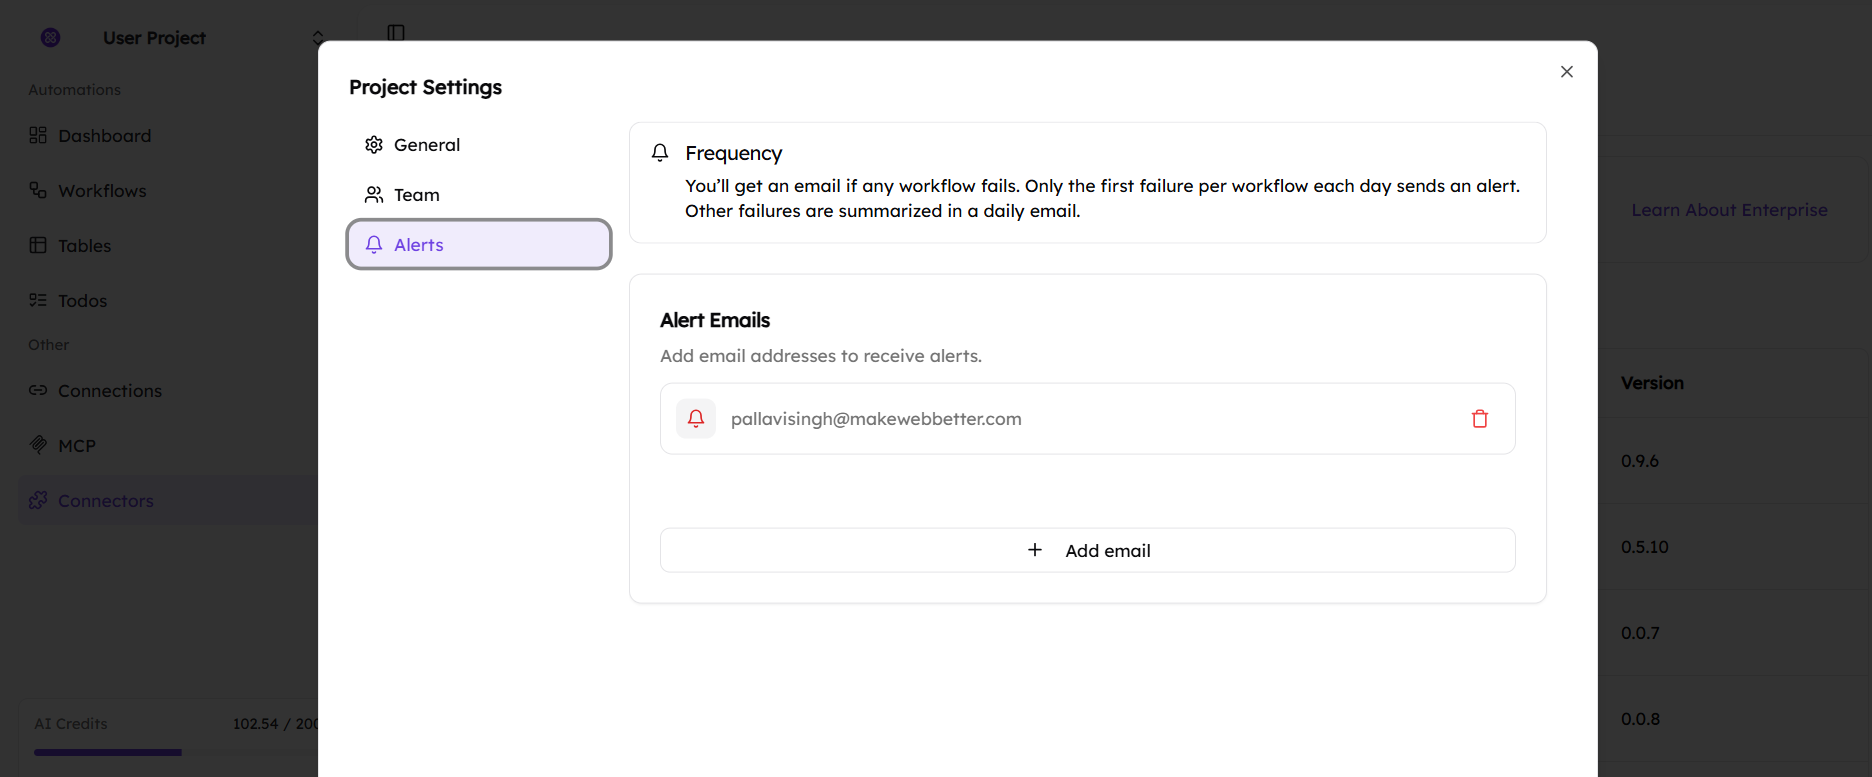
The Alerts tab lets you manage how and where workflow failure notifications are sent.
From this section, you can add or remove email addresses that should receive alert notifications.
Notably, Alerts help you stay informed about workflow issues without overwhelming your inbox.
13.Invite User
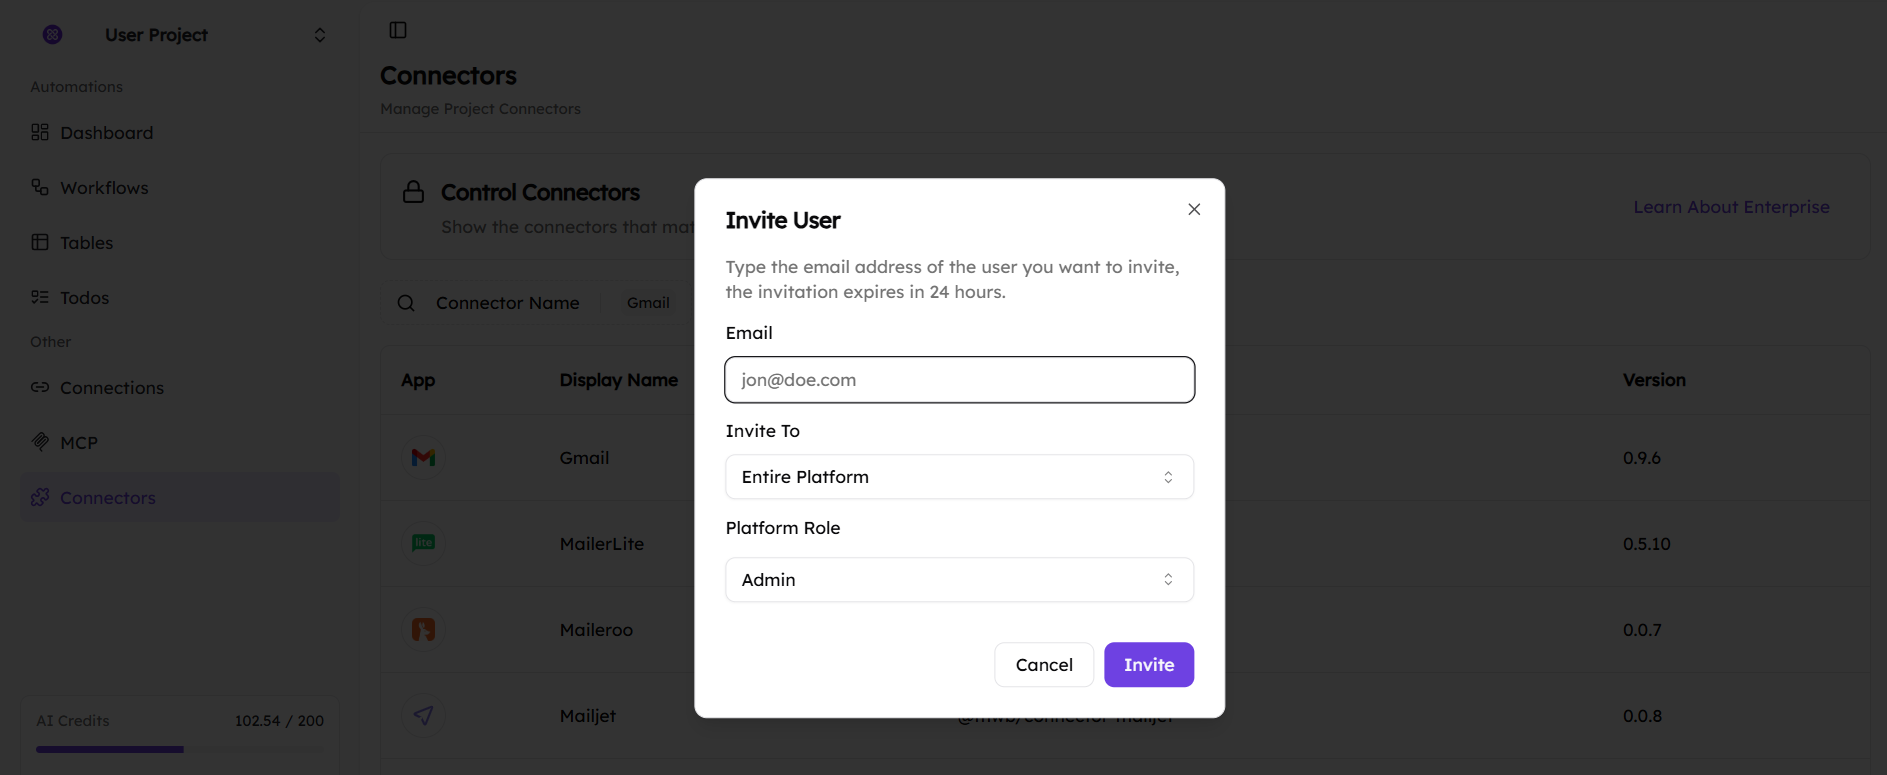
The Invite User option allows you to add new users to your project or platform.
To invite a user:
- Enter the user’s email address
- Select where to invite them (project or entire platform)
- Choose a platform role (for example, Admin)
- Click Invite to send the invitation
Invitations are valid for 24 hours. Once accepted, the user will gain access based on the role and scope selected. This feature makes it easy to collaborate with team members while maintaining control over access levels.