
1.Overview
Features
- Include product categories in membership plans
- Offer membership subscriptions
- Discount on members cart total (percentage or fixed)
- Select limited or lifetime accessibility to WooCommerce members
- WooCommerce membership details and plan creation
- View user membership history and WooCommerce membership details of customers
- Export and import membership plans
- Export members details
- Create user after membership payment is complete
- Perfectly neat shortcodes for single product page customization
- Error logging for handling WooCommerce membership errors
- Bulk actions to edit memberships and move them to trash
- The membership Plan tab shows all existing membership plans on your WooCommerce store
- Filter Member According to Membership Plan and Column Added in Members Table
- Filter Member According to Status
- Addition of Quick Status Update in Member Table
Plugin Compatibilities
- Offer subscription of membership plans using our Subscription for WooCommerce– WordPress plugin.
- WPML Compatible
- HPOS Compatible
2.Installation
Subsequently, there are two ways of installing the plugin:
Automatic Installation –
These are the steps for automatic installation of Membership for WooCommerce:
-
- Open the dashboard of your WordPress website. From the admin panel, navigate to the sidebar.
- Go to Plugins > Menu > Add New
- On this ‘add plugins’ page, go to the search bar and browse ‘ Membership for WooCommerce’
- Find the plugin, Membership for WooCommerce by WP Swings, and click Install Now.
Manual Installation –
You can easily download the Membership for WooCommerce plugin from WordPress.org or WP Swings website. Thereafter you can follow these steps for manually installing the Membership for WooCommerce plugin:
- Upload the Memberships for WooCommerce folder to the /wp-content/plugins/ directory.
- Activate the plugin through the ‘Plugins’ menu in WordPress.
After you install the plugin, the Membership for WooCommerce plugin will be shown below the option named WP Swings and another option will be generated in the name of Membership where you will find all the membership plans and members.
You can download our Membership For WooCommerce directly from here :
Please check our Premium Version for more enhanced features :
3.Plugin Configuration Form
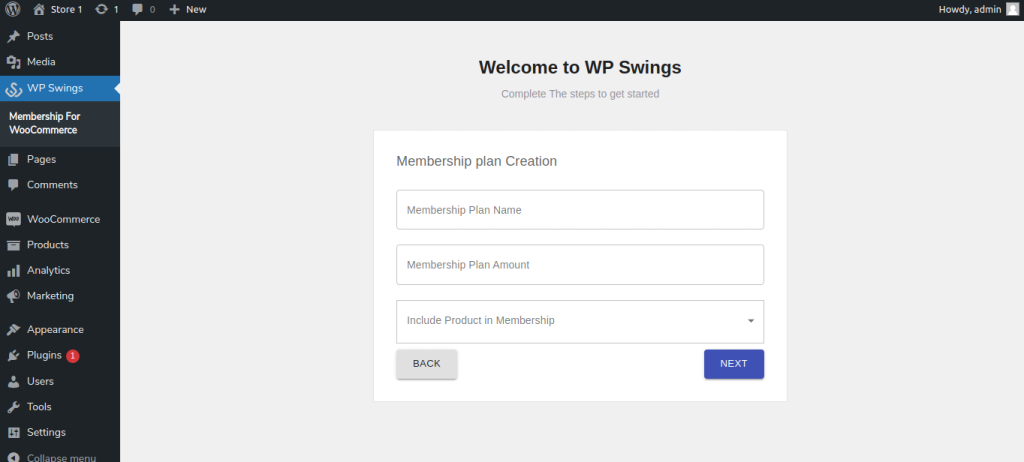
Initially on installing the Membership for WooCommerce plugin, the admin is guided through a multi-step setup. As soon as you activate the plugin and proceed towards Membership for WooCommerce from Dashboard, you’ll find a 3-step setup.
1. General Setting: Enable Membership Plan. Switch the toggle button. Press Next.
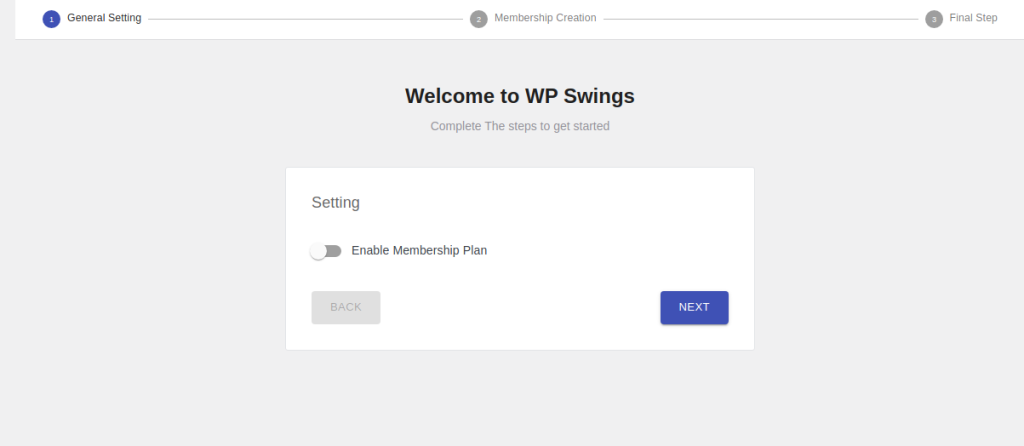
Note: “If you will not enable and skip this here than you will not get by default plan templates from plugin.”
2. Membership Creation: Mention the membership plan name, membership plan amount and include products in the membership plan. Press Next.
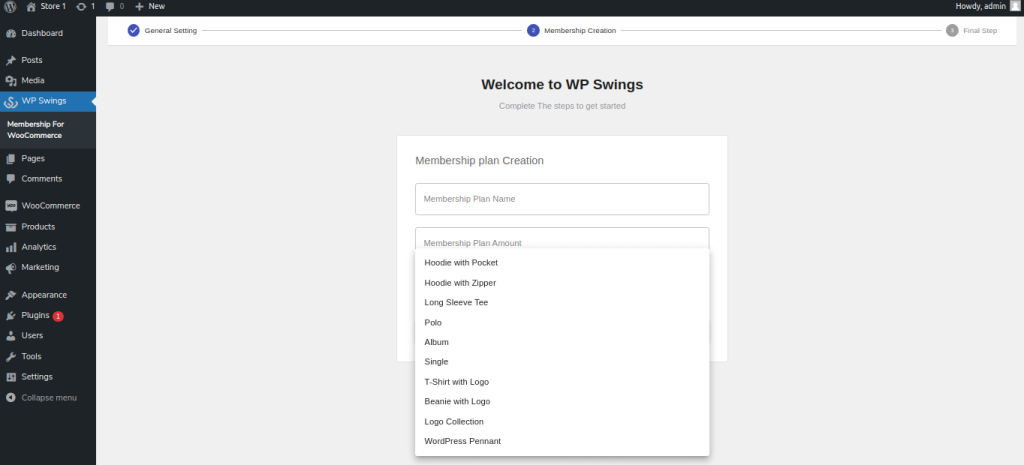
3. When you include membership products, some products of your store shall be listed. Choose from available products.
4.Membership Overview
If the admin wants an overview of the features of the Membership for WooCommerce plugin, he can go through this space. It is for the understanding of the admin. It has the general outlines of the WooCommerce Membership Plugin.
5.General Settings
For changing the general settings of Membership for WooCommerce plugin:
Go to Dashboard > WP Swings > Membership for WooCommerce > General Settings
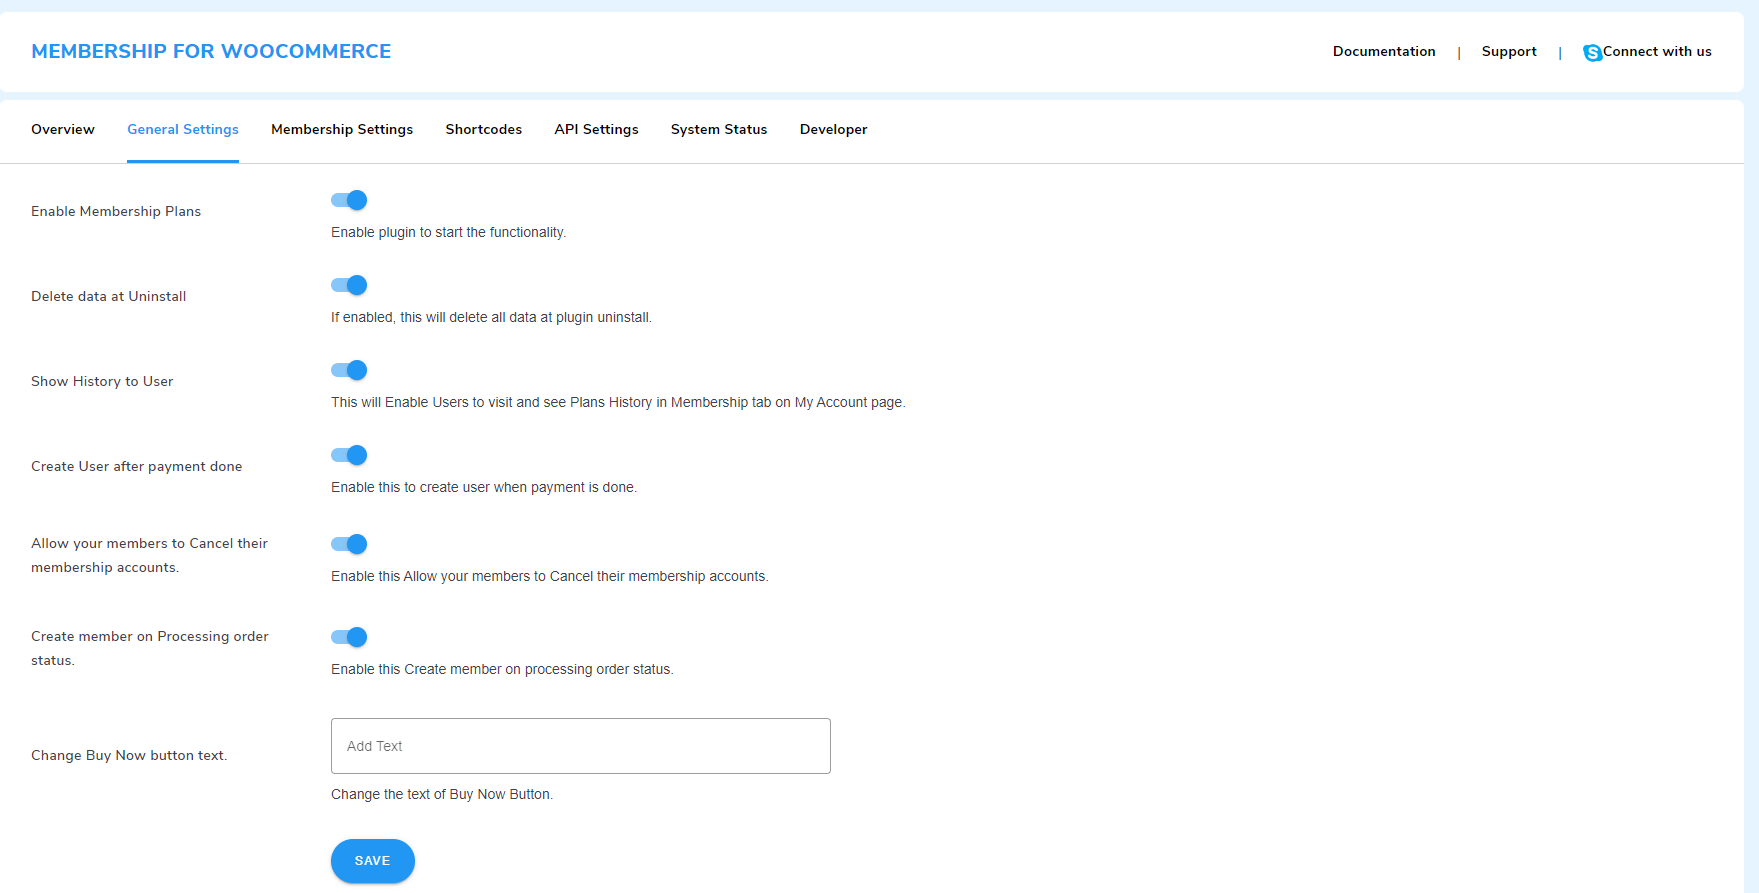
The general settings have the following options:
5.1) Enable Membership Plan
You can enable the membership for WooCommerce plugin by clicking on the toggle button. All other functionalities of our membership plugin will be usable afterward.
5.2) Delete Data At Uninstall
If enabled, this will automatically delete all the member details and Woo membership data after uninstalling the plugin.
5.3) Show History To User
You can enable the visibility of the user’s WooCommerce membership history. This way, the user can visit and see their plan history in the membership tab on ‘My Account Page’.
5.4) Create User After Payment Done
The admin can allow creation of users after membership payment is completed. No default user shall be created for membership buyers before payment is completed. It can be enabled or disabled as per your need.
After making changes in the general settings of the membership plugin. Save Changes.
5.5) Allow Your Members to Cancel their Membership Accounts
You can allow users to cancel their Woo Membership plans whenever they want. Users have to visit the My Account Page > Membership Plans and click on the cancel button to revoke their membership.
5.6) Create a Member on Processing Order Status
The membership plugin creates members even when the purchased plan order is in the processing stage.
5.7) Change the Buy Now Button Text
You can tailor the Buy Now button text, which is displayed on the Membership Plans page. Simply, enter your custom text and save your changes.
6.Membership Settings
The membership setting tab contains advanced options to create new plans, membership & content restrictions, give discounts, add new members, and send emails.
6.1) Add Plan
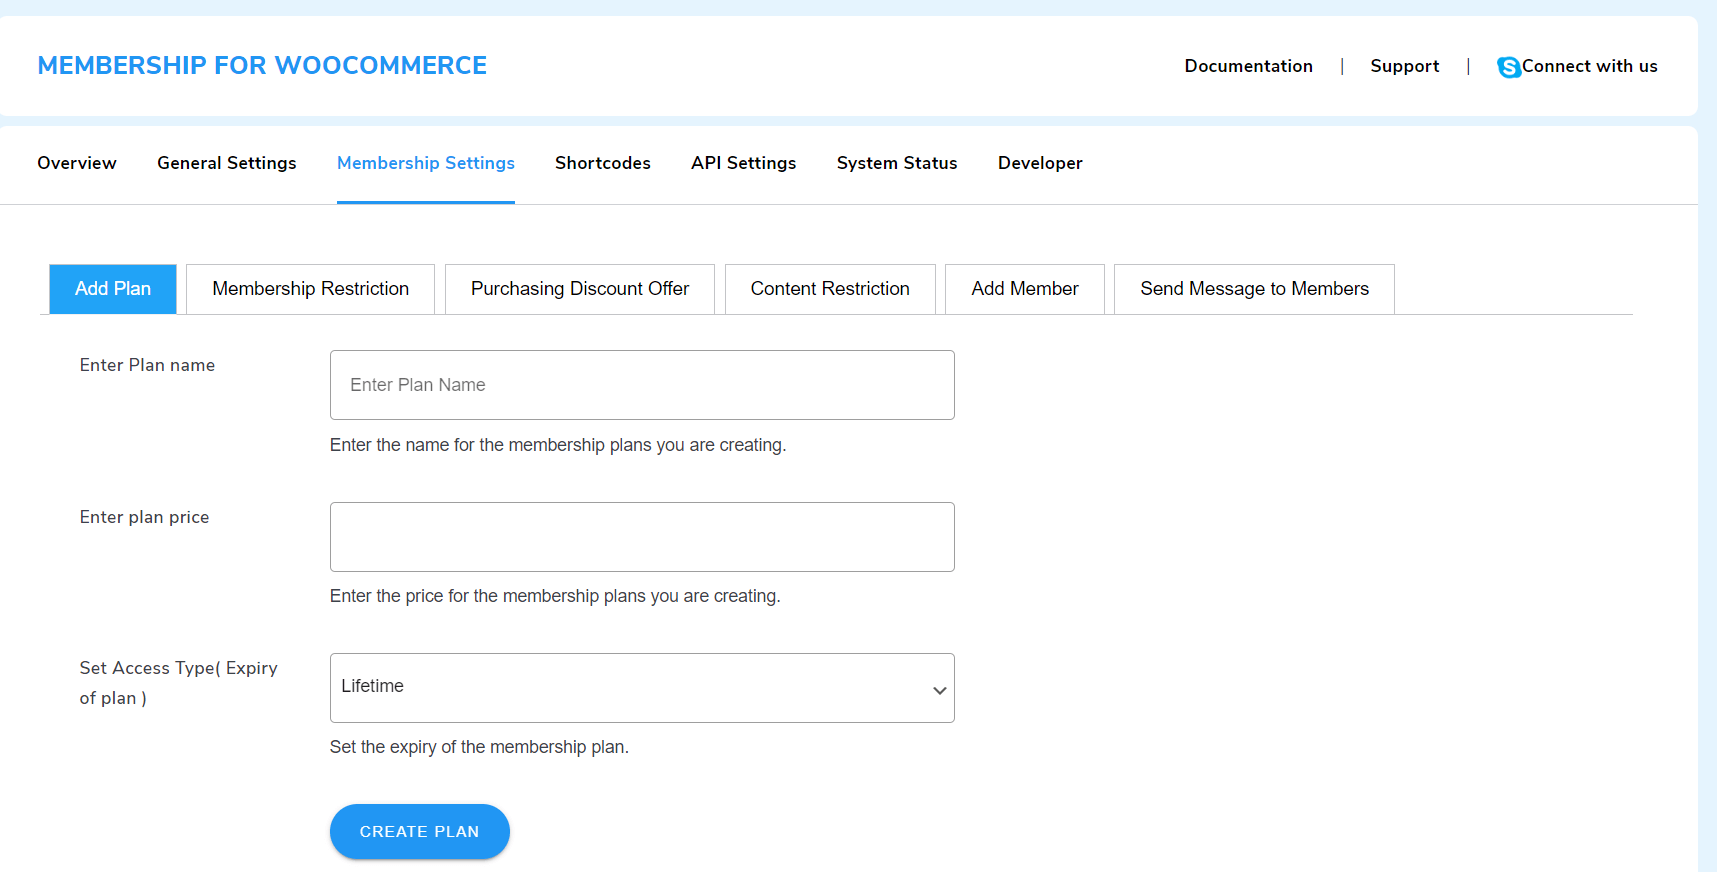
Enter Plan Name: Set a name for your new membership plan.
Enter Plan Price: Decide the plan’s price.
Set Access Type (Expiry of plan): There are two access types for members: Lifetime and Limited.
If you choose the limit, you have to set the expiry period in terms of days, weeks, months, or years.
6.2) Membership Restriction
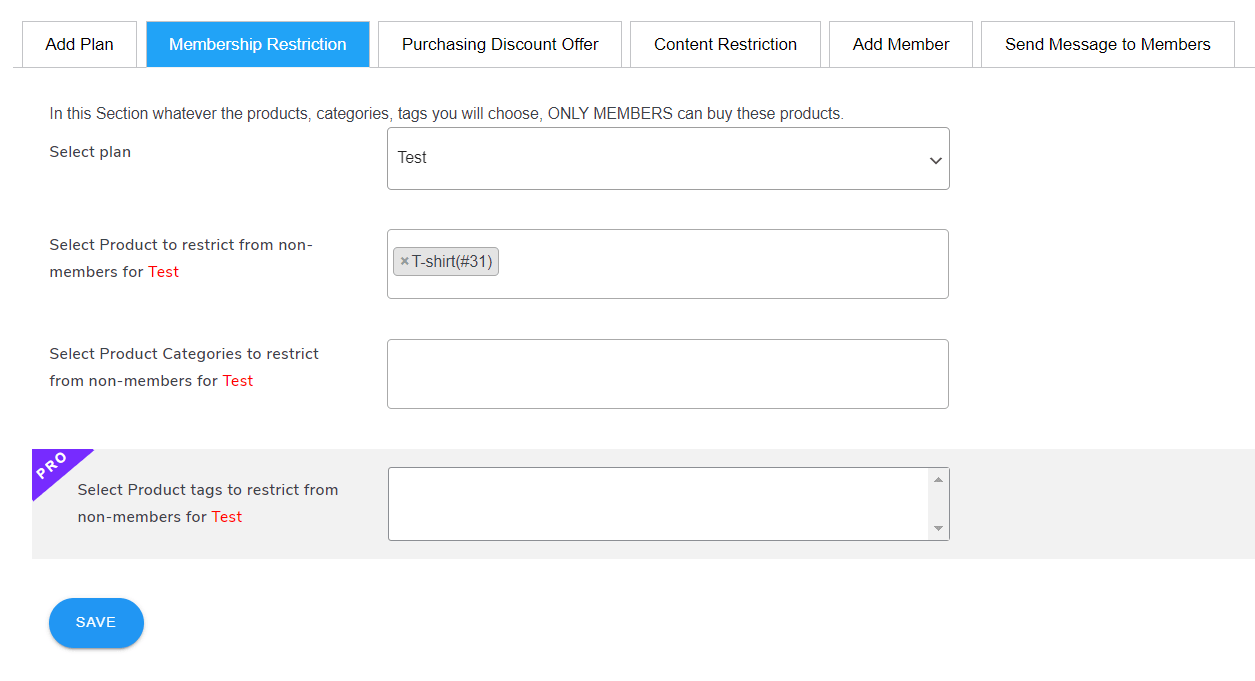
You can restrict products and categories for non-members of your selected plan. To do this, follow these steps:
- Click on the Select Plan drop-down and choose the plan you wish to restrict.
- Afterwards, the options to select products and categories for member-only access will appear.
- Select the appropriate products and categories and click on the Save button.
6.3) Purchasing Discount Offer
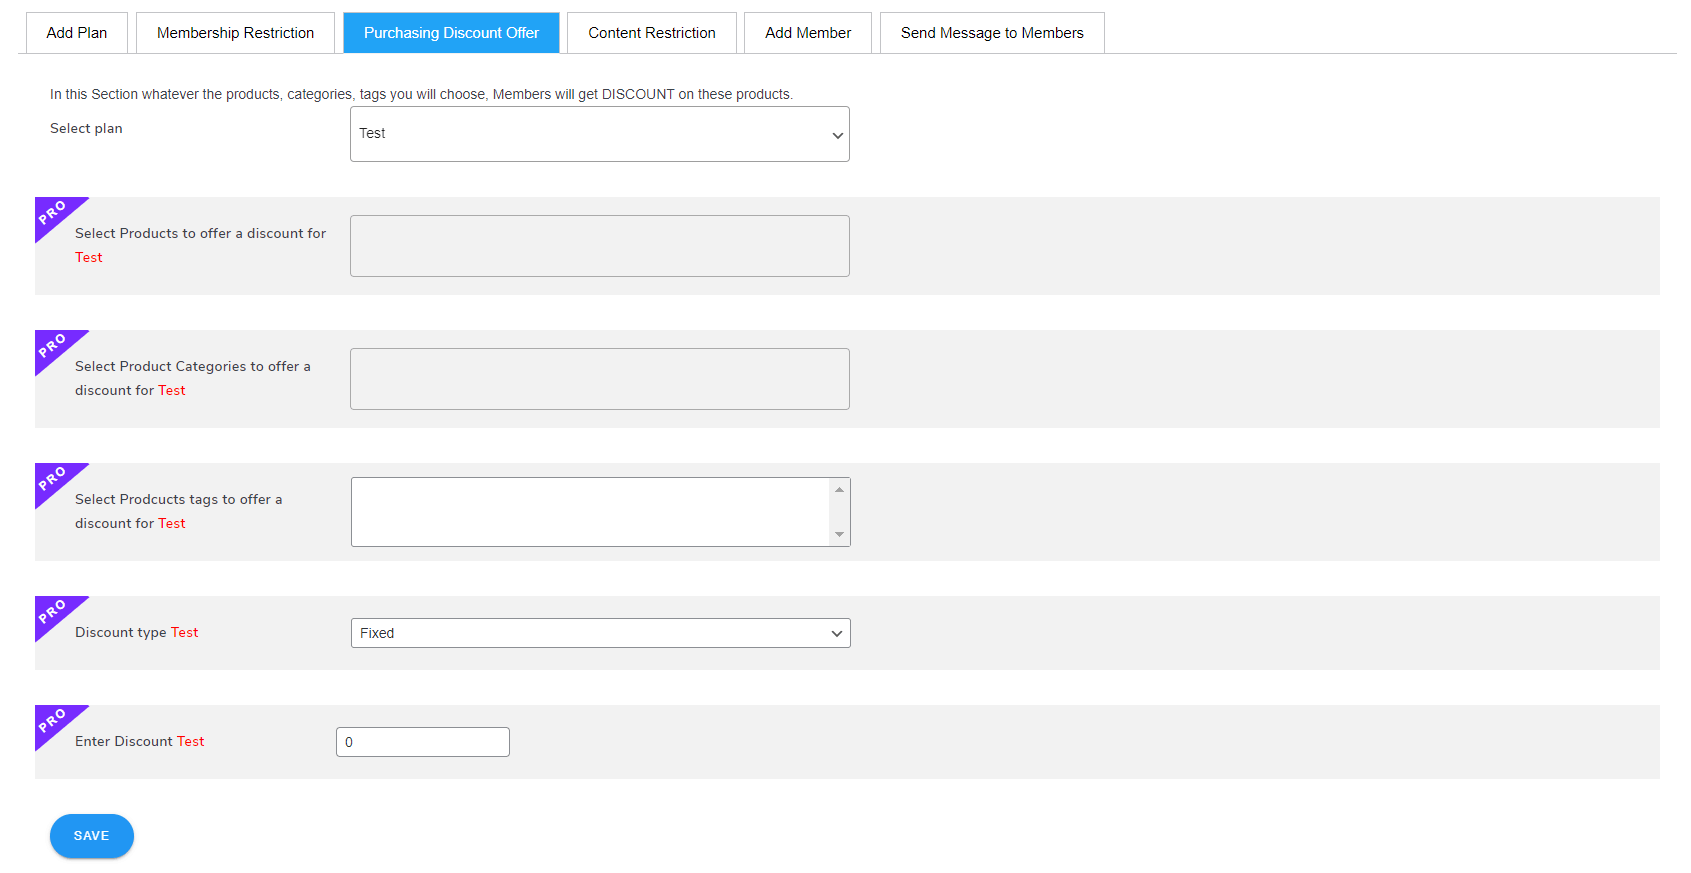
You can offer discounts to members of any plan on your selected products, categories, and tags. From the Select Plan drop-down, pick the plan whose members will be eligible for discounts.
This is a premium feature. So, I need to buy the pro version to implement it.
6.4) Content Restriction
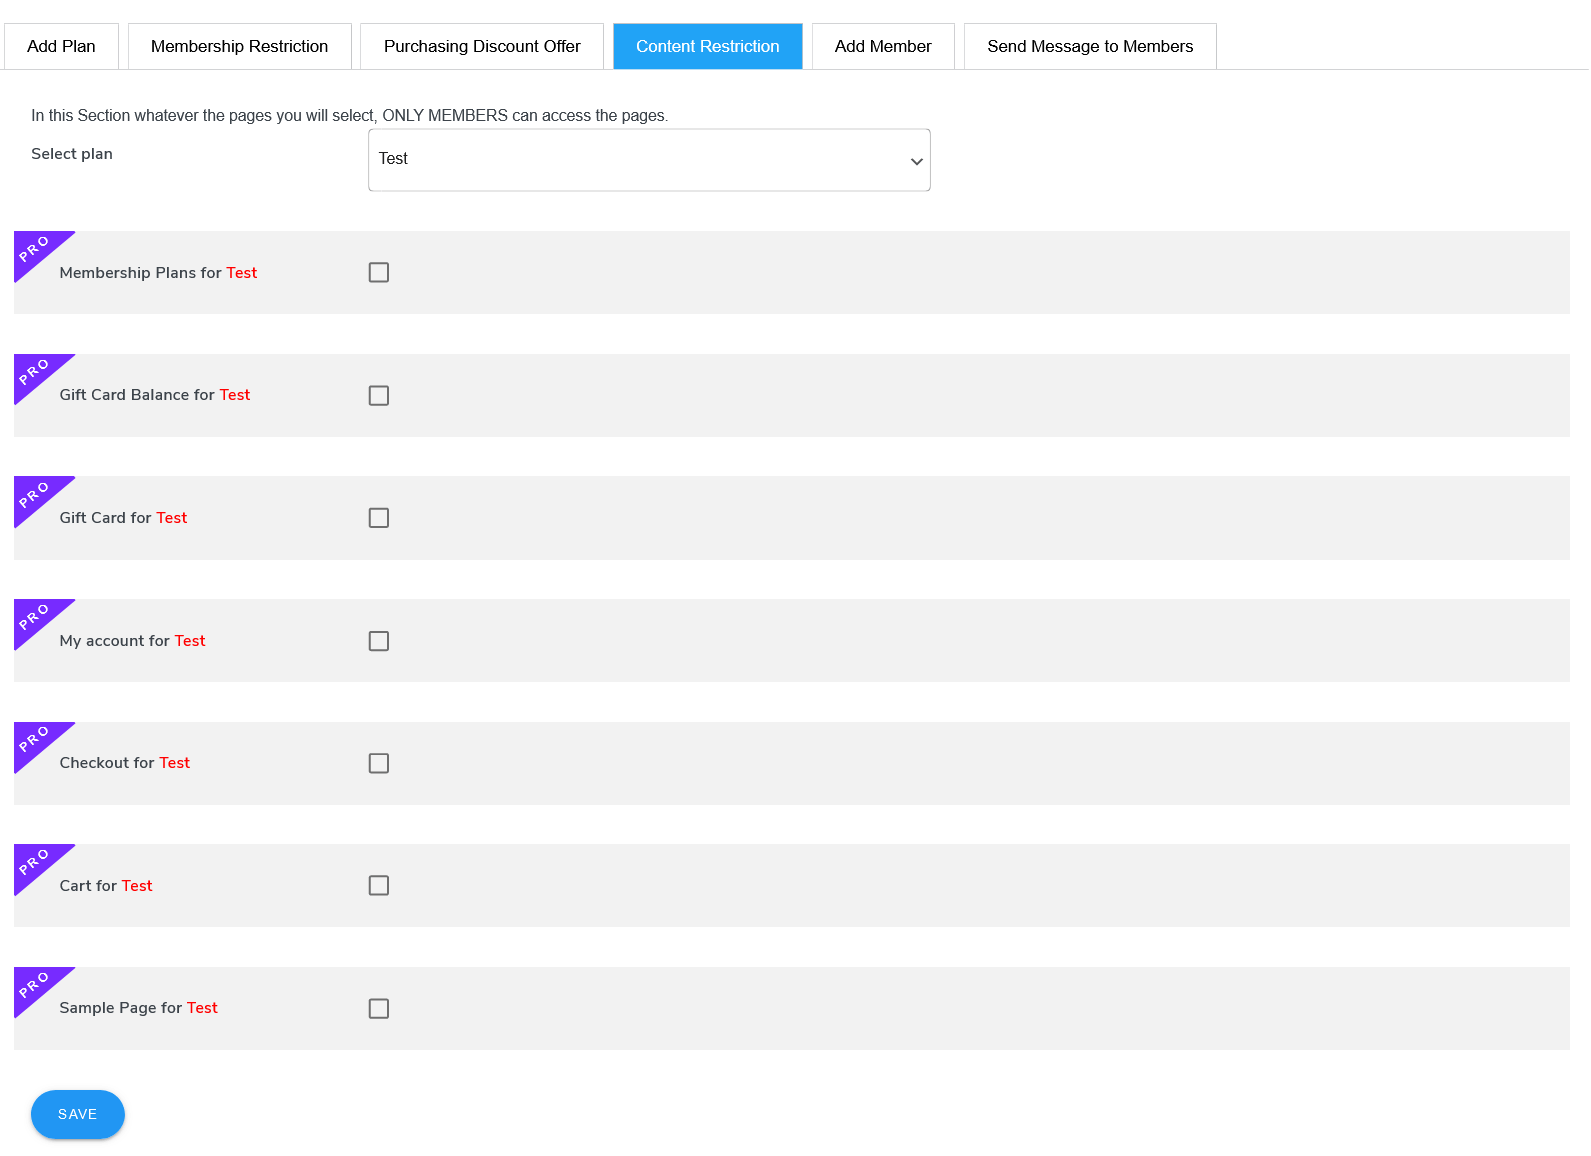
You can restrict non-members from accessing the pages of your WooCommerce store. Only members will be able to view your selected pages. To apply this restriction, follow these steps:
- Select the membership plan from the Select plan dropdown menu.
- Select the pages that should only be visible to members.
- Lastly, save your changes.
Note: this is a feature for Premium users of the membership plugin.
6.5) Add Member
You can manually add members to any of your membership plans. For these steps to add a new member:
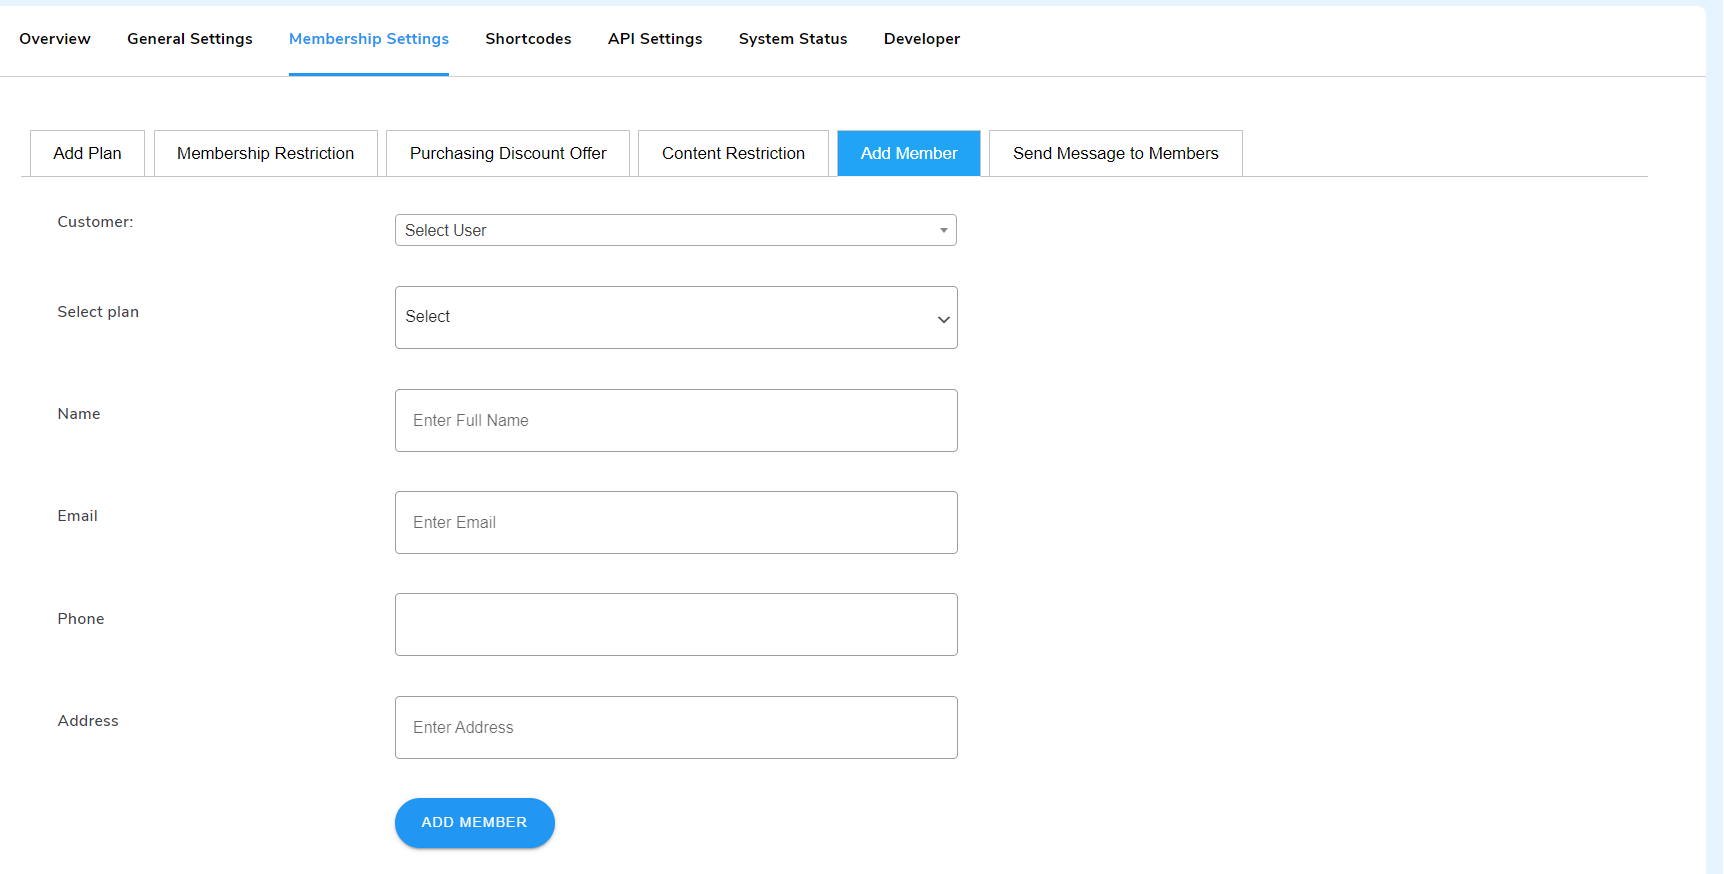
- Select the user from the Customer dropdown.
- Select a Plan to enroll the selected member.
- Enter the Name and Email of the member.
- Also, feed in the Phone and Address details.
- Lastly, click on the Save button to create a new member.
6.6) Send Message to Members
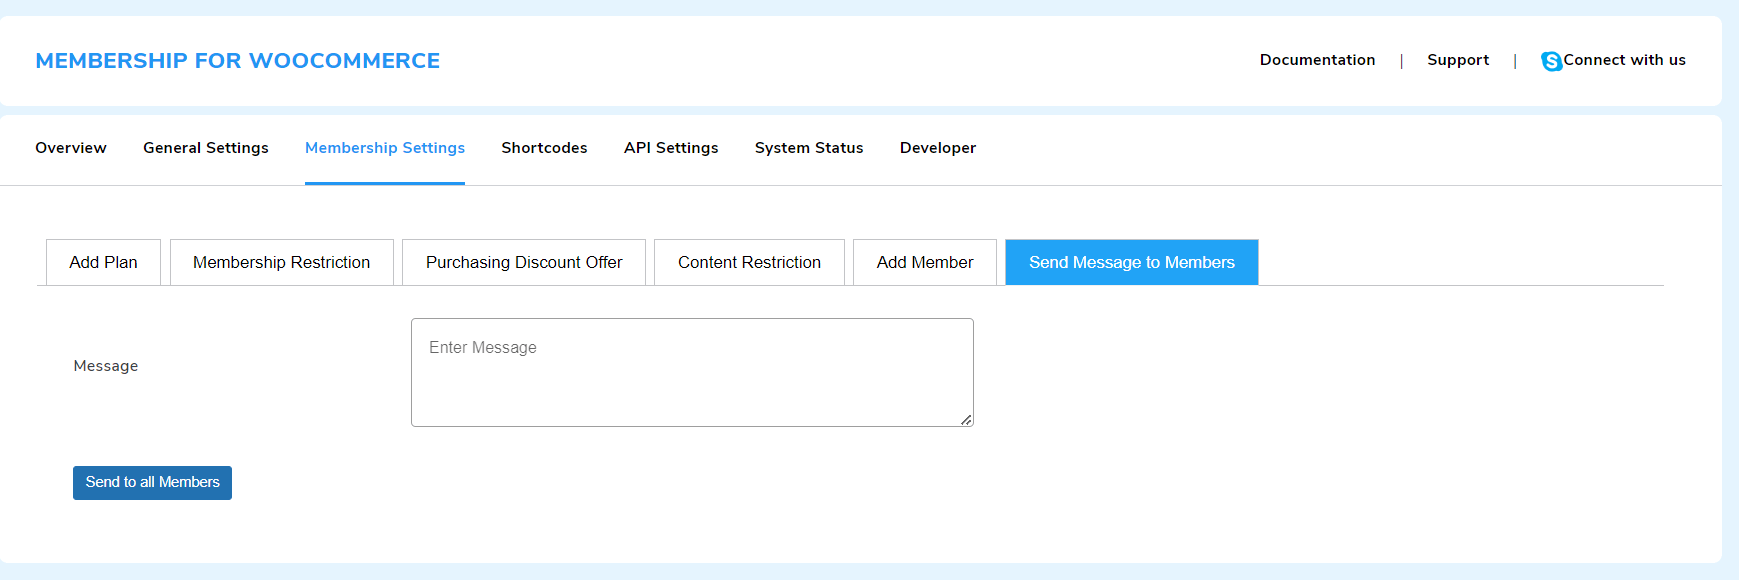
Send bulk email notifications to all members by entering your message in the Message box and hitting the Send to All Members button.
7.Membership Shortcodes
Admin can customize the single product page through the shortcodes that are provided in this space. These membership shortcodes are in action for:
- Membership Action Shortcodes
- Membership Plans Shortcodes
- Membership Registration Shortcodes

You have to copy these shortcodes on the product page and customize them according to your requirements.
Go to Dashboard > WP Swings > Membership for WooCommerce > Membership Shortcodes
Membership Action Shortcodes
- Buy Now: This shortcode only returns the buy now button. Use it as [wps_membership_buy_now].
- No Thanks: This shortcode only returns the no thanks button. Use it as [wps_membership_no].
Membership Plan Shortcodes
- Membership Plan Title: This shortcode returns the title of the membership plan. Use it as [wps_membership_title_name]
- Membership Plan Price: This shortcode returns the price of the membership Plan. Use it as [wps_membership_price]
- Membership Plan Desc: This shortcode returns the description of the membership Plan. Use it as [wps_membership_desc_data]
8.API Settings
Membership APIs render details about active membership plans and purchased memberships by any user in any software system or application.
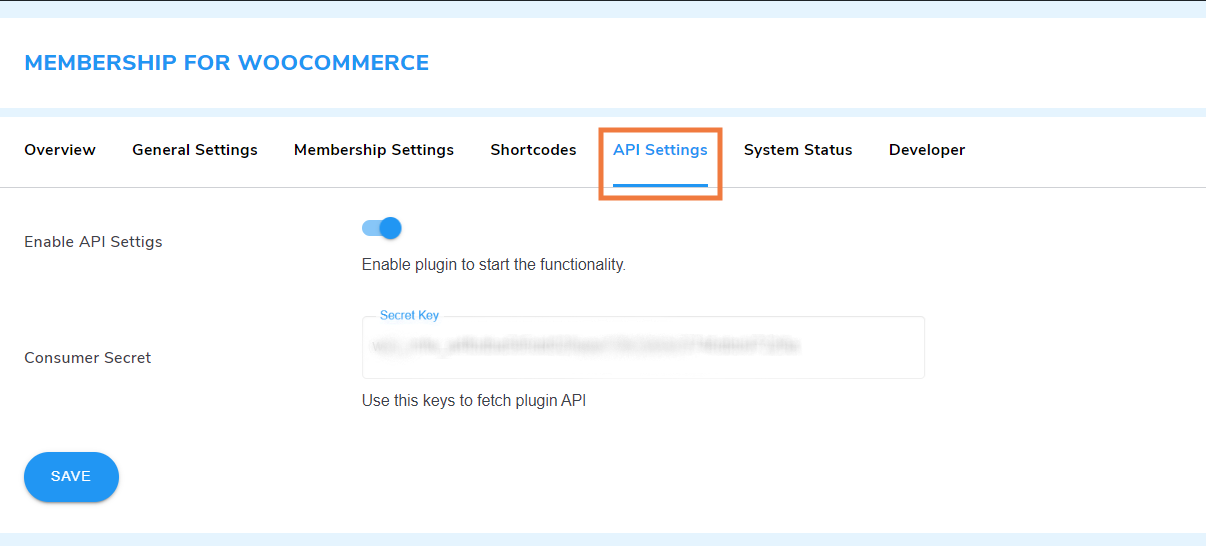
You can use API secret key with parameters to get the desired data.
Enable API Keys: Click on the toggle button to authorize membership API usage.
Consumer Secret Key: You can use this key to get plugin API. It will authenticate requests made to the membership plugin API.
8.1.Active Membership Plans API
To retrieve the specified data (Membership ID, Name, Type, Price, & Duration) from the provided API response using the consumer_secret key, we can use an HTTP GET request.
GET http://membership-development-site.local/wp-json/wps-mfw/get-user-membership?consumer_secret=<CONSUMER_SECRET>
JSON Response:
{
“status”: “success”,
“code”: “200”,
“data”: [
{
“membership_id”: 76,
“membership_name”: “Silver”,
“plan_price”: “15”,
“plan_validity”: “lifetime”,
“plan_duration”: “—“,
“membership_status”: “complete”
},
{
“membership_id”: 78,
“membership_name”: “Gold”,
“plan_price”: “20”,
“plan_validity”: “limited”,
“plan_duration”: “2 years”,
“membership_status”: “complete”
},
{
“membership_id”: 80,
“membership_name”: “Diamond”,
“plan_price”: “30”,
“plan_validity”: “lifetime”,
“plan_duration”: “—“,
“membership_status”: “complete”
}
]
}
8.2.Purchased Memberships By Any User API
This API response gives membership ID, name, price, validity, duration, & status.
The parameter for this API request should include user_id and consumer_secret.
HTTP Request:
GET http://membership-development-site.local/wp-json/wps-mfw/get-user-membership?user_id=<USER_ID>&consumer_secret=<CONSUMER_SECRET>
JSON response example:
{
“status”: “success”,
“code”: “200”,
“data”: [
{
“membership_id”: 76,
“membership_name”: “Silver”,
“plan_price”: “15”,
“plan_validity”: “lifetime”,
“plan_duration”: “—“,
“membership_status”: “complete”
},
{
“membership_id”: 78,
“membership_name”: “Gold”,
“plan_price”: “20”,
“plan_validity”: “limited”,
“plan_duration”: “2 years”,
“membership_status”: “complete”
},
{
“membership_id”: 80,
“membership_name”: “Diamond”,
“plan_price”: “30”,
“plan_validity”: “lifetime”,
“plan_duration”: “—“,
“membership_status”: “complete”
}
]
}
9.Create WooCommerce Membership Plans
Admin can create as many membership plans as he wants on his WooCommerce stores with respect to the inventory.
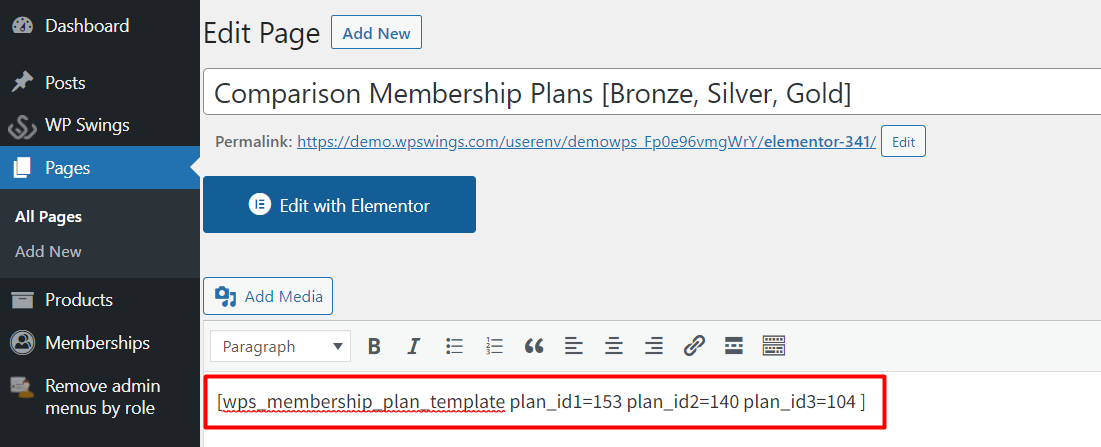
We have two different templates in PRO version one is “Simple” and other is a “Comparison” template which can be used with a shortcode in a click, check live demo here.
Go to Admin Dashboard > Memberships > All Membership Plans > Add Membership Plans
When you begin creating your WooCommerce membership plans, you will have to fill in the following details:
9.1.Title, Media & Description
Mention the name of your membership plan here. For example, Gold plan, Silver plan, Bronze plan, etc. Below this, you can describe your plan and also add media, just like you do on your regular WordPress website post.
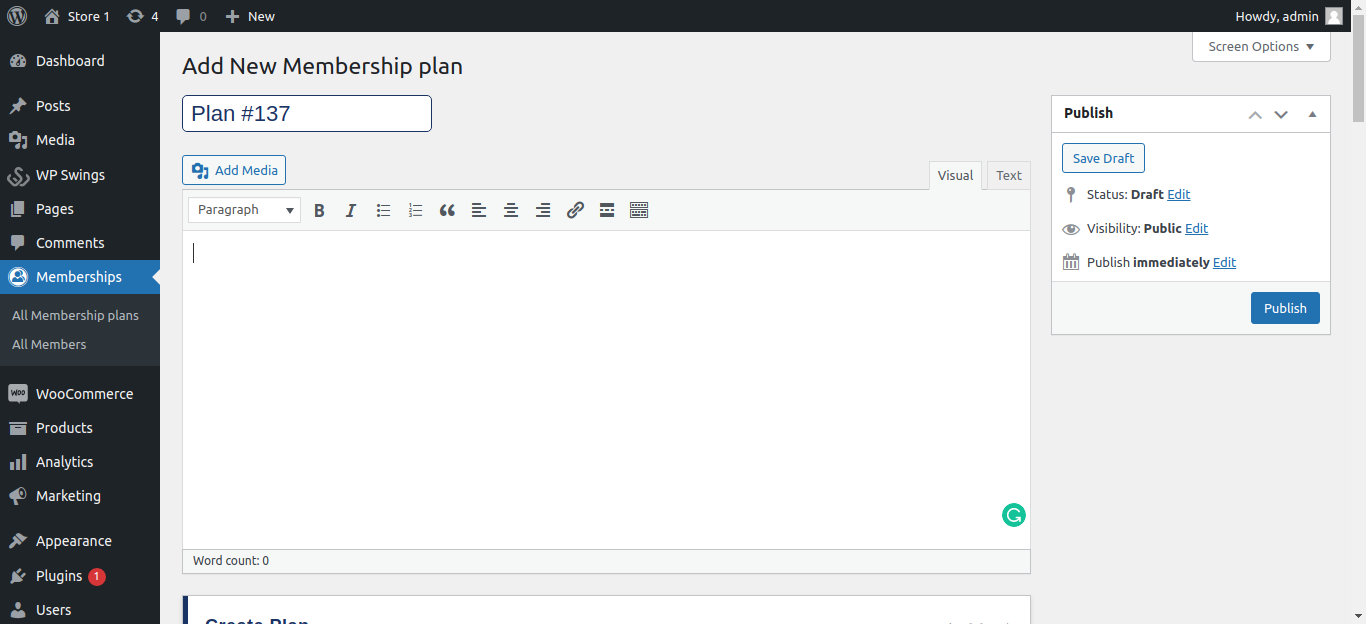
Under Create Plan heading you will find a series of important assignments:
Membership Plan Amount
It is the amount at which the admin wants to sell his memberships.
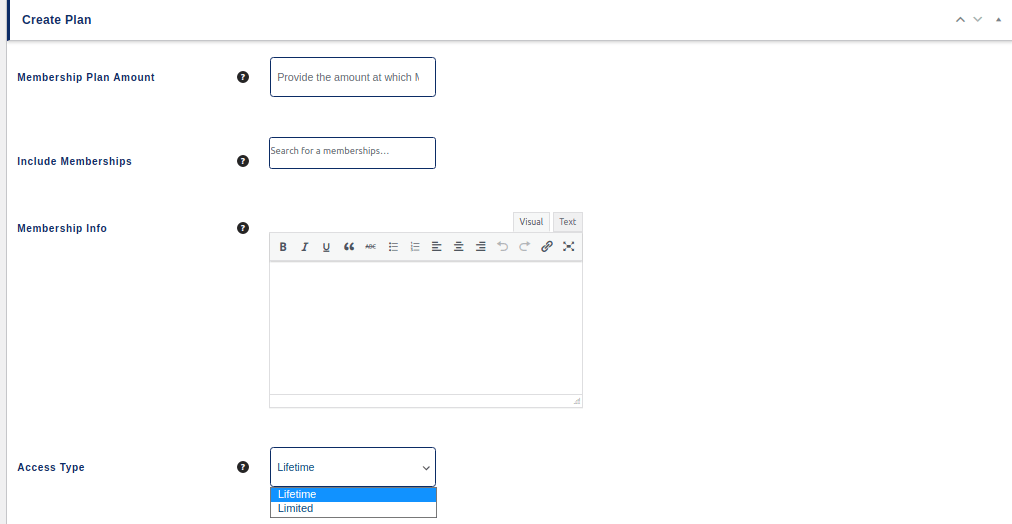
9.2.Access Type
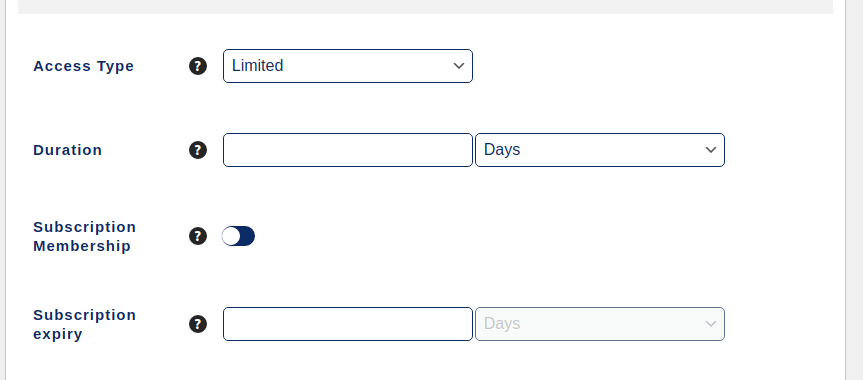
Here the admin can set the type of access he wants to grant to his users. You can select from two options, i.e. Lifetime and Limited.

For limited access type, the admin can select days, weeks, months, or years. Additionally, when the admin selects a limited access type, membership subscriptions are stimulated.
For Creating Membership Subscriptions
- Select limited access
- Select duration in days, weeks, months or years.
- Enable Subscription membership
- Enter Subscription expiry
Some features of the Membership For WooCommerce Pro plugin are also mentioned under Create Plan:
- Include Memberships
- Membership Pro
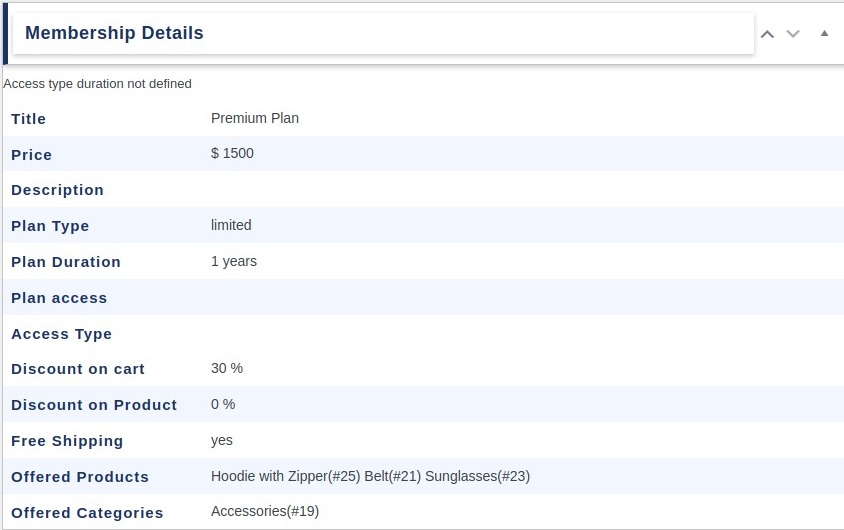
Under Membership Plan Offers in the Membership for WooCommerce Pro plugin, admin can access:
- Offered Products
- Offered Categories
- Offered Product Tags
- Discount On Products
So, you can provide discounts on membership products individually.
- Under the Included Section fill in the following fields:
Include Pages
This is a feature of the Membership for WooCommerce Pro plugin where you can include selected pages for membership users. Other such options available here are, included product tags, posts, post categories, post tags & accessibility types.
Offered Products
All the range of products you want to make available for the membership users can be listed here by the admin.
Offered Categories
These are the categories of products that the admin wants to make available for the membership users. These categories will only be visible to the WooCommerce members.
- Under the Memberships Features Section, you can edit these settings:
Discount –
Admin can specify the discount type that he wants to apply for membership users. Admin can set it to a fixed price or discount percentage.
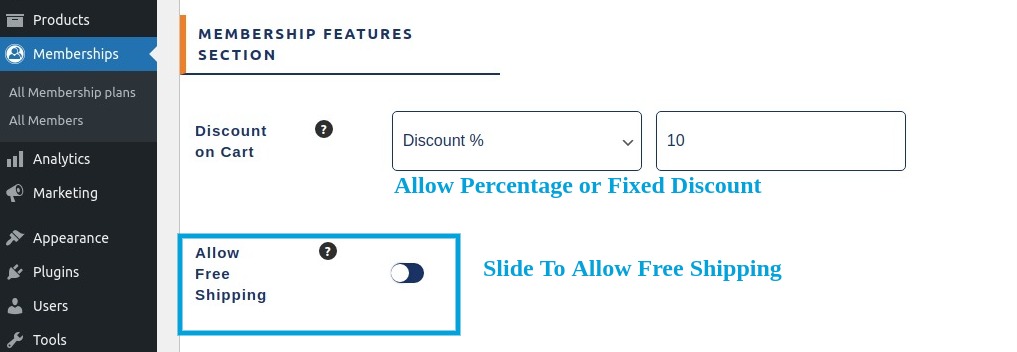
Allow Free Shipping
Admin can switch this to allow free shipping to the WooCommerce members. After sliding the button, the admin needs to manage free shipping for members.
Admin can directly manage shipping from the membership features section through these steps:
- Click Manage Free Shipping.
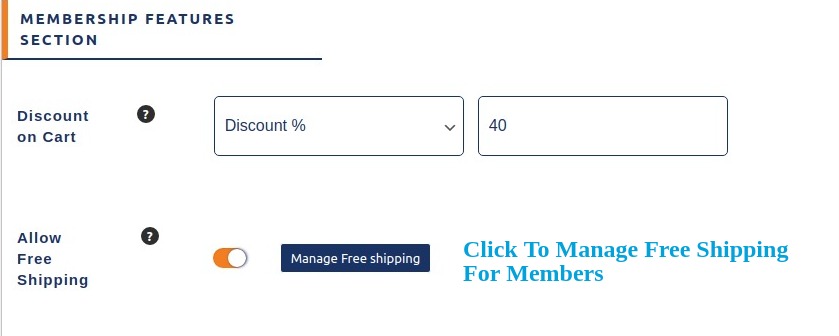
- Add Membership Shipping in the shipping methods.
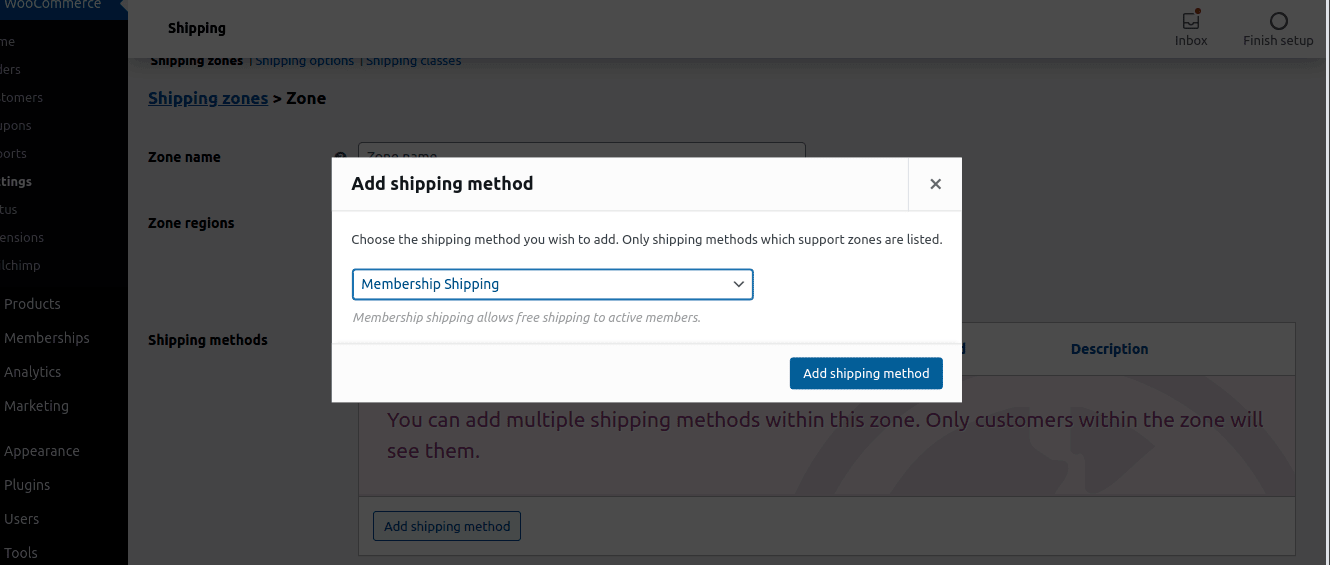
- Save changes.
- Admin can edit membership shipping settings anytime.

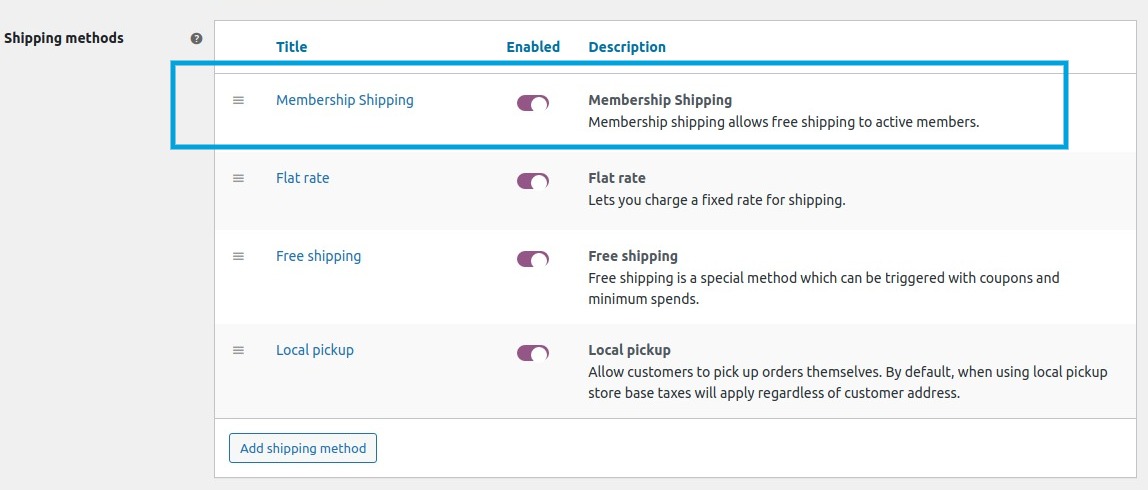
Now the shipping methods will also show membership shipping.
The premium features of Membership for WooCommerce Plugin in this section include:
- Hide Products From Non-members
- Show Notice To Members
- After filling in the entire set of fields, the admin can publish the page. Just as you publish a blog or your product page.
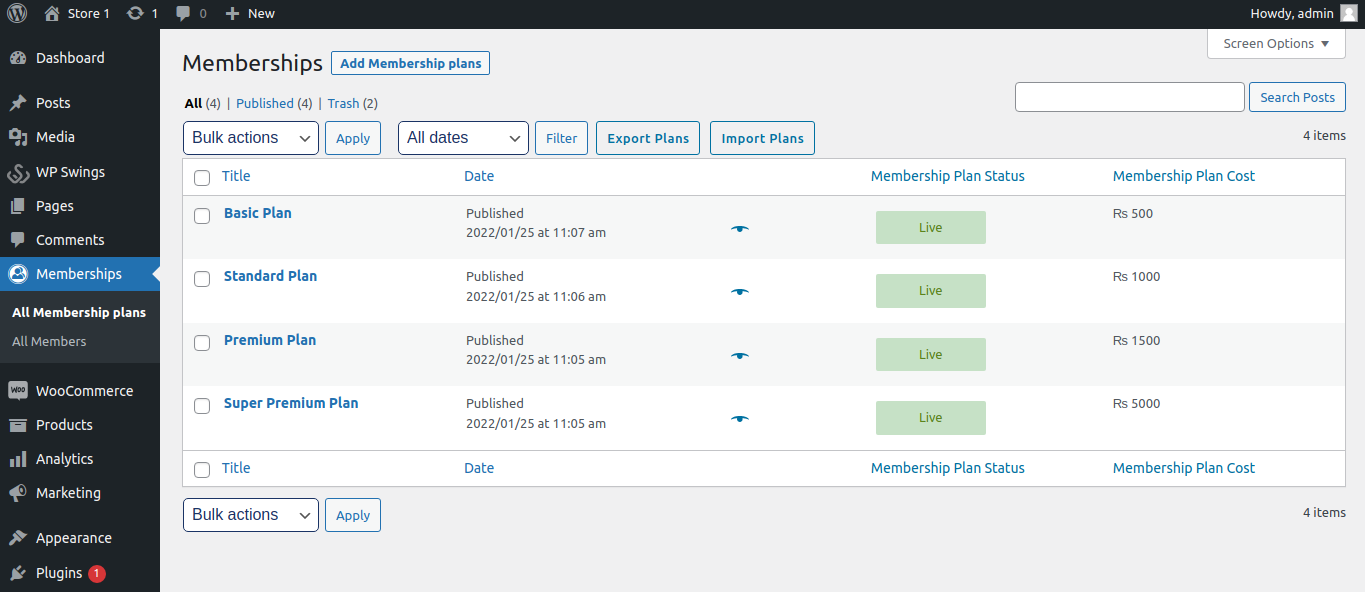
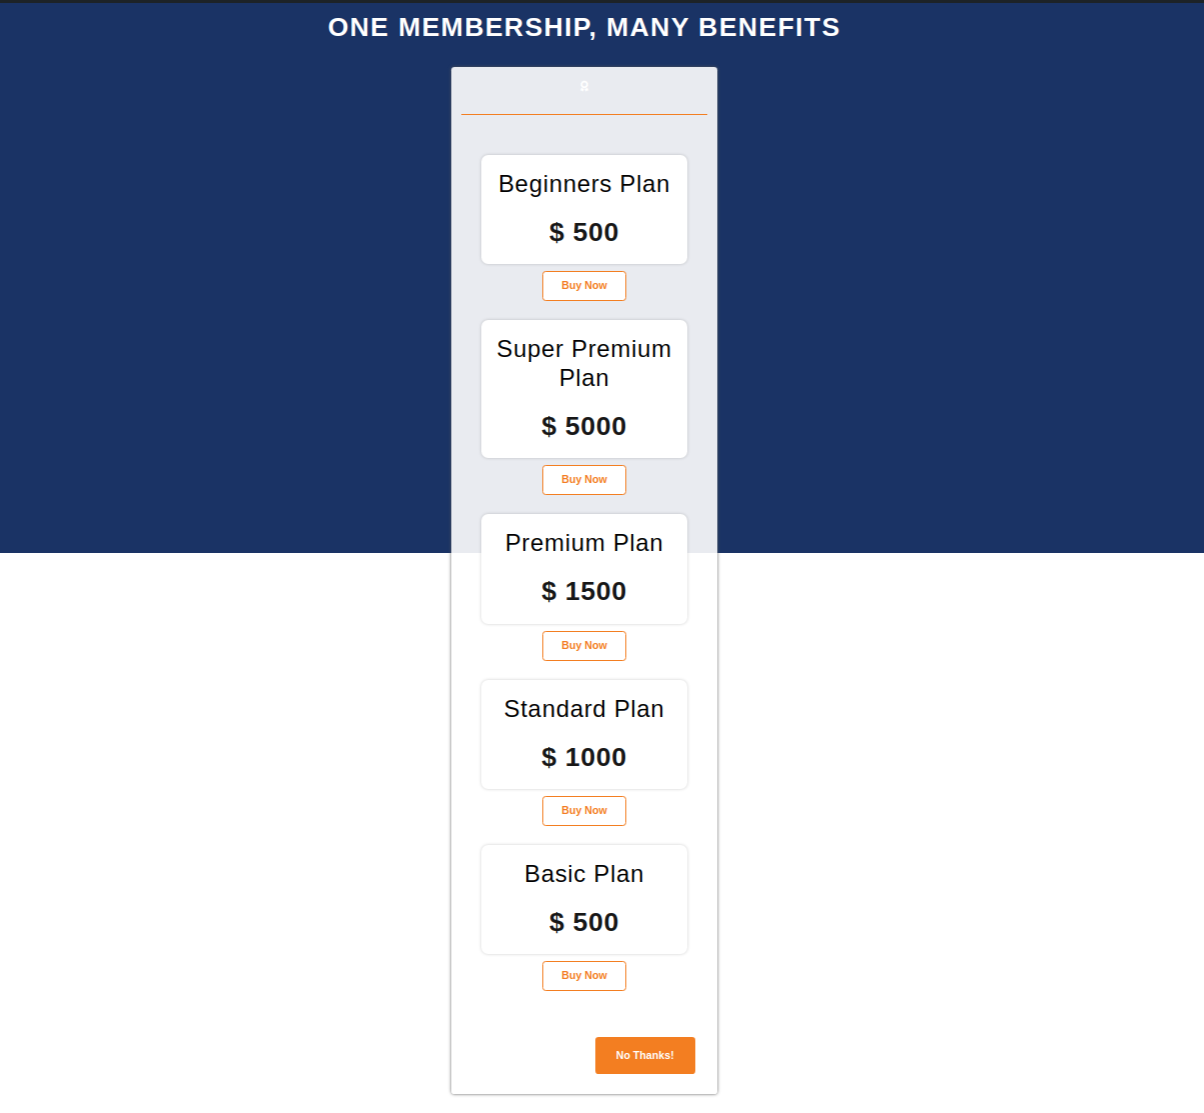
You can create and name as many plans according to your needs. We have also created 4 plans in this example.

All the membership plans will be displayed on your WooCommerce store on the Membership plan tab in the following way. The user can buy any of the membership plans from there itself.
9.3.Edit Membership Plans
For editing any of the membership plans that you have already created,
- Go to Dashboard > Memberships > All Membership Plans
- Now select the plan you want to edit > Make the desired changes in the plans > Update the page.
Bulk Actions
For bulk actions, Go to Dashboard > Memberships > Bulk Actions. The admin has two bulk action options:
- Edit membership plans
- Move membership plans to trash
Perform your desirable action, and proceed.
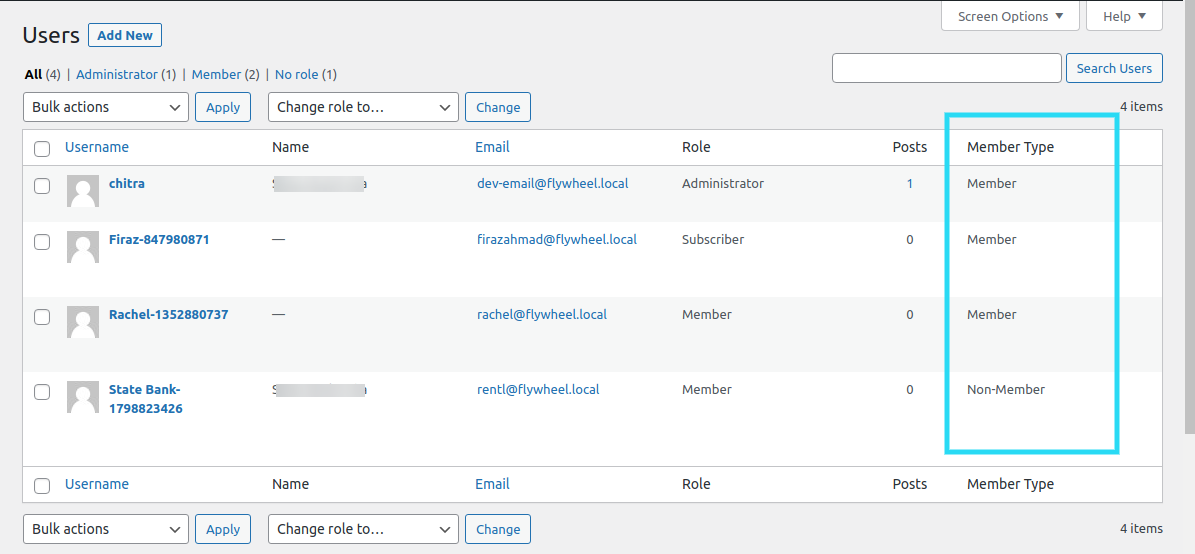
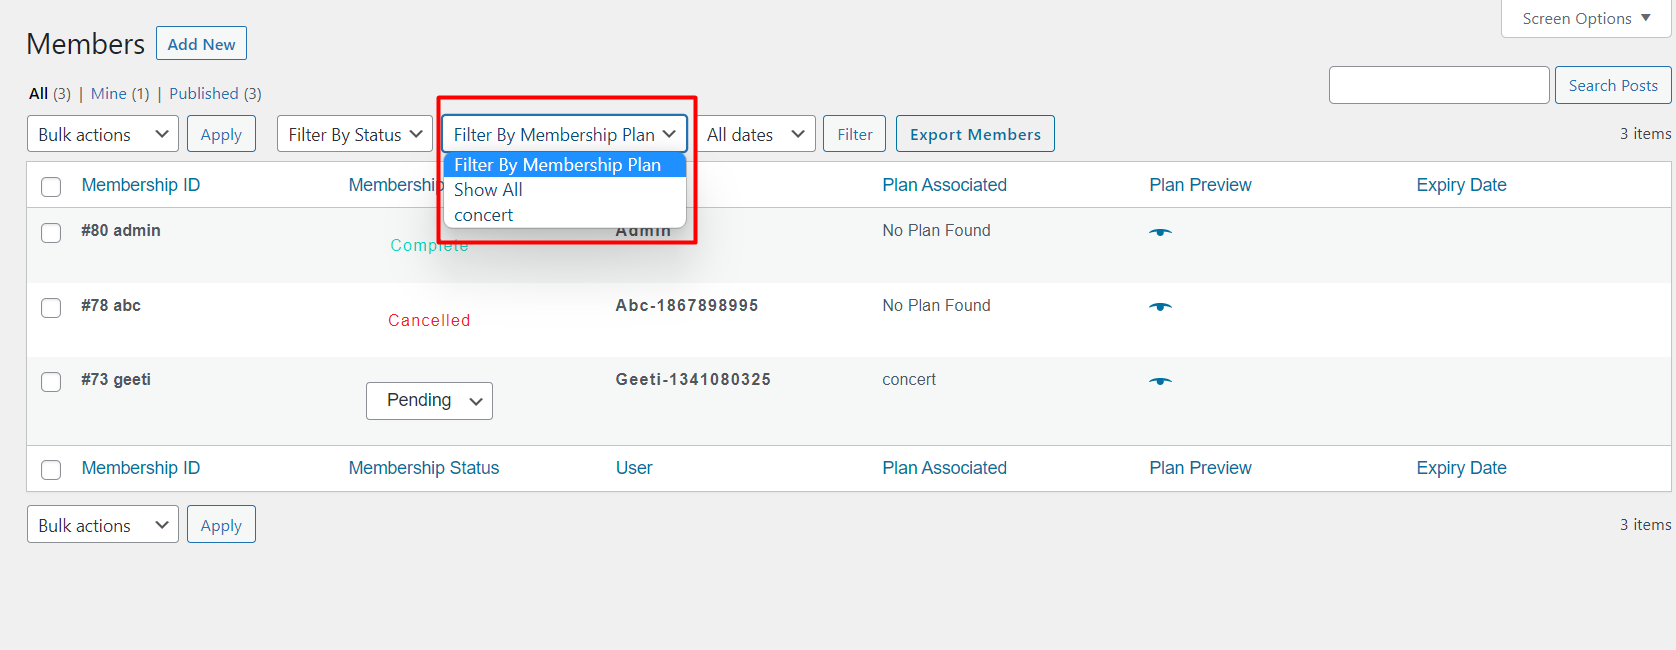
9.4.Filter Member According To Membership Plan And Column Added In Members Table
For filtering members according to their membership plans you have to,
- Go to Dashboard > Memberships > All Members
- Go to Filter By Membership Plan> Select the plan you want to filter.
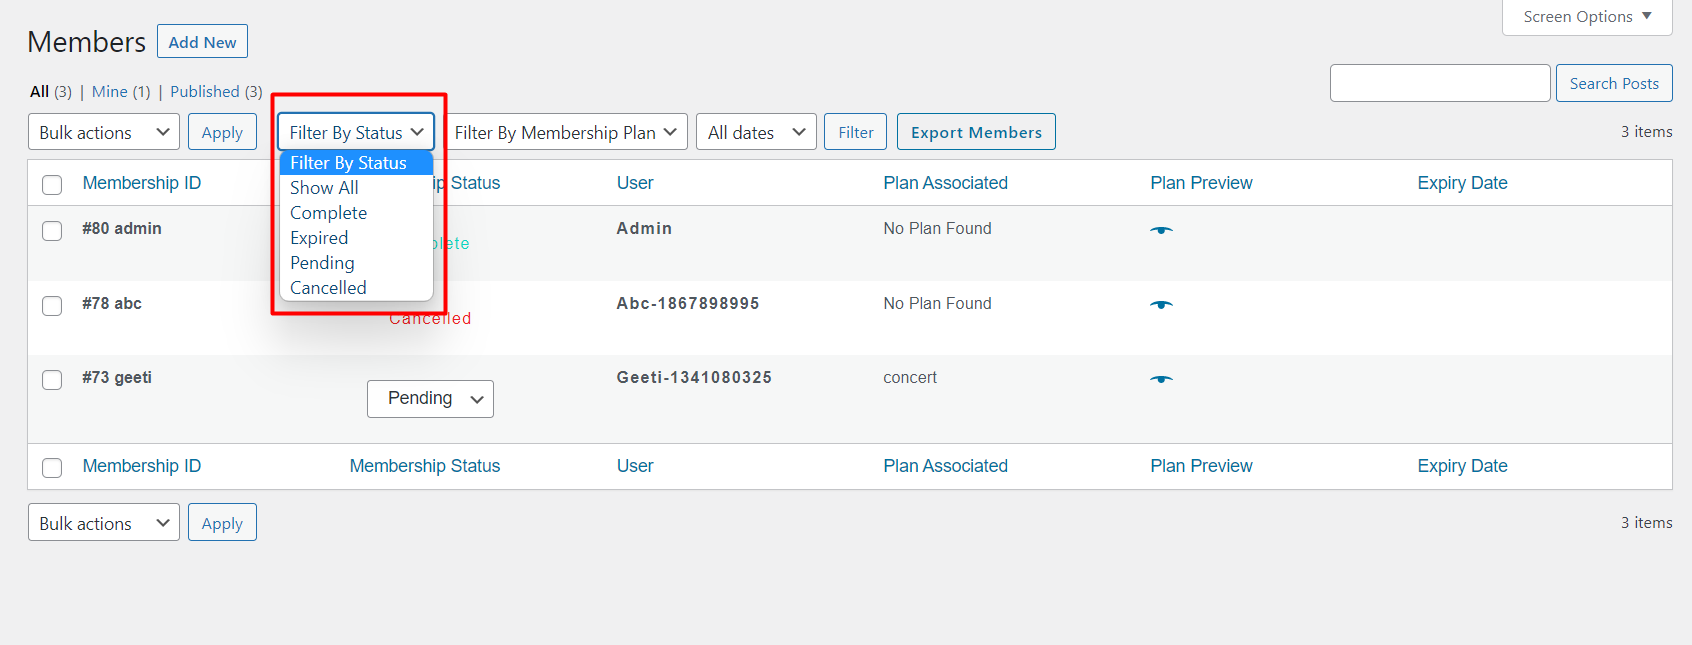
9.5.Filter Member According To Status
For filtering members according to their membership status you have to,
- Go to Dashboard > Memberships > All Members
- Go to Filter By Status> Select the status you want to filter.
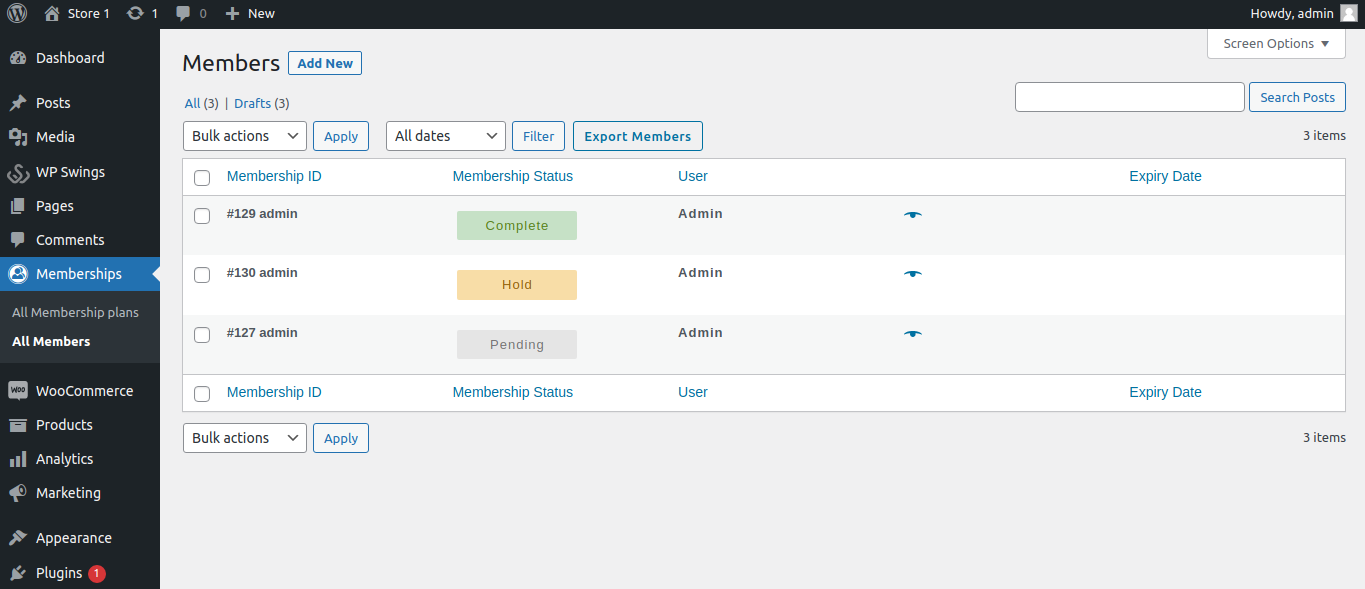
9.6.Addition Of Quick Status Update In Member Table
For adding of quick status update in members table
- Go to Dashboard > Memberships > All Members
- Click on Pending Statuses> Change status directly.
10.Export or Import Membership Plans With Membership for WooCommerce Plugin
For exporting membership plans,
- Go to Dashboard > Memberships > All Membership Plans
- Navigate and click ‘export plans’. This will export all your available membership plans into a simple CSV file that the admin can find in his downloads section.
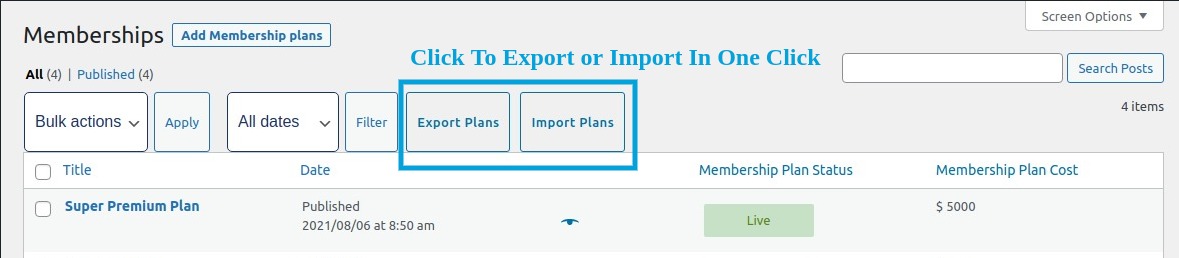
For importing membership plans,
- Go to Dashboard > Memberships > All Membership Plans
- Navigate and click ‘ import plans’. Then the admin can choose the file that has all membership details from his system. Upload the file and all your membership plans will be imported with details.
Please Note: Admin can import the WooCommerce membership plans and successfully apply this import if the CSV file products are available in the store. Otherwise, it will fail.
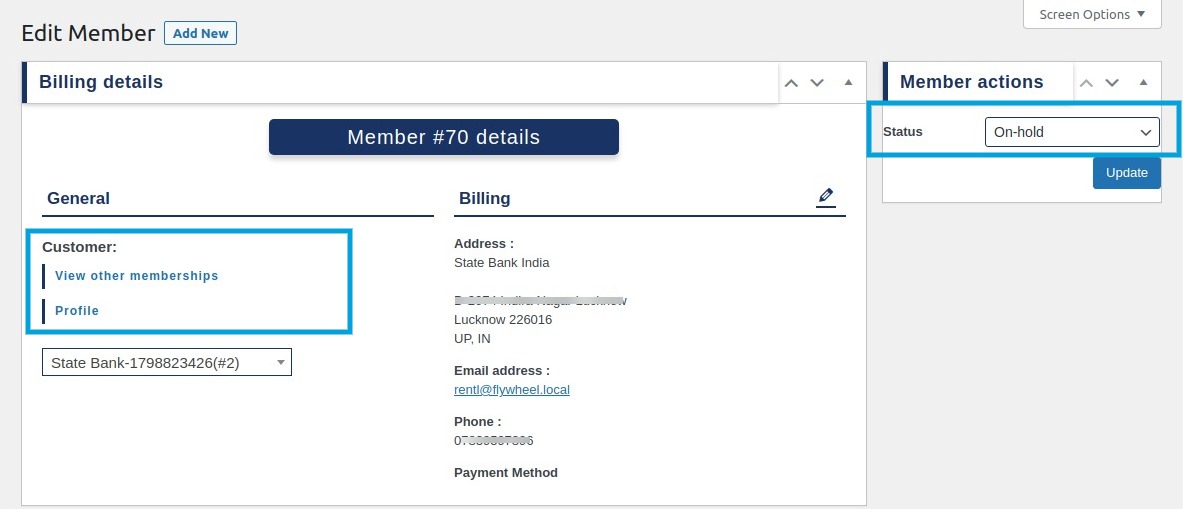
11.Add New Member
Admin can add new members manually to the membership plans.
Go to Dashboard > Memberships > All Members > Add New
- Select user. It can be an existing user or a new one.
- Mention billing details like address, phone number, email & payment method.
- Select Plan from Membership Details section from the existing membership plans of your WooCommerce store.
- Update status to on-hold, completed, pending & cancelled from the Member Actions box.
- Update post. And the member will be added manually.
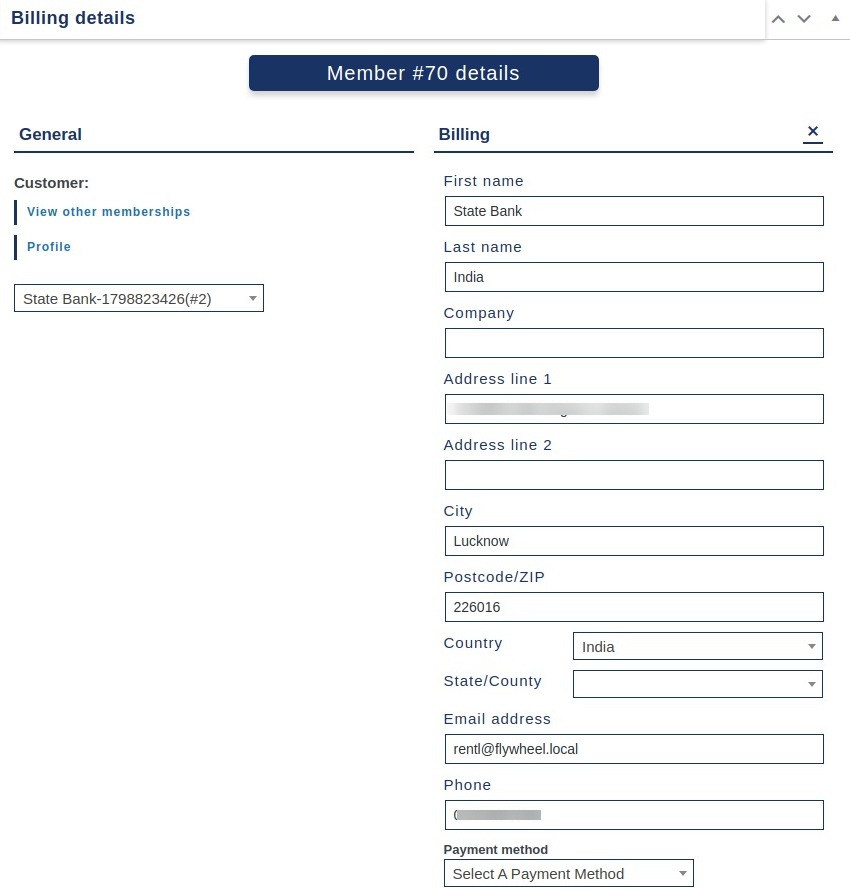
12.Edit Members Details
Under the All Members option, admin can edit the details of membership users. For that:
- Go to Dashboard > Memberships > All Members > Edit
Under Edit member section admin can:
- Edit User profile
- View other membership plans of the user
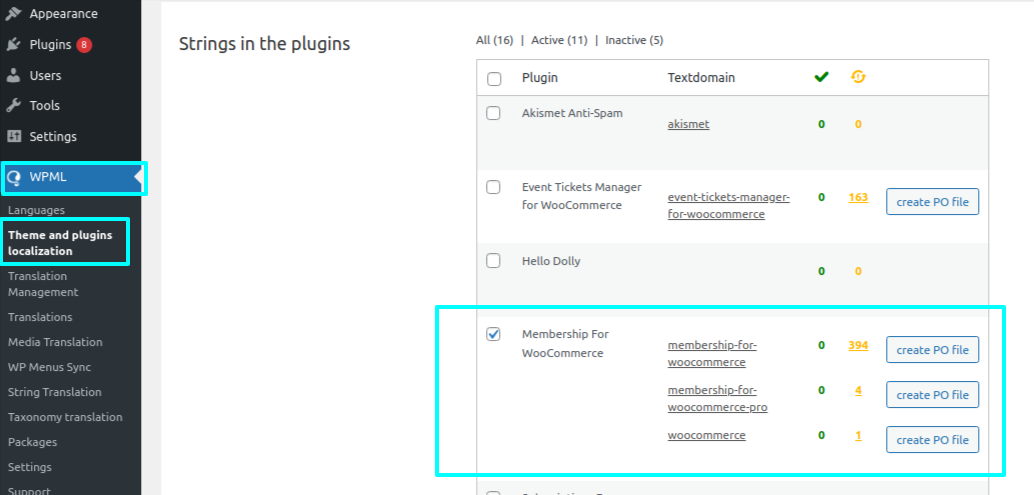
13.WPML Compatibility
The Membership for WooCommerce is compatible with the WordPress Multilingual (WPML) plugin for localization of the Membership for WooCommerce plugin’s strings.
In order to translate the Membership plugin, you need to extract all the plugins’ strings. Follow these steps:
1- Go to WordPress Dashboard > WPML > Themes Plugins Localization
2- Navigate to the ‘Strings in the plugins’ section
3- Select Membership for WooCommerce from the list of plugins
4- On the bottom of the page, Click ‘ Scan selected plugins for strings
For translating the strings into a different language click the number of strings present next to the plugin.
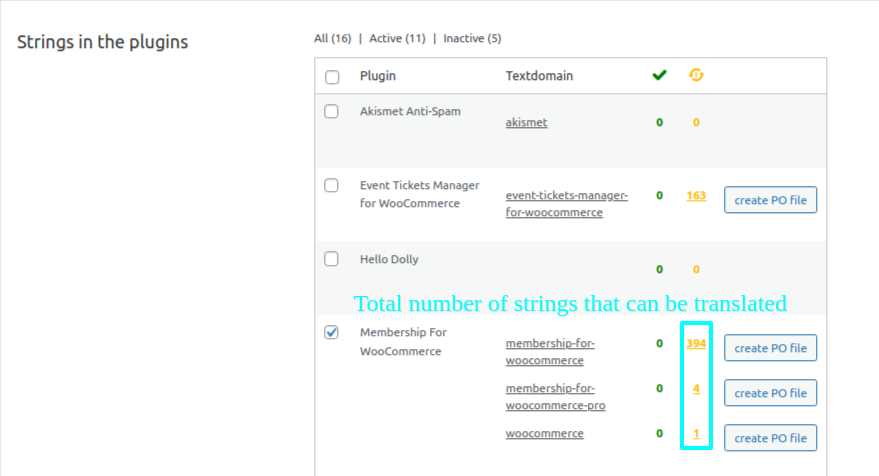
You’ll be redirected to a page where all the strings of the plugin are listed and you can translate each string from here.
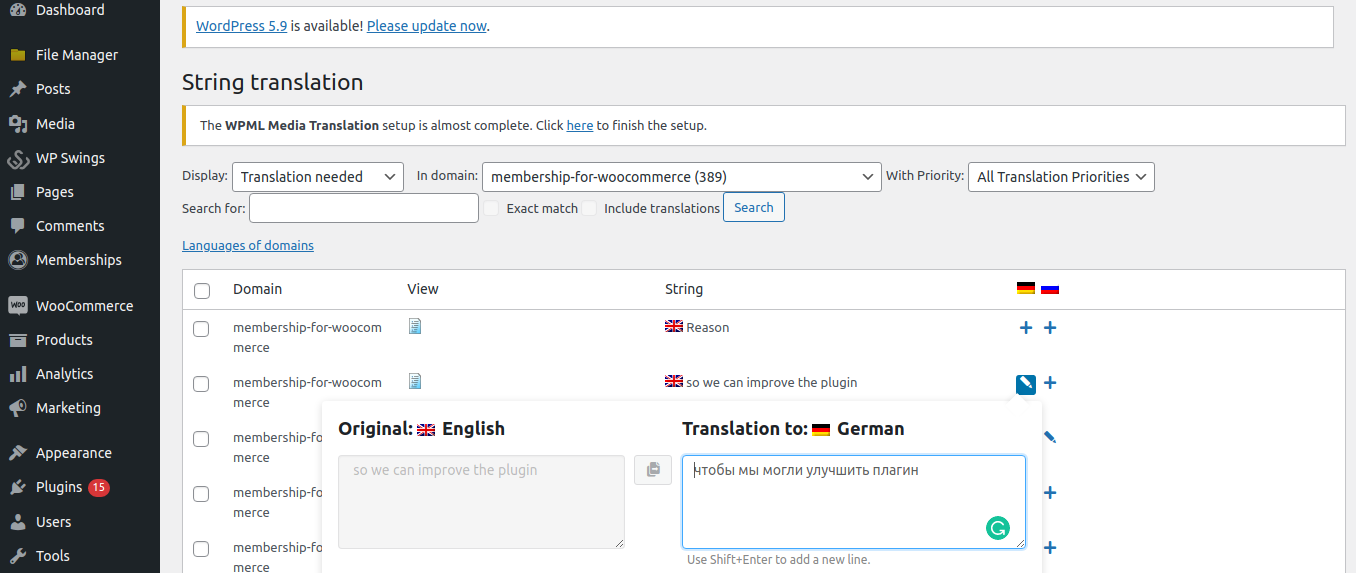
On visiting this page you can manually select a string for translation by clicking on the “+” button next to each string in a row.
A popup will occur in which you can write the translation of the string.
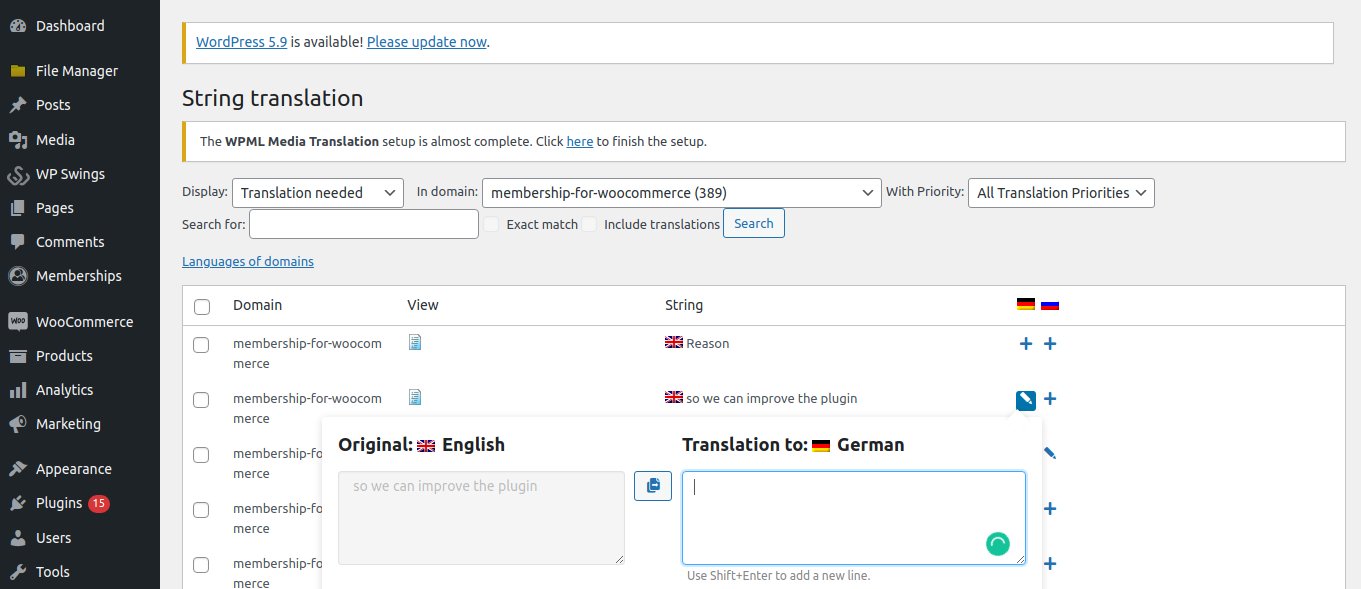
Once you’ve written the translation it will be automatically saved and when the customer chooses a different language they’ll see the translated version of the string.
14.WooCommerce HPOS Compatibility
Membership for WooCommerce is compatible with High Performance Order Storage (HPOS) Which uses WooCommerce CRUD design to store order data in custom tables to optimize order queries and ensure the smooth workflow of your WooCommerce store.
To Enable HPOS Follow these steps:
Firstly, make sure your WooCommerce version is updated with the latest 8.0. After that navigate to WooCommerce > Settings > Advanced > Features and choose the High Performance Order Storage option for orders.
For more information, refer to the WooCommerce HPOS Documentation
16.Feedback and Suggestions
Don’t see a feature in the Membership for WooCommerce plugin that you think would be useful?
We’d love to have your suggestions: Reach out to our Support query and we’ll consider adding it in a future release.
17.FAQs
Can I have free and recurring memberships at the same time?
Yes, you can have both memberships types in the premium version of the Membership for WooCommerce Plugin.
Can a person get a lifetime membership or limited membership?
We have an option to set the membership lifetime, you can set either of two.
Do you have a shortcode to display Membership Plan/price?
Yes, Membership for WooCommerce has the shortcode to display Membership plan, price and description.
Membership Plan Title → [wps_membership_title]
Membership Plan Price → [wps_membership_price]
Membership Plan Desc → [wps_membership_desc]
What should I do if this WooCommerce Membership plugin is not working on my online store?
You can first test for the common reasons and try to:
- Check for theme conflict. Test the plugin with the default WooCommerce theme.
- Check for plugin conflicts by deactivating plugins one by one to make sure which plugin is causing the error.
- If the problem still prevails, reach out to our support and give detailed information about your issue. We will contact you personally.
If user did not receive credentials after signup, what possible errors it can be?
If in case user didn't get credentials then only two issues can occur-
- Either your email is already registered on the site you are trying
- Your mail setup has an issue