
1.Overview
WooCommerce RMA Return Refund and Exchange Pro plugin is a complete solution for any kind of refund and exchange request. It gives your customers an easy and simple way to apply Refund, Exchange, Wallet, Cancel Order requests, and much more. The whole refund or exchange process goes under a proper mailing system being the ideal return management system.
Return Refund and Exchange Pro for WooCommerce extension provides various key features-
- With RMA Report Feature, admins can have a holistic view of the returns, exchanges and cancellations.
- The merchants can add the exchange and refund days product-wise for different types of listed items.
- The merchant can enable/disable the WooCommerce refund request feature.
- The user can submit multiple product refund requests with reason.
- Add custom WordPress Refund Rules/Regulations and display on frontend with ease.
- Add a Coupon Regenerator for allowing the customer to change the Wallet Coupon Code.
- Provide a shortcode to display the Customer Wallet on any page.
- Allow admin to manage Customer Wallet from the user edit page.
- To add a payment gateway for Users to make payments through their wallets.
- The merchant can enable the customer wallet to save the refunded amount into the customer wallet except to refund the amount.
- The merchant can manage stock for the approved request.
- The merchant can enable requests for selected order status.
- A user can pay an excessive amount in the RMA exchange process.
- Guest User Restriction for Wallet method of payment as well refunds.
- The merchant can Customize refunds or exchange mail content.
- Customer and admin are both notified by email for all events.
- The exchange feature is enabled for a selected number of days from an order delivered.
- The user can submit multiple product RMA Exchange requests with reason.
- Merchants can enable/disable the Exchange request feature.
- The merchant can prevent the selected category product from the refund.
- The merchant can exclude shipping costs to refund the product.
- The merchant can disable the refund feature for sale items.
- The WooCommerce refund feature is enabled for a selected number of days from an order placed.
- The customer can also exchange orders in the less old order amount and leave the amount refunded to the customer.
- Quantity will be updated at the time of canceling the order.
- The merchant can also refund the amount later in case of a wallet disability.
- It allows the customers to cancel only the selected product instead of the whole order.
- Allow the merchant to exchange the product with the same product and its variations only.
- Add Global and Product wise shipping fees.
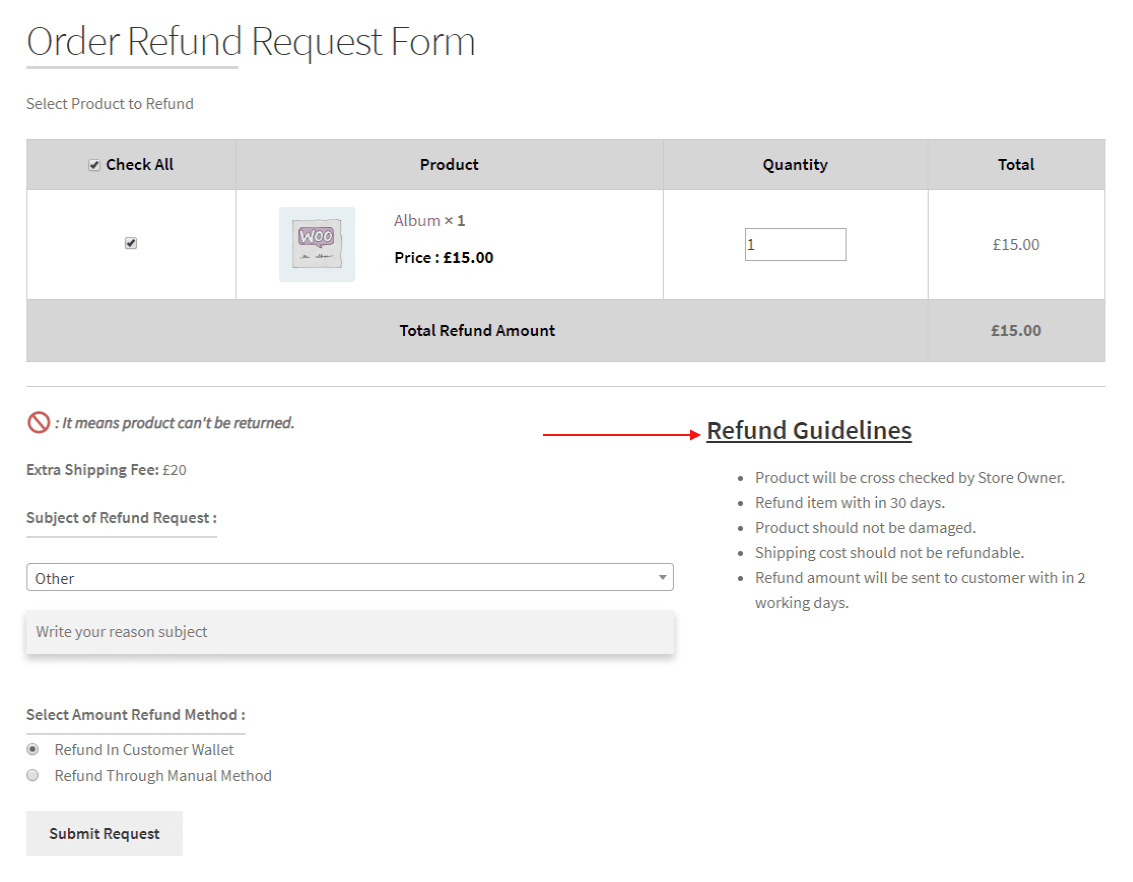
- Allow admin to add Refund Guidelines on the Refund Request form.
- Guest users can also Refund/ RMA Exchange/ Cancel their order.
- Allow Admin to Add or Remove predefined refund/exchange reason whenever needed.
- Allow the Guest user to pay the extra amount by using the email “click here” button.
- Use Shortcode to display the Guest user’s Refund or Exchange form.
- Allow Automated Payment Refund Feature through this feature the admin can refund the amount with the same payment method used by the customer during the purchase.
- Admin can show return/refund/exchange rules on respective forms with the Rules Editor.
- Select pages to display the refund/exchange/cancel button.
- Set limits on the attachments that a buyer can send along with the request forms.
- Remove different buttons for COD buyers.
What if your WordPress website can auto-accept the refund requests of your customers according to the set days? Wouldn’t it be too effective to check manual efforts to accept refund requests? Watch Demo Video of RMA Return Refund And Exchange For WooCommerce Pro.
The tutorial video will familiarize you with the premium features that we have introduced in our Refund plugin to enhance refund management on your WooCommerce store. It will demonstrate to you the working of the PRO version of our refund and exchange management plugin.
I hope you are persuaded…. Let’s take a closer look at the plugin by getting over the setup and installation process in detail.
3.Plugin Installation
The WooCommerce Return Refund and Exchange Pro plugin can easily be installed abiding the following steps that are detailed below-
- Download the WooCommerce Return Refund and Exchange Pro plugin from the respective website product page i.e. WP Swings.
- After that just login to your WordPress dashboard.
- Next to that, just navigate to the Plugins > Add New page and hit the Upload Plugin button.
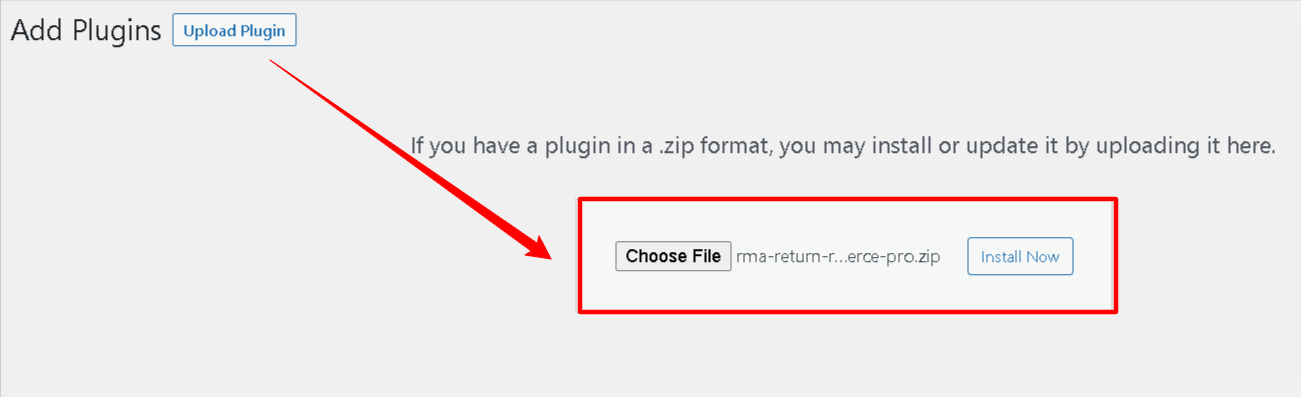
- Upload the .zip file of the plugin and hit the Install Now button.
- Finally, activate this plugin from the Plugins > Installed Plugins page and hit the Activate button to continue.
Note : Make sure you have also installed the Return Refund and Exchange For WooCommerce – WordPress Plugin, before activating the WooCommerce RMA Return Refund & Exchange for WooCommerce Pro . As the PRO version is a further advanced version update to that.
So, if you don’t already have it, you can download it directly from here: Download Zip
After installing the plugin, the next step is to configure the backend so that you may use its functions. So, let’s get started-
4.Plugin’s Backend Setting
WooCommerce RMA Return, Refund, and Exchange Pro plugin backend setting is quite simple yet straightforward, have a look at the setup tab scrutinies in detail below to have a better understanding of each setting’s purpose-
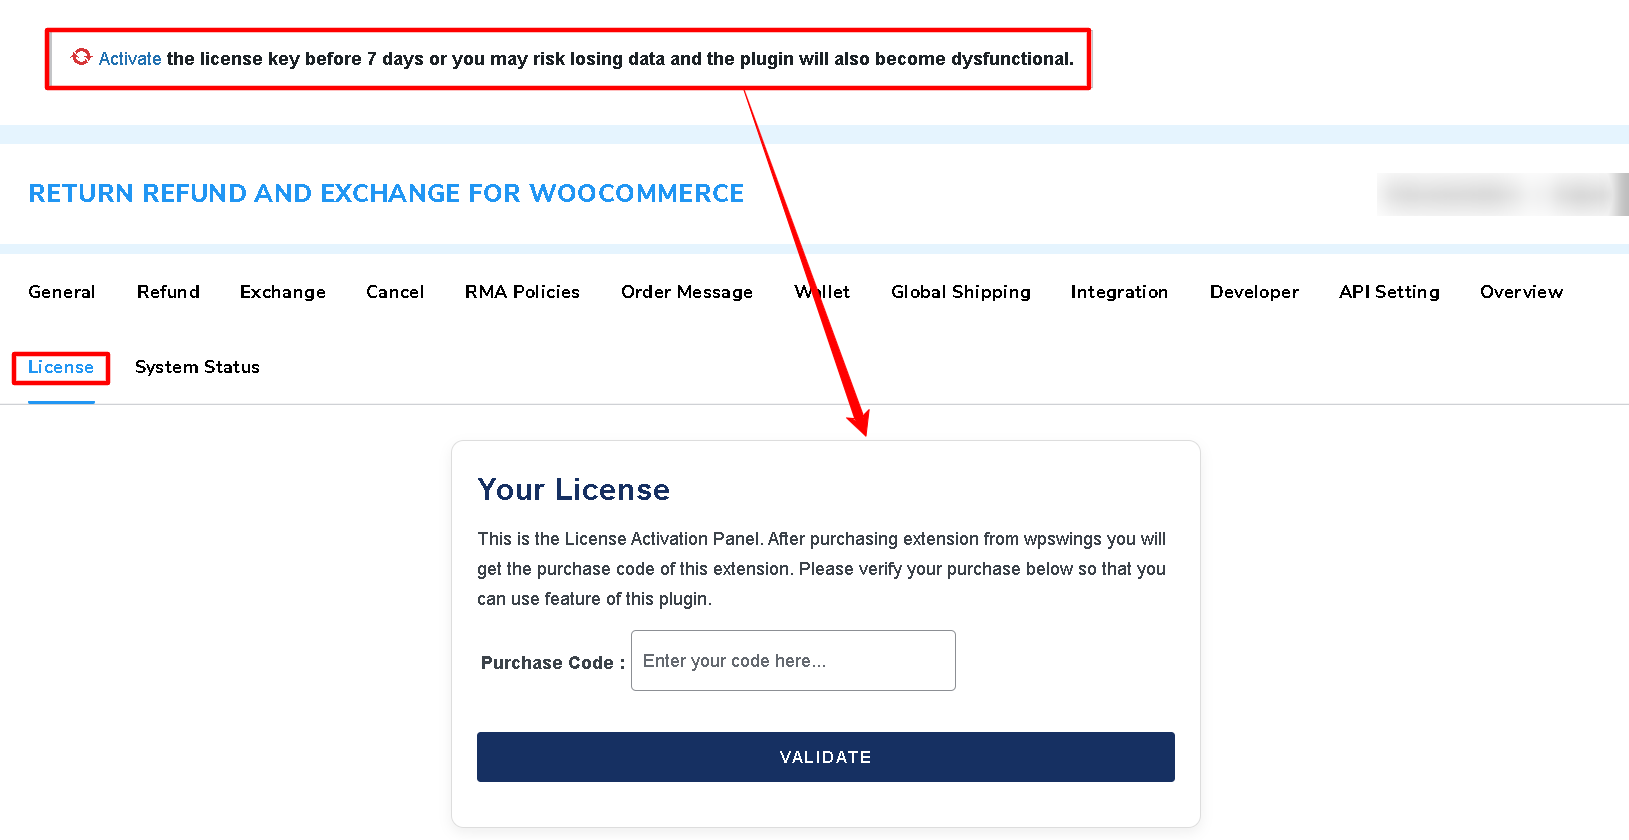
4.1.License Activation Tab
The very first tab defines the license activation panel in a tab setting. This tab depicts the purpose of activating the PRO license of the plugin utilizing the activation code offered while purchasing the plugin.
Refer to the screencast below to get an idea of that-
4.2.General Settings Tab
The very next tab in the backend setup is the general tab. This tab covers all the general setup options available for the plugin as well as allows the administrator to enable the WooCommerce refund setting to your customer.
To continue with this tab settings, firstly you have to enable these most basic yet essential toggle based settings–
Enable the WooCommerce Refund setting
This is a toggle-based setup option available that is purely dedicated to the smooth enabling/disabling of the refund feature within the plugin.
 You can simply toggle switch ON to enable and toggle switch OFF to disable the plugin refund feature.
Enable Order Messages
This is a toggle-based setup option available that is purely dedicated to the smooth enabling/disabling of the order-related messages feature within the plugin.

You can simply toggle switch ON to enable and toggle switch OFF to disable the plugin order message feature.
Frontend Demonstration of these setting options-
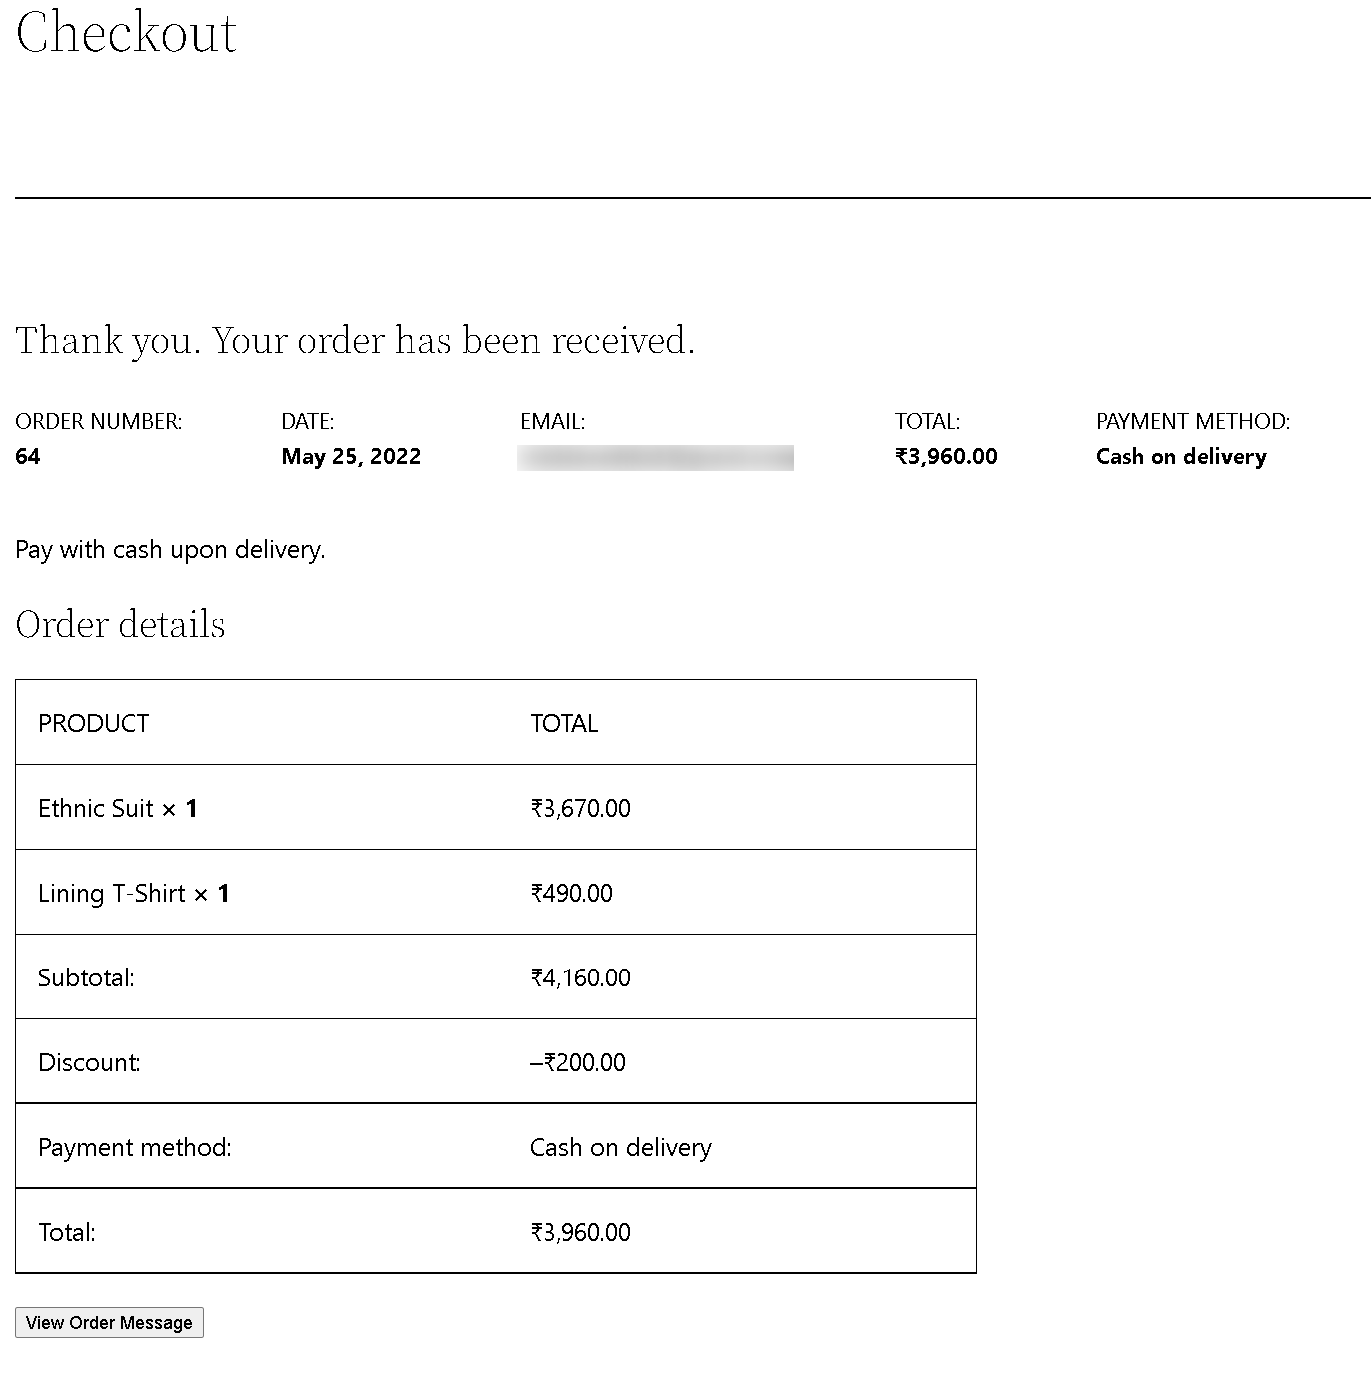
This is the actual order display section at the frontend displaying Order Message and Refund buttons within. Have a look-
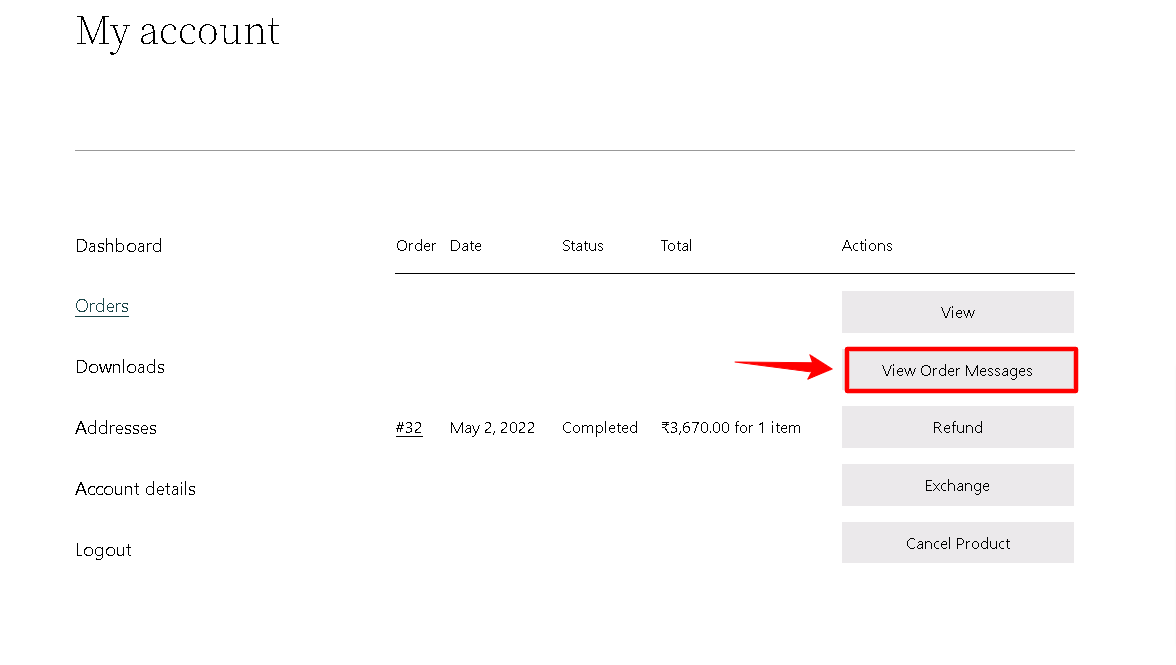
As soon as you click on Order Messages button you’d be redirected to the page for order messages, displayed in the screencast below-
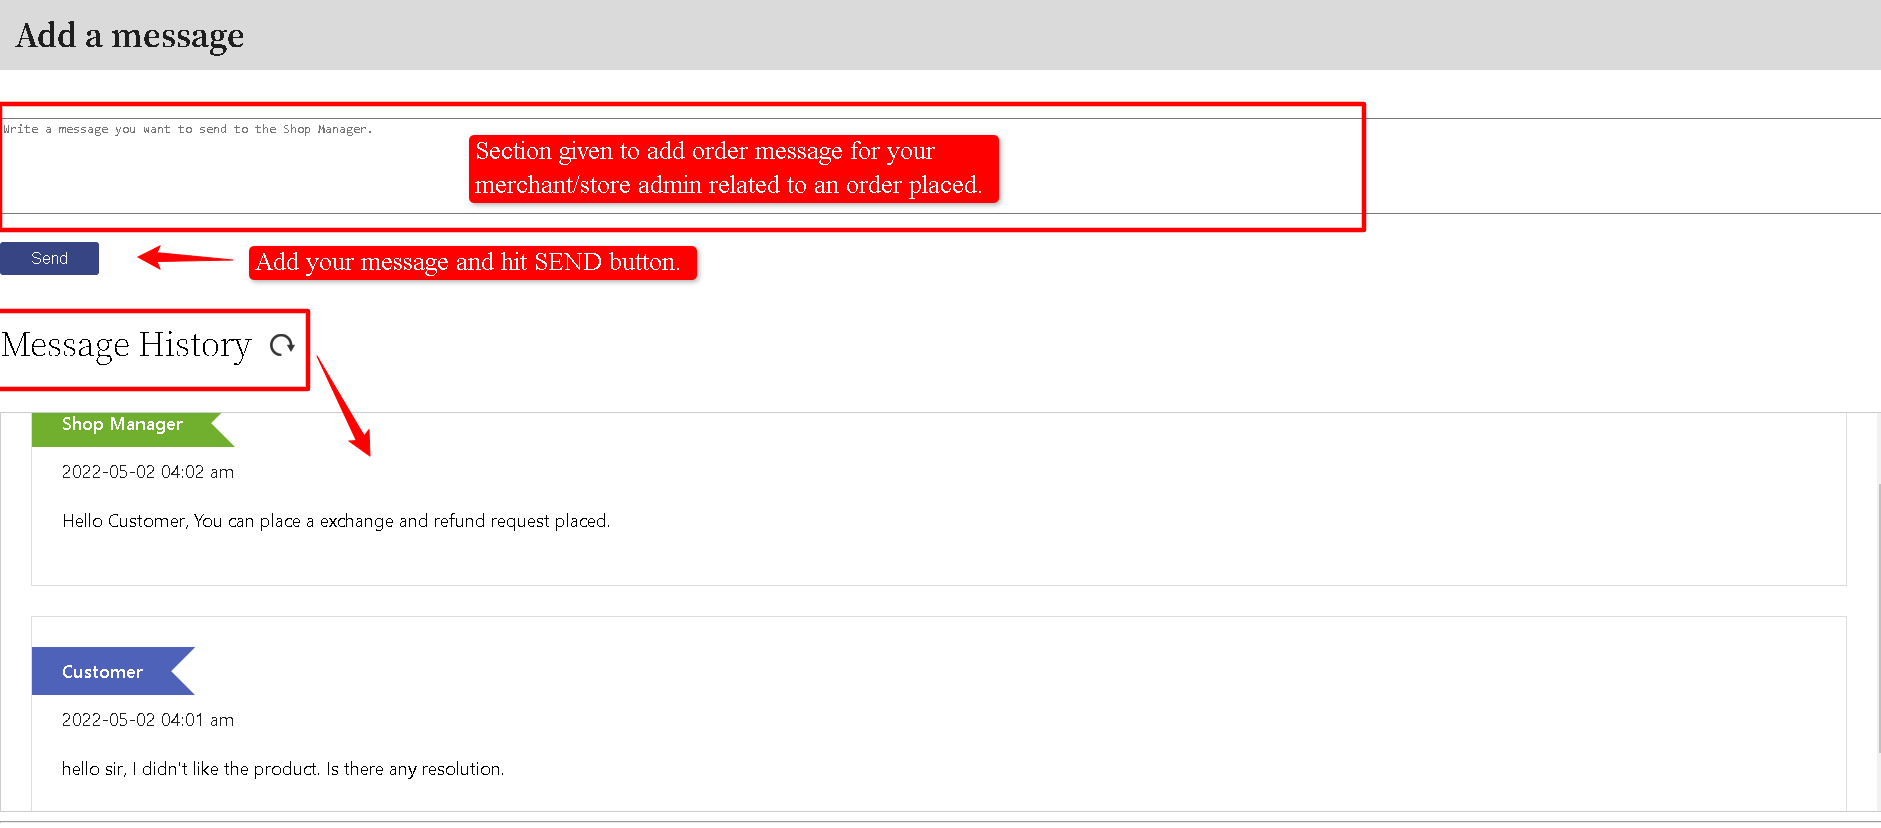
Here, you can send as well as can review your order related messages history i.e. your personal communication with the store admin related to that particular order with ease.
Enable Exchange
This is also a toggle-based setup option available that is purely dedicated to the smooth enabling/disabling of the exchange feature within the plugin.
 You can simply toggle switch ON to enable and toggle switch OFF to disable the plugin exchange feature.
Enable Cancel
This is a toggle-based setup option available that is purely dedicated to the smooth enabling/disabling of the order cancellation feature within the plugin.

You can simply toggle switch ON to enable and toggle switch OFF to disable the plugin cancel feature.
Enable Wallet
This is a toggle-based setup option available that is purely dedicated to the smooth enabling/disabling of the refund-based wallet feature within the plugin.
 You can simply toggle switch ON to enable and toggle switch OFF to disable the plugin wallet feature available in the plugin.
Enable Single Refund and Exchange Request per Order
Enabling/Disabling the single product-based refund and exchange can be managed per order utilizing this setting option available.
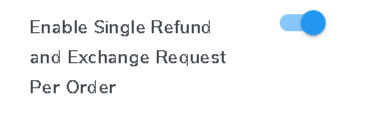
You can simply toggle switch ON to enable and toggle switch OFF to disable the feature available in the plugin.
Setting Demonstration…
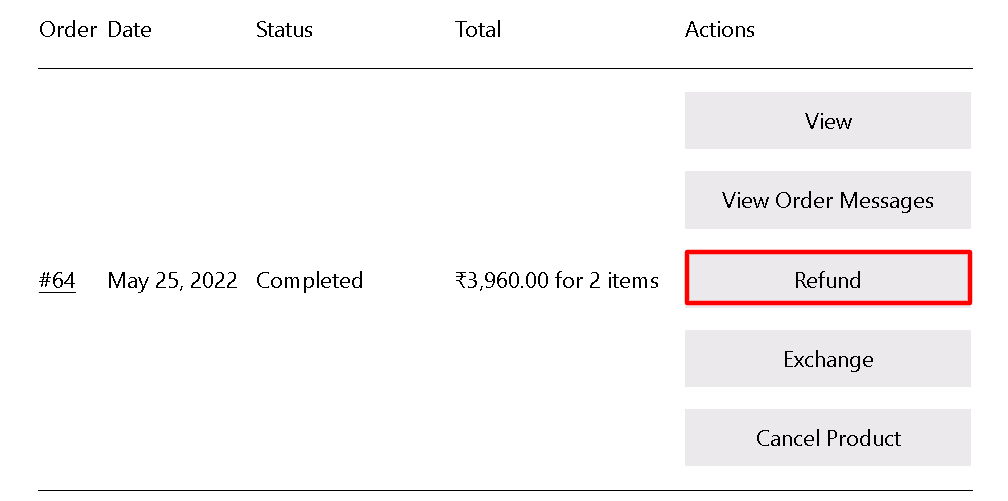
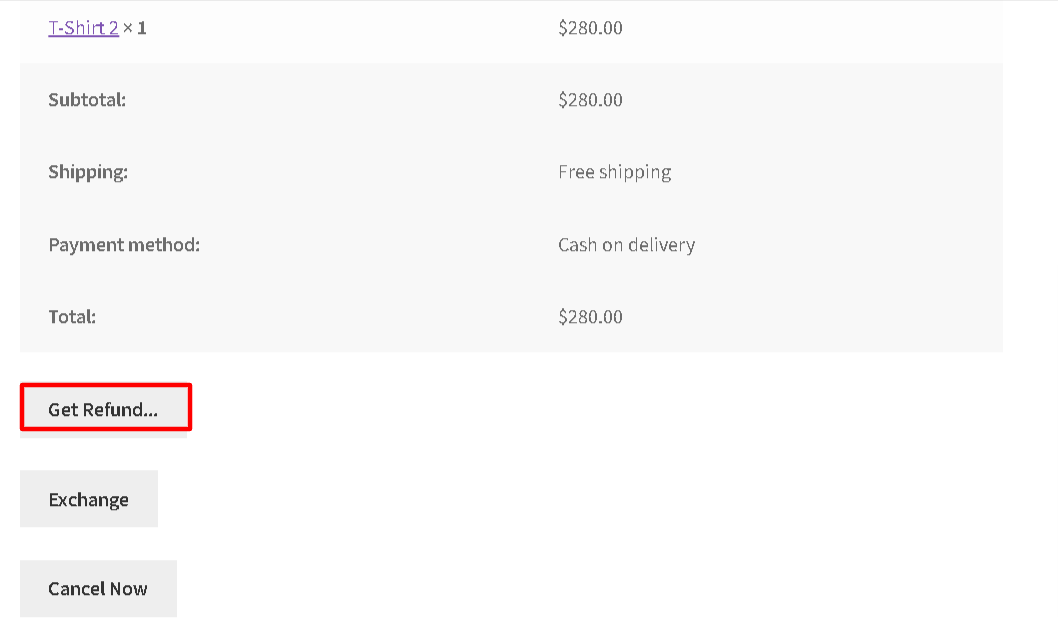
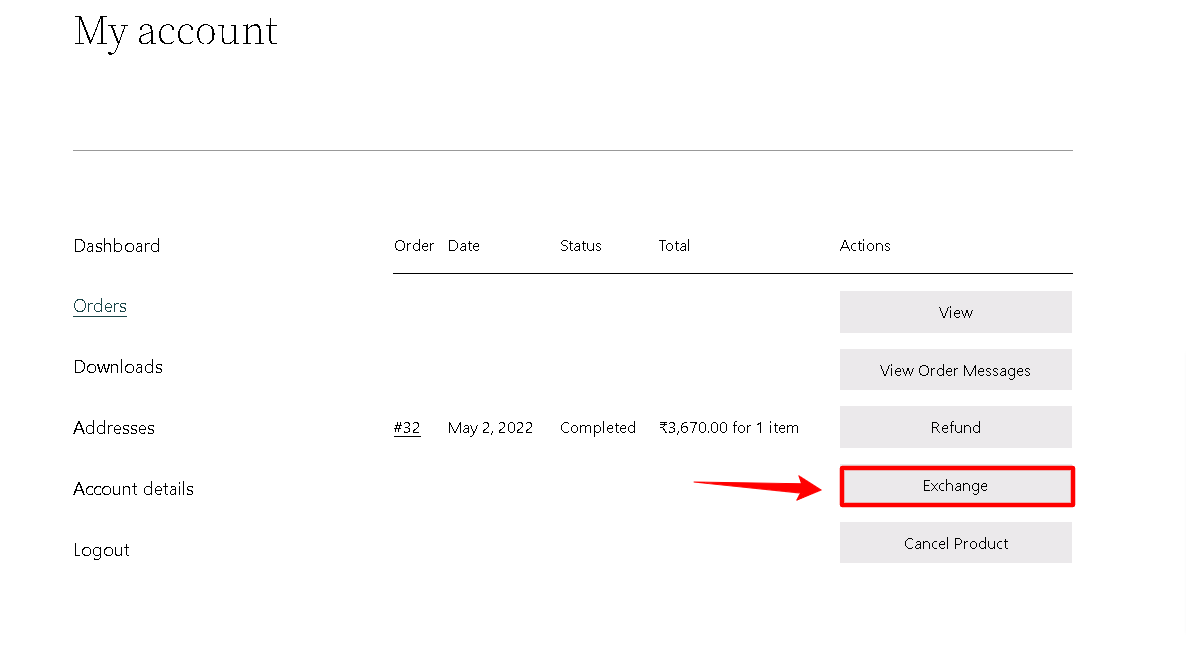
Let’s take an instance of this refund order. In order to place a refund request their order needs to be completed at least. To proceed one must visit the My Account > Orders and hit the refund button there to proceed with the refund request for the same.
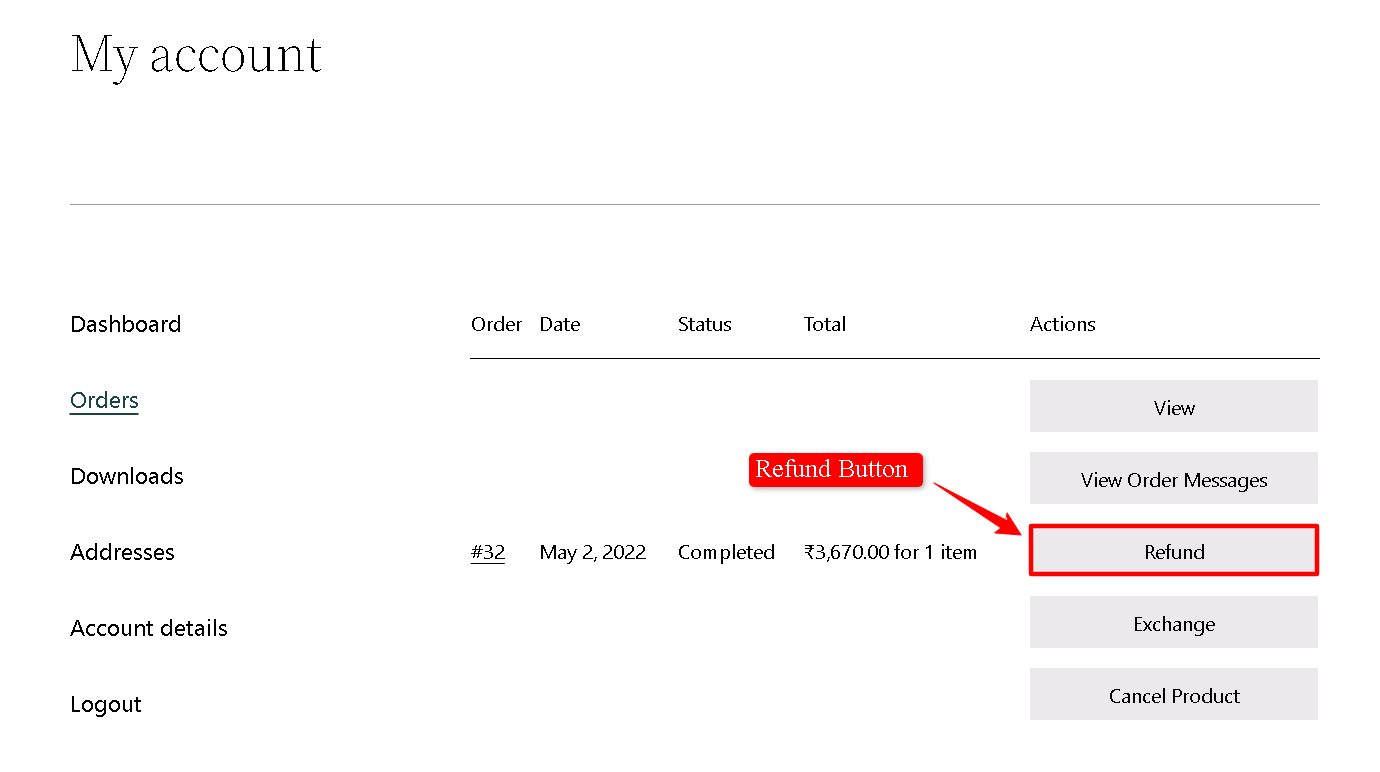
As soon as you click on the WooCommerce Refund button, you’ll be automatically redirected over the Refund Request Form.
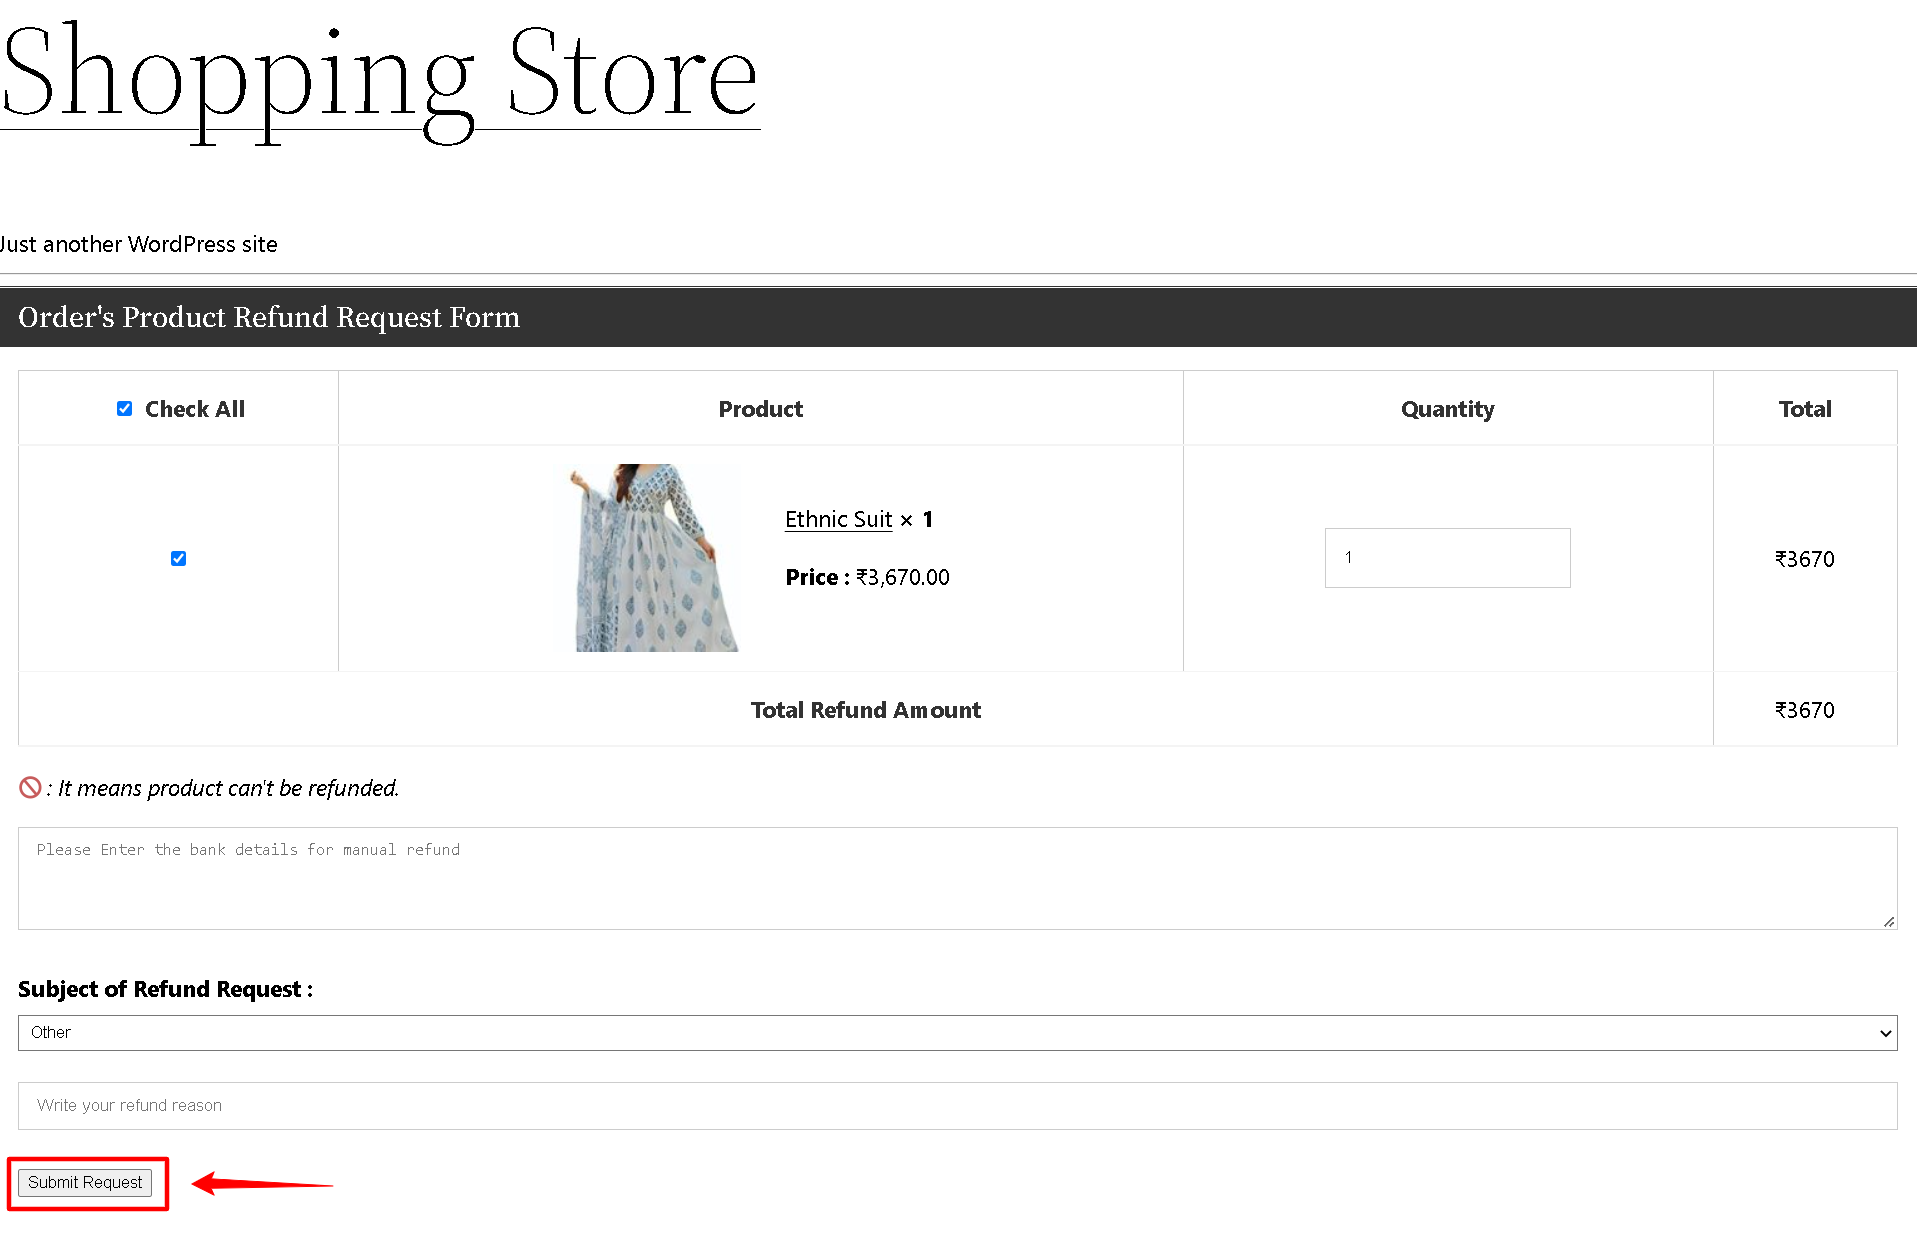
Complete the form fields by entering the data requested and hit Send Request to continue with the same.
One Refund Request Notification would be displayed after the process and you’ll be redirected to the orders section again after 10 sec.
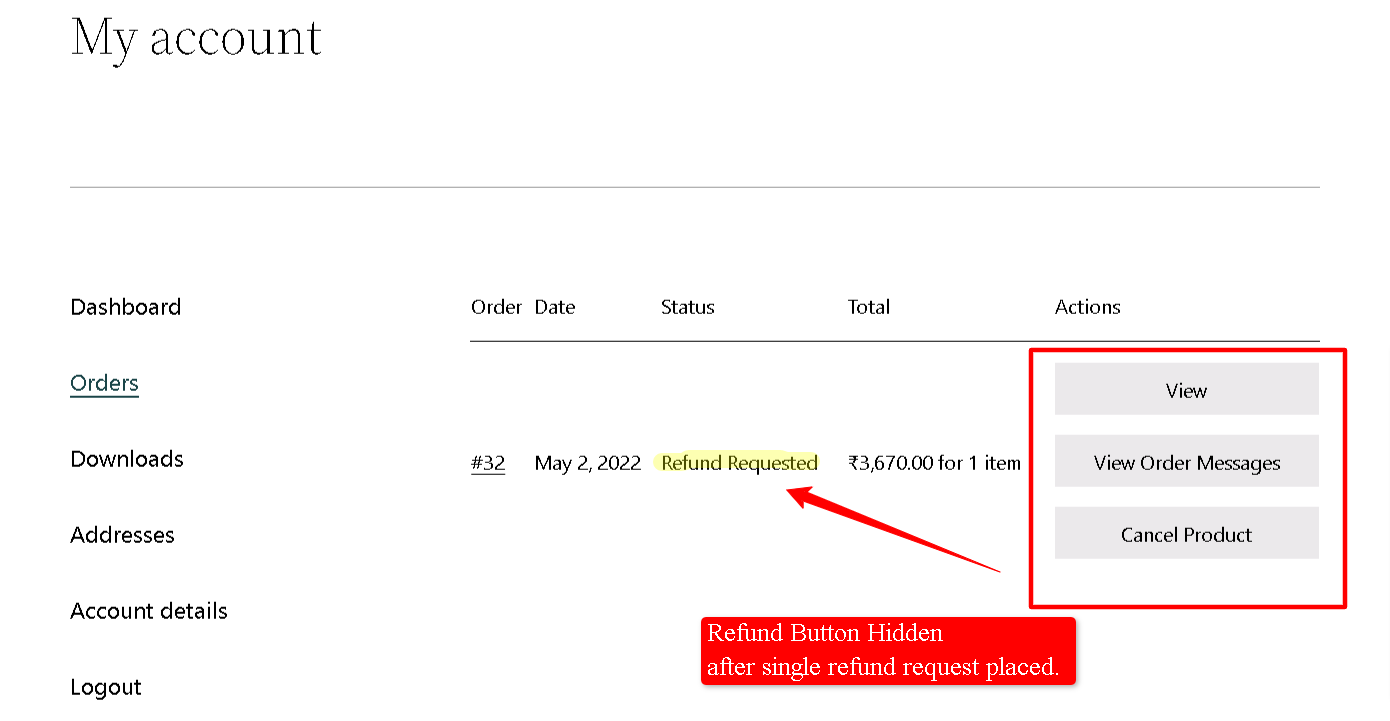
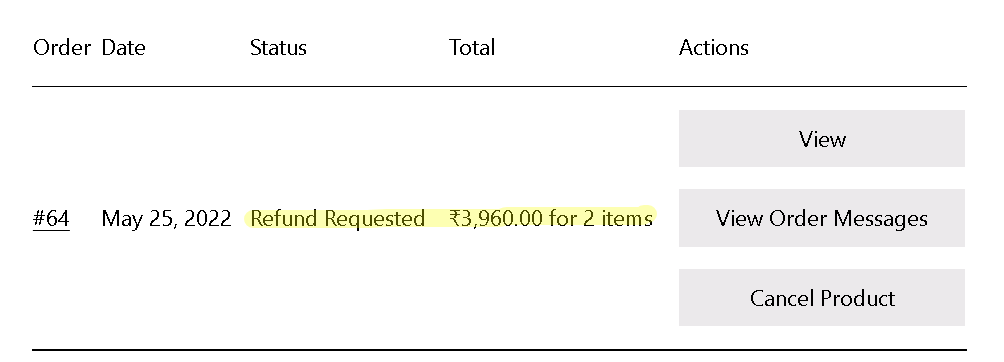
Now, if you observe clearly here. You can see that— the status for that order would be updated to Refund Requested and the Refund & Exchange button is now not available with the order setting options. That’s, just because of the setting you’ve set enable i.e. Enable Single Refund and Exchange Request per Order.Note– No matter whether you cancel your refund/exchange request after that, still you cannot process another request for the same if this setting is said to be enabled.
Enable Refund and Exchange for Exchange Approved Order
Enabling/Disabling the single product-based refund and exchange can be managed per order after the merchant or the store owner’s approval utilizing this setting option available.
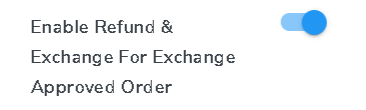
You can simply toggle switch ON to enable and toggle switch OFF to disable the feature available in the plugin.
Show Sidebar for Refund, Exchange, and Cancel Form
If you want to enable/disable the sidebar for the refund, exchange, and cancel form available in the plugin, you can simply utilize this option.
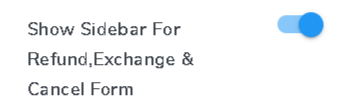
Simply toggle switch ON to enable and toggle switch OFF to disable the feature available in the plugin.
Hide Refund, Exchange, and Cancel button for COD orders when Processing
If you want to enable/disable the refund, exchange, and cancel button from the COD orders when setting status to processing, you can simply utilize this option.
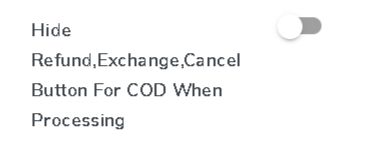
Simply toggle switch ON to enable and toggle switch OFF to disable the feature available in the plugin.
Guest Feature via Phone Number
You can also offer a guest login feature for your visiting customers utilizing their phone numbers as a primary id. With this feature, guest users need not be required to enter their email address to request for refund or exchange. They can do so using their phone number, and take the equivalent refund and exchange privileges as the registered users.

Simply toggle switch ON to enable and toggle switch OFF to disable the feature available in the plugin.
Refund, Exchange, and Cancel functionality starts from Order Status Date
Here, you can simply mention the refund, exchange, and cancel order-based status sort in the available text field.
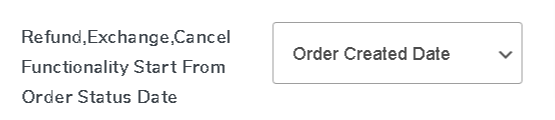 Just define the fields and personalize the settings.
Guest Form Shortcode
Your guest form can have a shortcode-based display per your ease.

You can create your guest form shortcode here and utilize that for displaying your guest login forms in the website pages or sections you like.
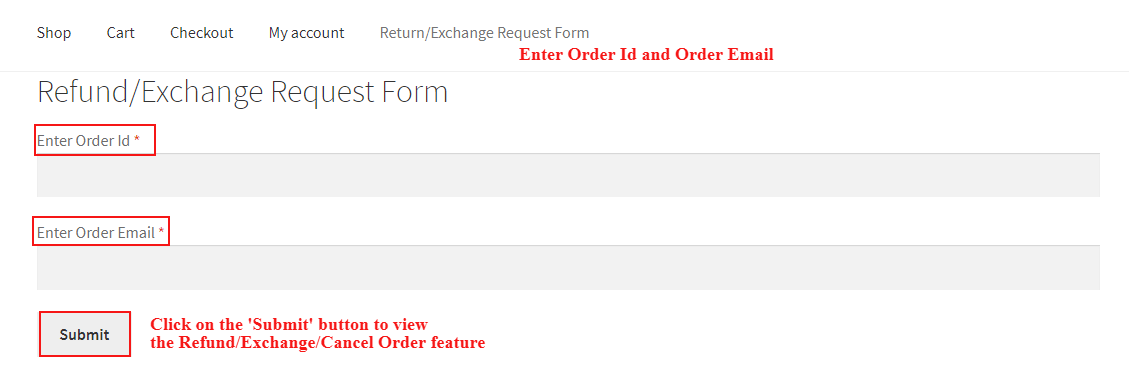
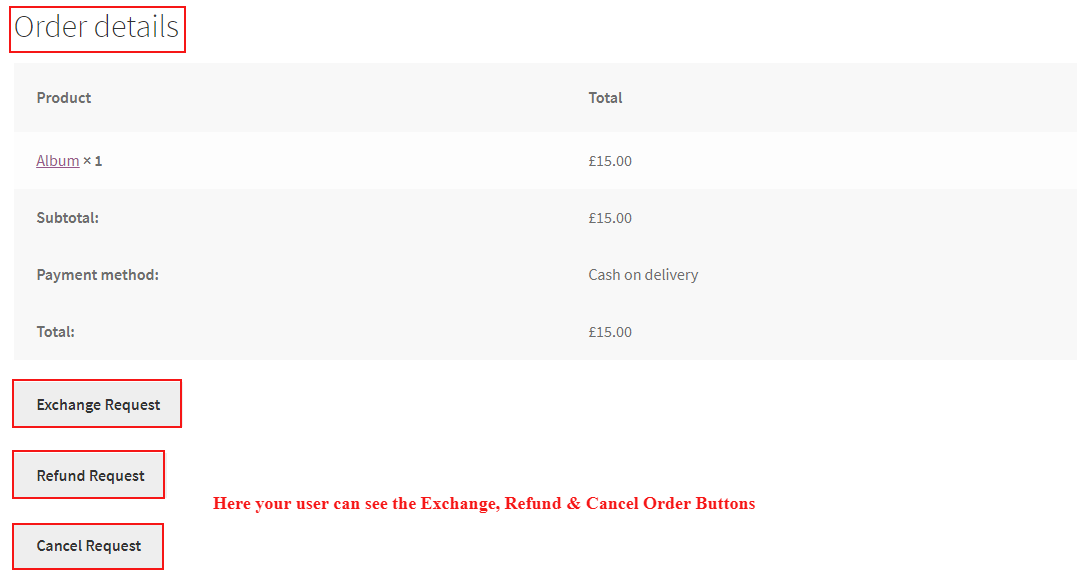
After clicking on the Submit button, an order detail page will display with WooCommerce Refund, Exchange, Cancel Request tabs. By clicking on these buttons users can send the requests.
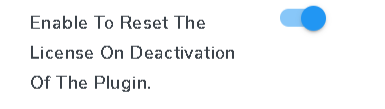
 Enable to Reset the License on Deactivation of the Plugin
You can simply utilize this setup option to enable/disable the reset setting of your after your license plan got deactivated.
 Enable Tracking
For data tracking, you can utilize this setting option. Just toggle switch ON or OFF the setting option available. This option enables us to access your site data that ease future concerns related to assistance.
You can enable/disable the bank details field in the return, refund, and exchange form when setting up for the manual WooCommerce refund method.
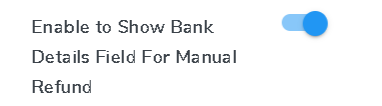
Simply toggle switch ON to enable and toggle switch OFF to disable the feature available in the plugin.
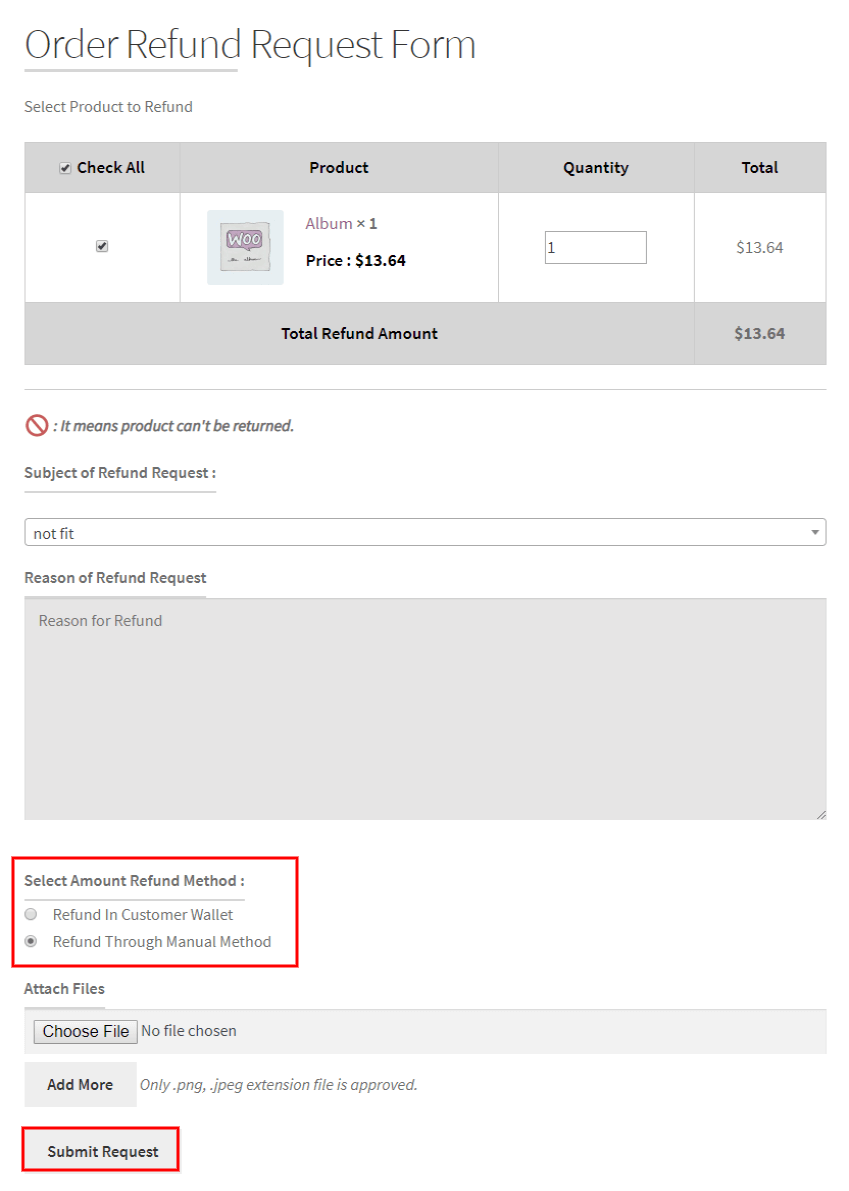
Setting Demonstration over Frontend…
After successfully placing a refund request for a certain product, the customer can wait till the request gets acceptance from the store admin or the store manager.
Note- This wait step can be skipped if you’ve already enabled Enable Refund & Exchange For Exchange Approved Order toggle in the General settings tab or the Enable Auto Accept Refund Request in the Refund settings tab.
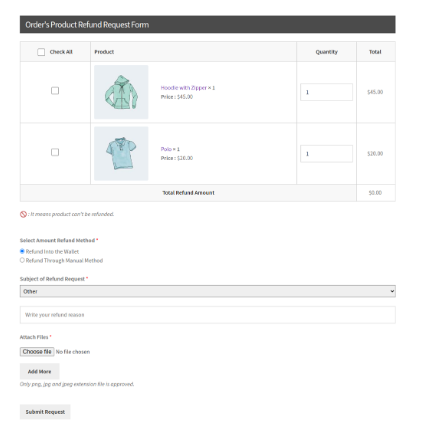
While placing the refund request, one need to set the refund method likewise the two options displayed in the above screencast i.e. Refund in Customer Wallet and Refund Through Manual Method.
Suppose, you select Refund in Customer Wallet then the refund amount would automatically be transferred into customer’s wallet. But, if he selects the Refund Through Manual Method then a new field i.e. The Bank Details field would be displayed just below the refund method field in order for the customer to fill the bank details within.
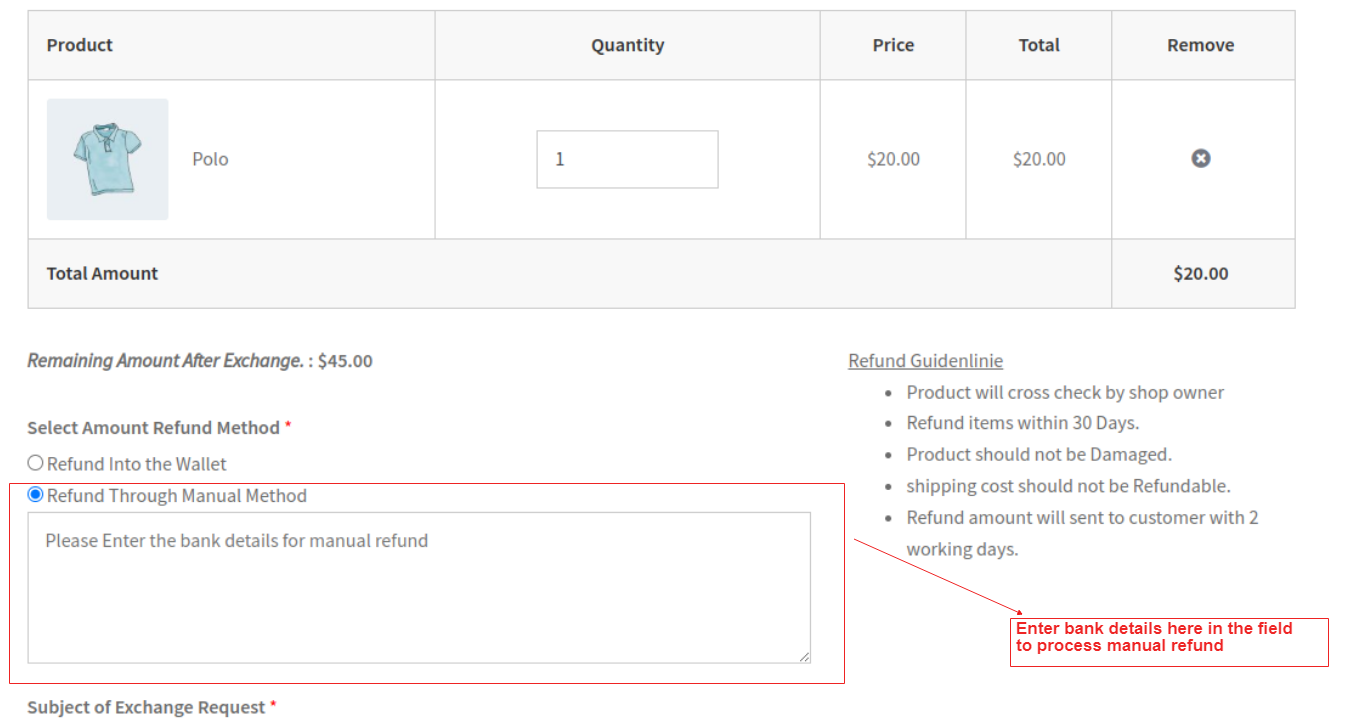
Note– In order to display the Bank Details field, One must enable the Enable to Show Bank Details fields for Manual Refund option available in the General settings tab.
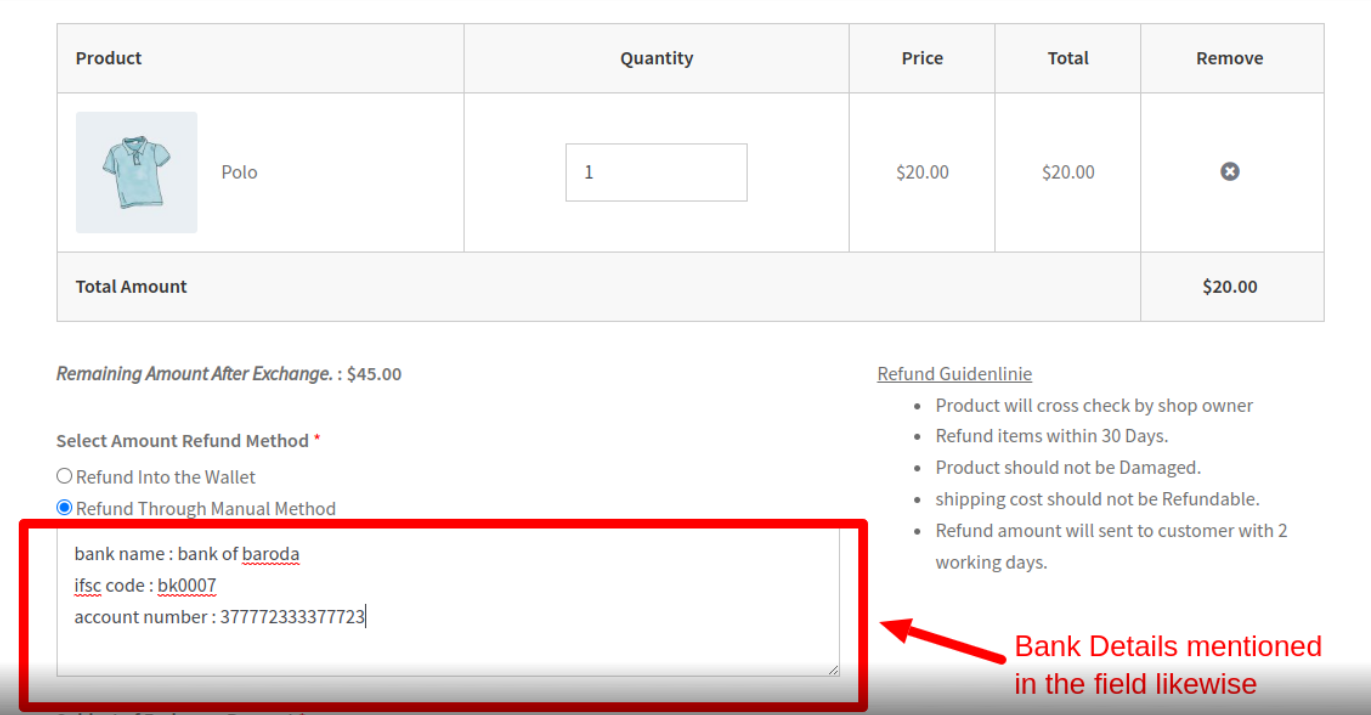
Just, enter your bank details available in the field given and proceed further. In case you need an idea, refer to the screencast displayed below-
Now, the store admin receives the refund requested notification. He/She can simply navigate towards the Order Listing panel and select the order which is requested for refund. For more clarity refer the screencast below-

Select the order for Order Details and check for refund requests placed in order to Accept or Cancel the request and proceed further.

Store admin can review customer’s entered bank details in order to process their manual refund from here. But, before that admin needs to Accept the refund request placed.
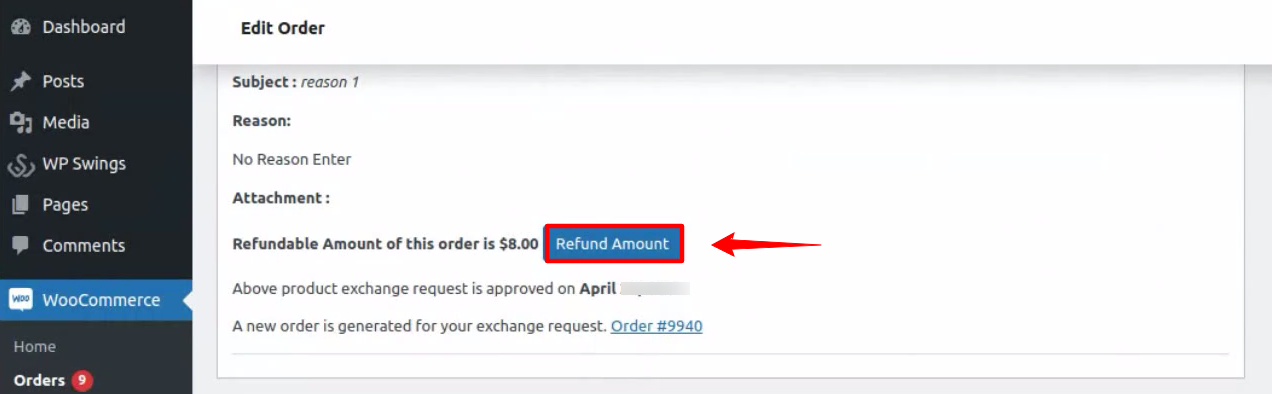
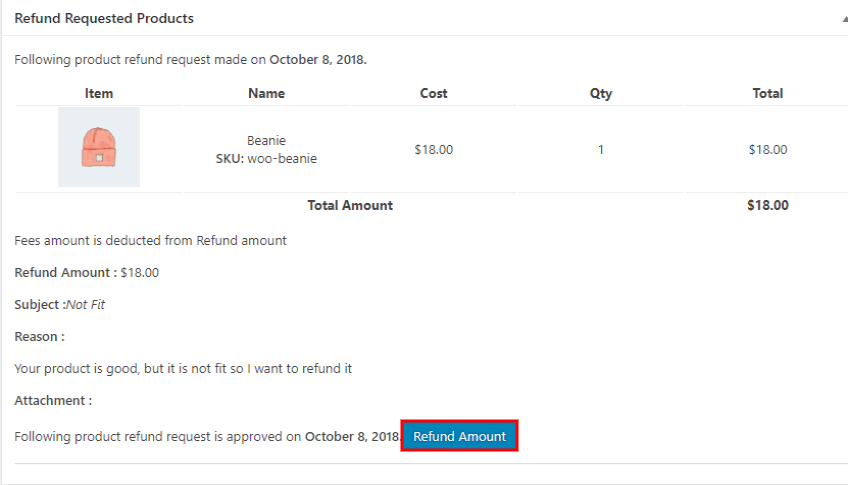
As they accept the request for refund, the refund amount related details are to be presented over likewise in the below screencast. You need to just hit the Refund Amount button to set the product amount to be refunded in the customers account directly.
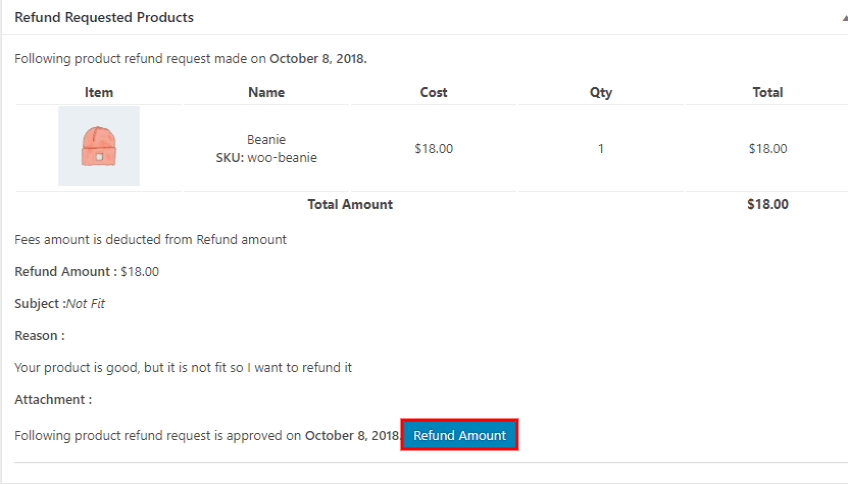
After accepting the refund you can refund the amount Manually or by Automated Payment Refund Feature. Through this feature the admin can refund the amount with the same payment method that is used by the customer during the purchase.
Enable Time-Based Policy
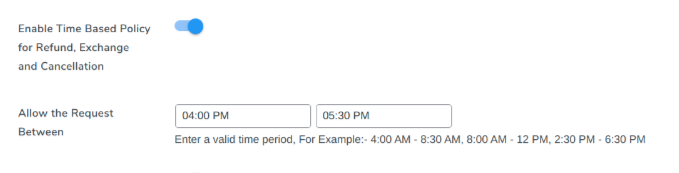
The admin can utilize this setting to set a specific time frame for all the refund, exchange, and cancellation requests. During this defined period, customers will have access to these respective request options on the website, while outside this timeframe, they will no longer be visible.
For example: if the admin sets the time frame to be 9 AM to 10 AM, then the customers will not see the refund, exchange, and cancellation options after this time frame, these buttons will disappear from the website.
4.3.WooCommerce Refund Tab
The next tab to the general settings tab is the refund tab, this tab refers to the setup options that include a smooth refund process for your outstanding placed orders. The settings that refund tab include within are-
Select Pages To Hide Refund Button
Utilizing the setting option you can show/hide the refund button from the selected pages.
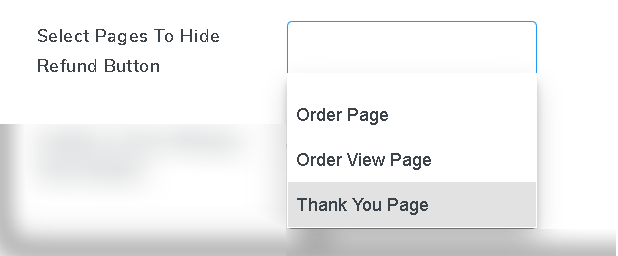
Just you have to mention the pages in the text field available and make use of the setup feature.
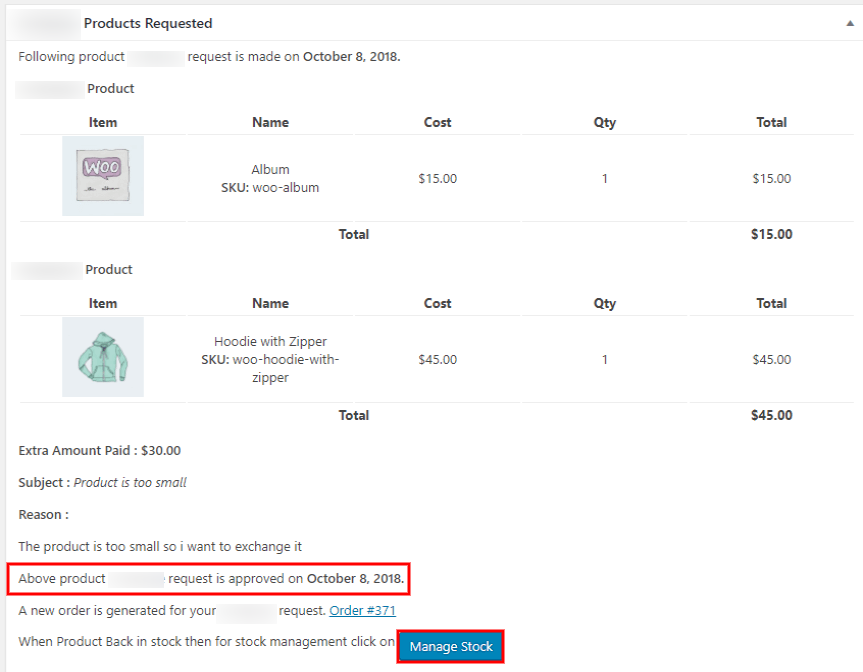
Enable to show Manage Stock Button
Utilizing the setting option you can show/hide the manage stock button. All you have to do is toggle the plugin feature ON/OFF.

If the admin accepts the Exchange request then manage stock by clicking on the “Manage Stock” button.
Enable Attachment
Utilizing the setting option you can offer an attachment feature within your refund, exchange, and Cancellation form. Simply toggle the plugin feature ON/OFF.
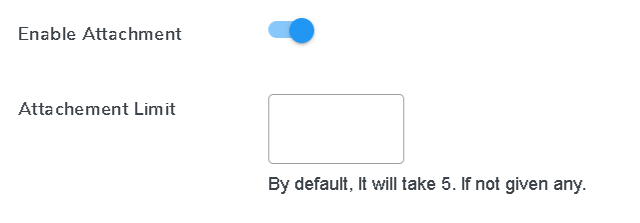
Attachment Limit
You can also offer the attachment-based limit when offering an attachment option within your refund, return, and exchange form. Simply mention the no. of attachments you can offer.
Note- When the Attachment limit on the frontend is reached, the Add More button for additional attachments disappears automatically.
Frontend Demonstration of the setting-
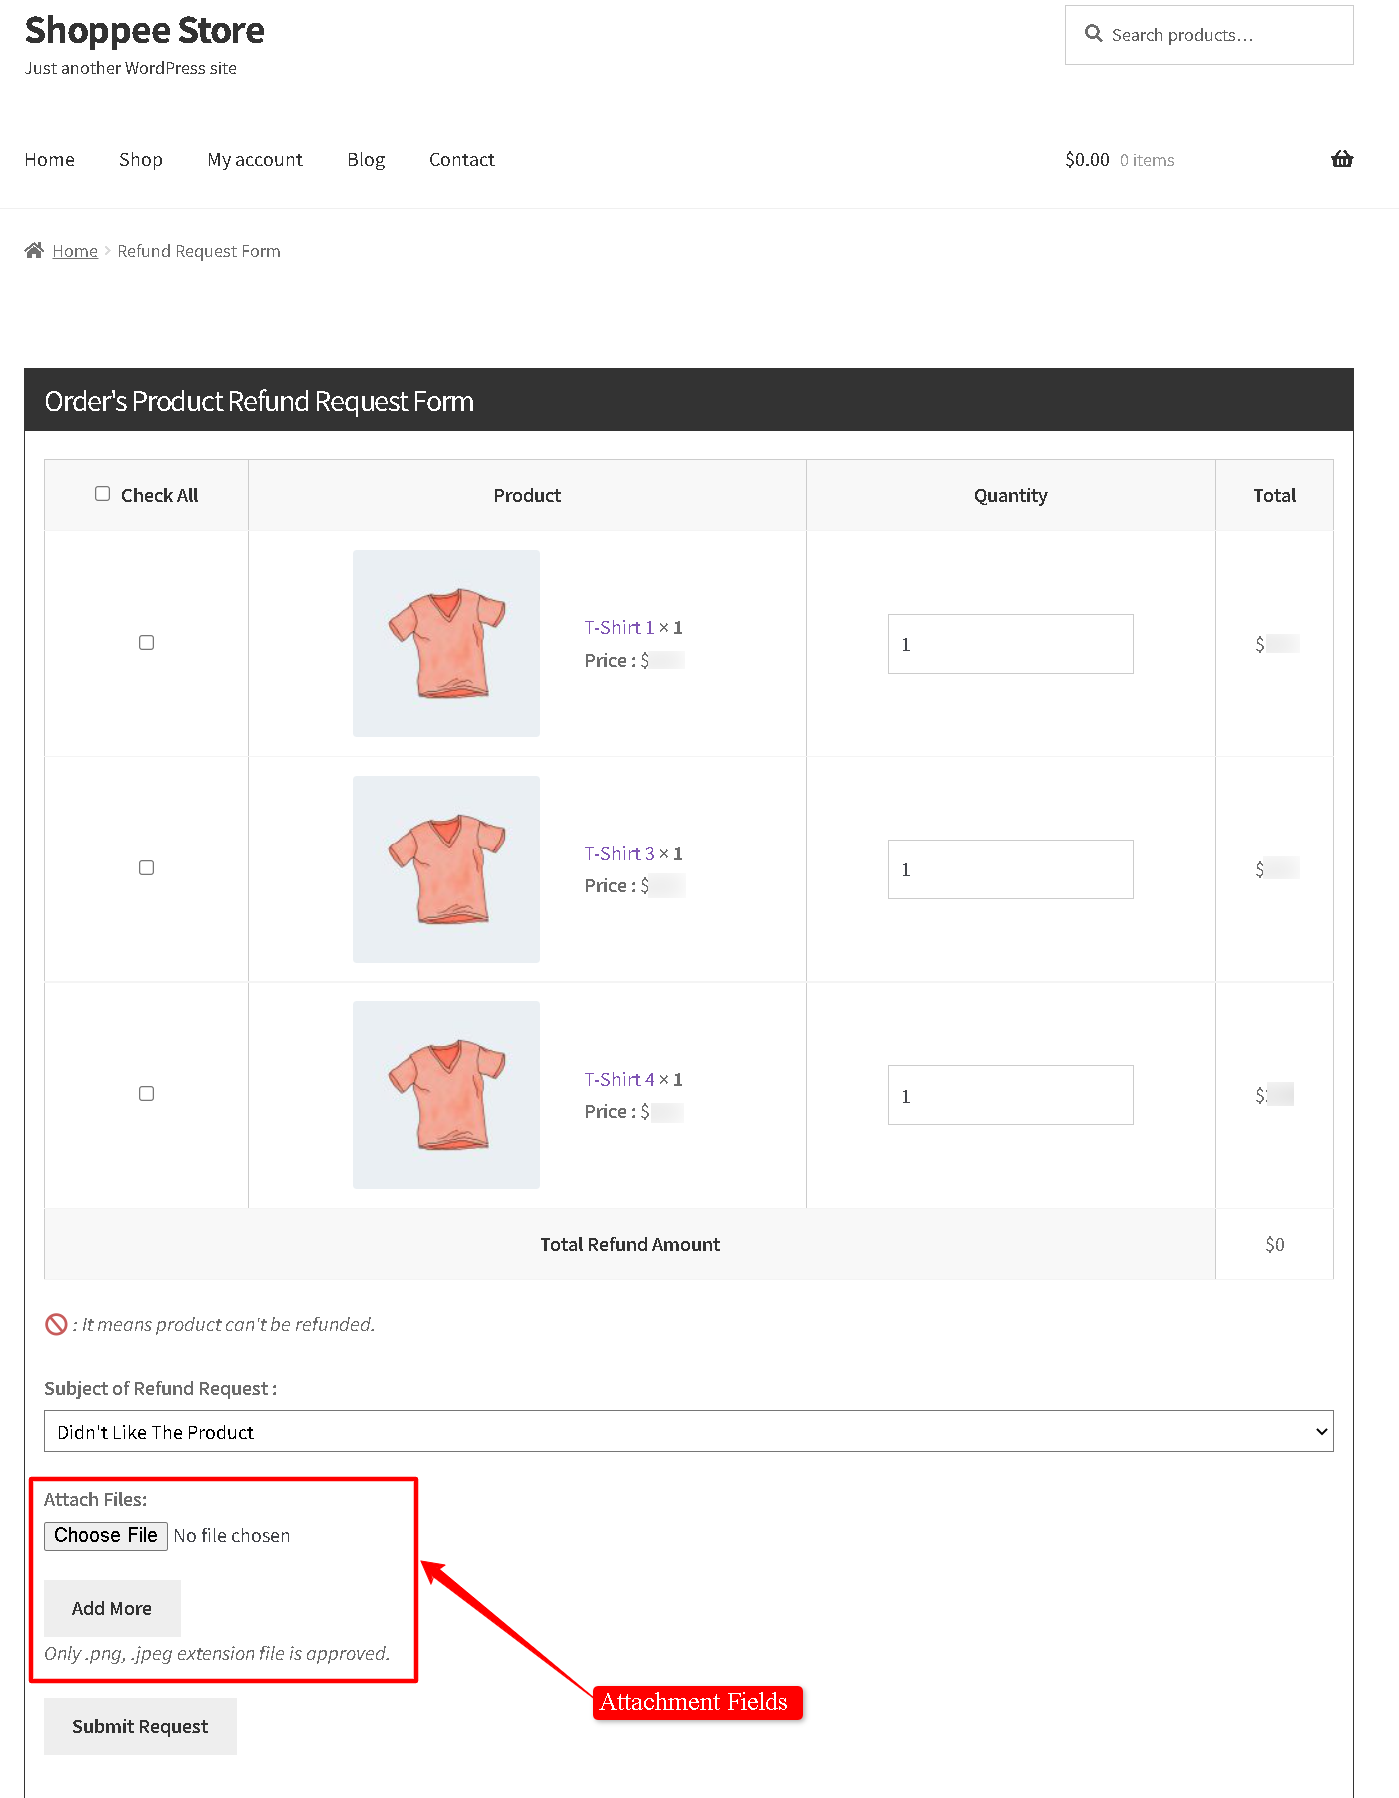
Enable To Refund on Sales Item
You can also offer a refund option over sale-based products, likewise enabling or disabling the setting option. Simply turn the plugin feature on or off.

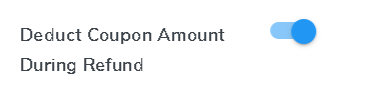
Deduct Coupon Amount During Refund
You can also provide a refund/reimbursement possibility, while deducting your offered coupon amounts from the order’s requested for refund.
Yes, why give a full refund when your customers already had enjoyed the discount coupons? You don’t have to do much; all you have to do is toggle the plugin feature ON/OFF.
Setting Demonstration
Assume you have a pre-created coupon for your store, like seen below.
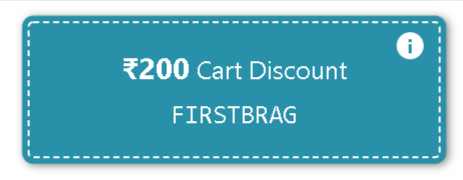
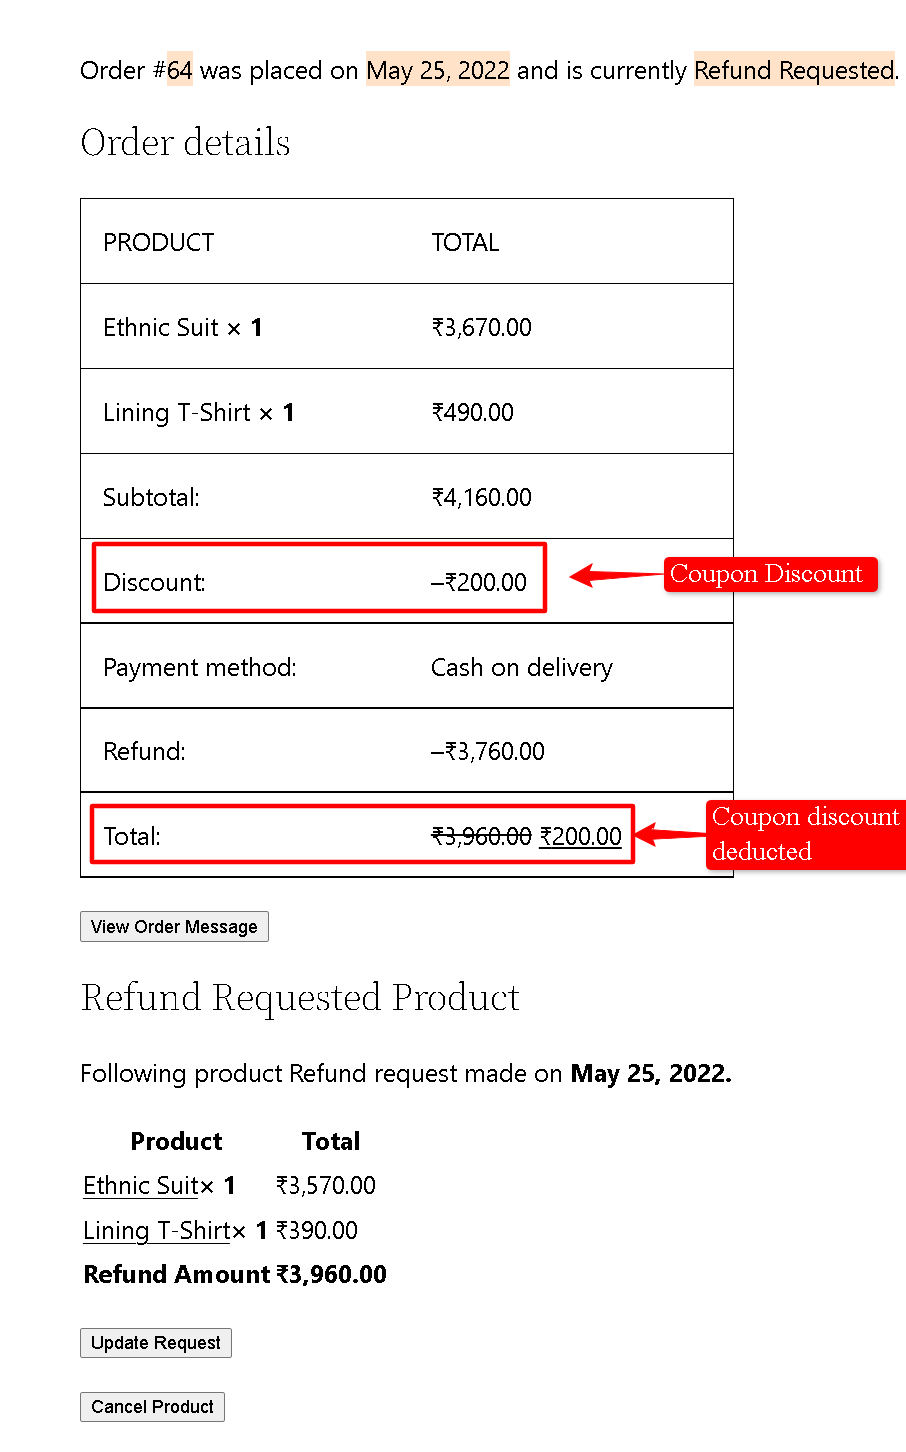
As a result, your customer places an order with a coupon, which is also displayed above. As a starting point, I’m using the discount shown above.
Following that, the screencast below showed an order placed with a discount using the above coupon. Take a look at it.
If a customer wants to return a product and receive a refund, he or she must first submit a refund request, which is done by clicking the Refund button in the orders area, which takes them to the Refund Request Form.
After successfully submitting the refund request, the order will appear in the orders area with a status indication, as shown in the screencast below.
When the merchant or business owner receives the refund request from the customer, he or she can process it in the backend for approval or cancellation.
You may watch the screencast below to see the refund request made by the customer, which includes a coupon discount—
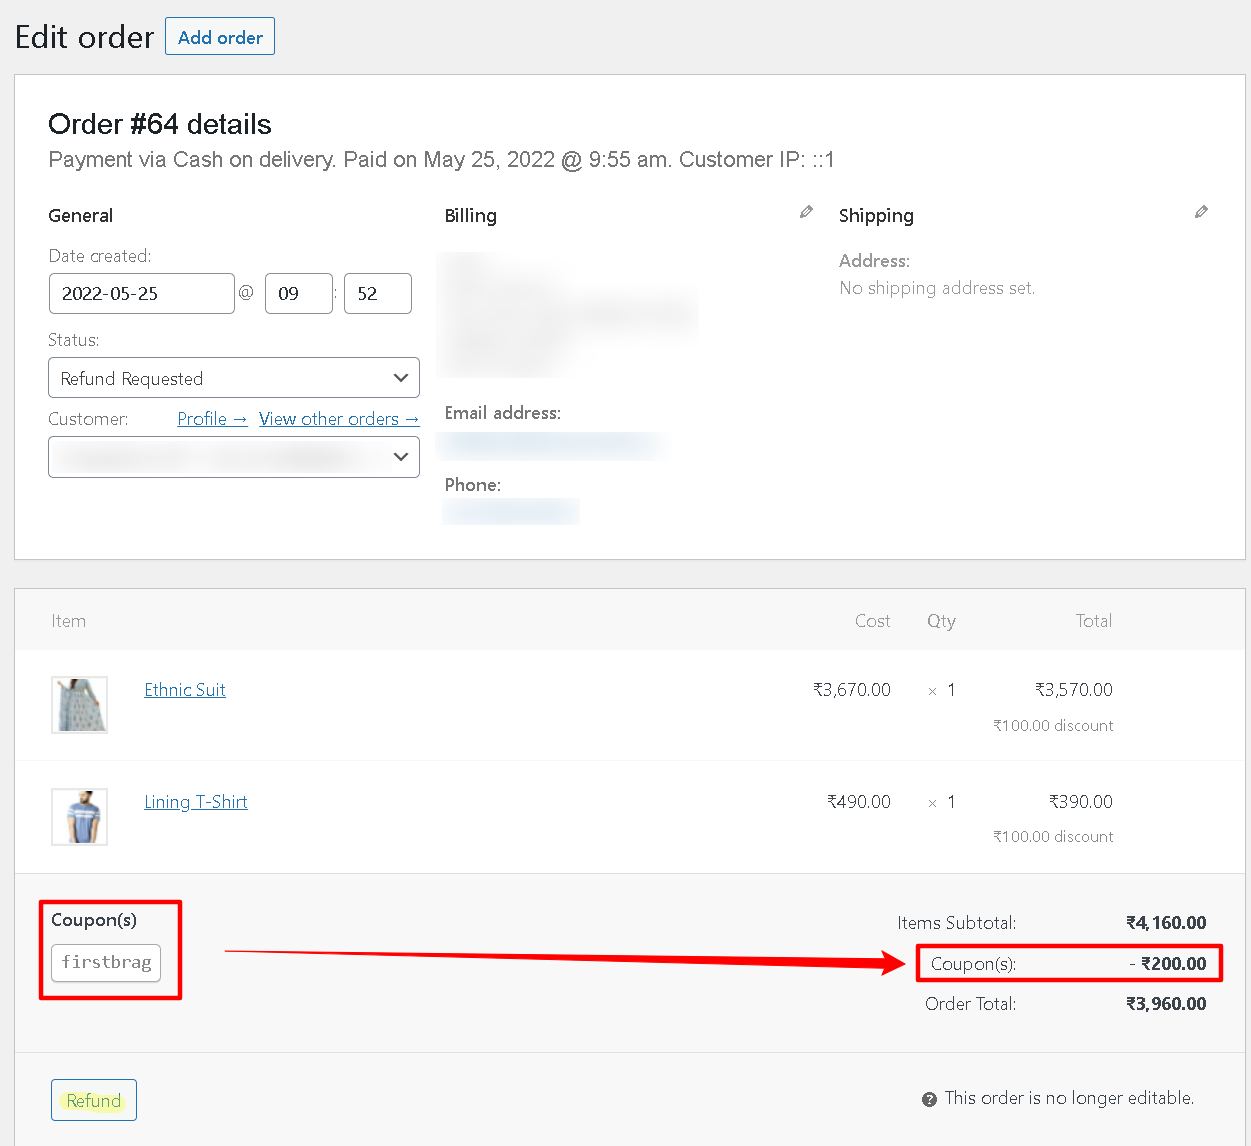
When the merchant clicks the Refund button in the backend to process the refund amount, the Deduct Coupon Amount During Refund setting on the Refund tab is activated. He or She will be allowed to deduct the coupon-based discount from the return amount manually.
The effect of this feature can be seen in the screencast below—
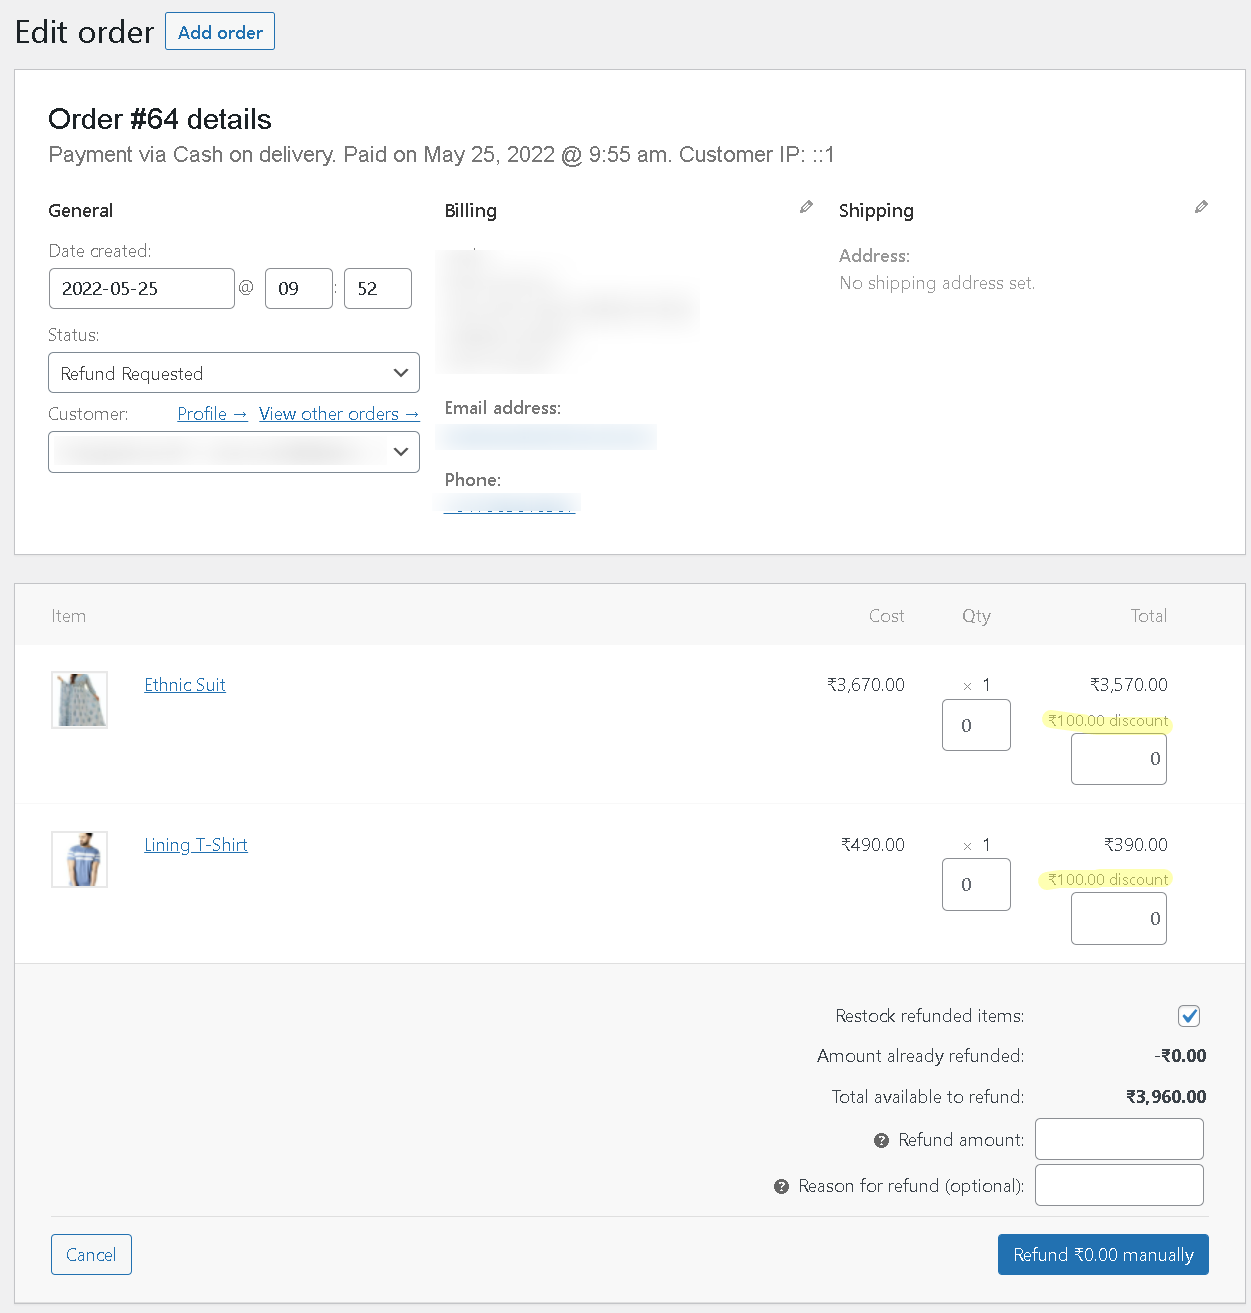
Following that, the merchant is free to enter the refund amount and process the customer’s refund.
Take a look at the screencast below, which shows the coupon amount deducted from the refund amount processed.
Enable Auto Accept Refund Request
You can offer an Auto Accept Refund Request feature within your plugin for refunds, likewise enabling or disabling this setting option. All you have to do is toggle the plugin feature ON/OFF.
Enable To Block Customer Refund Request Mail
You can simply block the customer to send refund request mails, likewise enabling or disabling this setting option. Simply toggle the plugin feature ON/OFF.
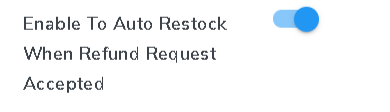
Enable To Auto Restock When Refund Request Accepted
You can simply Enable To Auto Restock When Refund Request Accepted, likewise enabling or disabling this setting option. Just you have to toggle switch ON/OFF the plugin feature.
Refund Button Text
You can simply customize your refund button text utilizing this setting. Just enter the text over to display as a caption within your refund button at the frontend.
For Example- If you have updated your refund button text to be-

Then, at frontend your refund button would look like-
Enable Refund Reason Description
You can simply customize your refund reason-based description text utilizing this setting. Just ON/OFF the toggle switch over to display as a description at the frontend.

Predefined Refund Reason
You can simply offer custom predefined refund reasons for your refund requesting customers utilizing this setting. Just enter the text over to display as predefined reasons for a refund at frontend.
Just add your list of predefined refund reasons separated by commas and display over frontend likewise, for more clarity refer the screencast-

Then, the frontend visual would be like-
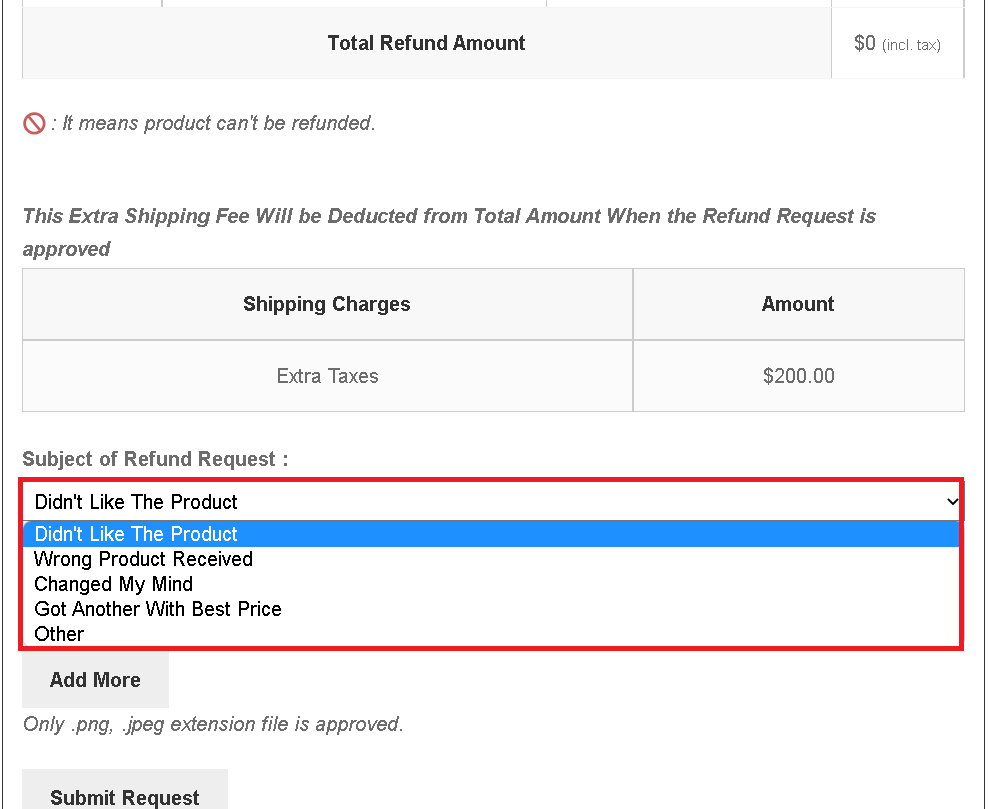
Your customer can conveniently choose one reason from the given list and proceed further.
Enable Refund Rules
You can also enable/disable the refund rules displayed at the frontend utilizing this setting option available at the backend. Just toggle the switch ON/OFF to display the refund rules appropriately.
For that, just toggle On the Enable Refund Rules button and add your defined refund regulations in the Refund Rules Editor given below. Refer the screencast for better understanding-
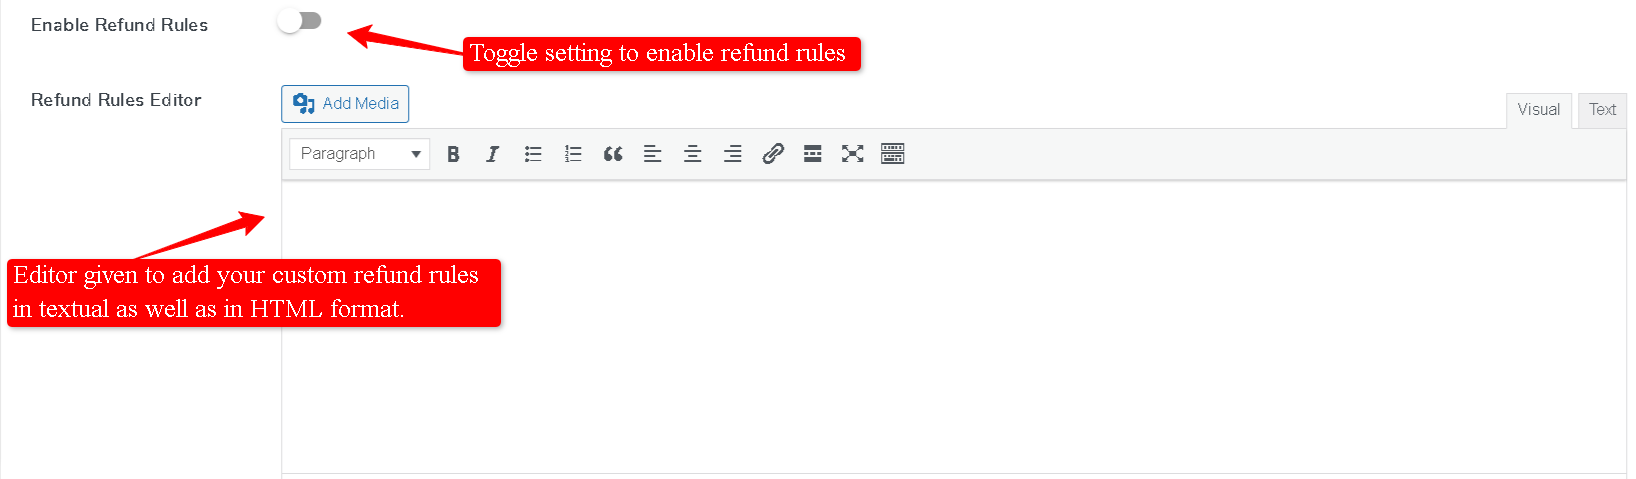
Refund Rules Editor
This setup option offers easy and seamless integration of refund rules editor i.e. ckeditor in the backend.
Refund rules mentioned in the editor would easily be displayed over frontend, for clarity refer the screencast below-
Reason for Refund Placeholder
A placeholder can be added to this section of the settings to write refund reasons. The term “placeholder” refers to the set of words that appear in an input column or area before the user begins typing their data.

So, the refund placeholder can be anything you want it to be in order to give your consumers an idea of what they need to fill in there.
Refund Request Form Shipping Fee Description
You want to add shipping description within your refund request form, don’t worry just utilize this setting and easily add description to your shippings.

If you want to update your shipping fee description can be added if you want to inform your customer about any important update in your shipping fee. For instance refer the screencast below-

Enable Refund Note On Product Page
Utilize this setting to enable refund note over product page with all ease, just you have to toggle switch ON the option to enable the feature.
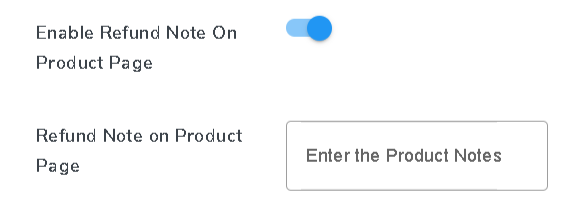
Refund Note on Product Page
Corresponding to the above setting option the refund note text on the product page can be entered utilizing this option.
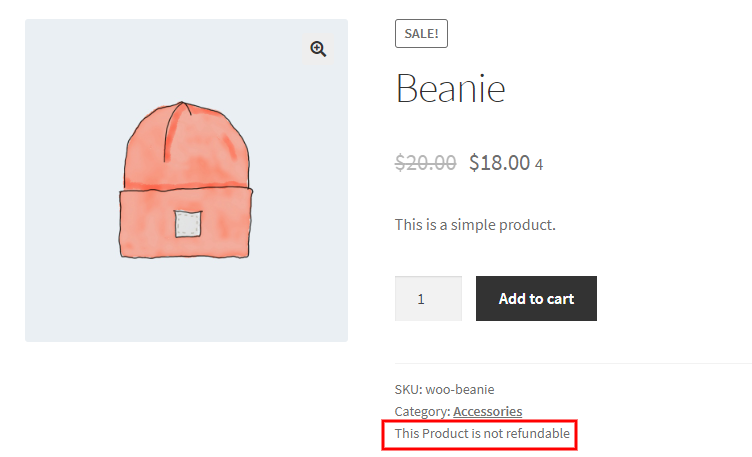
For better understanding about the refund note, you can refer the screencast displaying custom refund note on the product page itself-
Refund Form Wrapper Class
The refund form based wrapper class can be entered here utilizing the setting for the product page.

Refund Form Custom CSS
Custom CSS for your refund form can be entered here utilizing the setting option. Just add your custom CSS class here referring to the section.
Other than these setting options, some other setup links are available beneath the setup page referring to the email setup, they are-
To Configure Refund Request Email Click Here.
In order to configure, refund-request email based setting you can refer to the link given here.
You can access the link given in order to configure your refund request based on that email. As you access the link given you’ll be automatically redirected to the page, displayed here in the screencast below-

This page consists of email configuration settings including the shortcodes to be displayed on the top that serves the purpose fully. The settings here include-
- Enable/Disable- This is a checkbox enable setting that is required to serve the notification enabling and disabling feature in check.
- Subject- This setting requires the mail subject based input.
- Heading- The email heading is to be inputted here to continue.
- Custom email- The mail body or the mail description text need to be updated here in this block.
- Email type- You need to define the email type here.
- HTML Template- This offers the link to the original template based email copy, if the merchant wants to edit the theme file directly. Either you can refer to the template through the link or hit the View Template button.
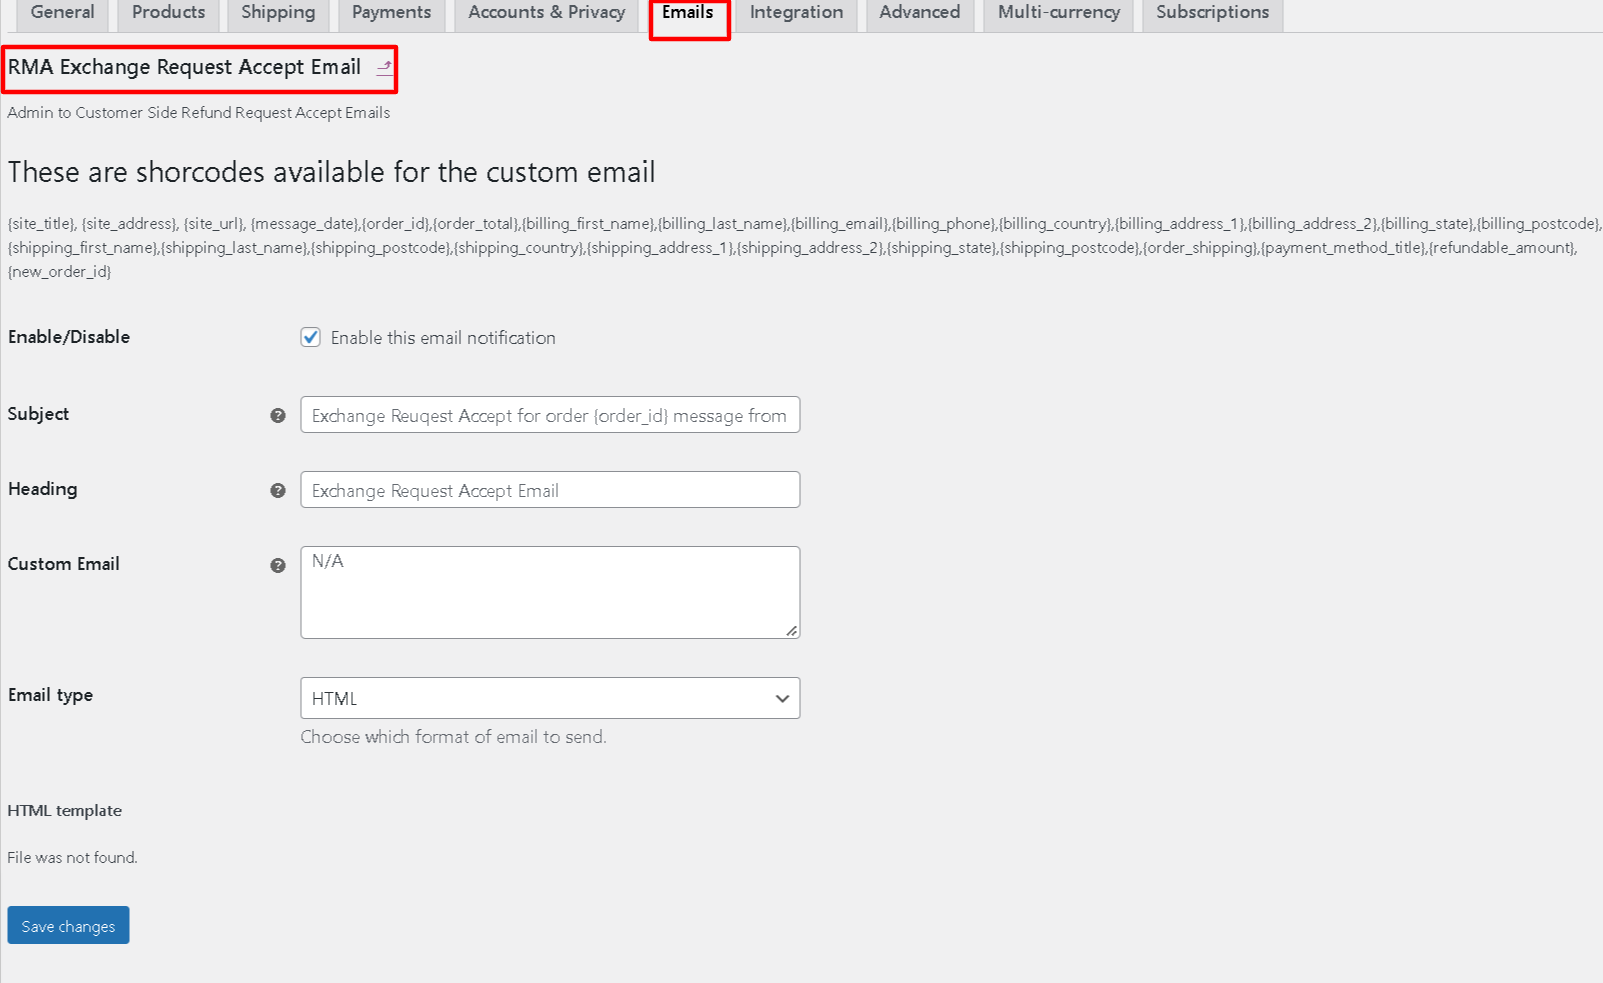
To Configure Refund Request Accept Email Click Here.
Similar to the refund request email configuration, you can also configure the refund-request accept email based settings you can refer to the link given here and proceed with the settings part.
For better understanding of the setup options and the page, refer the screencast below-
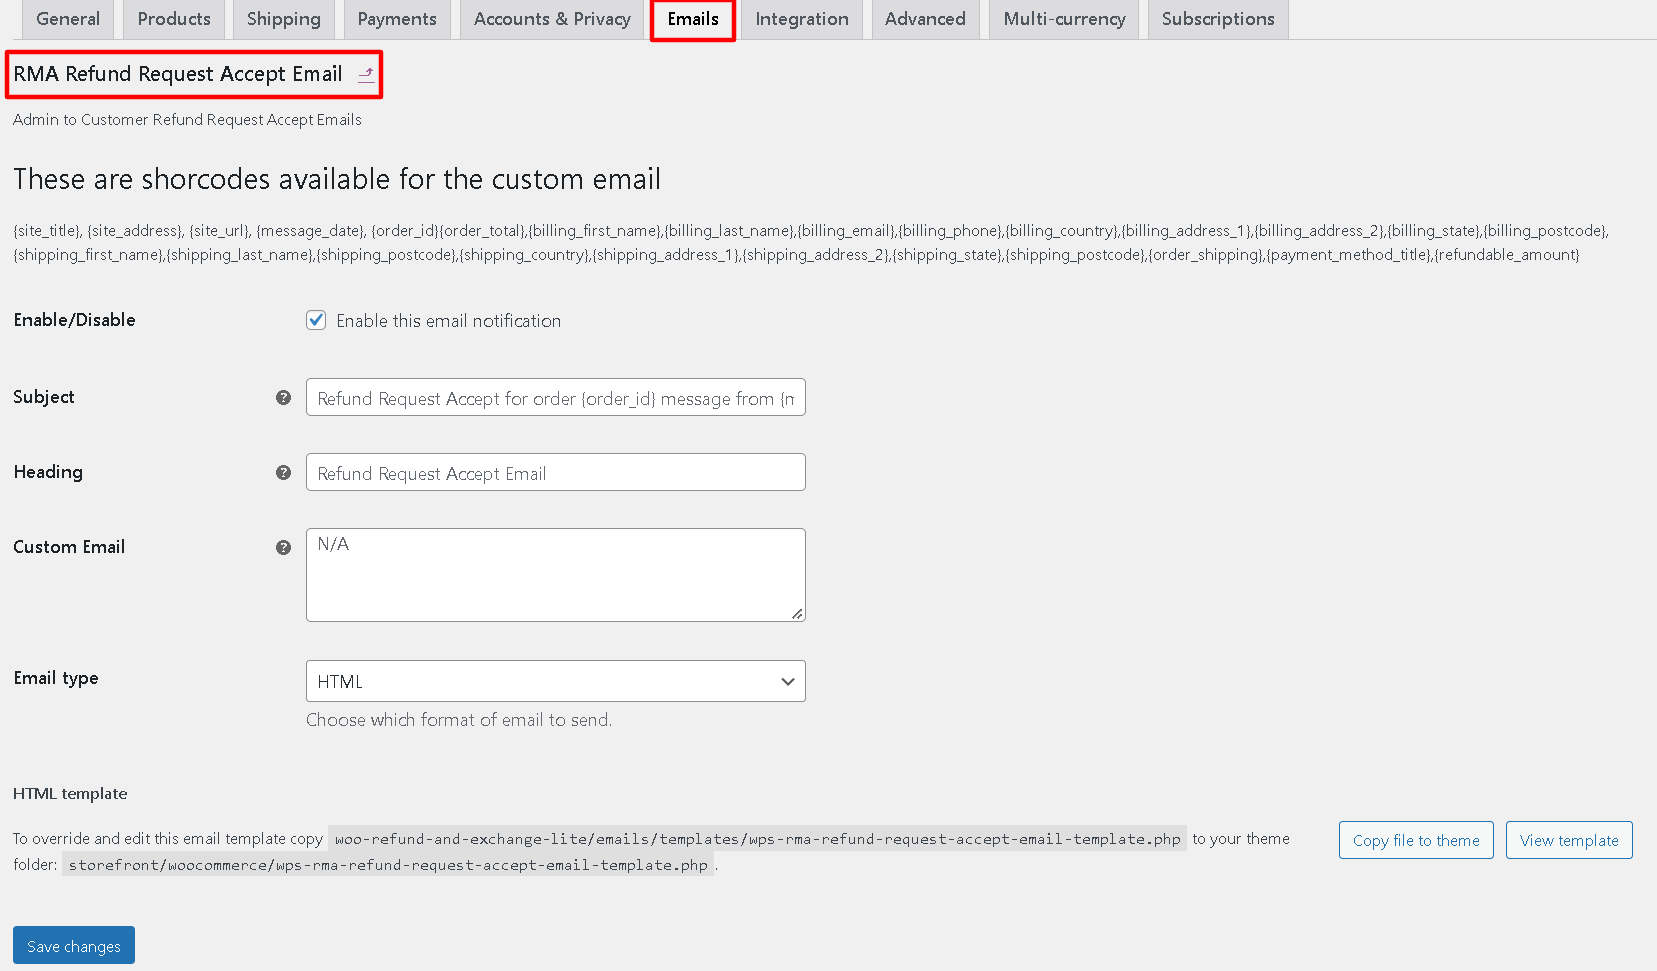
This page consists of accept email configuration settings including the shortcodes to be displayed on the top that serves the purpose fully. The settings here include-
- Enable/Disable- This is a checkbox enable setting that is required to serve the notification enabling and disabling feature in check.
- Subject- This setting requires the mail subject based input.
- Heading- The email heading is to be inputted here to continue.
- Custom email- The mail body or the mail description text need to be updated here in this block.
- Email type- You need to define the email type here.
- HTML Template- This offers the link to the original template based email copy, if the merchant wants to edit the theme file directly. Either you can refer to the template through the link or hit the View Template button.
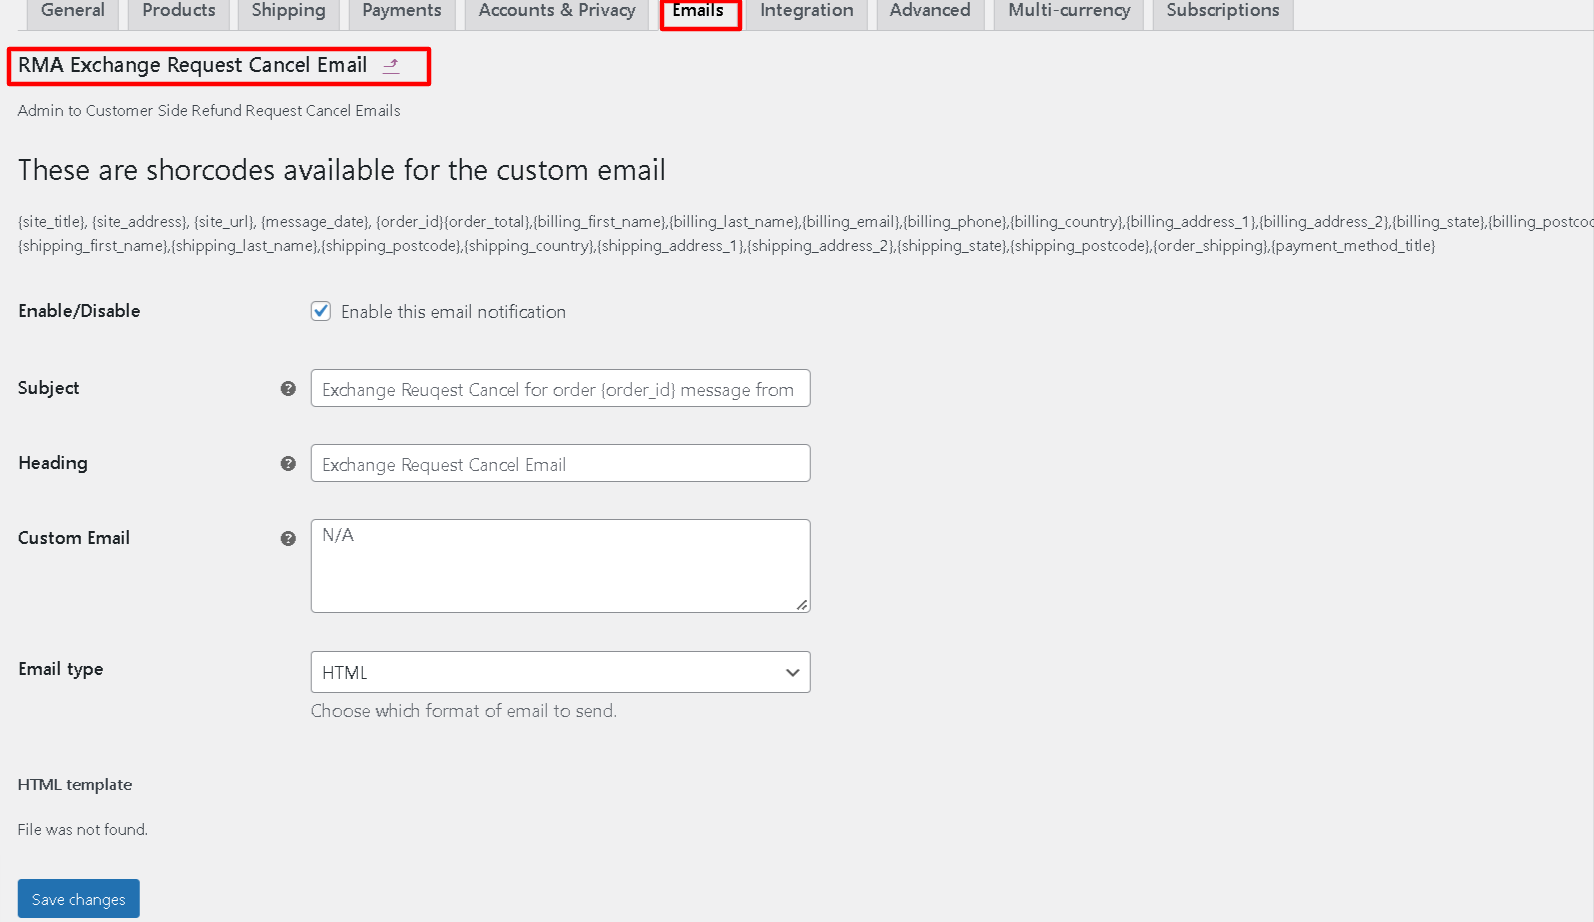
To Configure Refund Request Cancel Email Click Here.
In order to configure, refund-request cancel email based settings you can refer to the link given here.
You can access the link given in order to configure your cancel refund request based on that email. As you access the link given you’ll be automatically redirected to the page, displayed here in the screencast below-

This page consists of cancel email configuration settings including the shortcodes to be displayed on the top that serves the purpose fully. The settings here include-
- Enable/Disable- This is a checkbox enable setting that is required to serve the notification enabling and disabling feature in check.
- Subject- This setting requires the mail subject based input.
- Heading- The email heading is to be inputted here to continue.
- Custom email- The mail body or the mail description text need to be updated here in this block.
- Email type- You need to define the email type here.
HTML Template- This offers the link to the original template based email copy, if the merchant wants to edit the theme file directly. Either you can refer to the template through the link or hit the View Template button.
4.4.Exchange Tab
The next tab is the exchange tab available in order to set up exchange product related settings. This tab includes different setup options along-
Select Pages to Hide exchange Button
You may easily hide your exchange button from the pages of your website by using the configuration option.
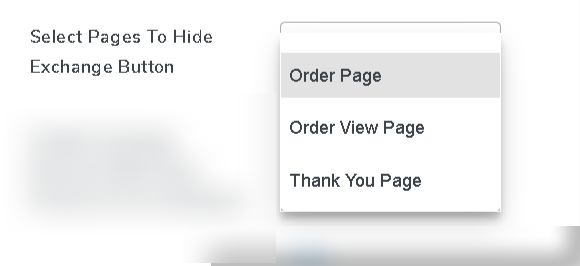
All you have to do now is specify the page names and you’re ready to go.
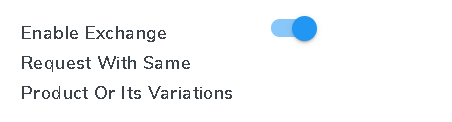
Enable Exchange Request with same products or its variations
Enable this setting, If you want to allow your customer to exchange the product only with the same product or its variations.

For a clearer understanding, kindly refer the demonstrative example below-
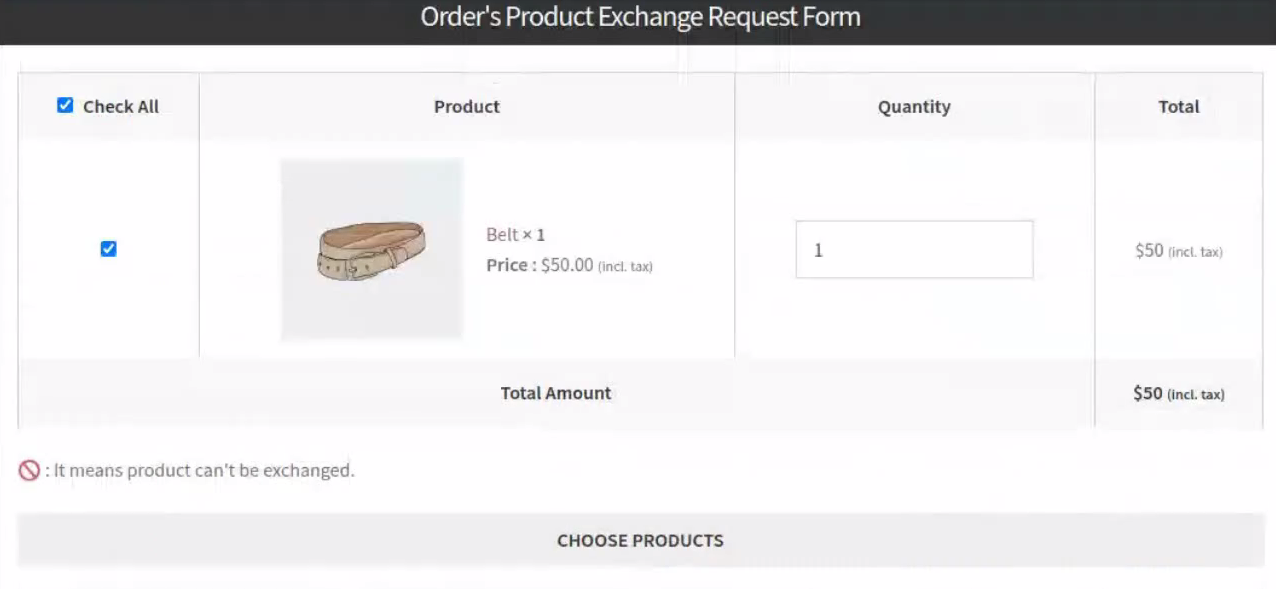
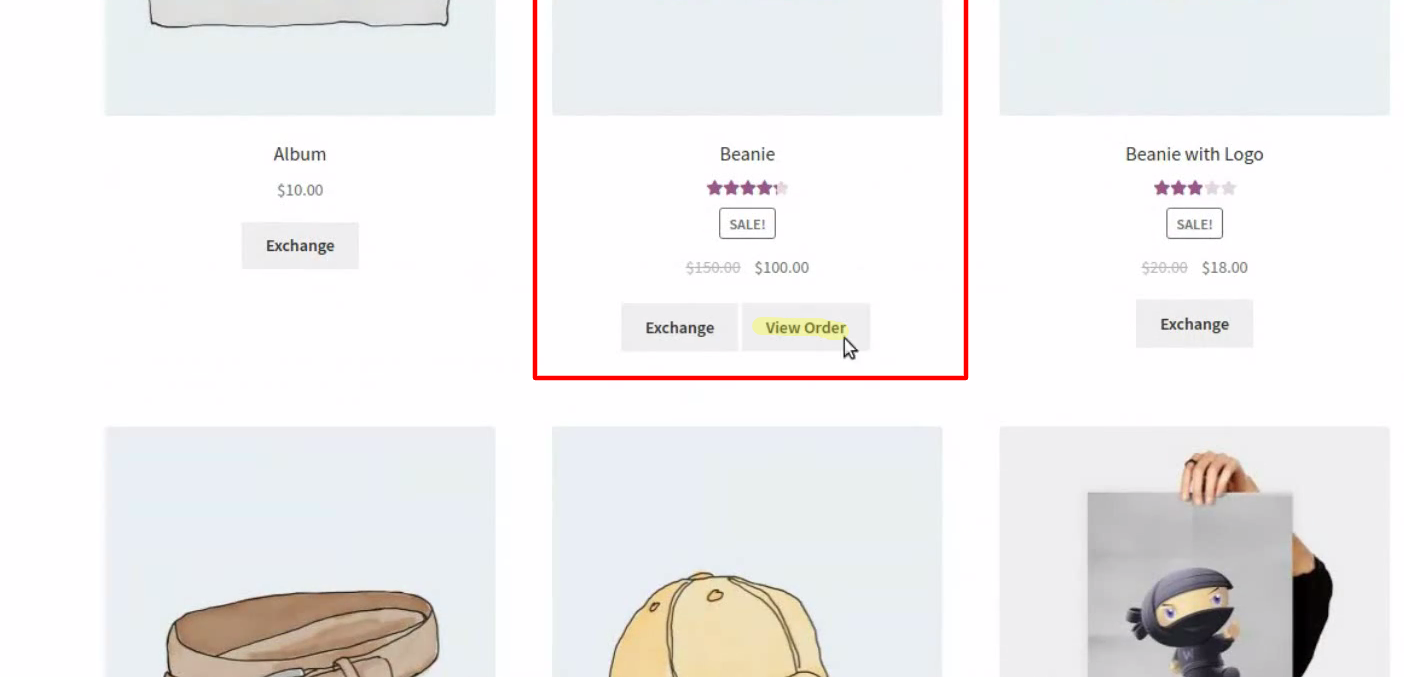
Refer to the screencast that displays an exchange request form. This form consists of an exchange option product list.
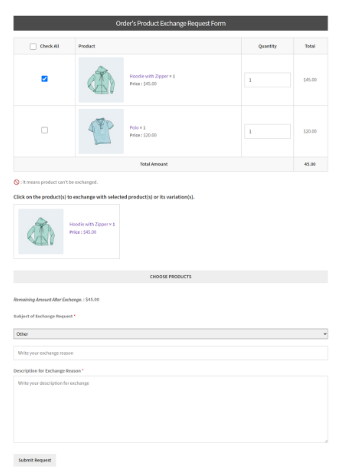
What customers need to do is to just choose one similar or variable product utilizing the Choose Product button given and set that as a replacement for their actual product.
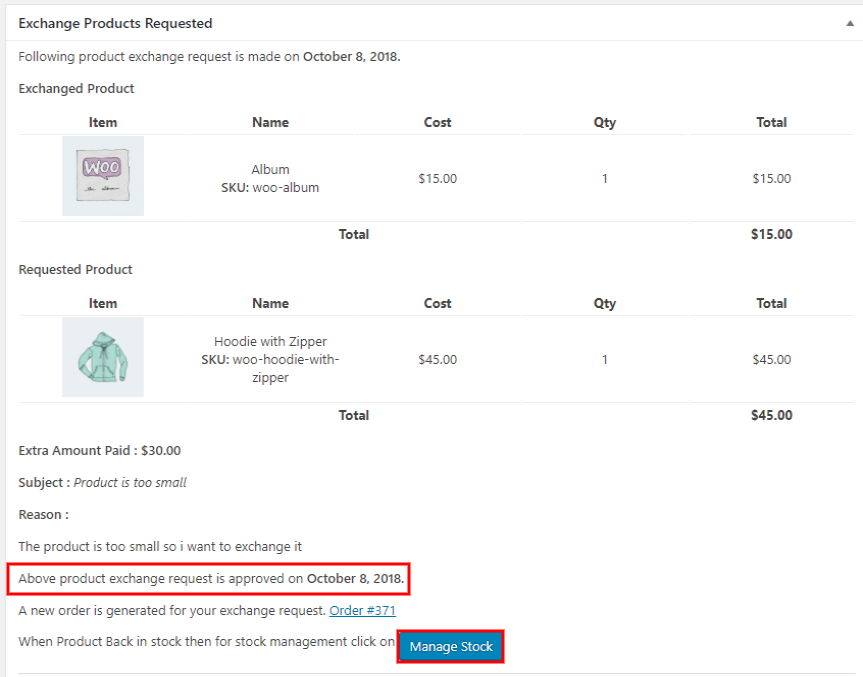
Enable to Manage stock button
Enable this setting if you want to automatically manage stock when any exchange request is accepted.

After accepting the exchange request, the admin can manage stock by clicking on the “Manage Stock”.
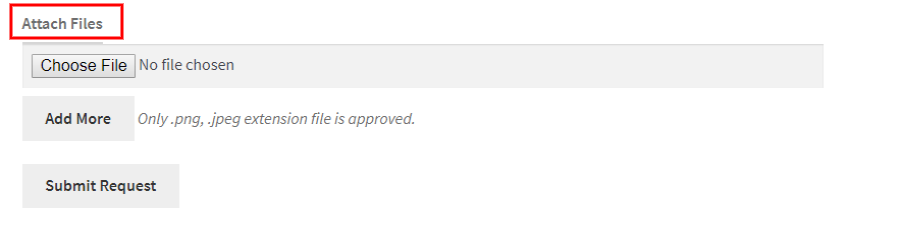
Enable Attachment
Enable this setting for the customers to send the attachment with the refund request. they can attach .png, .jpg, .jpeg type files.

This is simply an ON/OFF toggle switch that enables attachment settings.
Attachment Limit
Admin can set the number of attachments that a customer can send along with the exchange request form. By default, this number is set to 15.
Note- When the Attachment limit on the frontend is reached, the Add More button for additional attachments disappears automatically.
Enable to Exchange on Sales Item
Through this setting, the administrator can enable the exchange feature for the sale items. Just toggle ON the switch to start offering refunds on your sale items.

Deduct Coupon amount during Exchange
The administrator can enable this setting to deduct coupon amount from the exchange amount at the time of exchange Request.
Enable to block customer exchange request mail
The administrator can enable this setting when they want customers to not receive any exchange-related mails. This setting option disables the reply email from the customers and offers only one-way reply communication.
Enable to auto restock when Exchange Request accepted
Admin can enable this setting to automatically manage the stock of the exchanged products. The product returned from the customers in exchange for some other product will be automatically added to the stock saving effort and time of the seller.
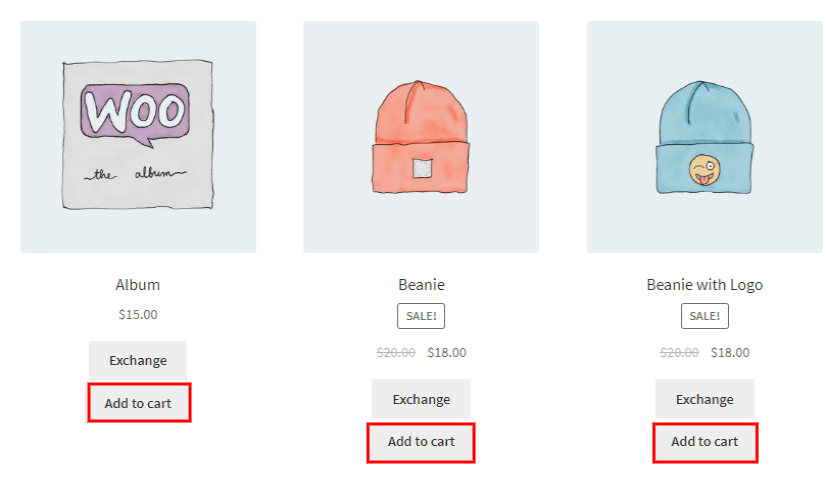
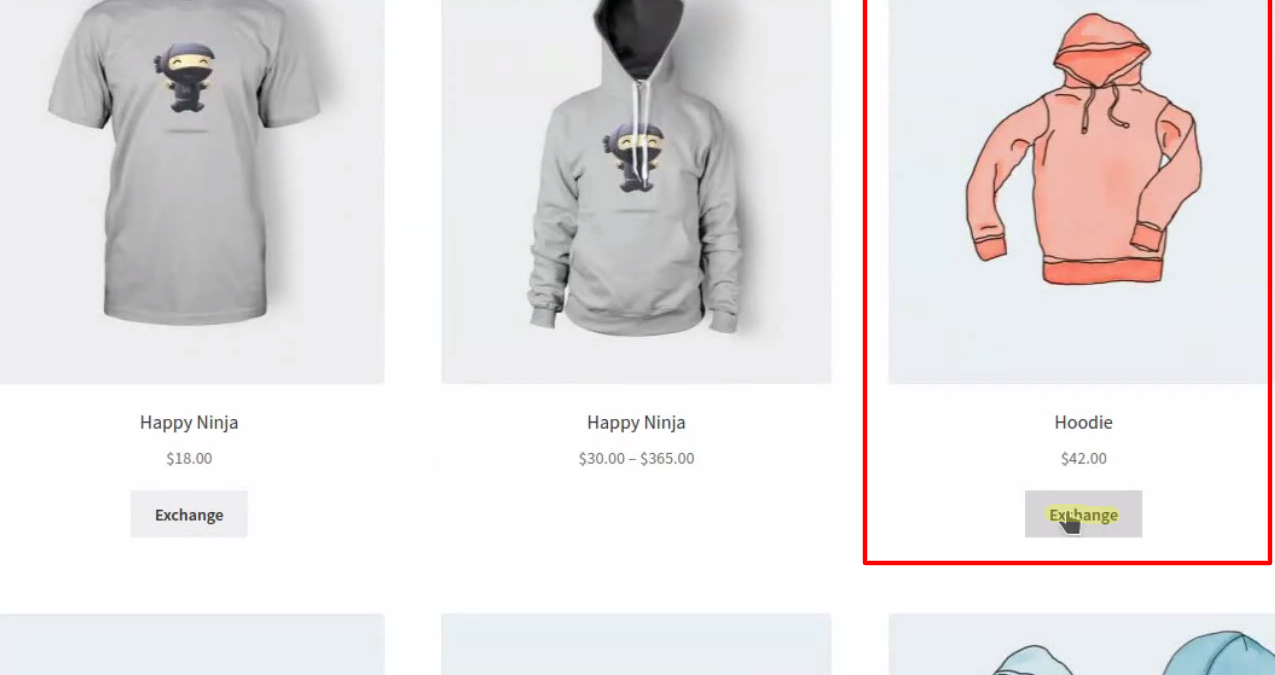
Show add to cart button
Enable this setting, if you want to show the “Add To Cart” button at the time the exchange session is started. “Add To Cart” button will display with the “Exchange Button”.
For clearer understanding and demonstration, you can refer to the screencast belowthat displays the “Add To Cart ” button and will display with the “Exchange Button ” along with the shop page.
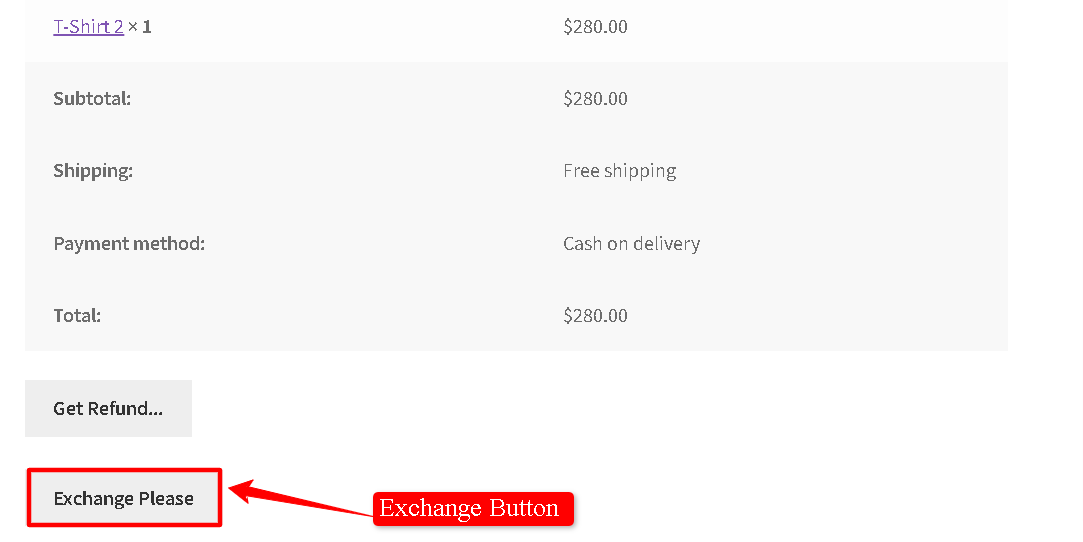
Exchange Button Text
Utilizing the setting you can easily update your exchange button text and update whatever you like to add. Just enter the text over to display as a caption within your exchange button at the frontend.
For Example- If you have updated your exchange button text to be-

Then, at frontend your refund button would look like-
Enable Exchange Reason Description
Utilize this option to enable the exchange reason description field. For that you just require to toggle switch ON the setup option.

Predefined Exchange Reason
Merchants can add/remove predefined exchange reasons which may be the reason for the User. You can easily utilize this field to add multiple custom exchange reasons separated by commas (,) in the text field given here.
Frontend Demonstration of the setting.…

Enable Exchange Rules
Admin can add a list of rules for the exchange of the product in the exchange request form using this Rules Editor. For that you just need to toggle switch ON this option to enable the feature.
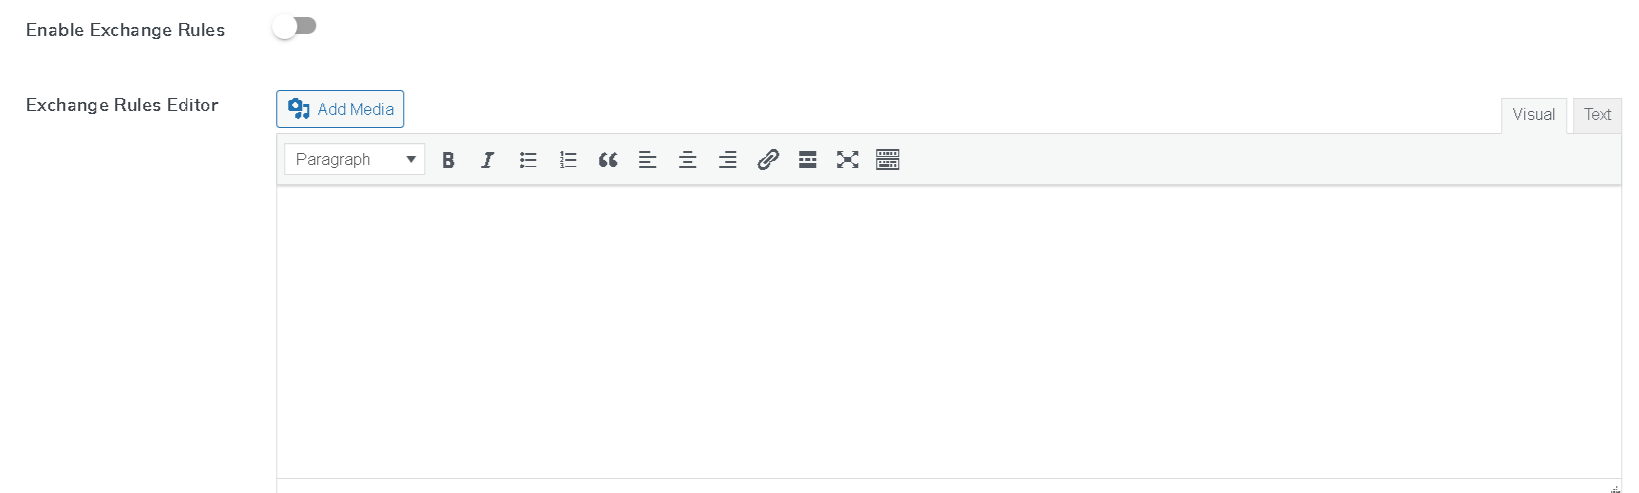
Exchange Rules Editor
Admin can add a list of rules for the exchange of the product in the exchange request form using this Rules Editor.
Reason of Exchange Place holder
Admin can add a list of reasons for the exchange of the product in the exchange request form using this Rules Editor.

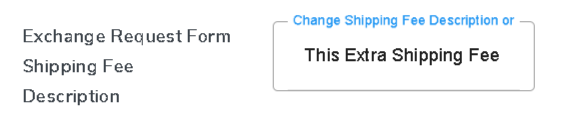
Exchange Request form Shipping Fee Description
You can see the Extra Shipping Fee notification on the Exchange Request Form.
Enable Exchange Note on Product Page
If you want to show any information related to Exchange requests, Enable the “Exchange Note on Product Page” setting and enter the message. This setting is applicable only for the “Sale” products.
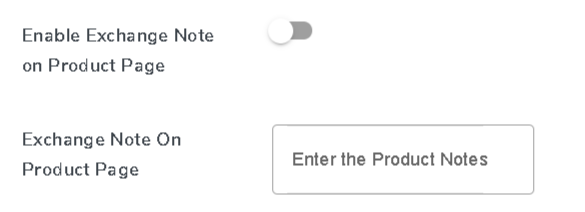
The notification will be displayed on the product page.

Exchange With Same Product Text
This setting option allows the merchant to exchange the product with the same product and its text customization.
Exchange Form wrapper Class
Utilizing the setting admin can Write Main Wrapper Class & Child Wrapper Class of Theme if add some design on the frontend.
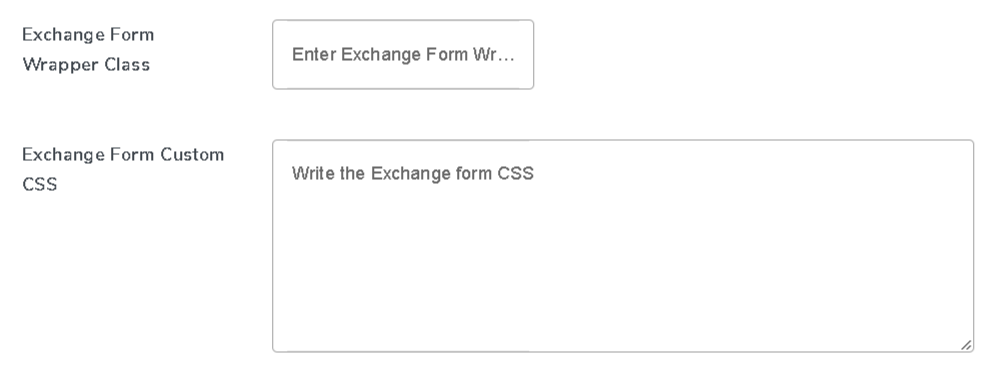
Exchange Form Custom CSS
The merchant can change the physical properties of the exchange form using the custom CSS.
Other than these setting options, some other setup links are available beneath the setup page referring to the email setup, they are-
To Configure Exchange Request Email Click Here
In order to configure, exchange -request email based settings you can refer to the link given here.
You can access the link given in order to configure your exchange -request based on that email. As you access the link given you’ll be automatically redirected to the page, displayed here in the screencast below-
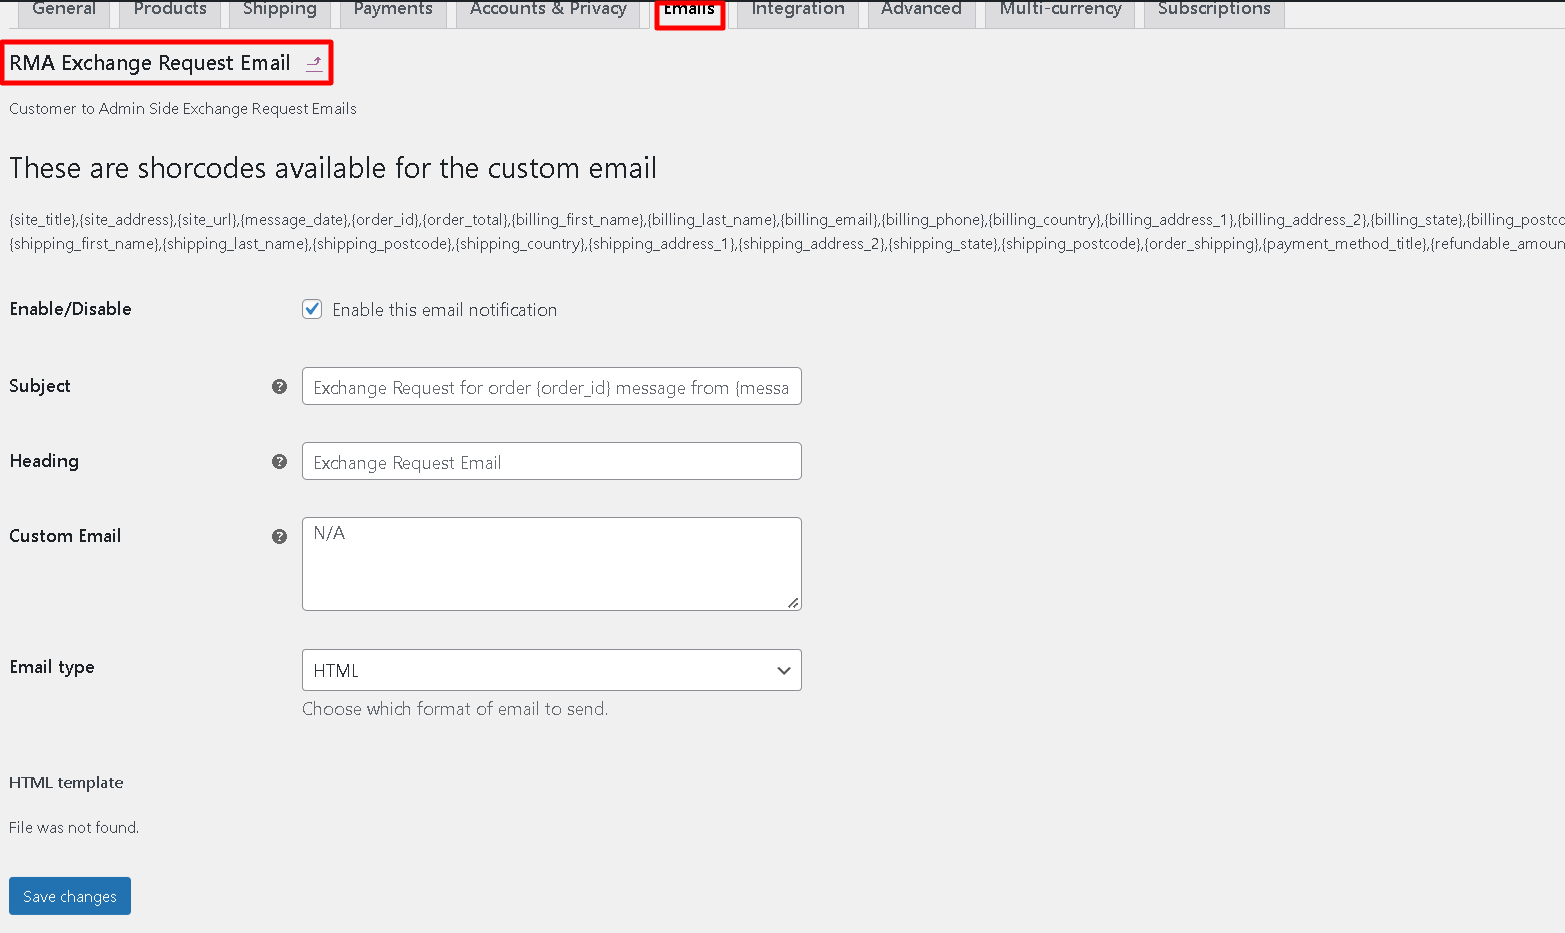
This page consists of email configuration settings including the shortcodes to be displayed on the top that serves the purpose fully. The settings here include-
- Enable/Disable- This is a checkbox enable setting that is required to serve the notification enabling and disabling feature in check.
- Subject- This setting requires the mail subject based input.
- Heading- The email heading is to be inputted here to continue.
- Custom email- The mail body or the mail description text need to be updated here in this block.
- Email type- You need to define the email type here.
- HTML Template- This offers the link to the original template based email copy, if the merchant wants to edit the theme file directly. Either you can refer to the template through the link or hit the View Template button.
To Configure Exchange Request Accept Mail Click Here
In order to configure, exchange-request accept email based settings you can refer to the link given here.
Similar to the exchange-request accept configuration, you can also configure the exchange-request accept email based settings you can refer to the link given here and proceed with the settings part.
For better understanding of the setup options and the page, refer the screencast below-
This page consists of exchange-request accept email configuration settings including the shortcodes to be displayed on the top that serves the purpose fully. The settings here include-
- Enable/Disable- This is a checkbox enable setting that is required to serve the notification enabling and disabling feature in check.
- Subject- This setting requires the mail subject based input.
- Heading- The email heading is to be inputted here to continue.
- Custom email- The mail body or the mail description text need to be updated here in this block.
- Email type- You need to define the email type here.
- HTML Template- This offers the link to the original template based email copy, if the merchant wants to edit the theme file directly. Either you can refer to the template through the link or hit the View Template button.
To Configure Exchange Request Cancel Email Click Here
In order to configure, exchange-request cancel email based settings you can refer to the link given here.
You can access the link given in order to configure your exchange-request cancel based on that email. As you access the link given you’ll be automatically redirected to the page, displayed here in the screencast below-
This page consists of exchange-request cancel email configuration settings including the shortcodes to be displayed on the top that serves the purpose fully. The settings here include-
- Enable/Disable- This is a checkbox enable setting that is required to serve the notification enabling and disabling feature in check.
- Subject- This setting requires the mail subject based input.
- Heading- The email heading is to be inputted here to continue.
- Custom email- The mail body or the mail description text need to be updated here in this block.
- Email type- You need to define the email type here.
- HTML Template- This offers the link to the original template based email copy, if the merchant wants to edit the theme file directly. Either you can refer to the template through the link or hit the View Template button.
4.5.Cancel Tab
The next tab is the exchange tab available in order to set up exchange product related settings. This tab includes different setup options along-
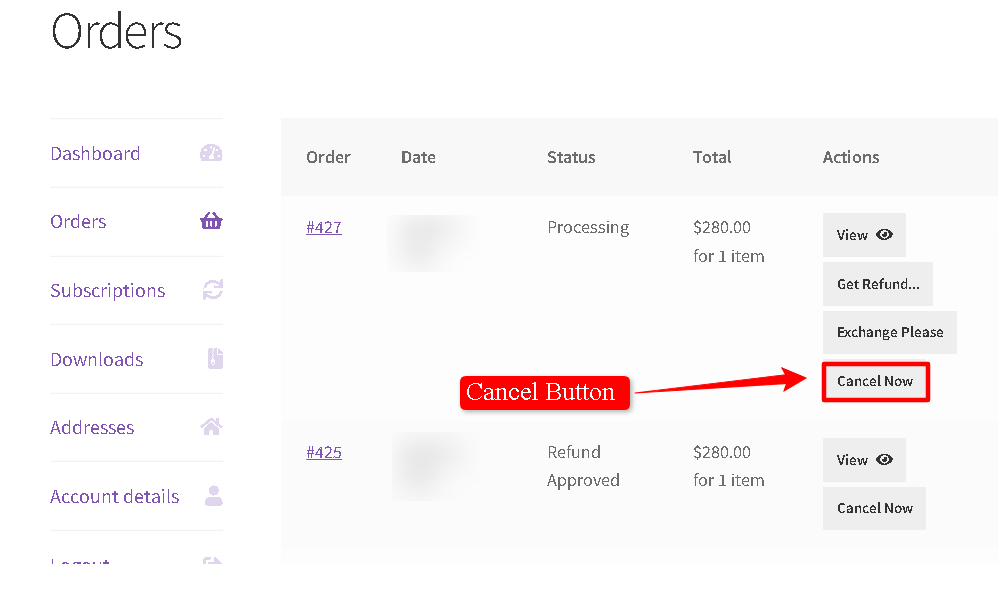
Enable Cancel Order’s Product
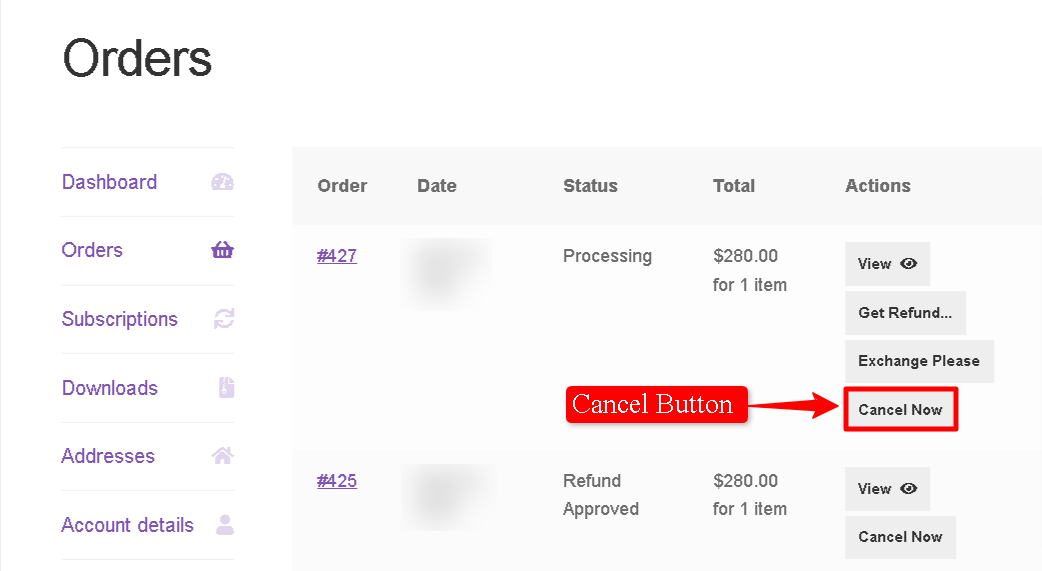
If you want your customer to cancel their products after purchasing, then enable the Cancel Order setting.

Through this setting, the customer can send the Cancel Order request by clicking on the “Cancel Order”.
Enabling this setting, the admin can allow the customer to cancel only the selected products instead of the whole order. All you have to do is toggle the plugin feature ON/OFF.
Select pages To Hide Cancel Button
Enabling this setting, the admin can allow the customer to cancel only the selected products over the selected pages of your website instead of the whole order.

Cancel Order Button Text
Utilizing the setting you can easily update your cancel order button text and update whatever you like to add.

In order to get an idea of the frontend demonstration of this setup option, kindly refer to the screencast attached below-
Cancel Product Button Text
Utilizing the setting you can easily update your canceled product button text and update whatever you like to add.

Cancel Form wrapper Class
Utilizing the setting admin can Write Main Wrapper Class & Child Wrapper Class of Theme if add some design on the frontend.
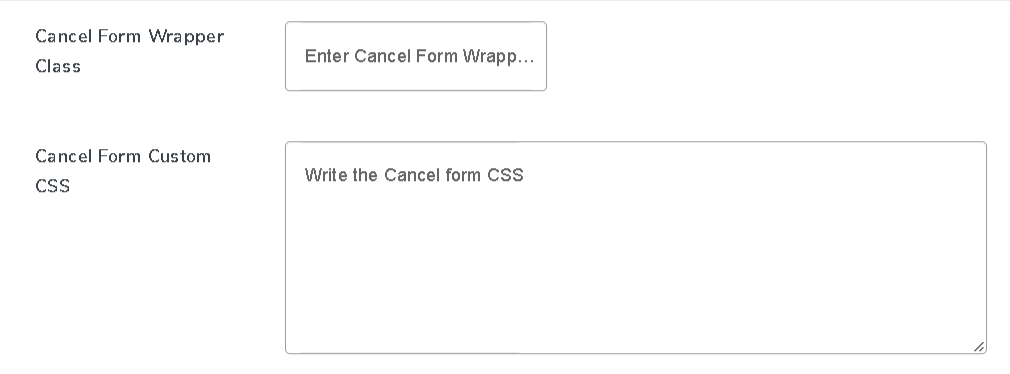
Cancel Form Custom CSS
The merchant can change the physical properties of the exchange form using the custom CSS.
Other than these setting options, some other setup link are available beneath the setup page referring to the email setup, they are-
To Configure Cancel Related Email Click Here
In order to configure, cancel email based settings you can refer to the link given here.
You can access the link given in order to configure your cancel based on that email. As you access the link given you’ll be automatically redirected to the page, displayed here in the screencast below-
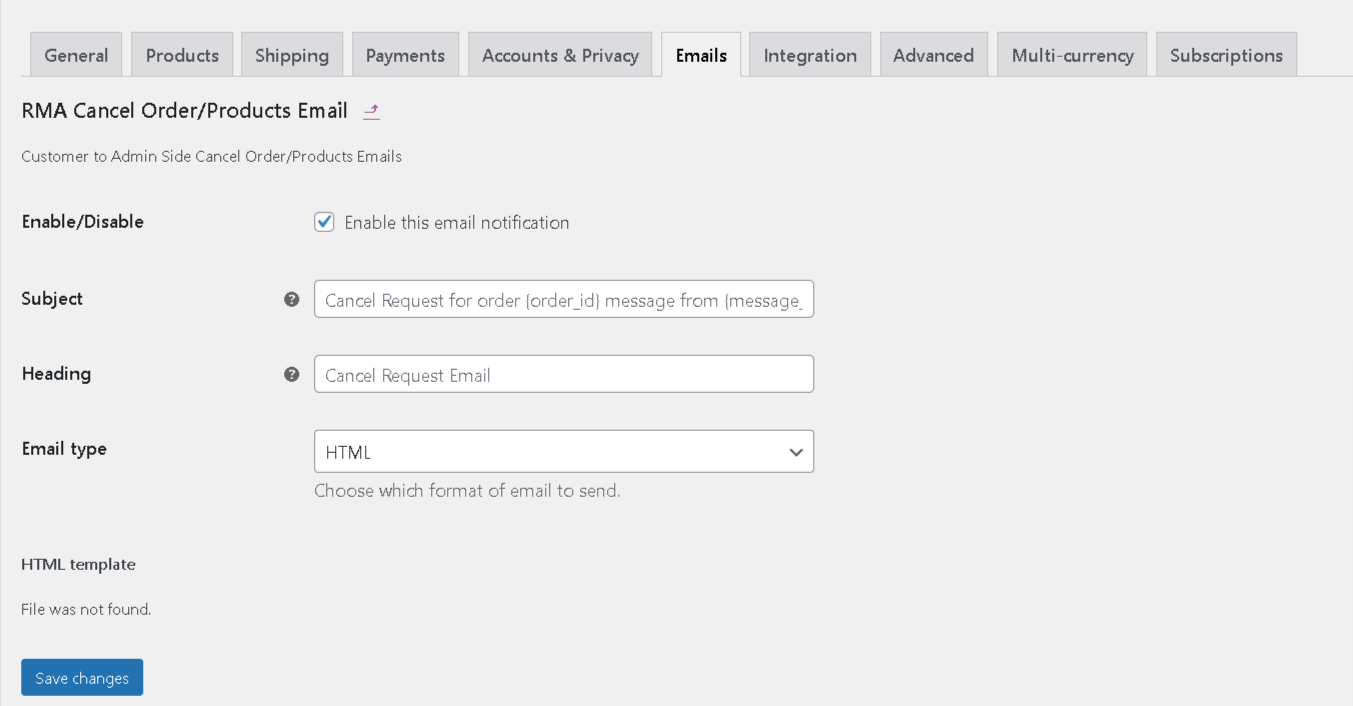
This page consists of cancel email configuration settings including the shortcodes to be displayed on the top that serves the purpose fully. The settings here include-
- Enable/Disable- This is a checkbox enable setting that is required to serve the notification enabling and disabling feature in check.
- Subject- This setting requires the mail subject based input.
- Heading- The email heading is to be inputted here to continue.
- Email type- You need to define the email type here.
- HTML Template- This offers the link to the original template based email copy, if the merchant wants to edit the theme file directly. Either you can refer to the template through the link or hit the View Template button.
Cancel
To get started with a exchange request for your order placed, one can simply follow the stepwise process defined below-
STEP-1 Click on the ‘Cancel Request‘ button.
A Cancel Request Form will display, where users can select those products which they want to remove from the order or cancel the whole order.
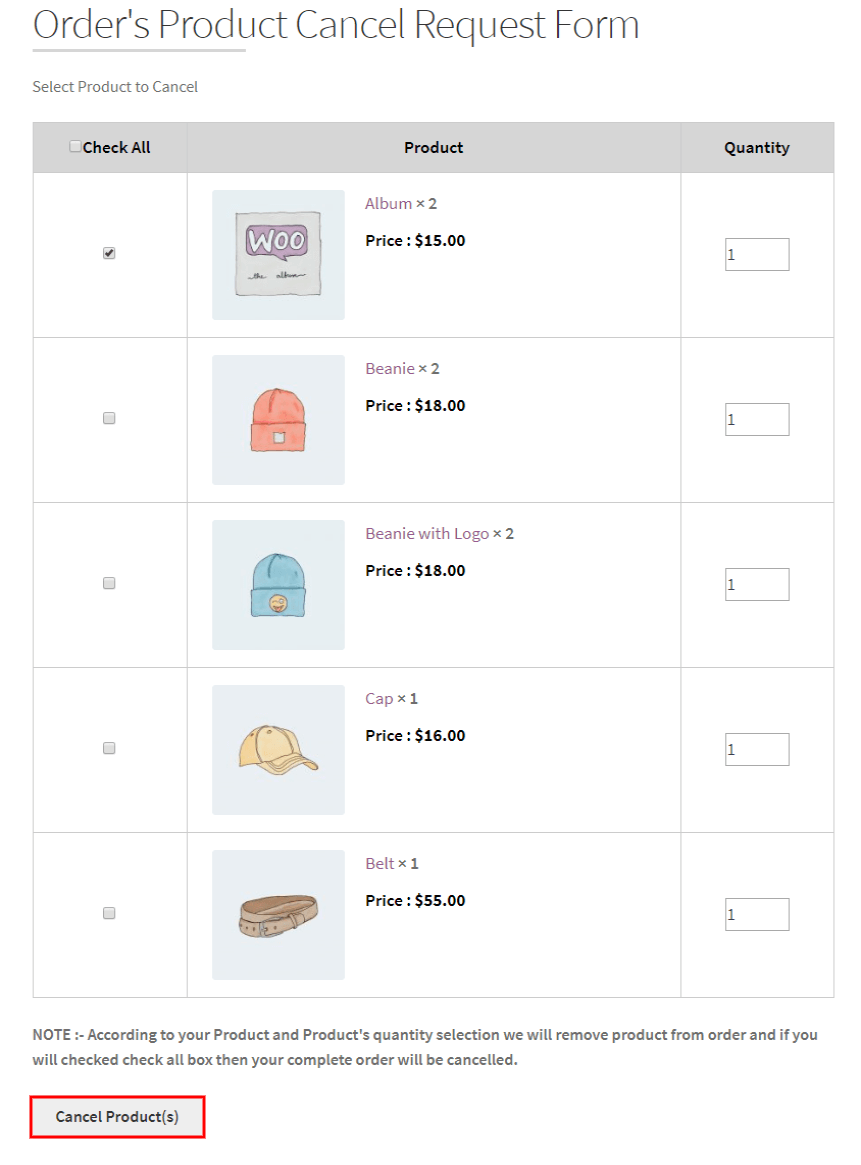
STEP-2 Click on the “Cancel Product” to remove the selected product from the order.
Note- Admin can see all the requests from WooCommerce -> Orders. To review the detailed information of any order by clicking on that particular order.
Admin can verify all the details of the claimed order and also accept and cancel requests by clicking on the particular Accept/Cancel request buttons on the order edit page.
As of now, you have an idea of the process flow. Then, let’s continue with our further tab settings.
4.5.1.Process Workflow Demonstration for Refund, Exchange and Cancel Requests Utilizing the Plugin Features
Refund
To get started with a refund request for your order placed, one can simply follow the stepwise process defined below-
STEP-1 Clicking on the Refund Button,
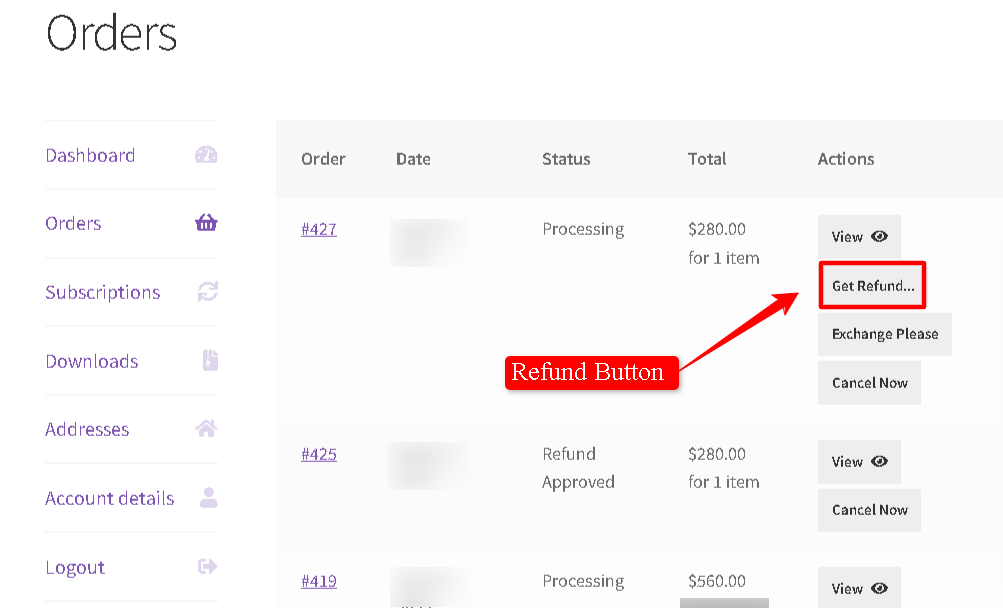
A Refund Request Form will display. After filling out this form users can send the refund request to the admin.
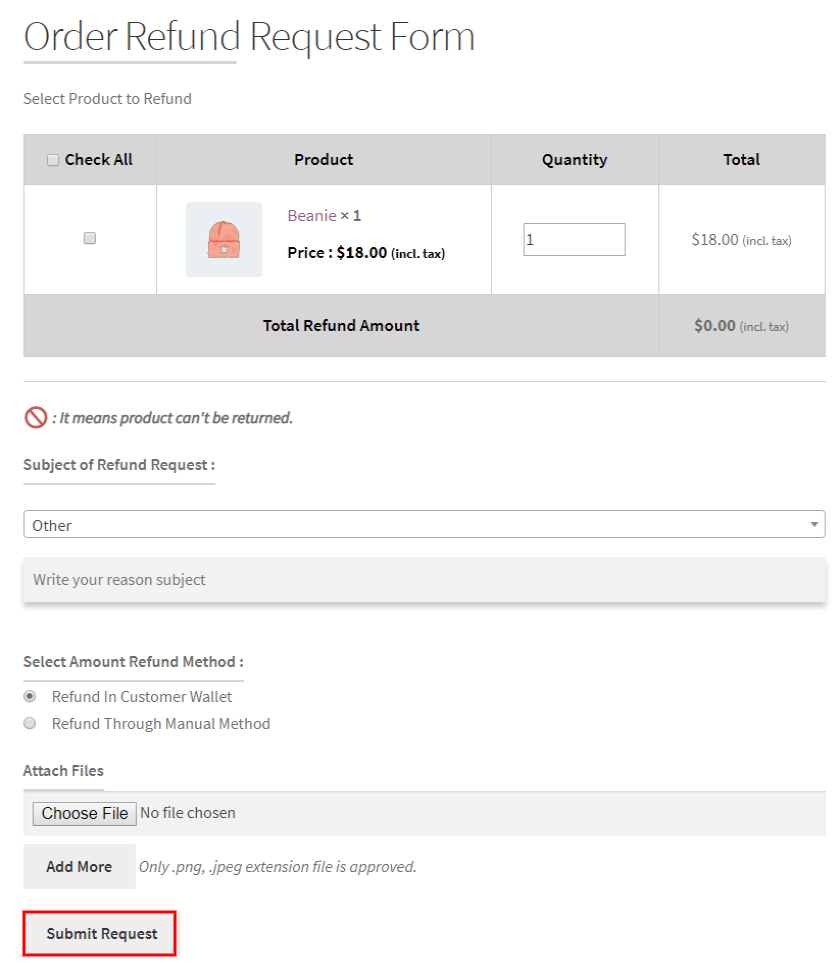
STEP-2 After clicking on the Submit Request, the Refund Request will be transmitted to the Admin.
Note- Requests would be automatically accepted if you’ve enabled the Enable Auto Accept Refund Request in the General Settings tab.
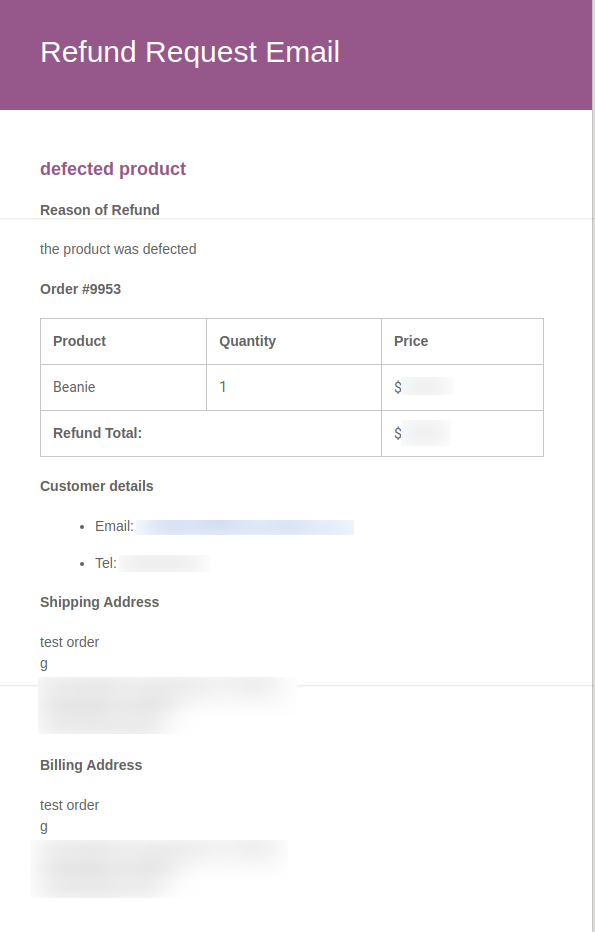
Notification Email for the Refund Requests
Exchange
To get started with an exchange request, you need to understand one thing very clearly i.e. the exchange cases. Yes, heard that right, our exchange process in the plugin follow 3 simple exchange cases. Let me detail you with them here-
Exchange Case 1: Exchange Product with Same product of Same Price.
In this exchange scenario basically the customer places an exchange request for a product that is similar. Such requests are basically placed in order to resolve size issues or damaged product received like concerns. Let’s start with that-
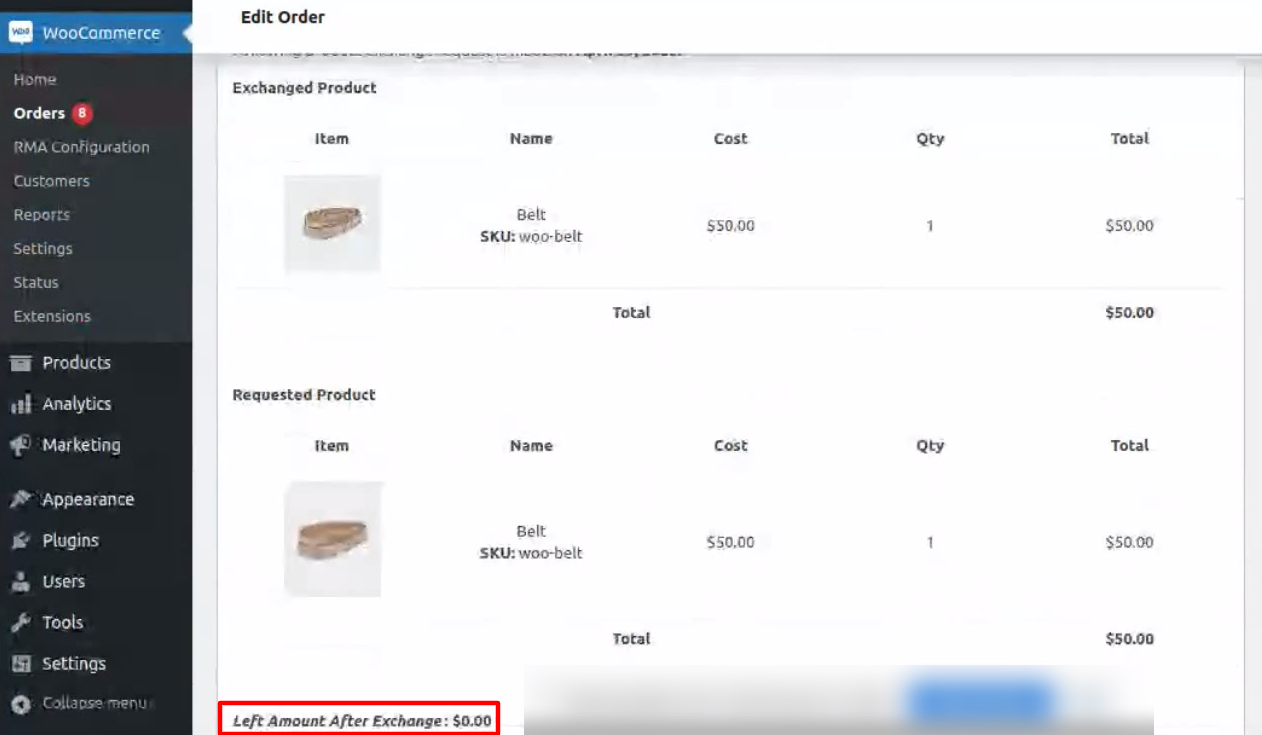
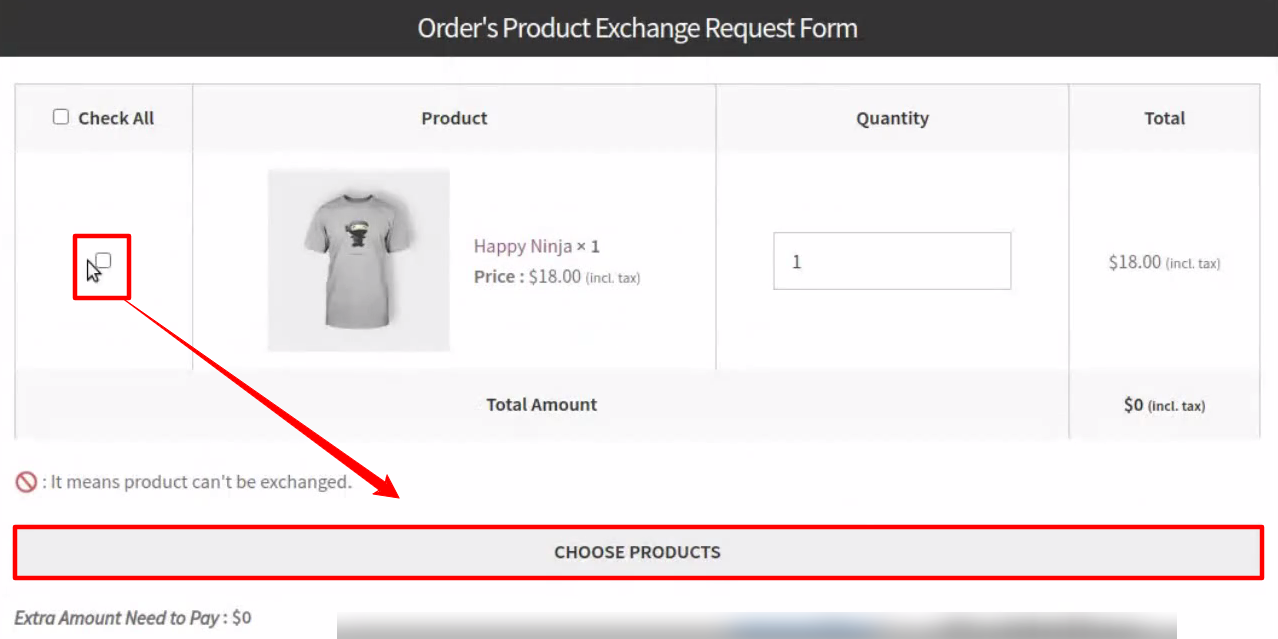
STEP-1 After clicking on the “Exchange Button” for an order. An Exchange Request Form will be displayed.
Just fill out the form by selecting the product that you want to be as your next exchange product. For that, just click on the Choose Products button and start.
As you can see clearly in the above screencast, the customer has selected the same product for exchange that is of the same price also. Then, the exchange request placed would have no balance amount in it, therefore the new order created with reference to the request would be of $0.
Enter the subject for your refund and description too if required along with some product screenshots, if you have some with you. After that hit on the Submit Request button to proceed with the exchange request.
STEP-2 After successfully submitting the refund and exchange request, the customer will receive the refund requested email.
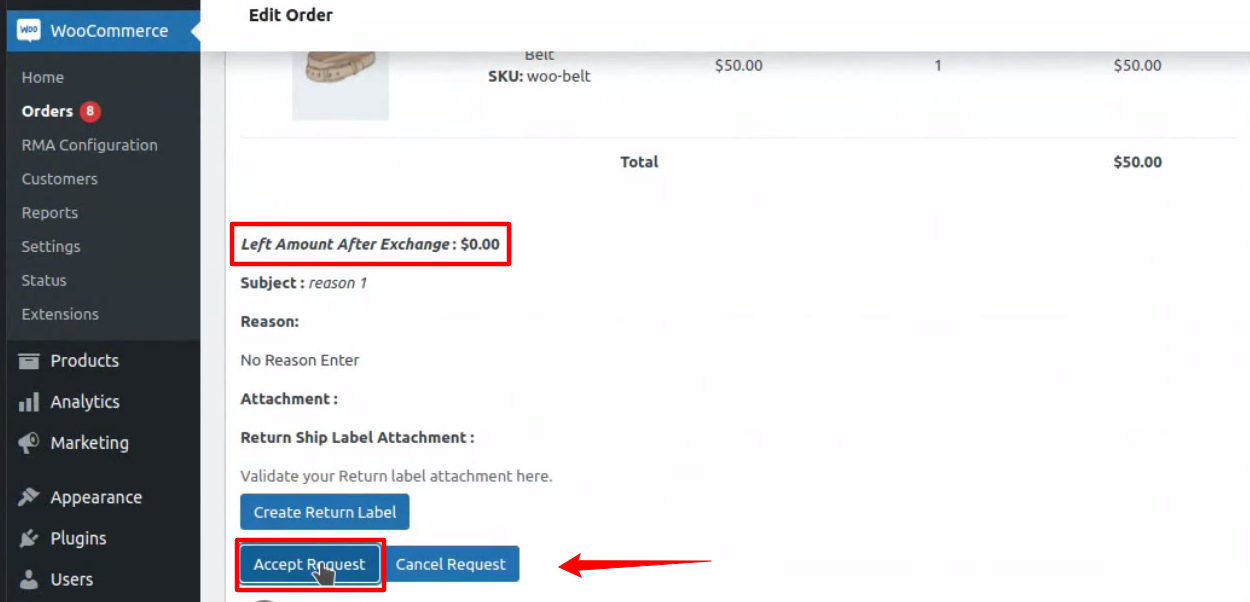
Store Admin can now select orders among— for which exchange is requested by the customer and check the order details.

If the store admin finds the exchange reason to be appropriate—
he/she would thereby accept the exchange requested and proceed with the exchange.

After accepting the exchange, a new order would be created automatically for the exchange requested.
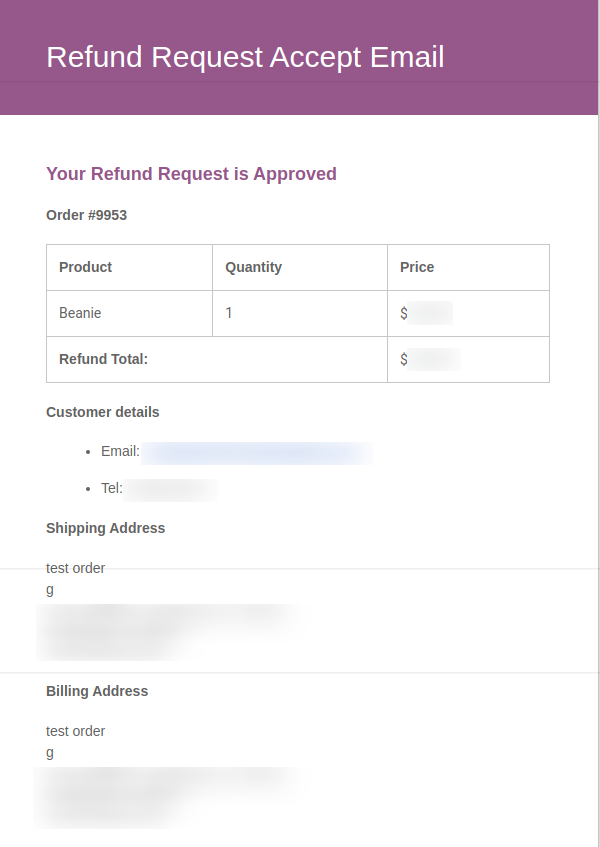
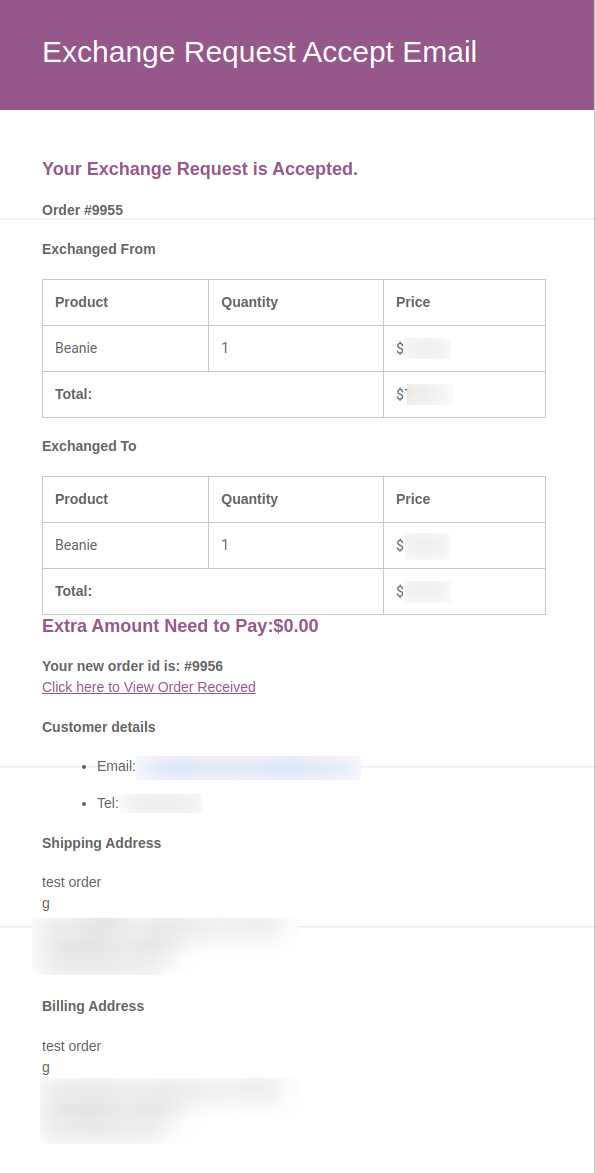
And an exchange approved request email is sent over to the customer with a new order link.

Exchange Case 2: Exchange Product with Same or Varied Product of Less Price.
In this exchange scenario basically the customer places an exchange request for a product which is totally varied that too costs less than the actual product.
Such requests are basically placed when a customer placed an order by mistake or when the customer is not interested in buying that particular product at that time like concerns. Let’s start with that-
Step-1 After clicking on the “Exchange Button” for an order. An Exchange Request Form will be displayed.
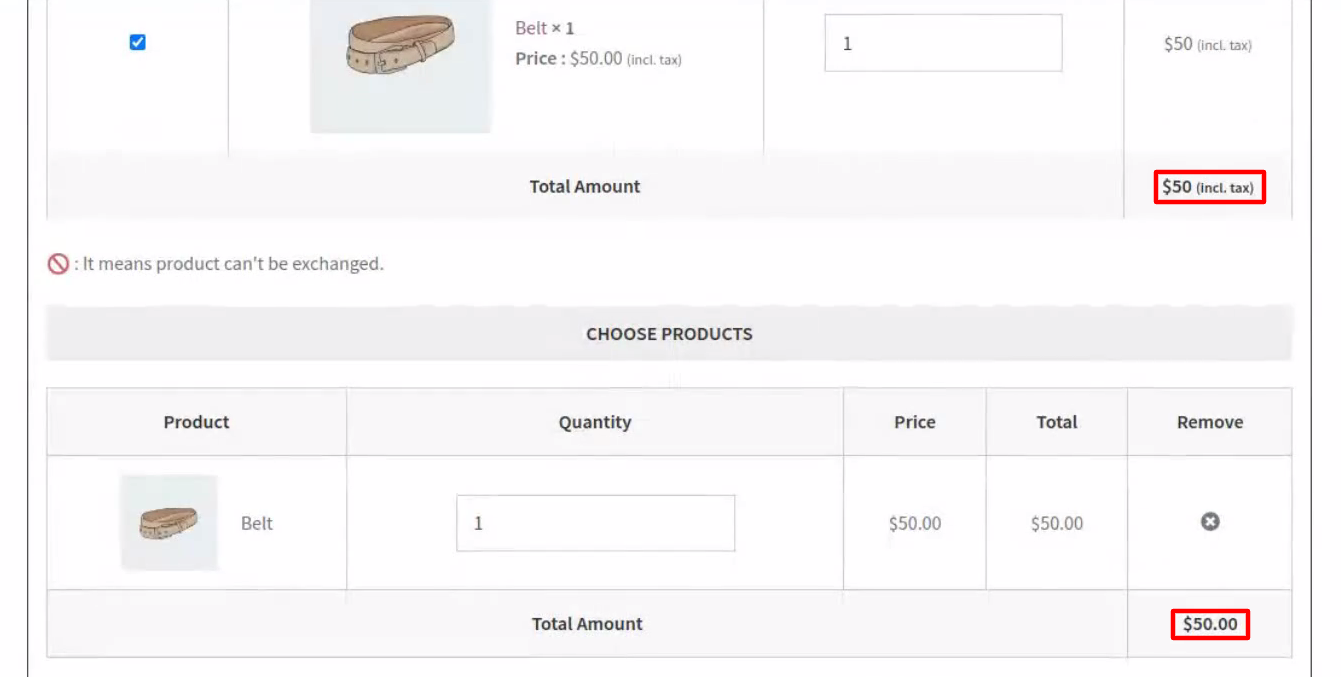
Just fill out the form by selecting the product that you want to be as your next exchange product. For that, just click on the Choose Products button and start.
The above screenshot displays the product display section where, customer has selected one product and set it for exchange.
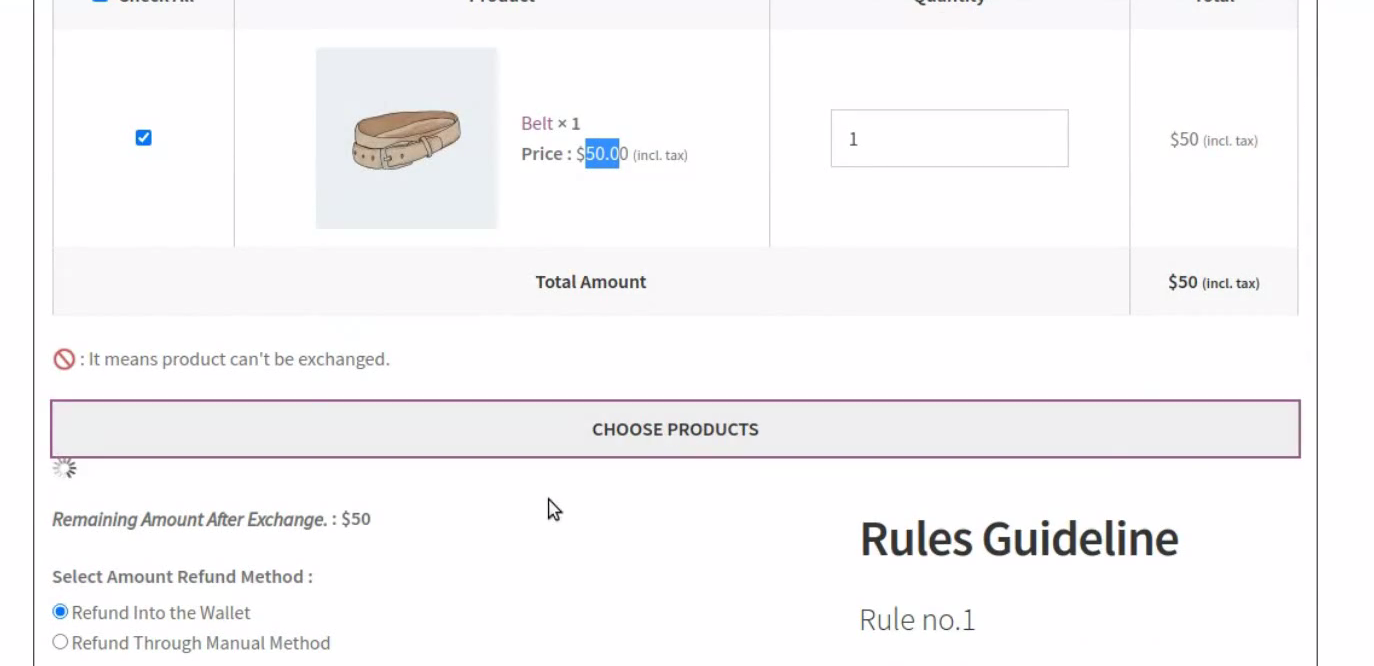
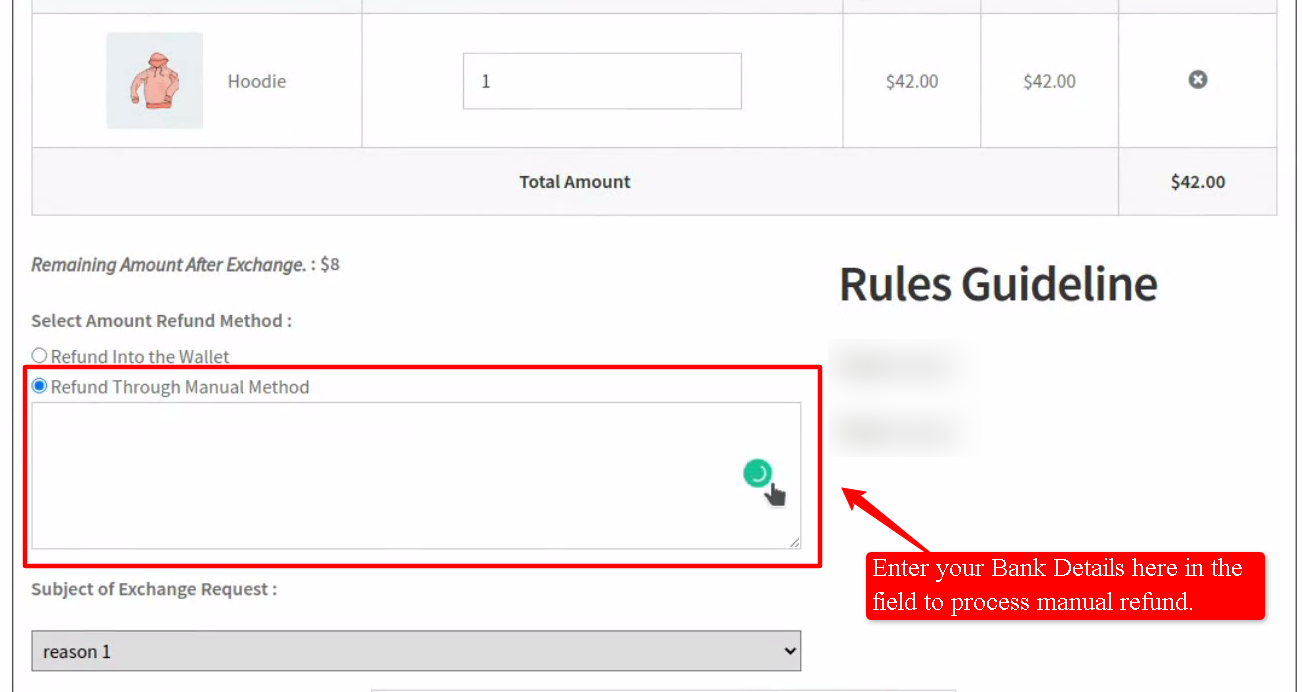
You can clearly see in the below screencast that—- the customer has selected a product that is varied from the actual one that too is of less price than the actual product set for exchange. therefore , creates a scenario of extra amount refund back to the customer.
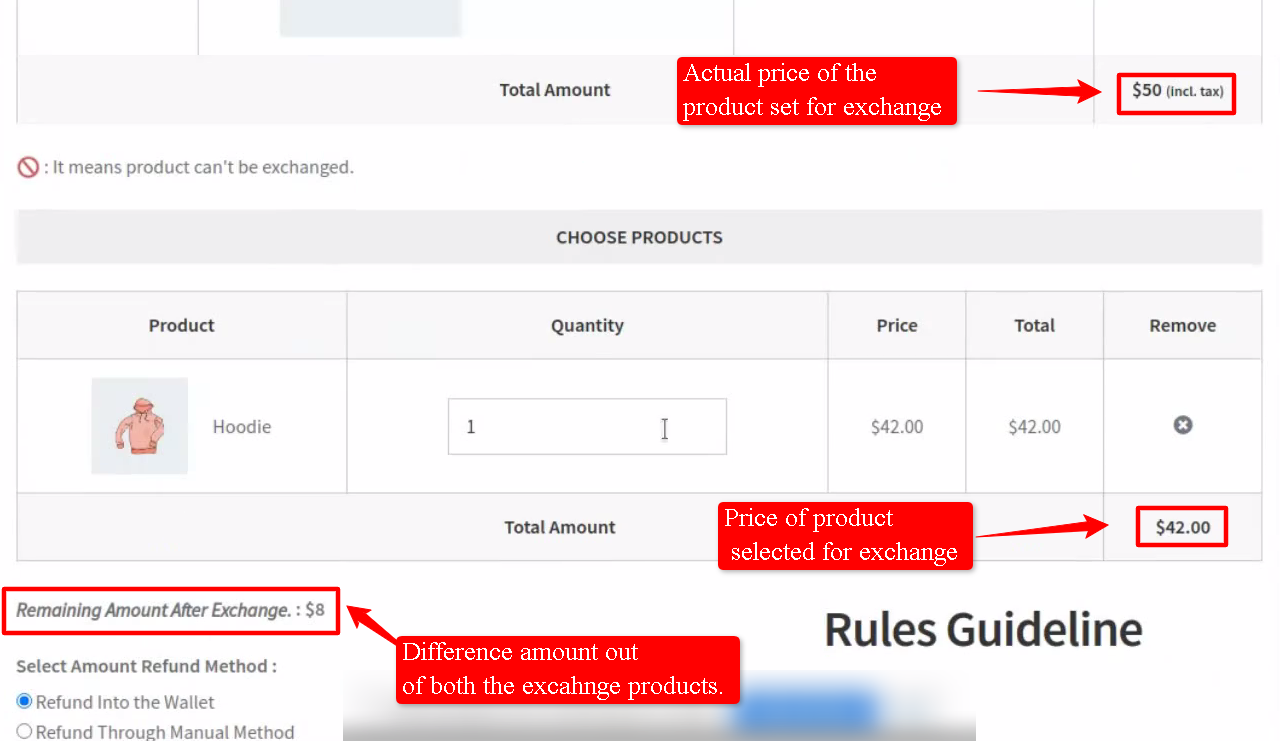
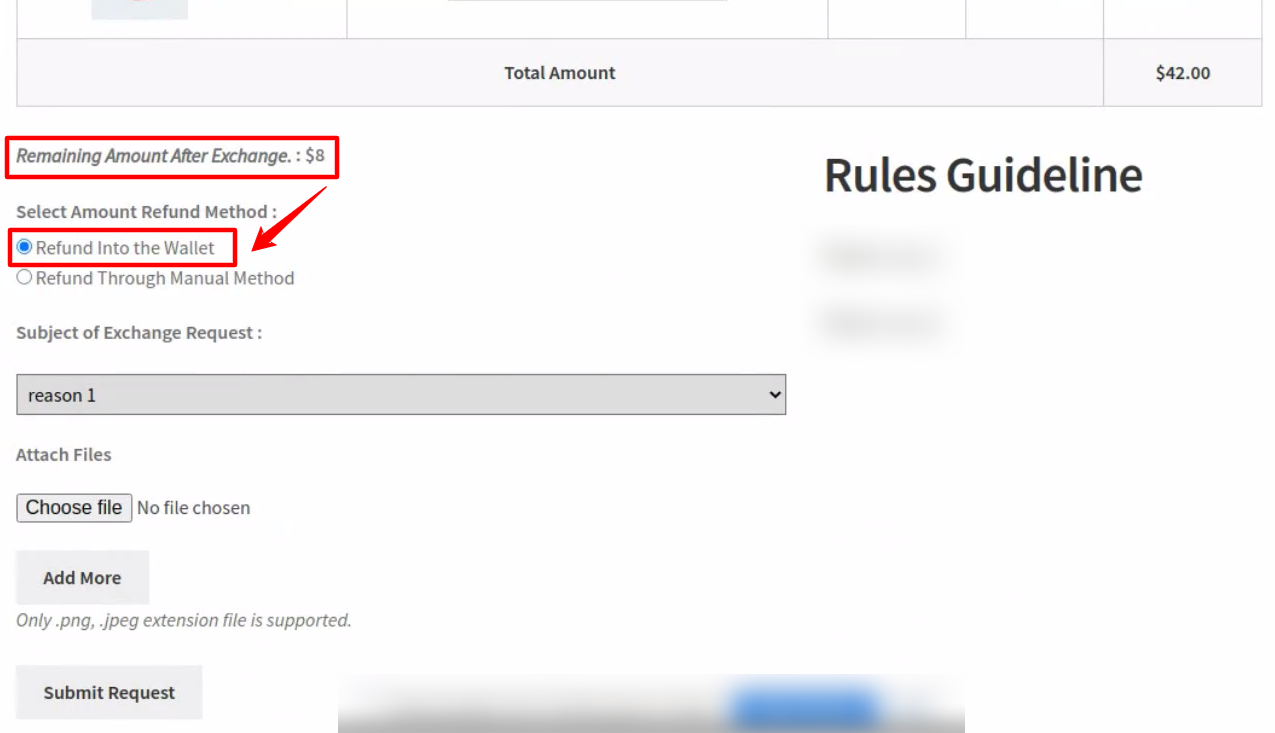
Here, you can see two different Refund Method fields displayed in the exchange form just below the Remaining Amount note. What you have to do is to select one out of the two methods in order to process your remaining amount refund.
We’re presenting demonstrations for both the options here. Let’s say the customer selects for Refund in the Wallet option and hits Send Request then.
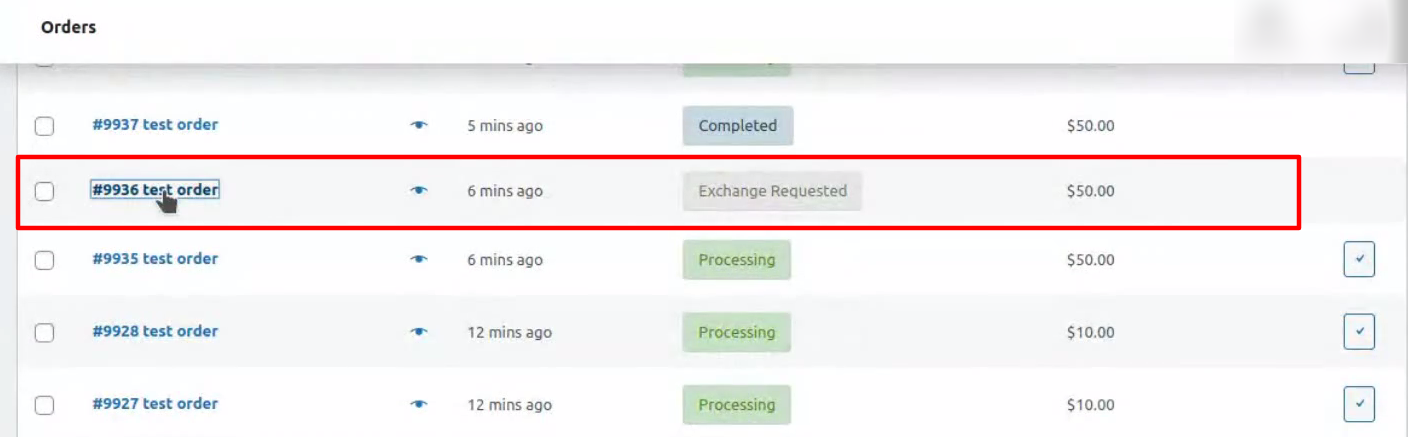
Step-2 As soon as the exchange request is placed the store admin receives an exchange requested email in reference to that.
Store Admin can now select orders among— for which exchange is requested by the customer and check the order details.
If the store admin finds the exchange reason to be appropriate— for which exchange is requested by the customer and checks the order details. He/she would thereby accept the exchange requested and proceed with the exchange.
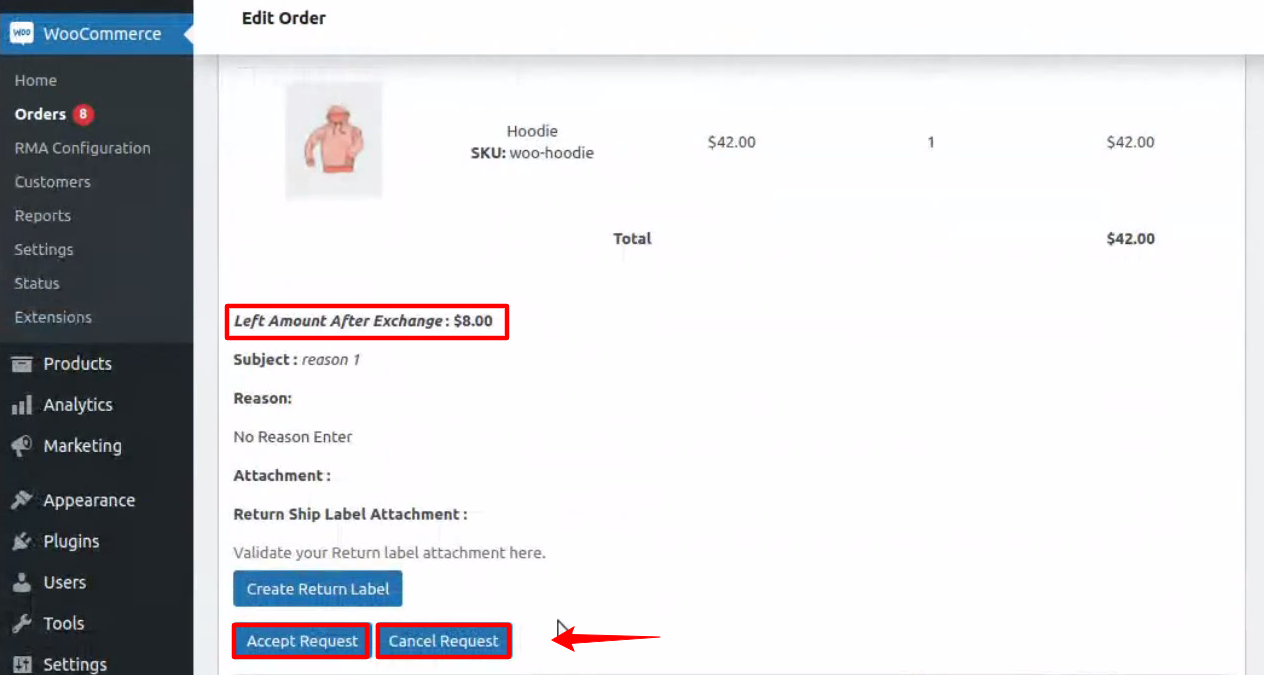
After accepting the exchange, a new order would be created automatically for the exchange requested.
And an exchange approved request email is sent over to the customer with a new order link.
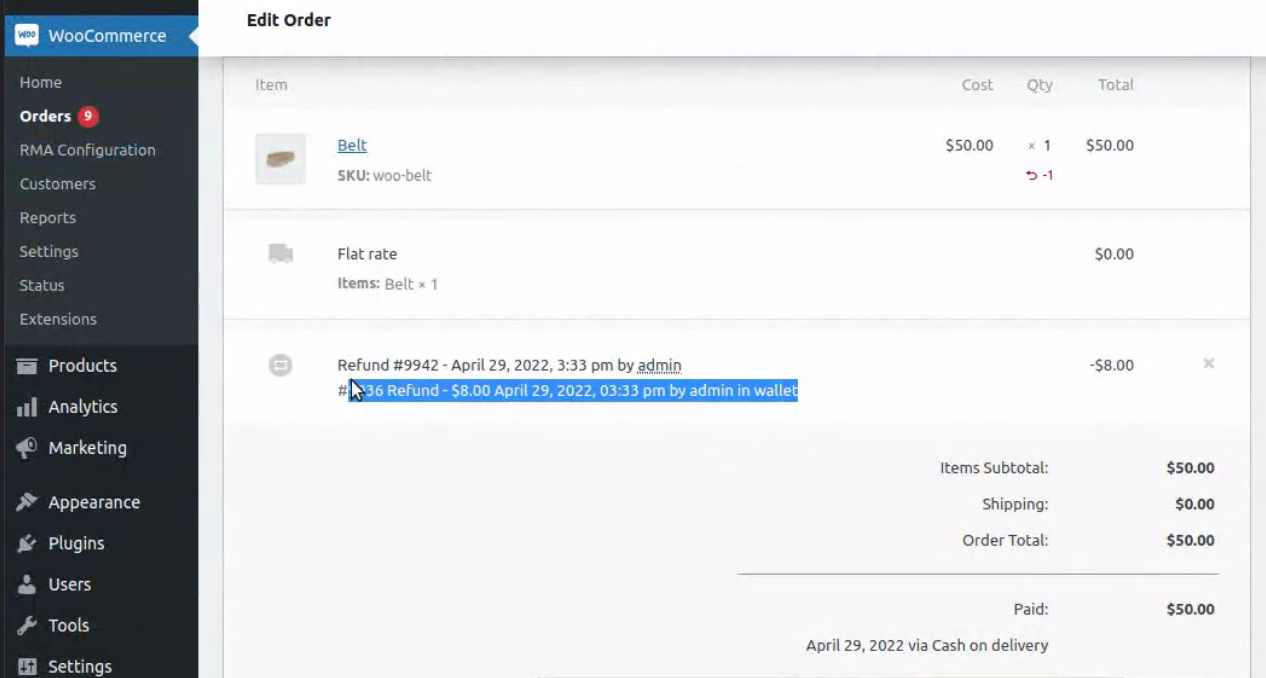
After the exchange is processed from the admin end, the refund is directly transferred in the customer’s wallet.
Let’s discuss the case with Manual Refund too.
Step-3 After successfully placing a refund request for a certain product, the customer can wait till the request gets acceptance from the store admin or the store manager.
Note- This wait step can be skipped if you’ve already enabled Enable Refund & Exchange For Exchange Approved Order toggle in the General settings tab or the Enable Auto Accept Refund Request in the Refund settings tab.

While placing the refund request, one need to set the refund method likewise the two options displayed in the above screencast i.e. Refund in Customer Wallet and Refund Through Manual Method.
Suppose, you select Refund in Customer Wallet then the refund amount would automatically be transferred into customer’s wallet. But, if he selects the Refund Through Manual Method then a new field i.e. The Bank Details field would be displayed just below the refund method field in order for the customer to fill the bank details within.
Just, enter your bank details available in the field given and proceed further. Now, the store admin receives the refund requested notification email.
He/She can simply navigate towards the Order Listing panel and select the order which is requested for refund. For more clarity refer the screencast below-

Select the order for Order Details and check for refund requests placed in order to Accept or Cancel the request and proceed further.


If it seems convincing, they can simply hit Accept to accept the refund requested or do the vice-versa to cancel the request.
As they accept the request for refund, the refund amount related details are to be presented over likewise in the below screencast. You need to just hit the Refund Amount button to set the product amount to be refunded in the customers account directly.
After accepting the refund you can refund the amount Manually or by Automated Payment Refund Feature. Through this feature the admin can refund the amount with the same payment method that is used by the customer during the purchase.
Here’s the refund accepted email request notification email that is to be sent by the store admin to the consumer in order to notify.

Exchange Case 3: Exchange Product with Same or Varied Product of More Price.
In this exchange scenario basically the customer places an exchange request for a product which is totally varied from the original product that too costs more than the actual product.
Such requests are basically placed when a customer placed an order by mistake or when the customer is not interested in buying that particular product at that time like concerns. Let’s start with that-
Step-1 After clicking on the “Exchange Button” for an order. An Exchange Request Form will be displayed.
Just fill out the form by selecting the product that you want to be as your next exchange product. For that, just click on the Choose Products button and start.
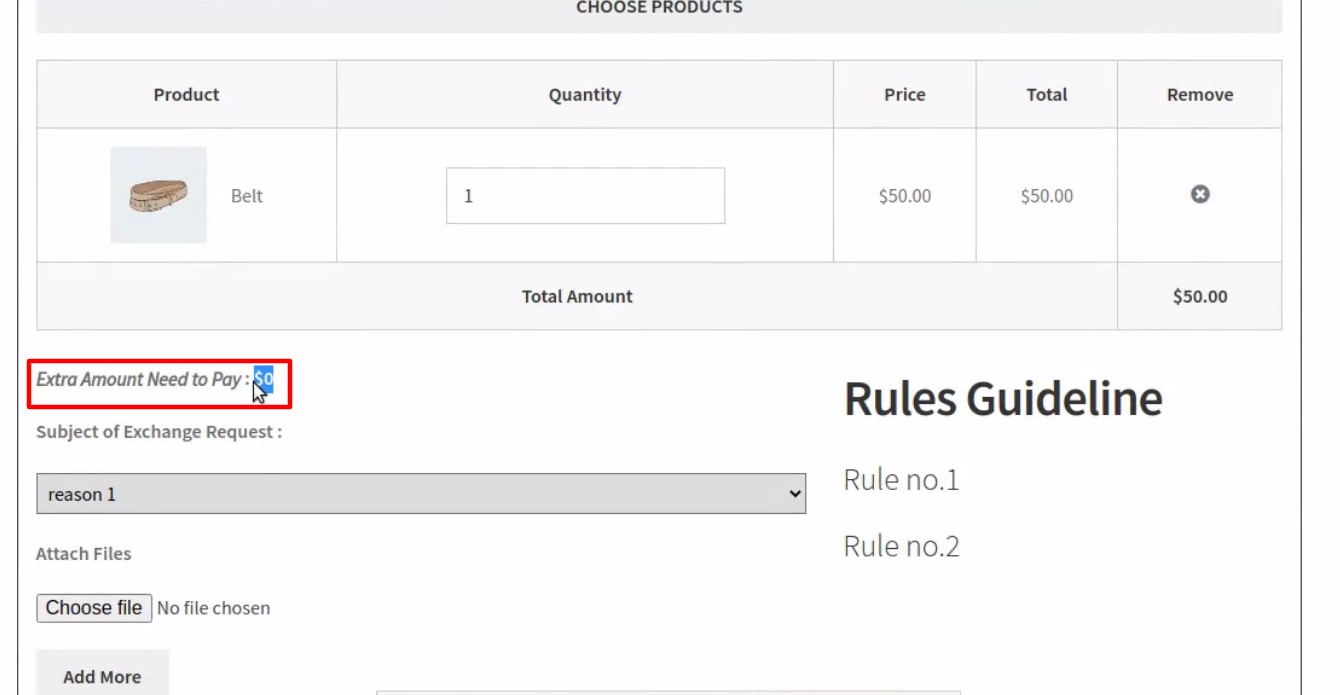
In the above screencast, you can clearly see that the customer has selected the product which costs more than the actual product set for the exchange by value. Therefore, it creates a clear case of product exchange with an extra amount.
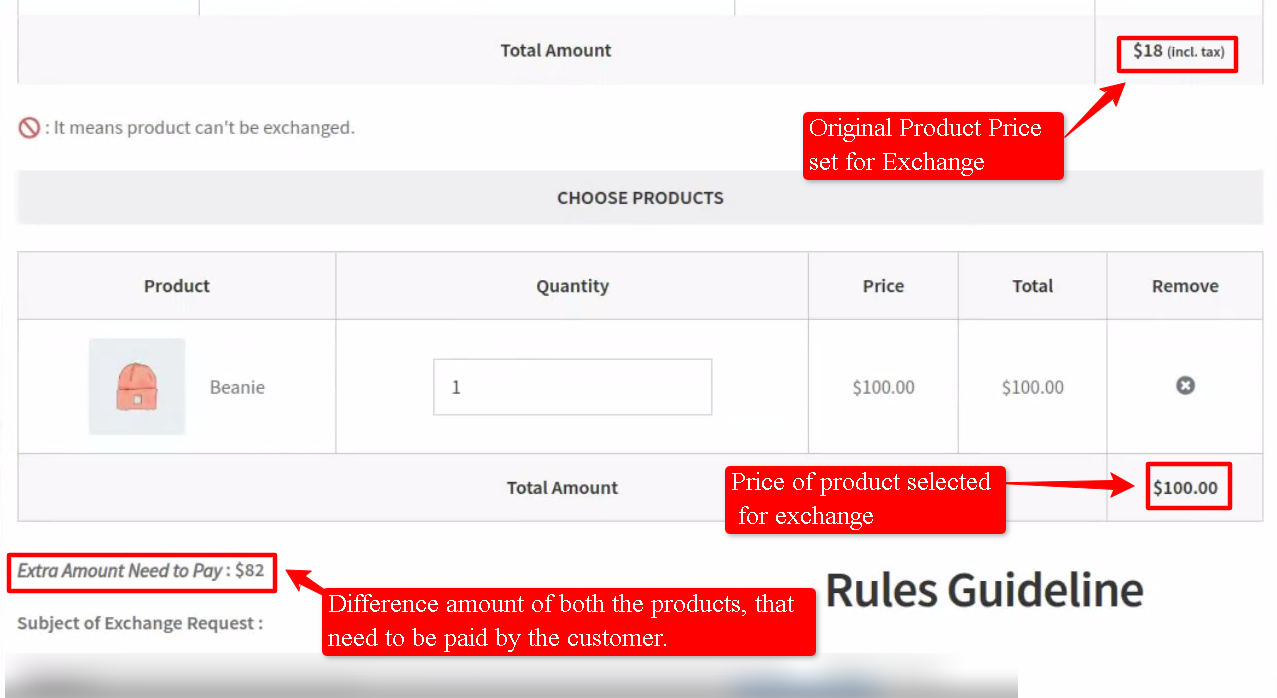
So, as per the rules this exchange can only be possible if the customer agrees on paying the extra difference amount for that order. For reference refer the screencast below-
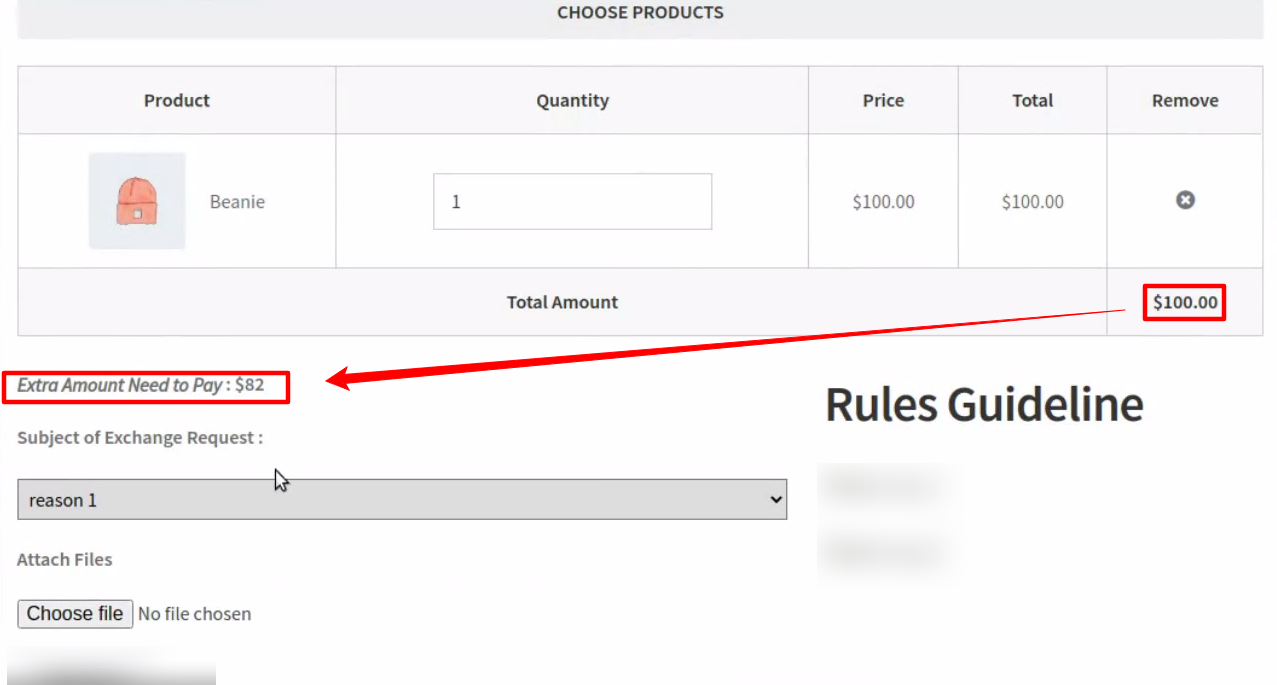
Step-2 Complete the exchange request form and process the exchange request by hitting the Submit Request button.
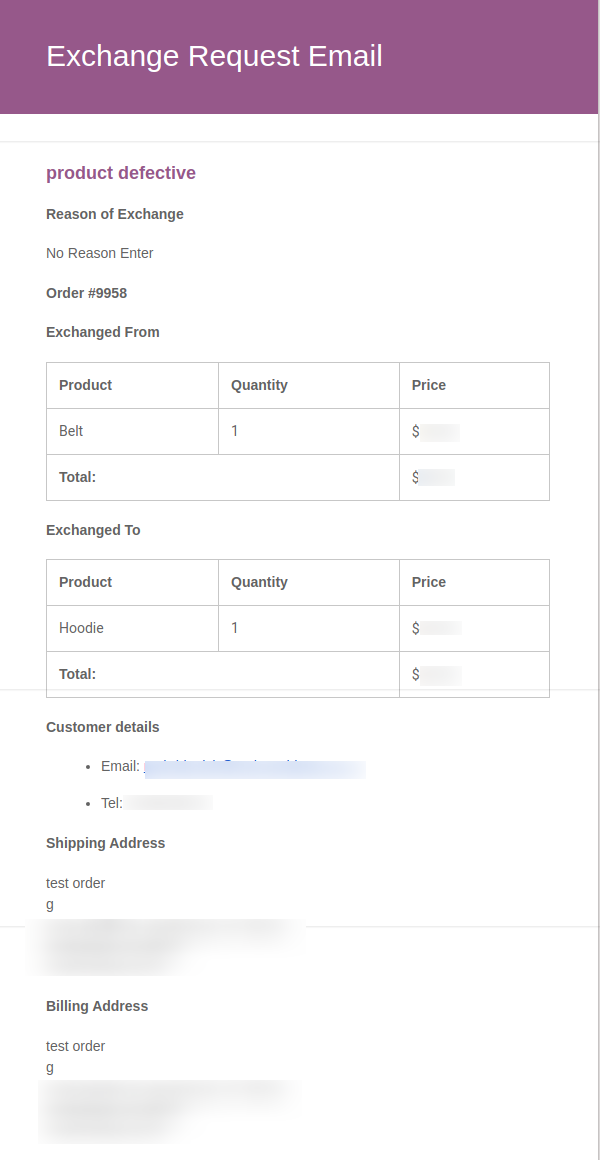
As soon as the request is submitted the store admin would receive an exchange request email regarding.

Store Admin can now select orders among— for which exchange is requested by the customer and check the order details.
If it seems convincing, they can simply hit Accept to accept the refund requested or do the vice-versa to cancel the request.
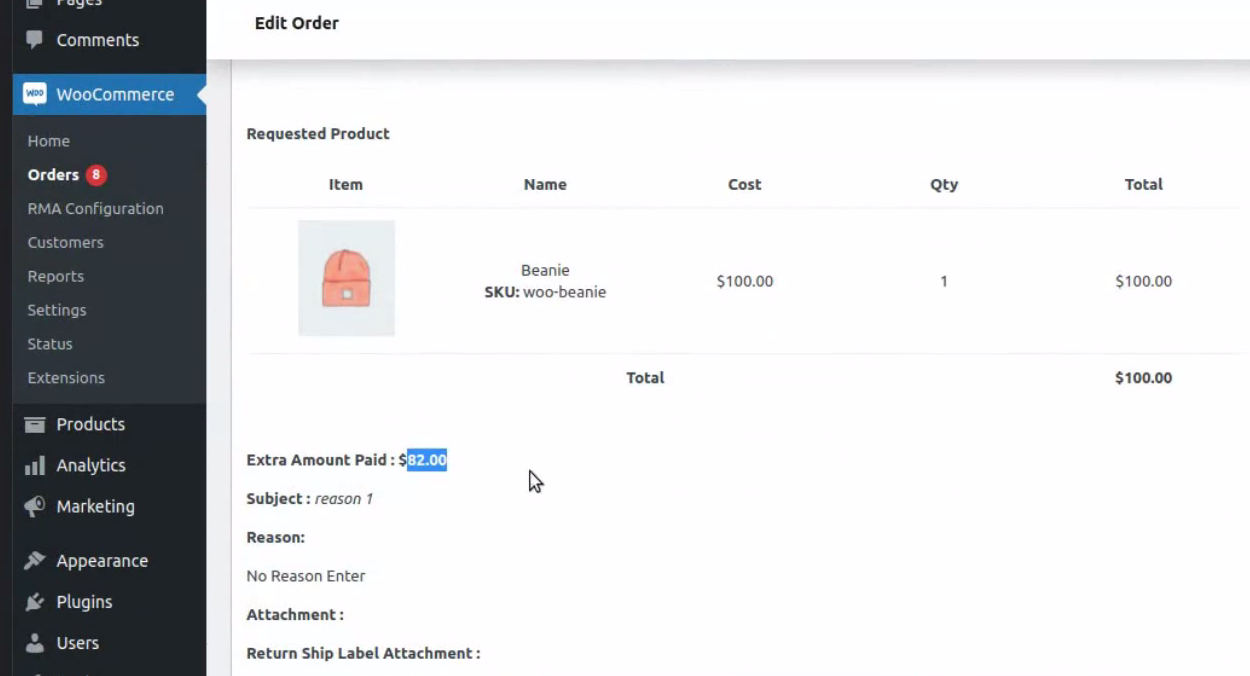
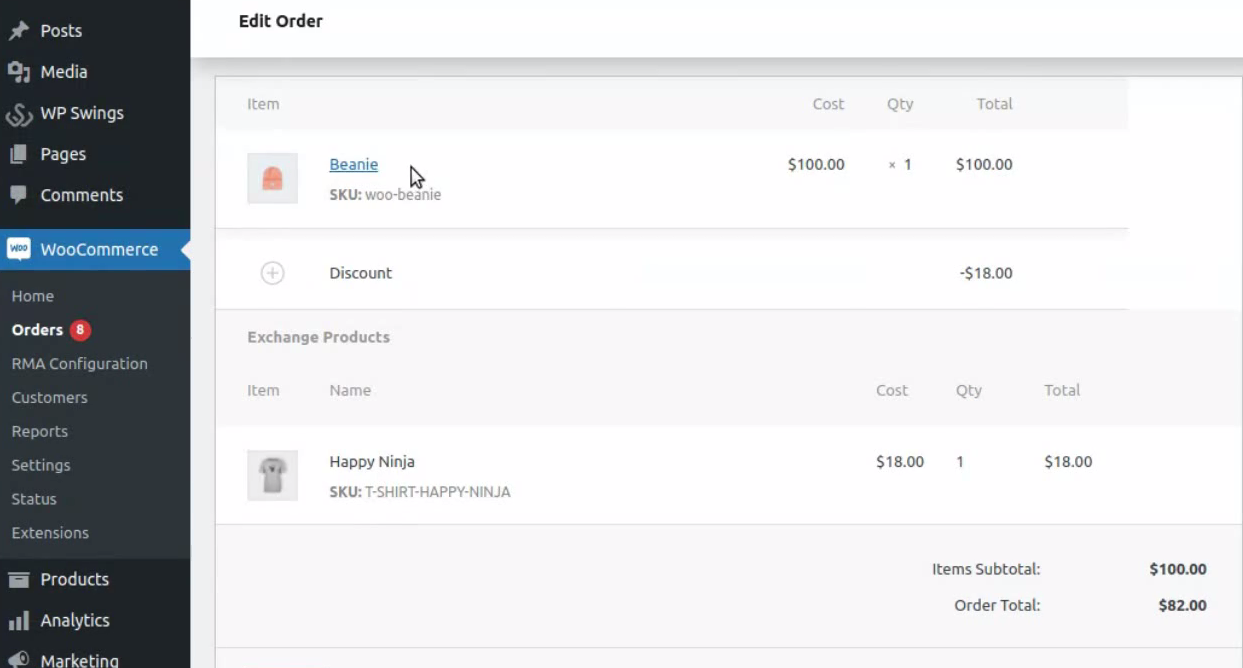
As they accept the request, a new order is generated that displays the extra amount to be paid along with the exchange product details likewise the screencast below-
Step-3 As the exchange request is accepted, the customer receives an exchange request accept email that displays the information along with the link to pay the extra difference amount within.
Note– Customers can utilize the link to pay the difference amount or shall proceed with the other way described below.
Customers can also refer to their Orders section time to time in order to process their exchange request further by paying the extra difference amount utilizing the Pay Now button displayed in the order manage controls.
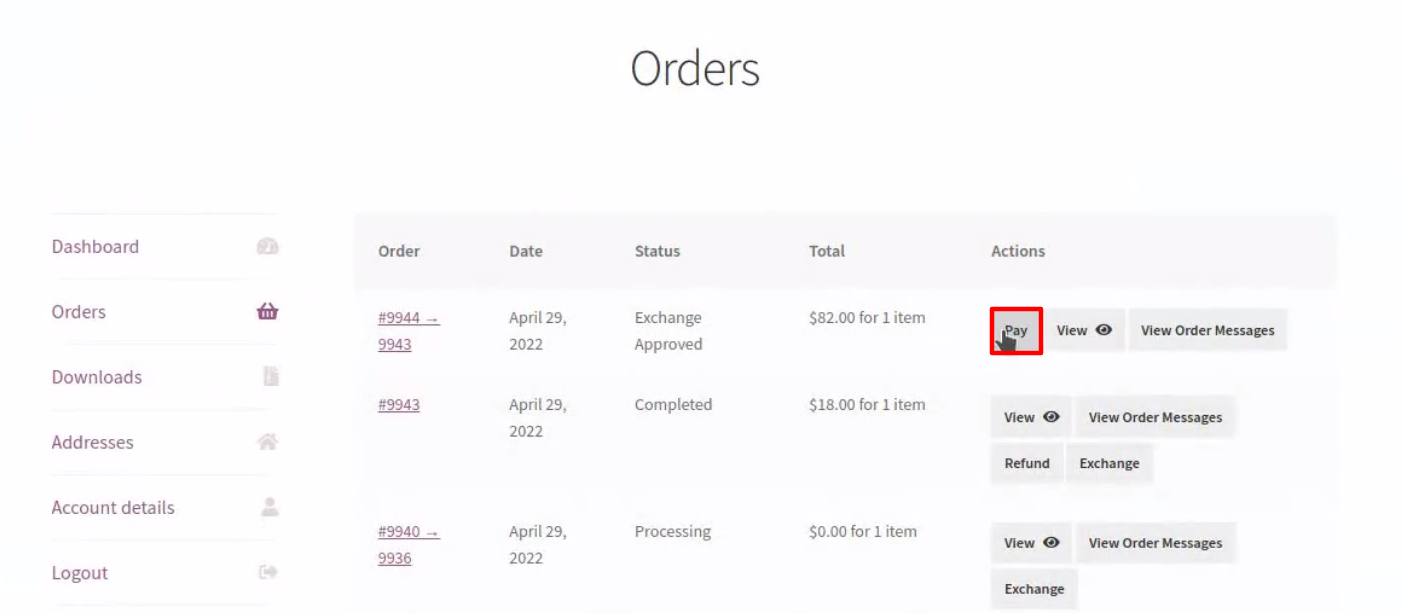
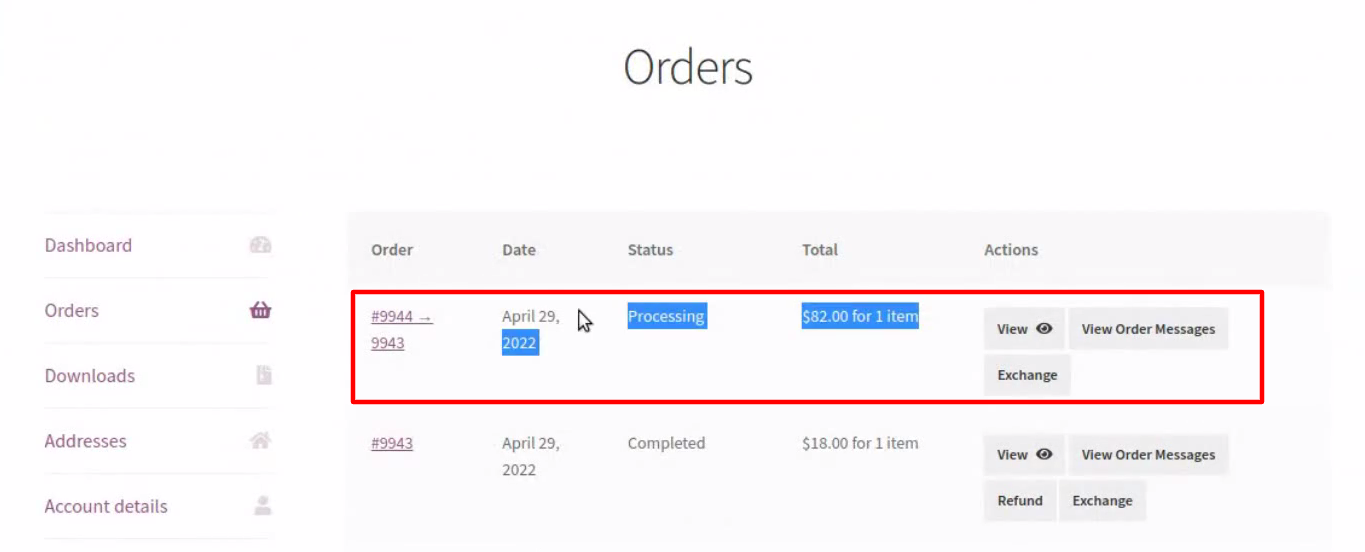
As they process the payment successfully the order i.e. exchange is placed and scheduled. You can refer to the below screencast to understand how the exchange status is modified.
4.5.6.RMA Policies Tab
This is an outstanding setup tab available in order to set up the predefined set of rules for the refund request based. In other words, the merchant or the store owner can set up the number of protocols based on the rules followed by if/else cases under the setting to be carried over as the refund policies.
For more clarity in the process refer the tab screencast attached below-
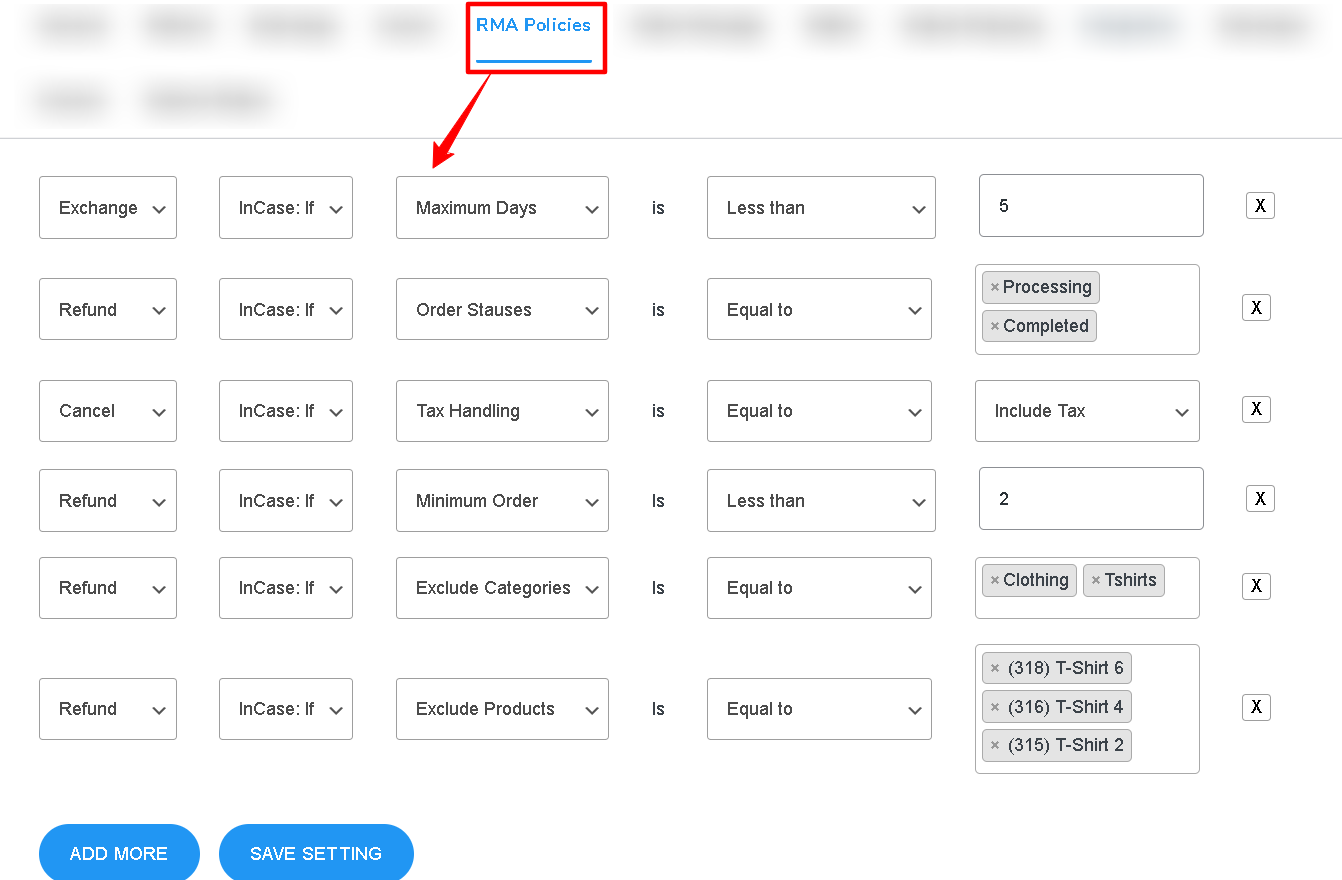
This setting options allows merchant or store owners to create custom taxonomies for their main processes likewise-
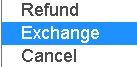
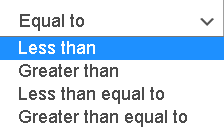
Simply choose one of the three alternatives and begin creating your own RMA-based refund, exchange, or cancellation policy, picking for the case scenario offered, i.e. In case: If.
In the screencast below, you’ll see the case scenario, followed by a variety of options.
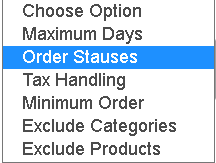
You can select any of the alternatives and continue with the policy configuration. Let me explain what each option means and why it was chosen.
- Maximum Day
Merchants can use this option to specify the number of days associated with their process policy. It’s as simple as stating the amount of days.
2. Order Status
This option is quite important, as it is followed by roughly 12+ status parameters that create different order processing statuses (see details below).
- Completed– This status defines the completion of an order.
- Processing– This status defines the order isn’t completed i.e. under process.
- Refund Approved– This status defines the refund approval related to an order that is requested for refund.
- Refund Canceled– This status defines the cancellation of refund related to an order that is requested for refund.

- Canceled– This status defines the cancellation of an order.
- Refunded– This status defines the refund completion status of an order.
- Failed– This status defined failure of an order due to any circumstantial issue.
- Exchange Requested– This status defines the request initiation placement of exchange related to an order.
- Exchange Approved– This status defines the approval of exchange related to an order.
- Exchange Canceled– This status defines the cancellation of exchange related to an order.
- Refund Requested– This status defines the request initiation placement of refund related to an order.
- Pending Payment– This status defines the pending payment status of an order placed.
- On Hold– This status defines the process on halt or on hold due to any circumstantial issue or concern.
3. Tax Handling
This option can be used to develop tax-related regulations that can aid in the refund, exchange, or cancellation of an order. There are two more sub-options in this option—
- Include Tax– This option defines inclusion of tax in that policy or order.
- Exclude Tax– This option defines exclusion of tax in that policy or order.
Minimum Order
The minimum number of orders that can be placed is defined by this parameter. Yes, you can use this option to set up as many orders as your store can dispatch.
Exclude Categories
As the name implies, this choice entailed the policy’s exclusion of product-based categories. Simply type the name of the product category in the box, and that category will be automatically excluded.
Exclude Products
This option, like the one before it, involves the exclusion of products from a policy. Simply type the product’s name into the box, and those items will be automatically excluded.
For Instance, let me assist you with the RMA Policy for each process i.e. Refund, Exchange & Cancel-
In this, we have created a policy for RMA Exchange that denotes— Exchange can only be performed if the maximum number of days for an order is less than 4.

This is the scenario, where we have created a policy for RMA Refund that denotes— Refund can be possible only if tax is included along with the refund amount processed.

Likewise, the above two scenarios consist of a RMA Cancellation policy that denotes— exclusion of defined categories based products for cancellation.

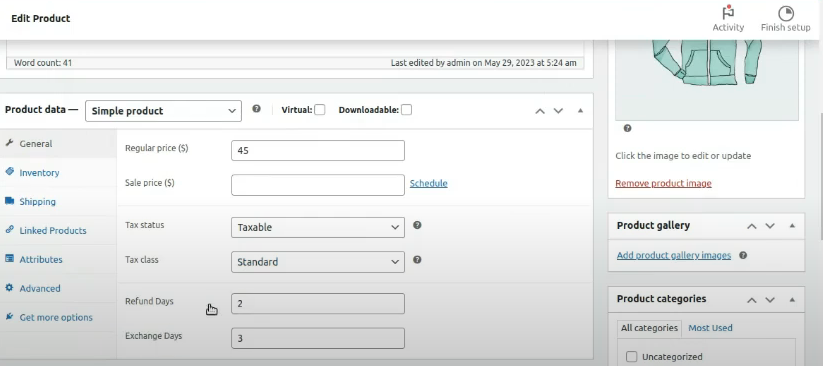
For example, you’re a merchant and you want to implement a 15-days refund and say a 10-days exchange functionality on T-shirts, but just a 5-day refund and 1-day exchange functionality on all the hoodies. You can do this by this new feature. To enable this, the merchants can navigate to the product page >> click on the “edit product”. Scroll down on the page, under the general tab, you’ll see two new settings called “Refund days” and “Exchange days”. From here the merchant can set the exact number of days for specific products.
4.5.7.Order Message Tab
The very next tab to the RMA Policies tab is the Order Messages tab. This tab is minimal in the setting options available but ranks first among the features it offers.
Utilizing the features of the tab, store owners can conveniently set up the messaging or the direct dialogue-based text exchange between the customer and the merchant itself.
This tab includes setup options like—

Enable Attachment
This is also a toggle setting that offers store owners or merchants to gEnable/Disable the toggle switch to allow your customers for the image files attachment field in their refund order messages.

Enable to Block email
The administrator can enable this setting when they want customers to not receive any exchange-related mails.
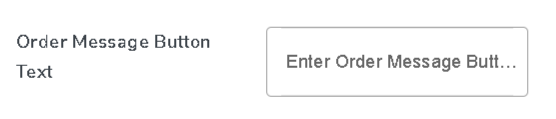
Order Message Button Text
You can simply customize your order message button text utilizing this setting. Just enter the text over to display as a caption within your order message button at the frontend.
Other than these setting options, some other setup link are available beneath the setup page referring to the email setup, that is-
To Configure Order Message Email Click Here
In order to configure, refund-request cancel order email based settings you can refer to the link given here and proceed with the settings part.
This page consists of cancel email configuration settings including the shortcodes to be displayed on the top that serves the purpose fully. The settings here include-
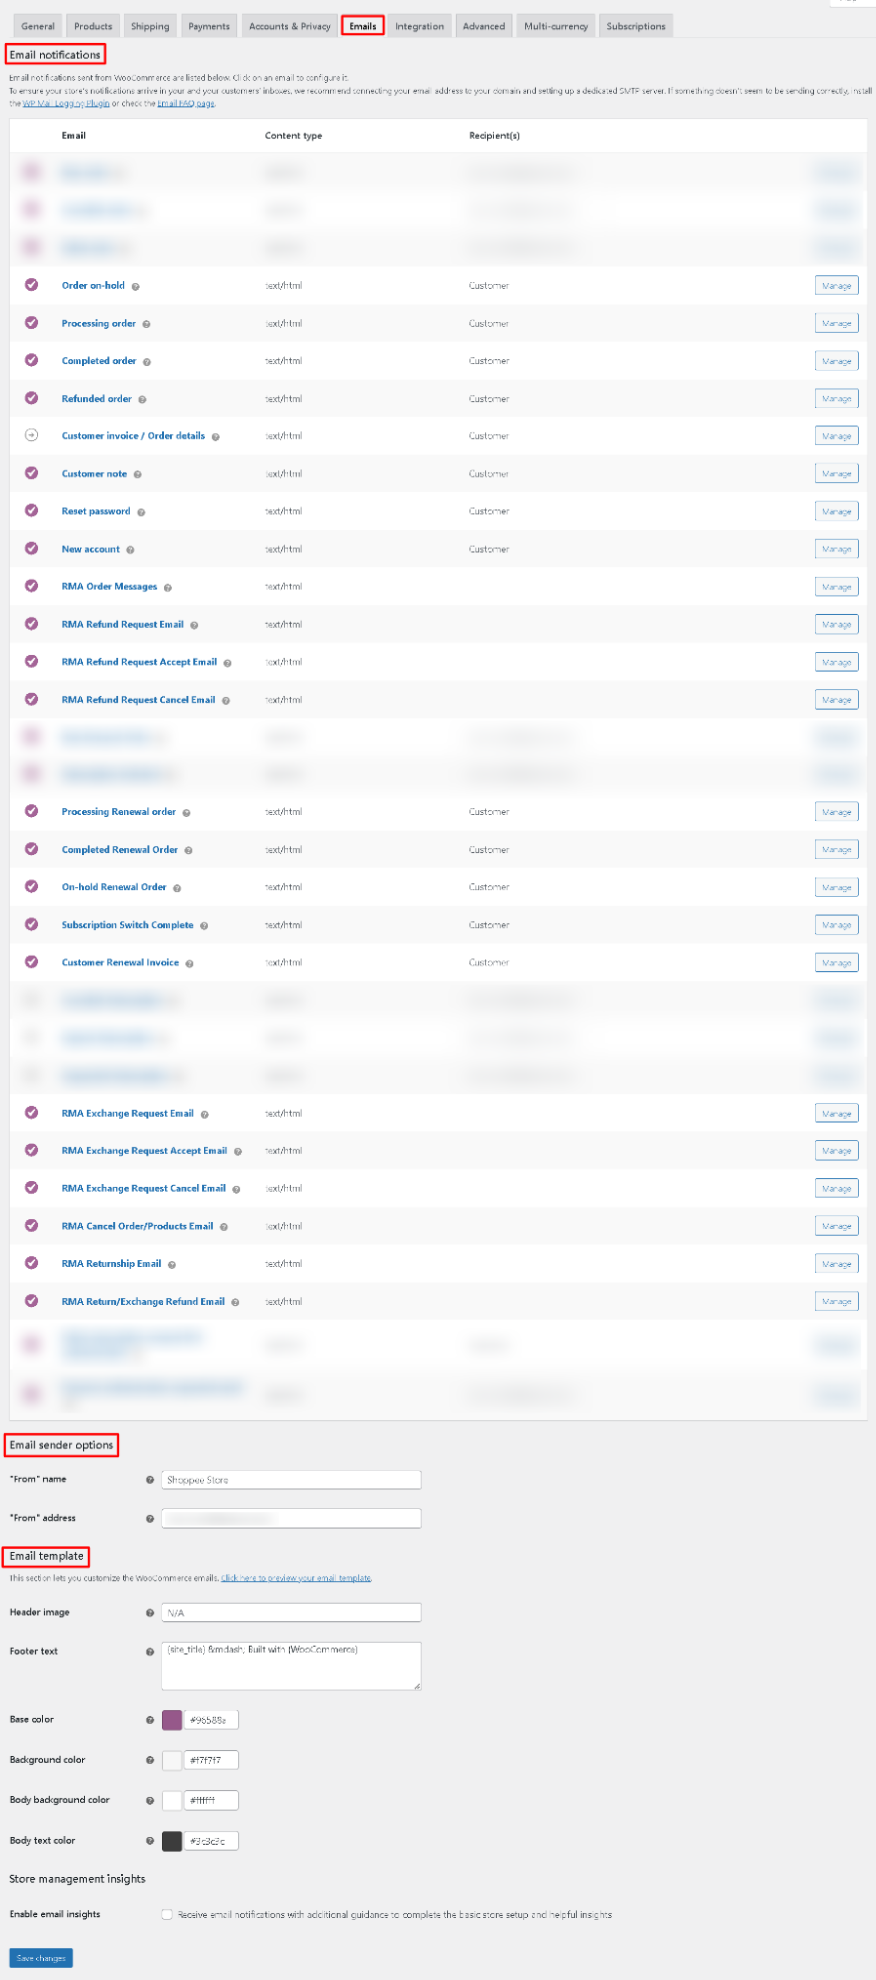
Email Notifications
It contains a list of multiple email notifications that are useful for your WooCommerce store processing. You can enable or disable any of the notification emails that seem feasible for you.
Email Sender Options
- From “name” This is a text field that defines— how a sender name would appear in an outgoing WooCommerce email from your store. It is predefined here as the store admin name, still if you require you can update that as per your ease.
- From “address” This is also a text field that requires—-how a sender email would appear in an outgoing WooCommerce email from your store. It is predefined here as the store admin’s email, still if you require you can update that as per your ease.
Email Template
- Header Image- This is an attribute field that requires a URL to an image as an input of an image that you want to show in the email header. Remember, upload images using the media uploader (Admin > Media).
- Footer Text- This is also a text field that requires input of text that you want to appear in the footer of all WooCommerce emails. Remember, all available placeholders: {site_title} {site_url} are utilized in this field.
- Base Color- This field requires input of the base color for WooCommerce email templates. By default the color given is— #96588a
- Background Color- This is also a color field that requires to be inputted for WooCommerce email templates. By default the background color given would be— #f7f7f7.
- Body Background Color- This field requires input of the main body background color. By default, the given color would be— #ffffff.
- Body Text Color- This field requires input of the main body text color. By default the color given would be— #3c3c3c.
- Enable Email Insights- Enable this option, if you want to receive email notifications with additional guidance to complete the basic store setup and helpful insights.
4.5.8.Wallet Tab
Enable this Wallet Settings tab if you want to add your customers’ refunded amount directly to their wallet. For this you need to first enable the Enable Wallet toggle in the General Settings tab and then perform the latter setting here in this tab to make the wallet refund process in action.
Note– We’re delighted to inform you that our WooCommerce Wallet System Free. and Wallet System for WooCommerce PRO are all compatible with the plugin. So, instead of implying any other wallet system to your store, you can try your hands on it too.

After enabling this setting, the refunded amount will be automatically added to the customer’s wallet.
Note– Once the wallet amount is migrated to the “WooCommerce Wallet System” plugin, then it can’t be reversed.
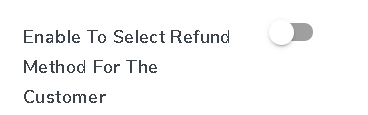
Enabling this setting if the Admin wants to allow the customer to select the refund method. There are two types of refund methods-
- Refund in Customer Wallet
- Refund Through Manual Method
If the customer selects the refund method is Refund Through Manual Method then Admin refunds the amount through the manual process.
Here the admin enters the refund amount and clicks on the “Refund Manually”.

If the customer selects the refund method as “Refund in Customer Wallet” then the refunded amount automatically adds to the customer wallet after approving the refund request.
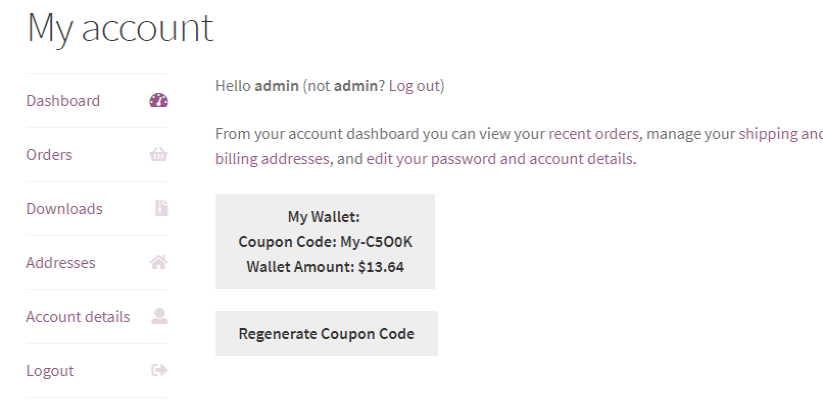
Apart from that, you can also enable your Cancel Order Amount to Wallet based setup option available in this tab.
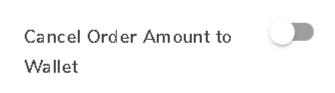
This option offers seamless refund of all canceled and paid orders to your customer’s wallet directly.
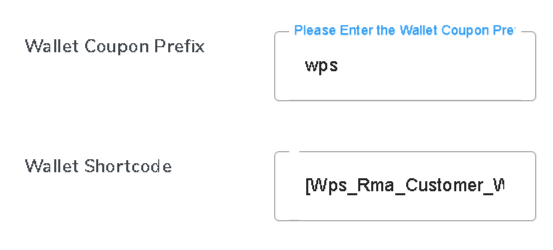
Refer to the screenshot above, you can get an idea of the Wallet Coupon Prefix and Wallet Shortcode based setup options available. You can either utilize the predefined ones or can modify them as per your ease, in order to generate wallet based coupon codes for your customers.
4.5.9.Global Shipping Tab
Through this setting, you can add an extra shipping amount to the refund/exchange requests. You can add the shipping amount by two different methods.
Enable Global shipping
This section is used to enable the Global Shipping for your shipping services offered. To enable this setting you have to enable.
As soon as you enable the global shipping button, there opens up an option in form form of a button i.e. ADD FEE with two field options along with Fee Name and Fee Cost. Here, you can get an idea of what I’m referring to utilizing the screencast below-
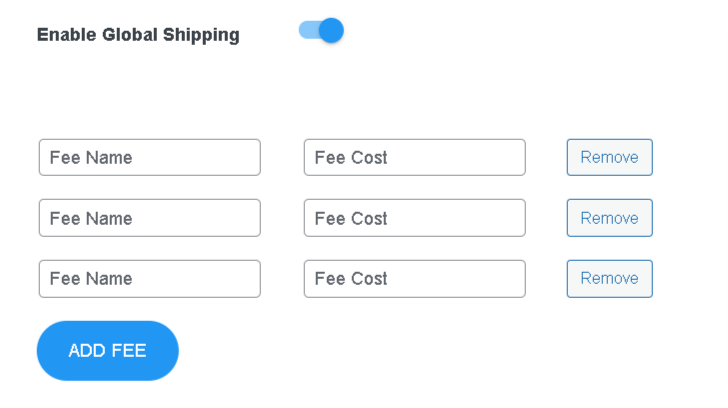
You can conveniently create as much as a global shipping based fee utilizing the ADD FEE button and SAVE SETTINGS to continue with, else can utilize the Remove button to discard that particular fee.
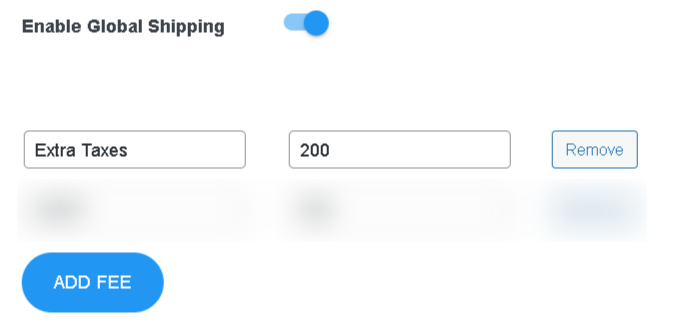
For Instance, you can refer to the screencast below to get an idea of global shipping cost addition.
Enable Product Category Based Shipping
This section is used to enable shipping based on the product category. Utilizing this setup option you can see the Extra Shipping Fee notification on the Refund Request Form and Exchange Request Form.

What you have to do is to just Enable Product Category Based Shipping, that button thereby opens up with a new field Select Product Categories into which you need to select the list of categories into which you want to add global shipping and hit SAVE SETTINGS to continue with.
4.5.10.Integration Tab
This plugin provides integration with top shipping channels such as ShipEngine and ShipStation that offers a multi-carrier solution to all eCommerce retailers. You can select any of the shipping providers that can help you fulfill your business requirements. To activate the functionalities of a multi-carrier provider follow the listed steps-
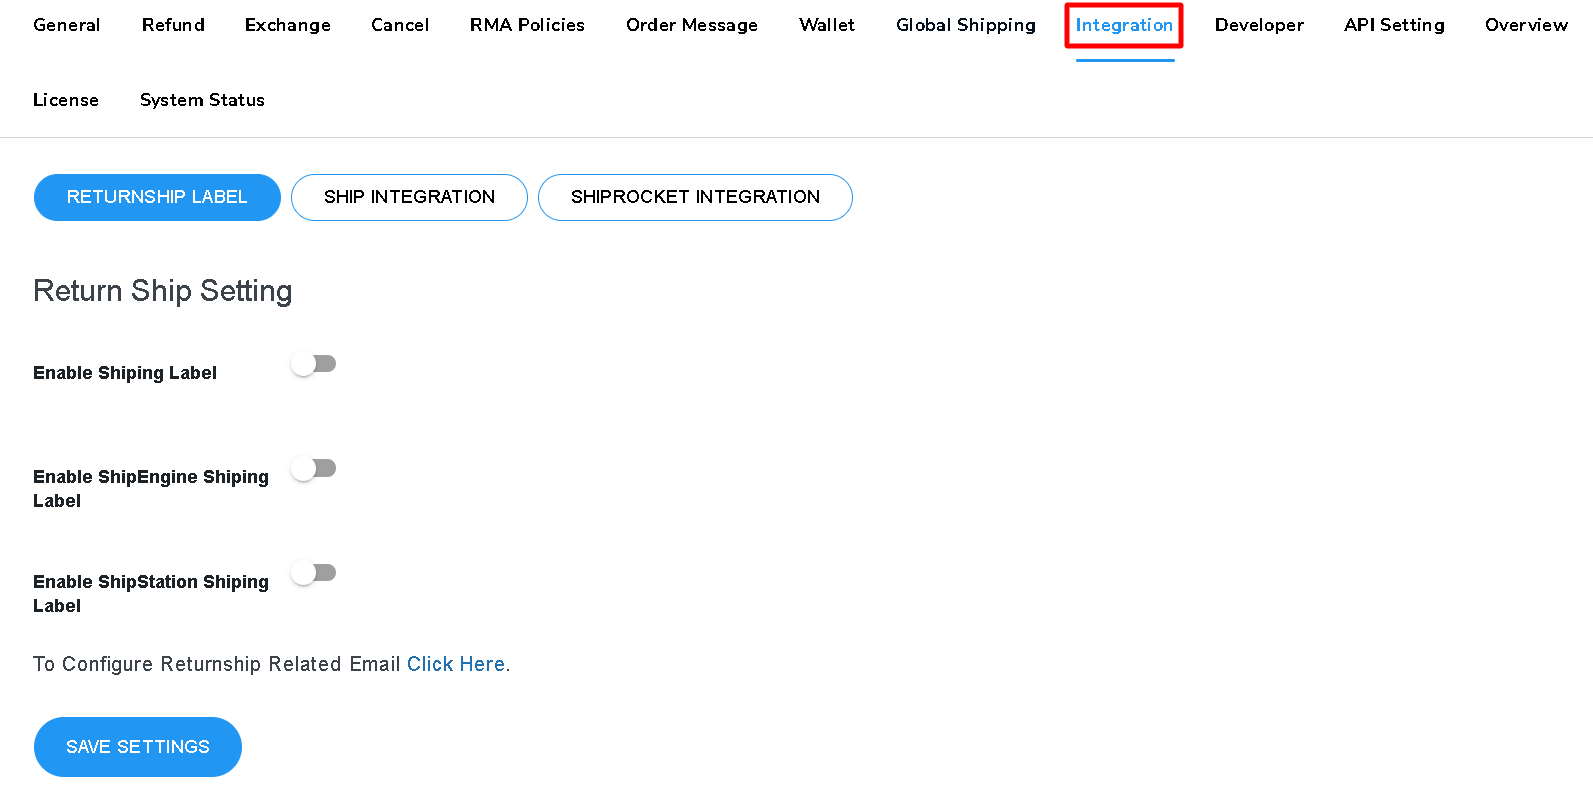
This setting tab consists of two setup further tabs, likewise— first Go to the WooCommerce > RMA Setting > ReturnShip Label sub tab.
RETURNSHIP LABEL
This setup tab option offers enable, if you want to generate the return shipping label through ShipEngine. It includes further setup options like-
Enable Shipping Label
Utilizing this setup option you can conveniently enable your product’s shipping labels based on their refund or return requests. Enable this to send a return slip label to the customer for sending the returned product back. Just you have to toggle switch ON your setup option and enable the feature.
Enable ShipEngine Shipping Label
Do you want to generate your Ship Engine Shipping label?? If yes, please utilize this setup option and generate your ship engine labels with ease. Enable utilizing the toggle switch and create a return ship label through the ship engine platform.

Enable ShipStation Shipping Label
Do you want to generate your ShipStation Shipping label?? If yes, please utilize this setup option and generate your ship station labels with ease. Just, enable this and create a return ship label through the ship station platform.
To Configure Returnship Related Email Click Here.
Want to configure your returnship related email, just refer to the link given here and make use of the settings available there.
You can access the link given in order to configure your RMA returnship email based on that email. As you access the link given you’ll be automatically redirected to the page, displayed here in the screencast below-
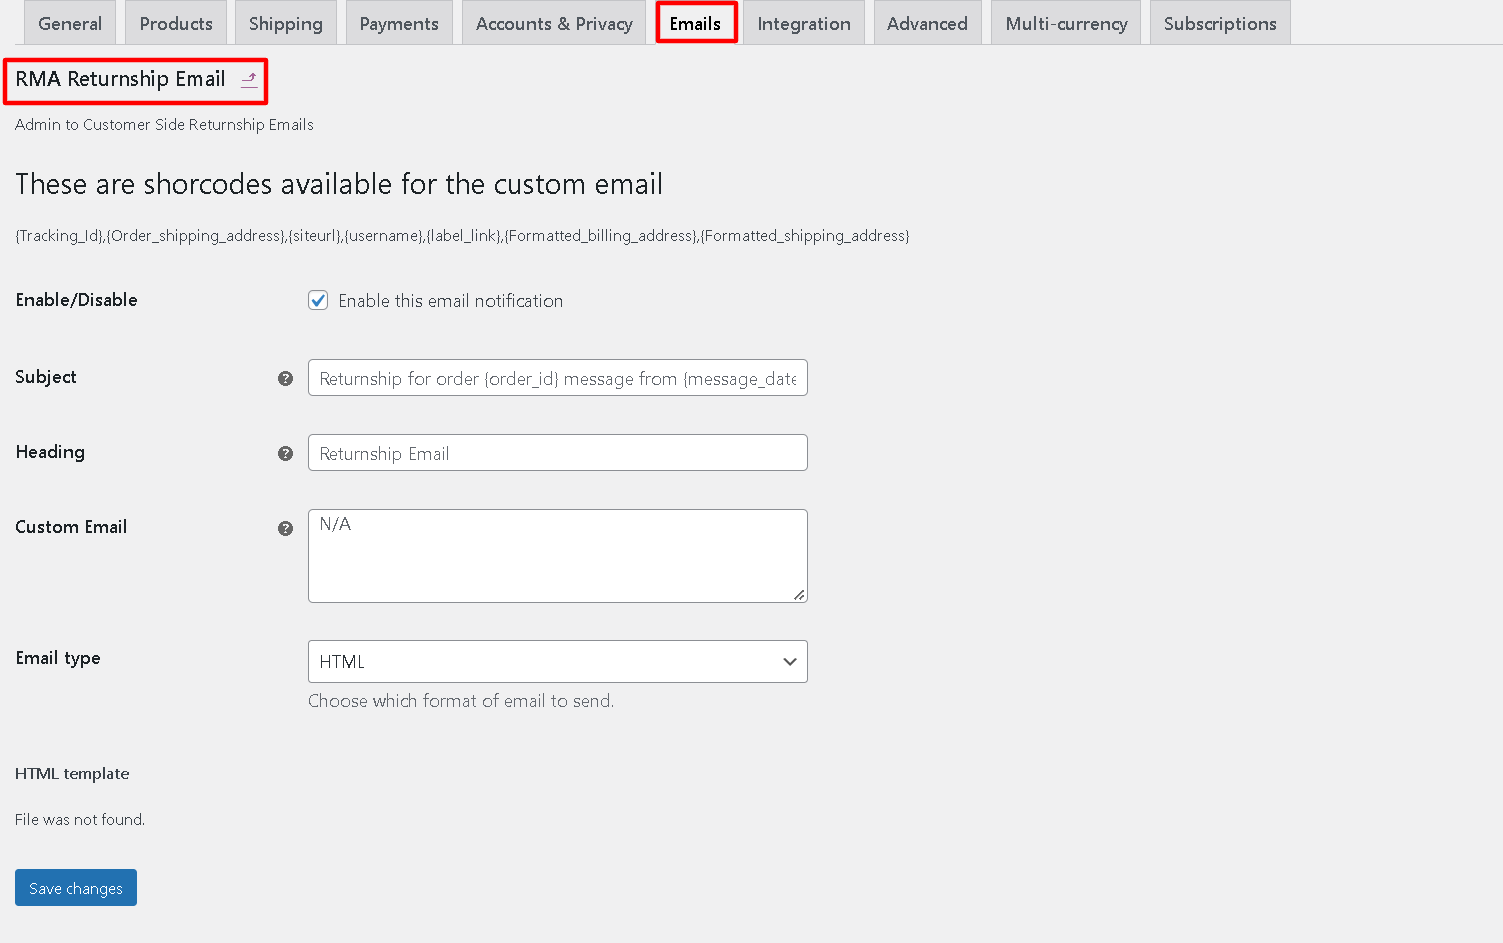
This page consists of RMA returnship email configuration settings including the shortcodes to be displayed on the top that serves the purpose fully. The settings here include-
- Enable/Disable- This is a checkbox enable setting that is required to serve the notification enabling and disabling feature in check.
- Subject- This setting requires the mail subject based input.
- Heading- The email heading is to be inputted here to continue.
- Custom email- The mail body or the mail description text need to be updated here in this block.
- Email type- You need to define the email type here.
- HTML Template- This offers the link to the original template based email copy, if the merchant wants to edit the theme file directly. Either you can refer to the template through the link or hit the View Template button.
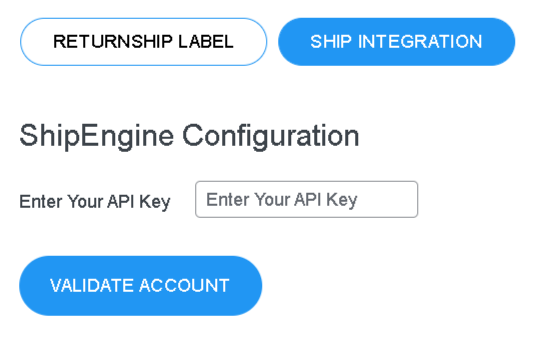
After that, navigate to the WooCommerce > RMA Setting > Ship Integration sub tab.
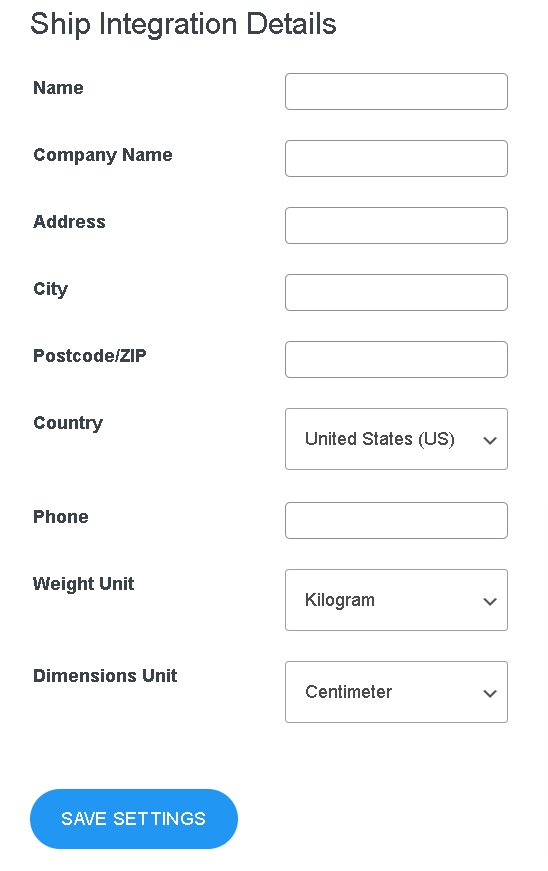
SHIP INTEGRATION
This setup tab option offers enable, if you want to generate the return shipping label through ShipEngine. It includes further setup options like-
Ship Engine Configuration
This setup option offers seamless ship engine configuration for merchants. If you’ve selected ShipEngine as your shipping channel, then you need to enter your API Key and click on the Validate Account button.
Ship Station Configuration
This setup option offers seamless ship station configuration for merchants. If you’ve selected ShipStation as your shipping channel, then you need to enter your API Key + Secret Key and click on the Validate Account button.
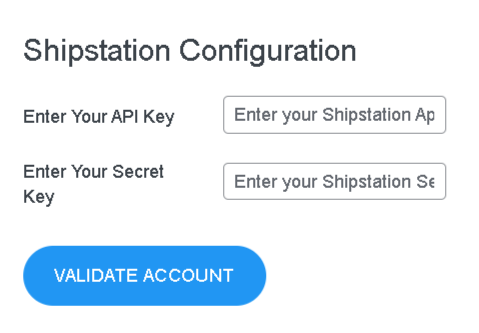
Note- You need to validate your account if you want to use the functionalities of these shipping channels and let them integrate with your plugin and store successfully.
After successfully performing the above steps, you can see the Account Settings on your dashboard. Here, you can connect your eCommerce store with the required Carrier Services.
After that, just fill in your Ship Integration details for the shipping channel you’ve selected and click on the Save Settings button & start generating the return shipping label.
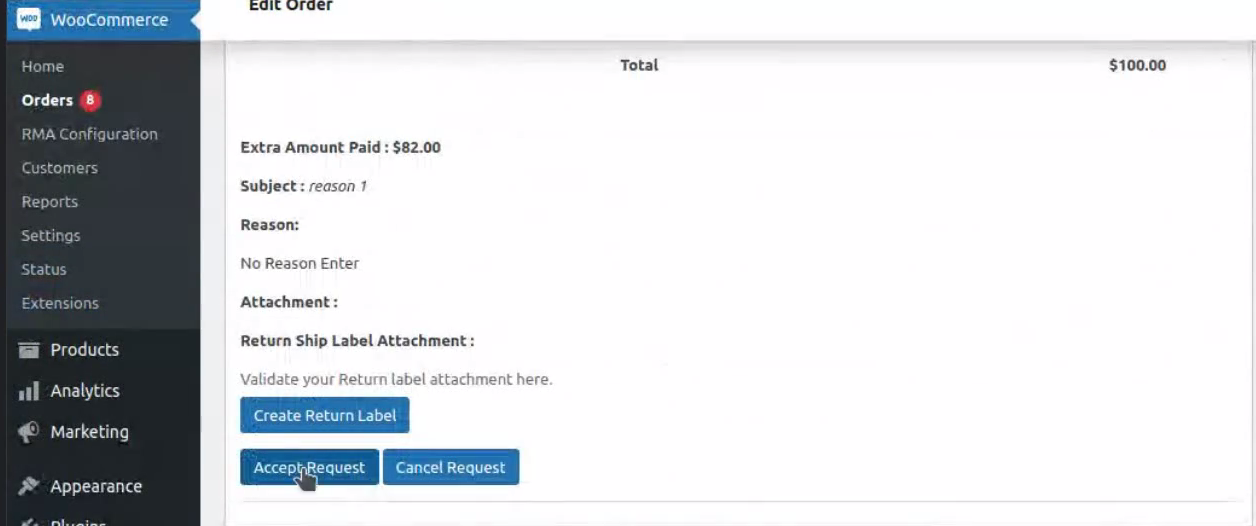
Workflow: Remember, whenever your customer transmits a refund request, you can create a return label for your customer by clicking on the “Create Return Label” button.
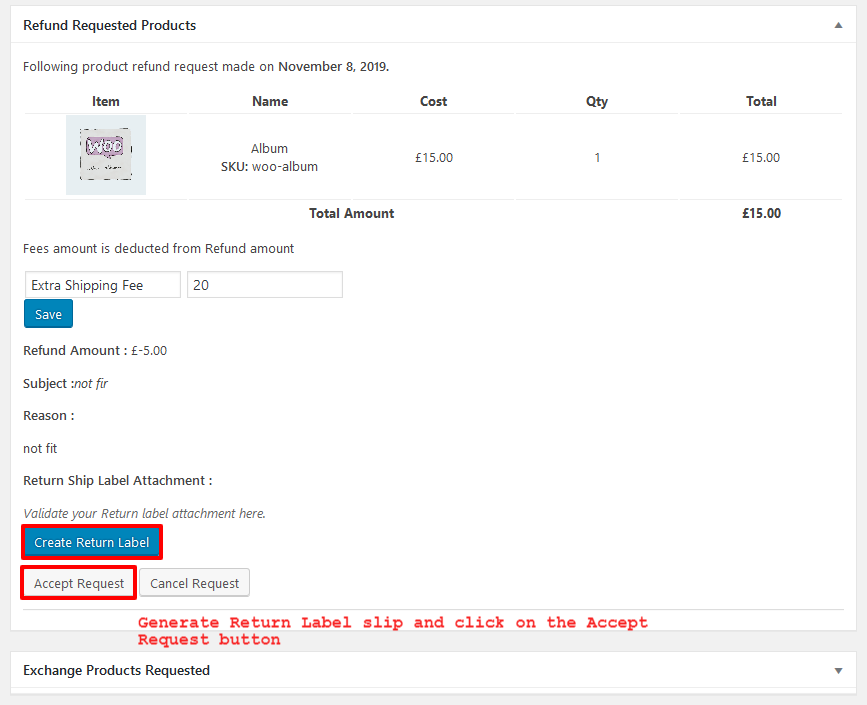
After successfully accepting the refund request, click on the ‘Create Return Label’ button to generate a Refund Label Slip for your customer.
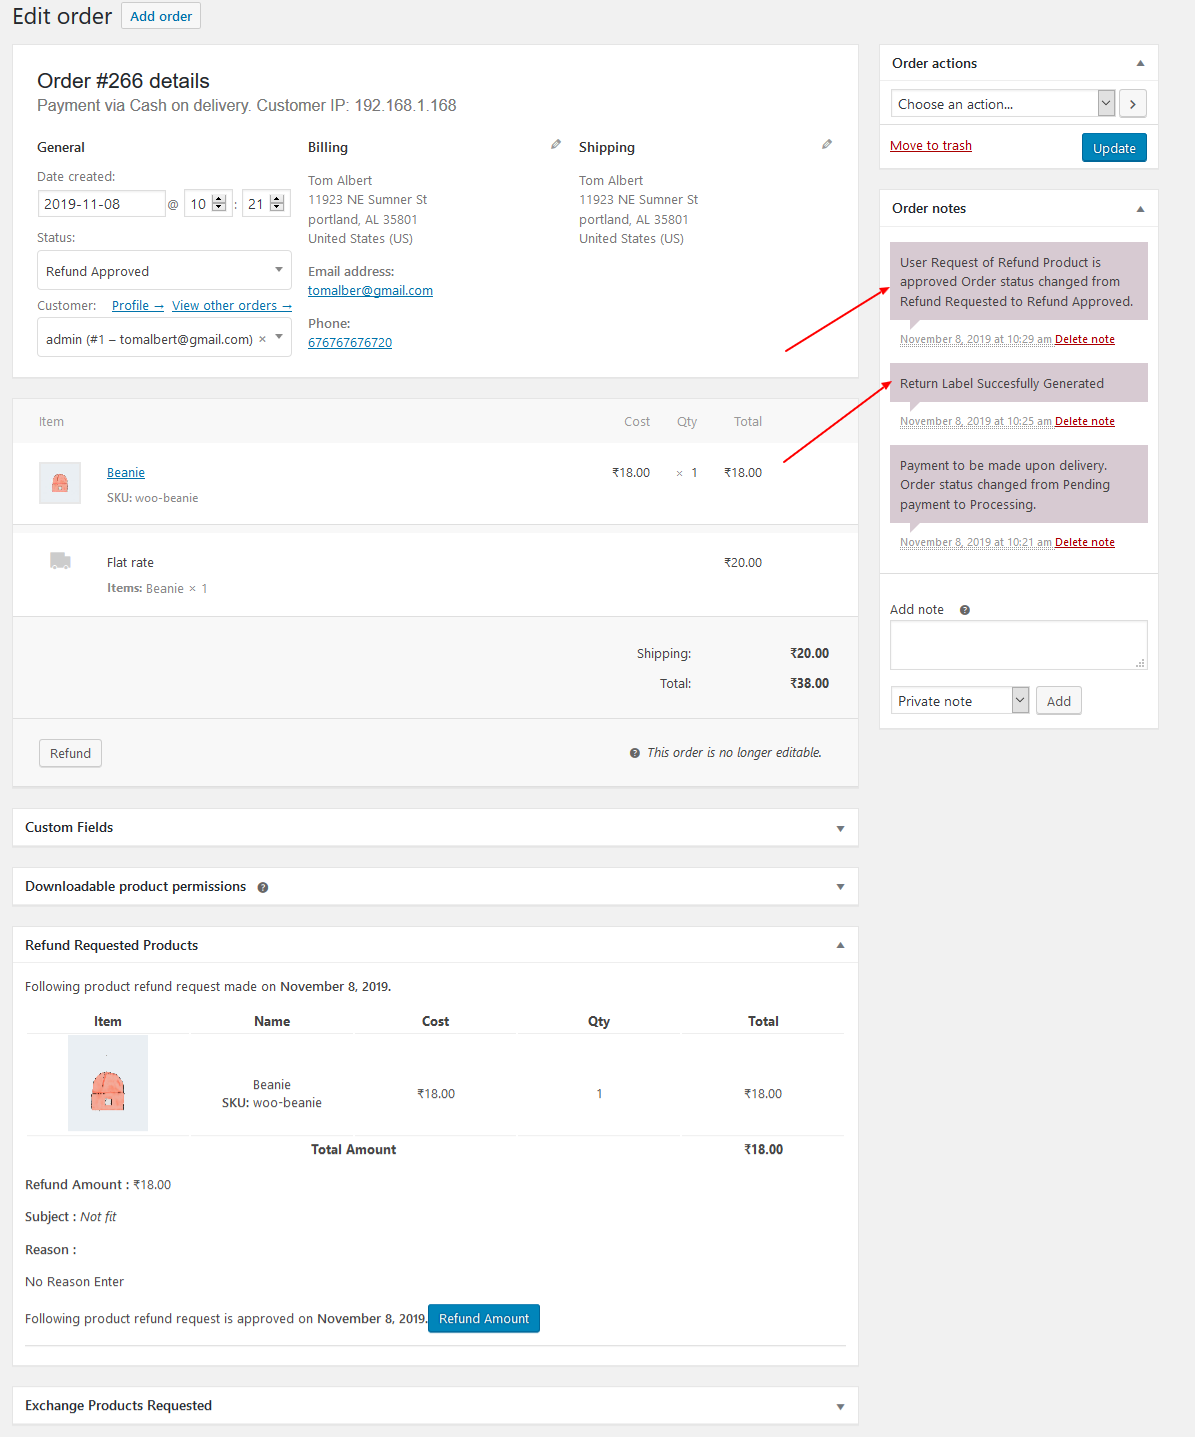
You can see the notification from the left sidebar on successfully created Return Label slip.
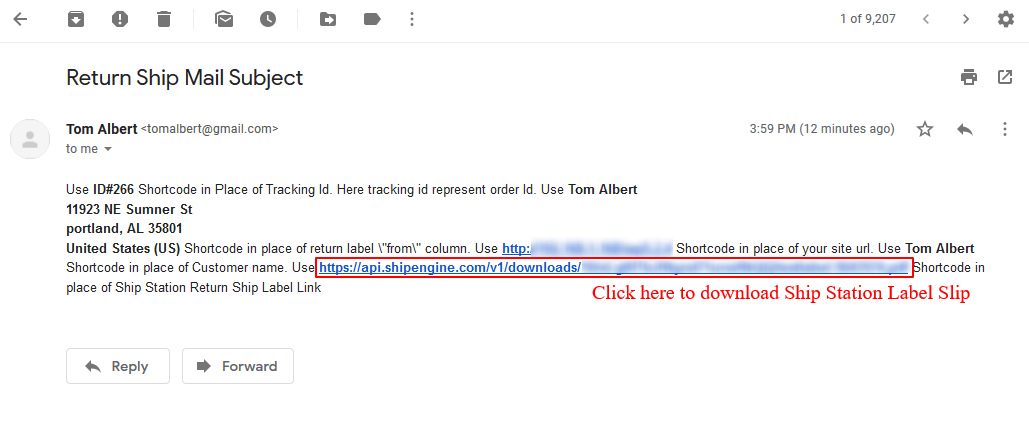
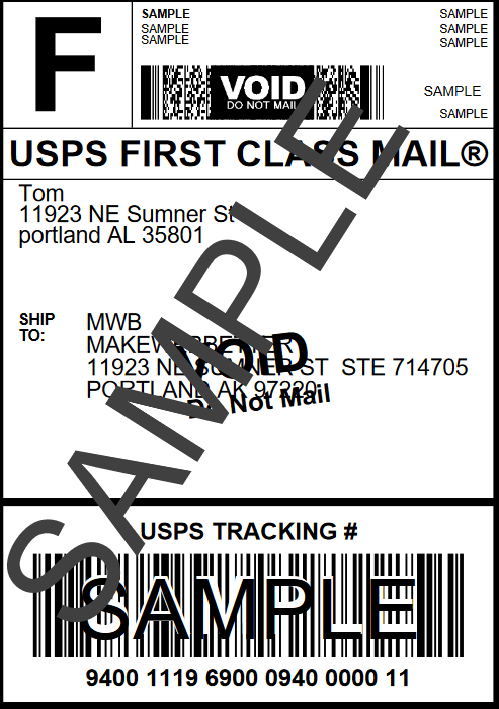
After successfully generating a Return Label, the customer will get a mail with the ShipEngine Return Ship Label link. By clicking on that link they can get the Return Ship Label.
Here you can see the Sample Return Ship Label PDF. Using this slip your customer can take the benefits of Carrier Services to return the product.
4.5.11.Shiprocket Integration
ShipRocket Configuration
This setup option offers seamless ship engine configuration for merchants. If you’ve selected ShipRocket as your shipping channel, then you need to enter your API Key and click on the Validate Account button.
Note- You need to enter your product-based details clearly likewise- height, weight, dimensions, etc. if you want to use the functionalities of ship rocket shipping channel and let them integrate with your plugin and store successfully.
For a clearer understanding of this setup option, kindly refer to this screencast below—
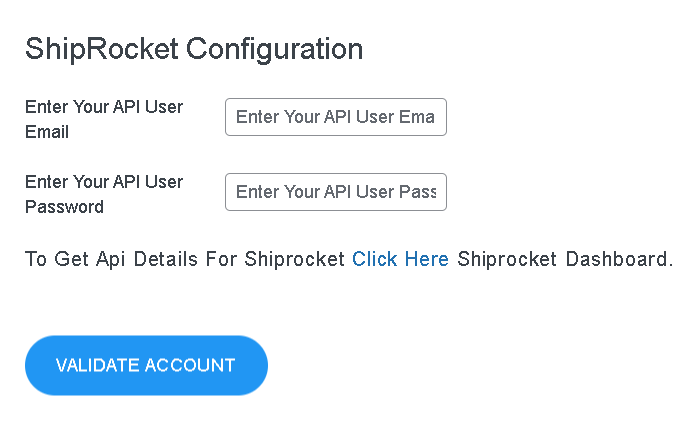
If you have no idea where to fetch the Api Details For Shiprocket, then just simply Click Here and refer to the Shiprocket Dashboard.
Just after to that, in order to setup channel options for seamless shiprocket configuration for merchants. If you’ve selected ShipRocket as your shipping channel, then you need to enter your Shiprocket Channel Id, and your Shiprocket Channel Name.
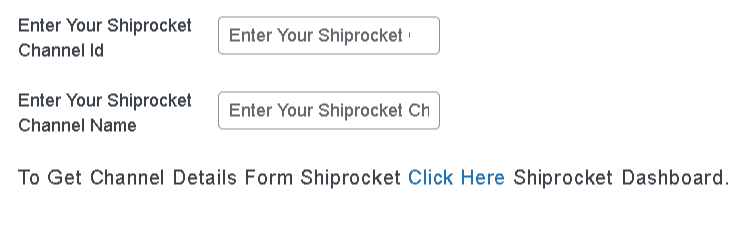
If you have no idea where to fetch the Channel Details For Shiprocket, then just simply Click Here for your Shiprocket Dashboard.
Ship Rocket Warehouse Address
This section requires you to add your warehouse address details that would help you out in an easy shipping process via ship rocket.
For fields and details, kindly refer to the below screenshot—
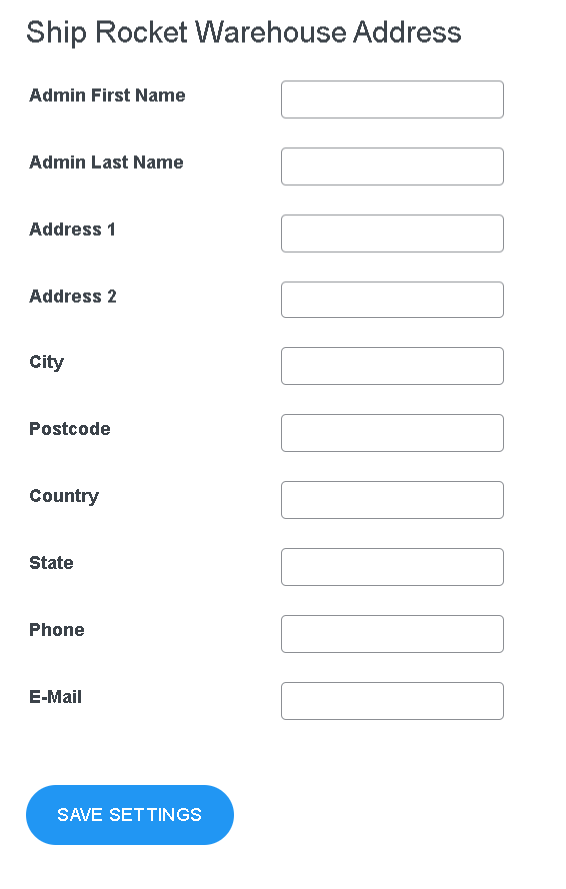
Just enter the warehouse details here in the fields given and hit Save to continue.
4.5.12.API Setting Tab
Last tab of the plugin setup area is API Settings. This tab’s sole purpose lies in the API setup for the plugin smooth integration over 3rd party sites. Our bespoke WooCommerce plugin offers easy and seamless integration of the plugin’s API into their shop.
The plugin not only acts as a link between the third-party API and the online store, but it also cuts down on the time it takes to complete each procedure. For that minimal setting options are to be available here, that includes-
Enable API
This denotes the API enable toggle switch that thereby turns ON or OFF the API setting for the plugin. APi settings thereby refers to an outstanding feature for the plugin i.e. you can utilize these settings to enable your plugin.
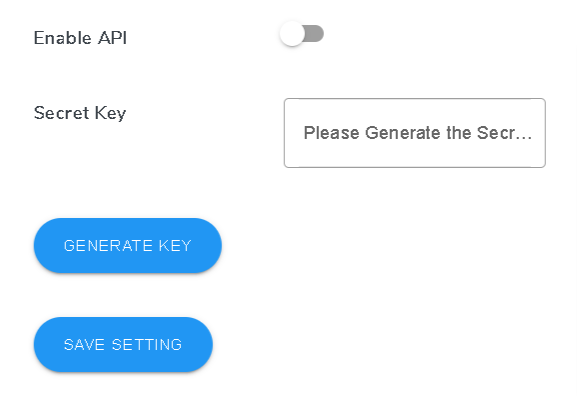
Secret Key
This setup option offers to save as well as generate your secret key for integration. Store owners can easily generate their integration secret key utilizing the GENERATE KEY button available and store that using the SAVE SETTINGS button thereafter.
That’s all for the initial setting options for the RMA plugin. For further clarity, there’s only one way through i.e. downloading and installing on your own website.
5.RMA Report
This setting enables the admins to have insight into the returns, refunds, exchanges, and cancellations across the website. The analytics section will cover the complete overview of return & exchange activities that take place on your website.
There are sub-sections to this setting.
5.1.Report
In this section, the admin can have a holistic view which will include the Order ID, Request Type, Request Status, Order Status, and Request Date in the report section. It also provides the admins to set the date range, that they can use to get accurate results. There is a separate section for “searching by ORDER ID” Here the admins can put in the order ID of certain items to get the exact insight.
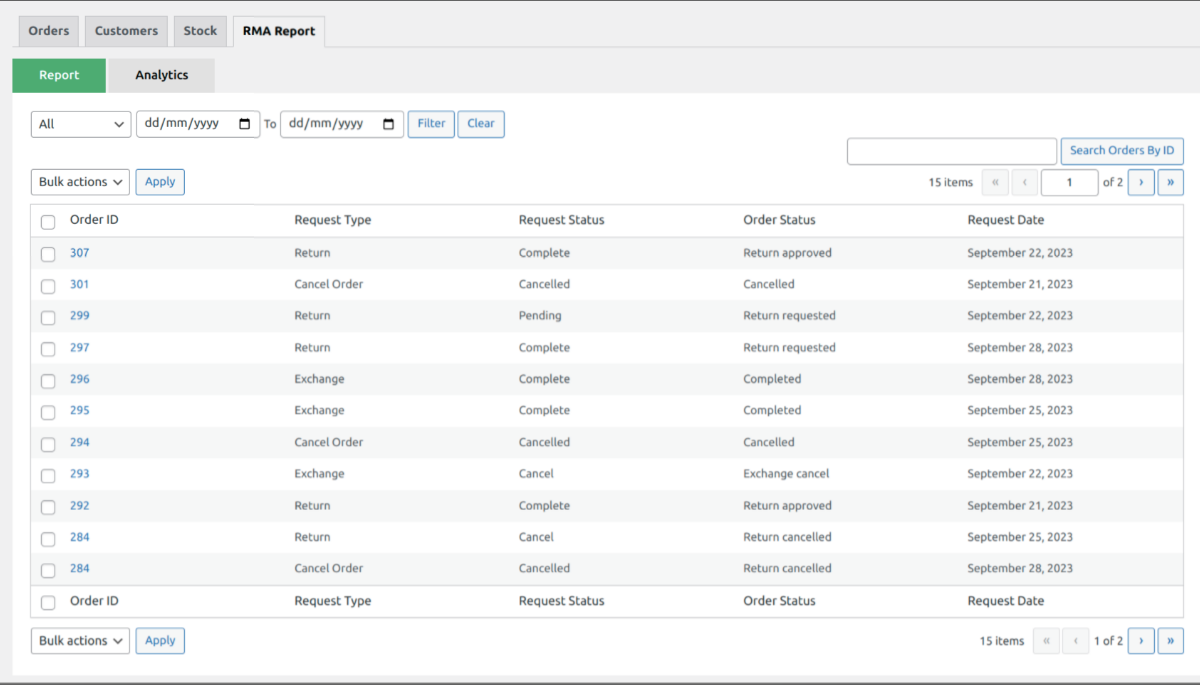
The request statuses will be of three kinds – Complete, Pending, and Cancel. Further, the admin can click on the “ORDER ID” of each item to get redirected to the section from where you can cancel or complete the request.
5.2.Analytics
This section is further divided into 4 sub-sections,
The first fold contains the total number of returns, exchanges, the top returned products, and the top exchange products.

The second fold contains the Category and Product Relationship of Return, Exchange, and Cancellation. This data is represented through a bar graph format. This bar graph is divided into different categories on the x-axis. When you hover over the particular data, you will be in a position to see the exact number of returns, exchanges, or cancellations for that particular category.
6.Multivendor Marketplace Extension Offered
Are you a WooCommerce store owner, who wishes to gear up your services or expand your reach in the market with multivendor store???
If yes, do not hesitate or think twice about the expansion, we’ll make sure everything goes on smoothly. WP Swings has one outstanding marketplace extension onboarded within their store i.e. RMA WCFM for WooCommerce.

The purpose of designing this solution is to make it easier for suppliers on an online marketplace like Amazon to process refund and exchange requests with all ease. The notable features of this plugin include—
- Offers consumers with the alternative to return products for a refund or exchange.
- Amounts reimbursed can be credited into customers’ eWallets.
- Everyone is informed at every stage thanks to the automated mail system.
- Refunds and exchanges always had an easy-to-use interface, which promotes customer confidence and entices them back to the online marketplace.
So, what are you waiting for…just transform your WooCommerce store to Multivendor one with RMA WCFM for WooCommerce today. The product documentation explains everything well in detail or you can schedule a personal demonstration of the product too.
7.Plugin Compatibilities
We have now made the Return, Refund & Exchange For WooCommerce PRO plugin completely interoperable with a variety of excellent plugins. All of these plugins that offer compatibility would add a sense of ease to your return, refund, and exchange order process carried out via plugin features.
Let’s get into the specifics of the plugin that define its purpose-
1. Compatibility with Ultimate WooCommerce Gift Cards
The RMA Management plugin is compatible with the WooCommerce Gift Cards and Gift Cards For WooCommerce Pro. Store admin can now provide refund functionality on gift cards to its users.But for the practical implementation users are required to fulfill two conditions i.e. the expiration period of the gift card shouldn’t be achieved and its usability should be equal to zero. The refund request for gift cards can be successfully initiated only if these conditions are satisfied by the user’s end.
2. Compatibility with WooCommerce Wallet System
This RMA Management plugin is compatible with the WooCommerce Wallet System Free. and Wallet System for WooCommerce PRO. It allows the admin to easily manage all the wallet functionality to one dedicated wallet system.
3. Compatible with Sequential Order Numbers for WooCommerce
The RMA WooCommerce plugin is fully compatible with WooCommerce Sequential Order Numbers Pro by SkyVerse and Sequential Order Numbers for WooCommerce by WebToffee.
You can quickly format the order numbers in your WooCommerce store thanks to this compatibility. The WooCommerce sequential order number plugins lets you format your old and new WooCommerce order numbers into a sequential or linear sequence. You don’t have to skip values when formatting your order numbers; you can use WT-01000-UK, WT-01001-UK, etc (such as 15, 37, etc).
8.WPML Compatibility
WordPress Multilingual i.e. WPML plugin in order to facilitate easy translations and localization within the plugin. It allows the admin to translate the word strings to all the languages that are supported by the WPML.
Yes, you can now effectively translate your plugin-based strings into the language of your choice. To begin the translation process, simply extract all of your plugin-based strings and then follow the steps below:
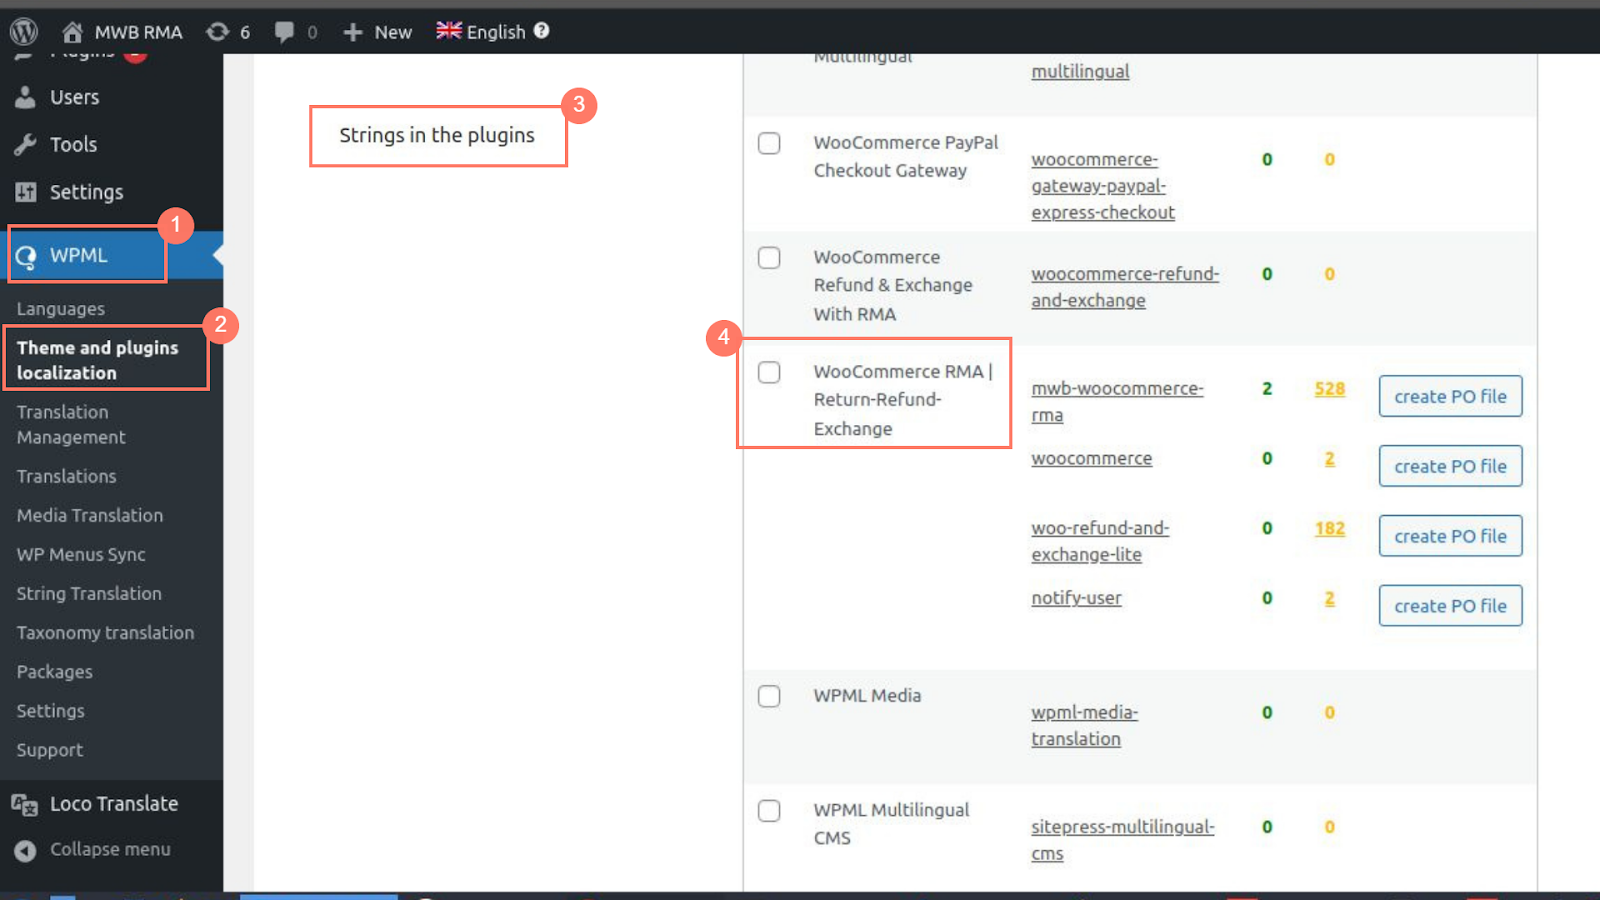
Click on WPML > Themes and Plugins Localization > Strings in the Plugin > WooCommerce RMA | Return-Refund-Exchange
Checkbox the plugin name and click on “scan selected plugin for strings”. The WPML extracts all the strings from that plugin.
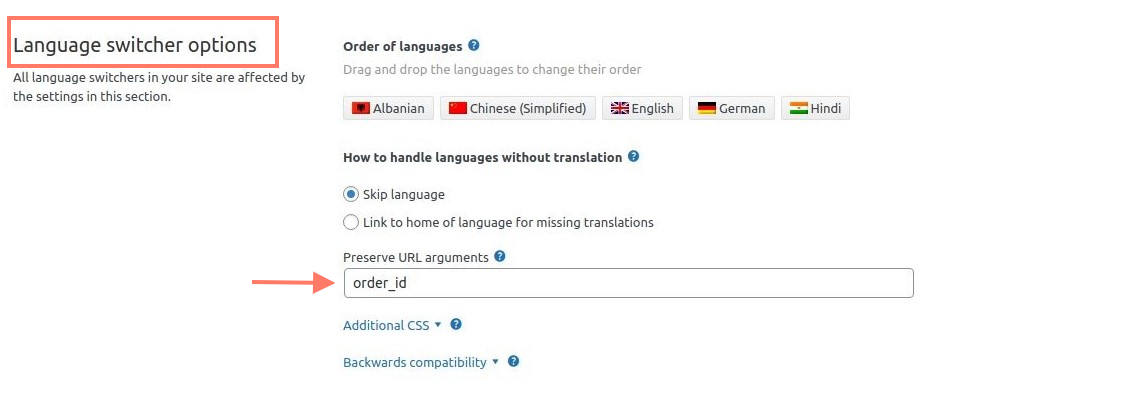
From language switcher options, add the preserve URL arguments as order_id.
After this, click on the (+) plus sign to translate that string for the chosen language…

Write the translated version of that string.

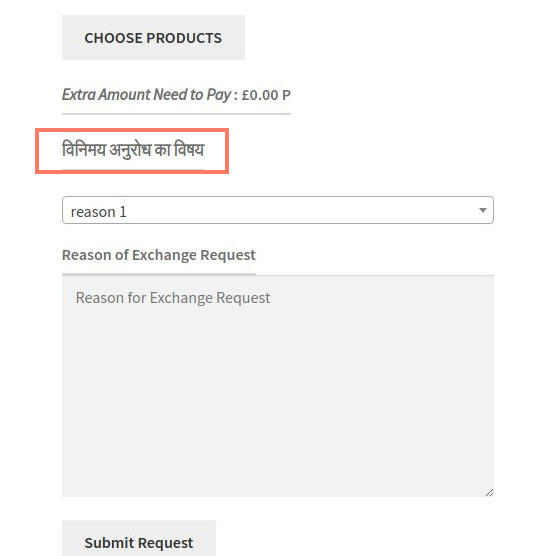
Now, if the customer opts for Hindi from the option, they see the translated version of the string. Similar to this, the admin can translate all the strings (supported by WPML) and engage multilingual buyers.
9.Feedback and Suggestions
Don’t see a feature in the RMA Return Refund & Exchange for WooCommerce Pro plugin that you think would be useful?
We’d love to hear it— Reach out to our Support Query and we’ll consider adding it in a future release.
10.FAQs
Can the admin put some customized refund & exchange policy according to the site on the refund & exchange form?
Yes, the admin can put customized refund & exchange policy by catching in WPSwings -> RMA Setting -> Refund/Exchange Tab ->> and enable the refund/exchange rules in the Appearance section and put the matter in the description box given as refund/exchange rule editor.
Can the admin add some fees for the refund & exchange process?
Yes, the admin can put some extra fees in the refund & exchange of a product by moving in WPSwings -> RMA Setting -> RMA Policies Tab >> & then set the Refund/Exchange include tax policies accordingly.
Is there any functionality to keep off the refund/exchange/cancel feature for an order to proceed via COD?
Yes, the admin can turn off the refund/exchange/cancel feature for such order by going through WPSwings -> RMA Setting -> General Setting -> Hide Refund, Exchange, Cancel Button For COD When in Processing Status.
Can the admin apply a minimum amount to restrict the customer to cancel their order?
Yes, the admin can apply the minimum amount cancel order functionality in the WPSwings -> RMA Setting -> RMA Policies Tab >> and set the cancel policies accordingly.
Can the admin set a form for the COD Orders to collect the customer bank details?
Yes the admin can collect the customer bank details in COD Orders by enabling the checkbox to Show Bank Details Field For Manual Refund from WPSwings -> RMA Setting -> General Setting.
Does ShipRocket operate with your RMA plugin?
Absolutely, Shiprocket is compatible with our RMA plugin. Please enter the username and password to configure and authenticate your account for this in the Plugin settings >> Integrations Tab >> Shiprocket Integration.
Where will the admin retrieve the ShipRocket API?
If the admin doesn't know the API login and password, they can access the Shiprocket integration by going to the Integrations tab and selecting it. From there, they can access the Obtain Api Information For Shiprocket Dashboard link. Alternatively, using the Shiprocket dashboard, the admin may set up an API account and password.