
1.Overview
2.Installation
2.1 Automatic Installation:
Automatic installation is the easiest option as WordPress handles the file transfers itself and you don’t need to leave your web browser.
The steps are as follows:
- Log into your WordPress dashboard. Navigate to the Plugins menu and click Add New.
- Click on the Upload Plugin button.
- Click on the Browse button and navigate to the downloaded Integration with Mautic for WP Zip file and click OK.
- Most importantly, you can install it by simply clicking Install Now.
2.2 Manual Installation:
The manual installation of the plugin is another option to install the extension to your WordPress environment. The manual installation method involves downloading our WordPress Extension and uploading it to your webserver via your favorite FTP application.
The steps are as follows:
- Extract the downloaded Integration with Mautic for WP Zip file.
- Upload the Integration with Mautic for WP folder to the /wp-content/plugins/directory.
- Activate the plugin through the Plugins menu in WordPress.
3.Workflow
3.1. Mautic WordPress Integration Setup
To proceed with the configuration step, add the following details and then click on “Save” to establish the connection between your website and Mautic CRM.
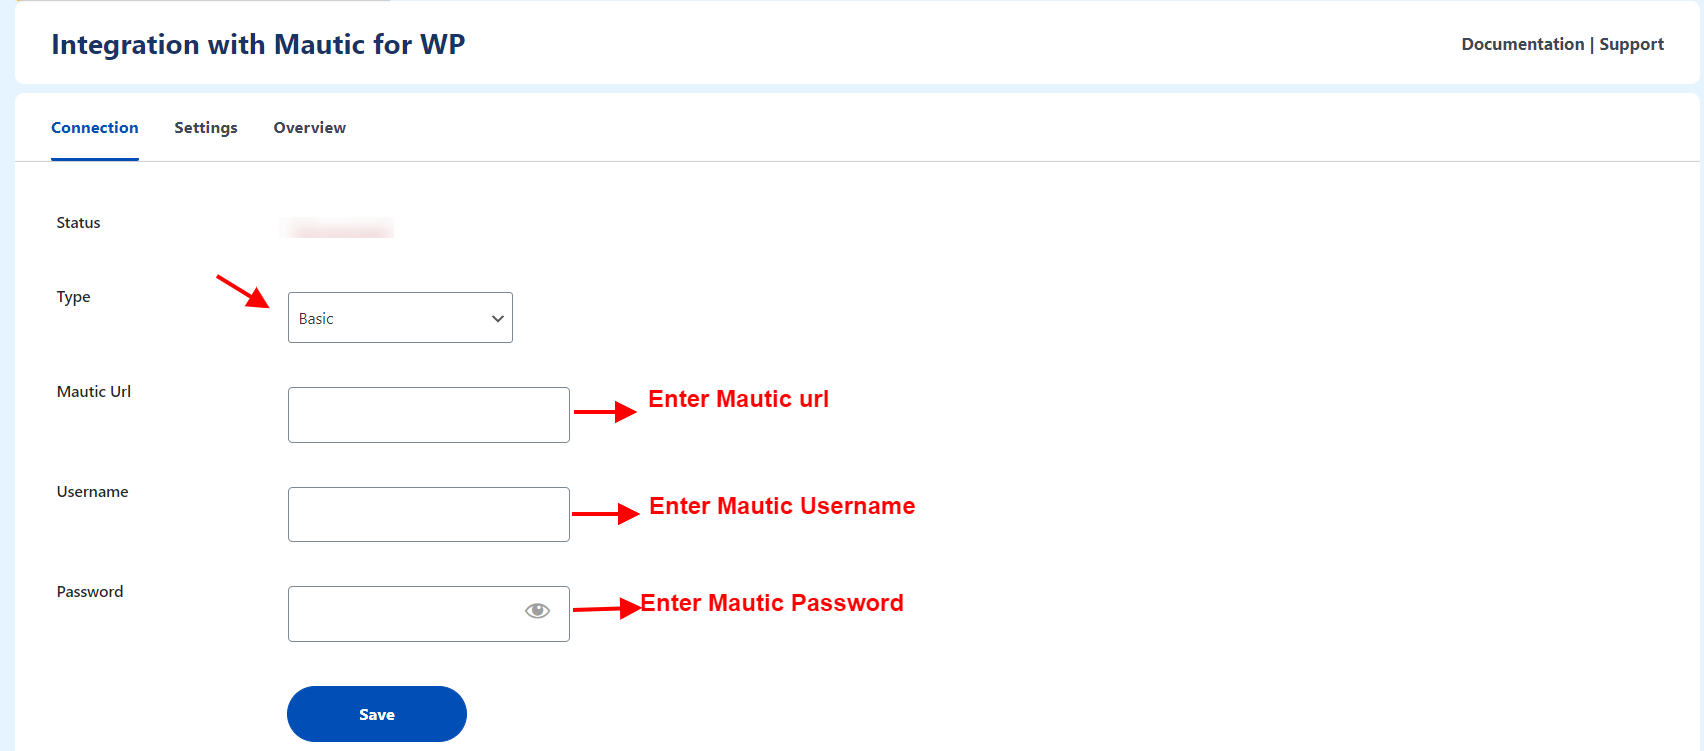
- Type: Select the Mautic API Authentication to secure the requests shared between the two platforms, i.e., your WordPress website and Mautic CRM.
Two Authentication types available with this plugin are –
1.Basic
2.OAuth2 - Mautic URL: Enter your Mautic account URL to establish the sync.
- Username: In the text box here, enter your Mautic Username/User ID.
- Password: In here, Enter a secure password.
You can also test your connection status after you save the above information by clicking on “Test Connection”.
3.2.Settings
- Enable Mautic Tracking: To enable Mautic tracking, you need to insert the site URL of the Mautic instance.
- Script Location: Since the tracking script is inserted into the source code, Integration with Mautic for WP plugins allows you to select the script location – either “Header” or “Footer”.
3.3.Dashboard
This WordPress Mautic integration plugin also helps you to analyze all your Mautic instance data directly on your WordPress Admin through an extensive dashboard feature. This dashboard visually represents the data for your better understanding. The data in the dashboard is carefully segregated into the following fields.
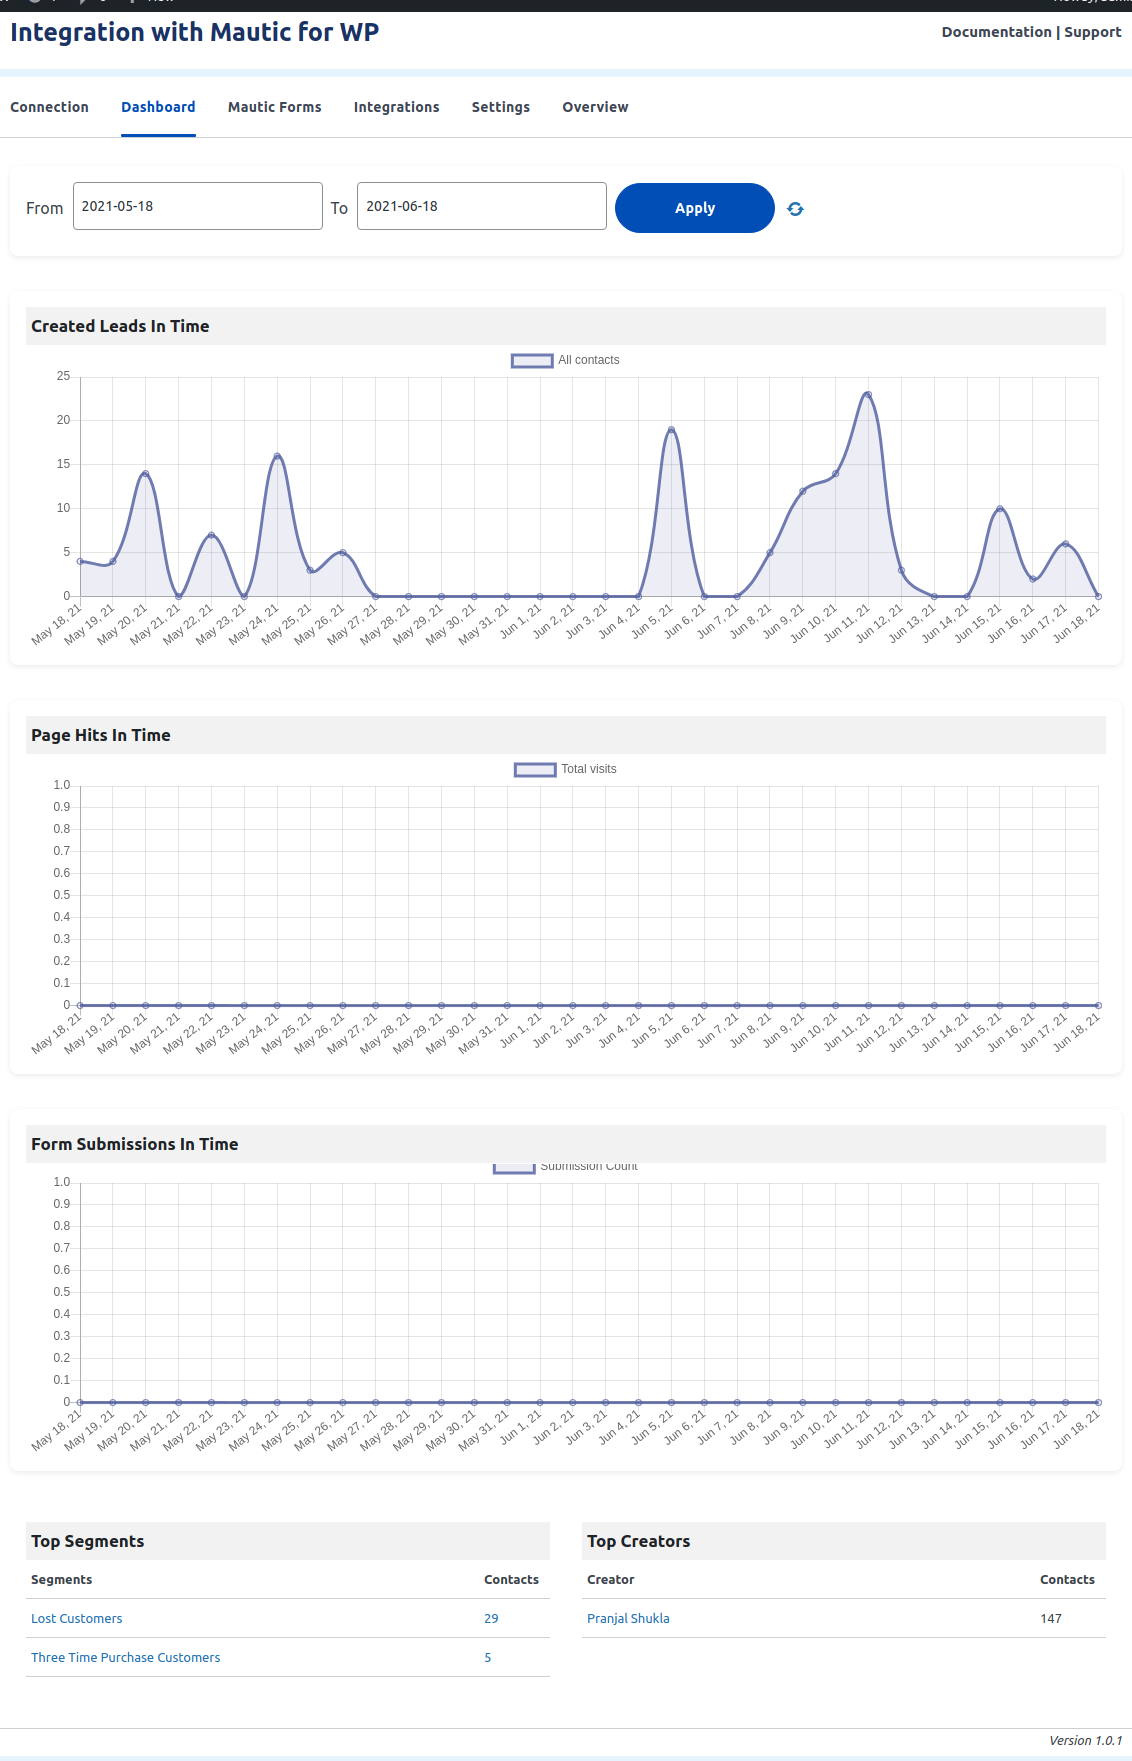
- Created Leads in Time
- Page Hits in Time
- Form Submissions in Time
- Top Segments
- Top Creators
3.4.Mautic Forms
All the forms that you have created in your Mautic CRM will reflect over your WordPress Admin panel in this section of the plugin.
This feature makes it easier for you to select the form which you wish to add to the web pages by simply copying the shortcodes present along with each form.
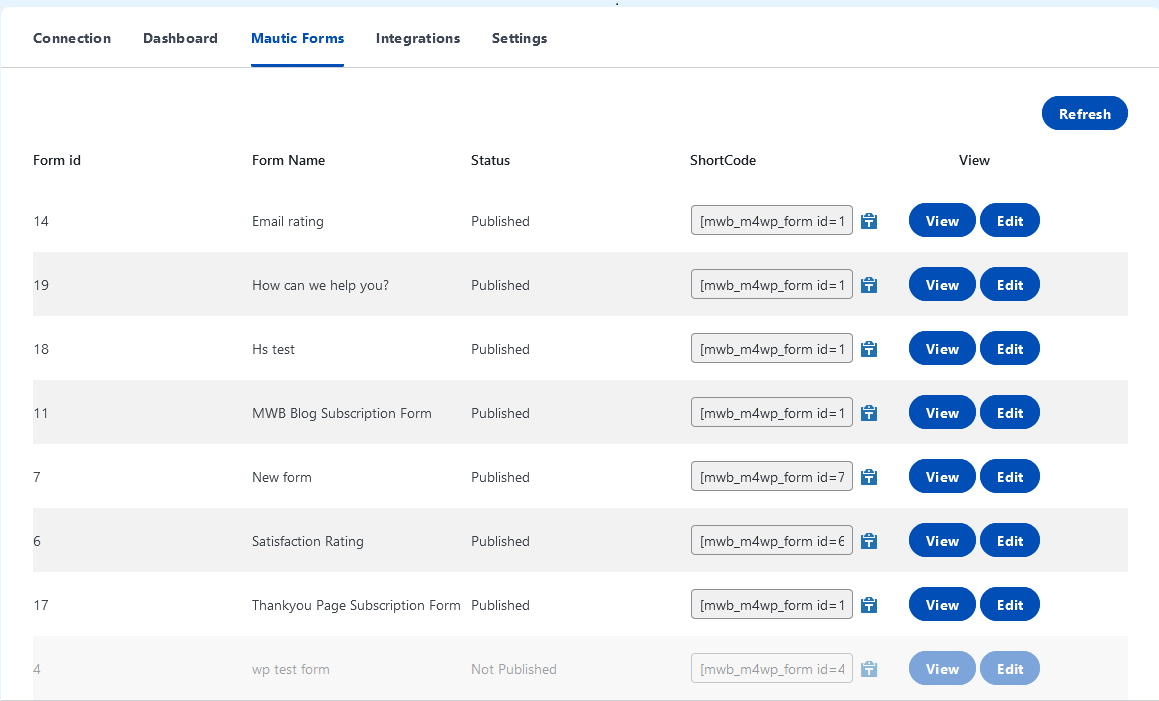
It also shows the form name and form ID along with the inserting shortcodes.
3.5.WordPress Integrations
This feature of the Integration with Mautic for WP plugin reflects the list of all the WordPress integrations that you’ve added to your website. It also provides you with the option to enable/disable the particular Add-on.
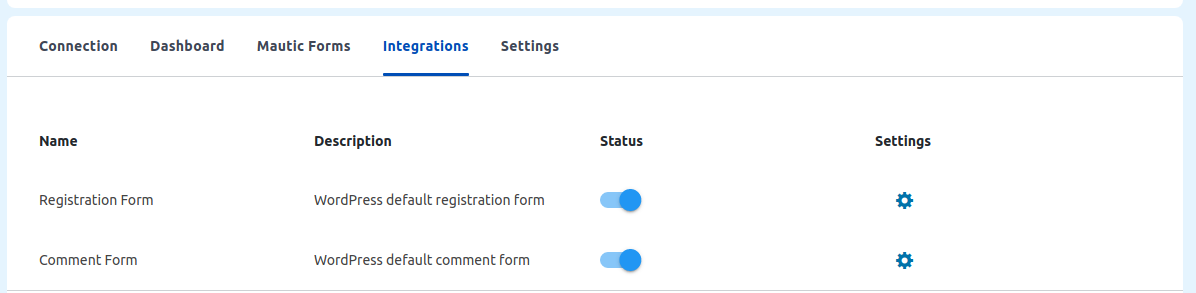
Once you enable the Add-on to integrate it with your website, you’ll see the “Settings” option. Under this Settings, you can easily configure the integrated plugin along with this Mautic WordPress plugin by adding segments and tags.
When you’ll click on the “Settings”, “Registration Form” and “Comment Form” integrations are present by default. To start working with them, toggle the status of the integrated form.
When you’ll enable the Registration Form integration, you’ll see a window like below.
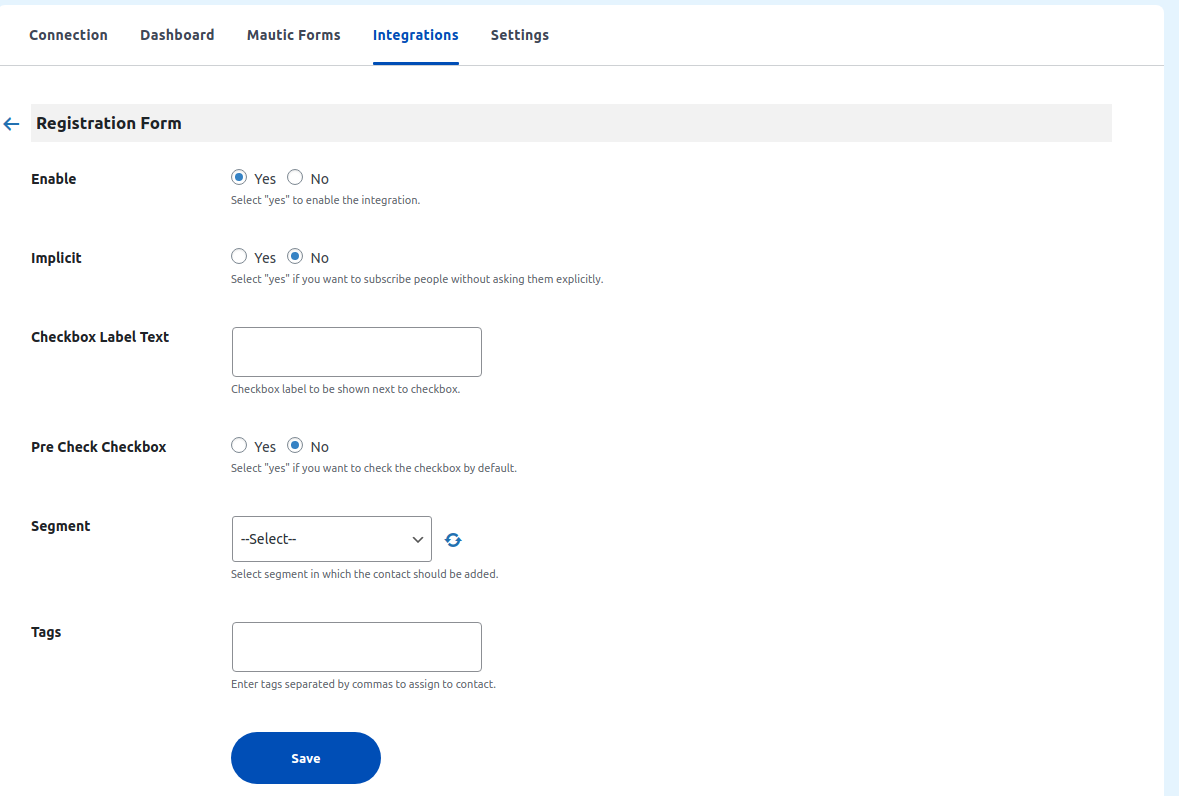
- Enable: Enable the integration
- Implicit: If selected No, it will add a checkbox in the respective form so the user can select if their data should be captured or not.
- Checkbox Text: Implicit checkbox text.
- Pre Check Text Box: Select yes if you want to pre-check the implicit checkbox.
- Segment: Select segment in which the contact should be added.
- Tags: Enter tags that should be added to contact.
Enter the required information and click on save.
3.6.Compatibility with WPEverest’s User Registration Form
This plugin is compatible with the User Registration Form. to sync your form data with Mautic CRM, you need to install & configure the plugin. Once you’re done with that, your plugin integration will reflect under the Integration menu of the Integrate Mautic with WP plugin’s dashboard.
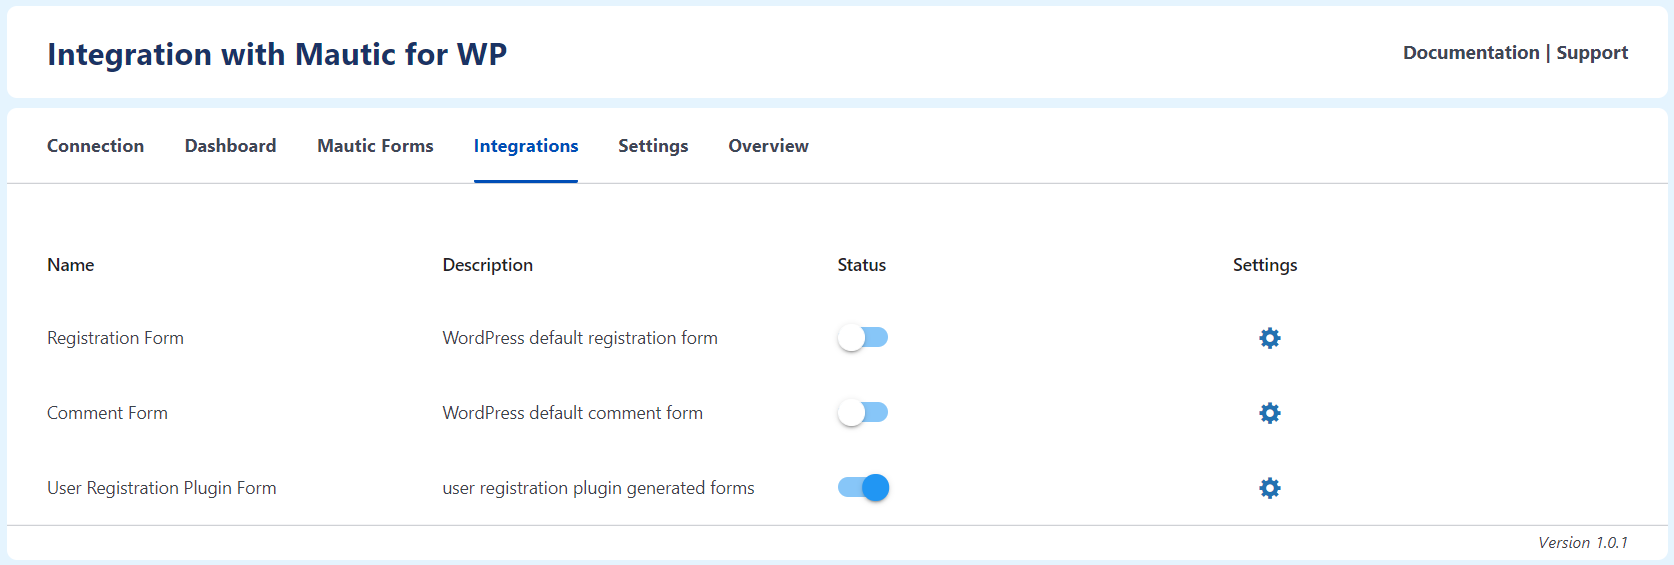
- Enable the status of the plugin by dragging the toggle button to the right.
- Go to Settings, to configure the data sync between the plugin form and Mautic CRM.
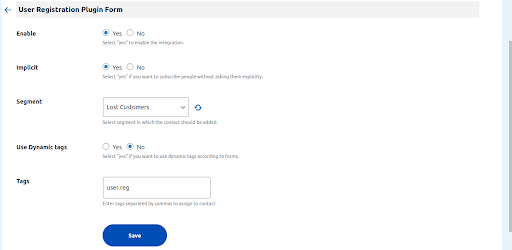
- Enable the form by selecting the Yes option.
- If you want to give a choice to your customers to subscribe to your website services while logging in with the form, select No in the implicit option, else select Yes.
- You can select the segment to be added in the form. Please note that the segment you select will remain common for all the forms designed using the user registration plugin forms.
- The “Use Dynamic Tags” option allows you to add dynamic/different tags for each form if selected Yes here like –
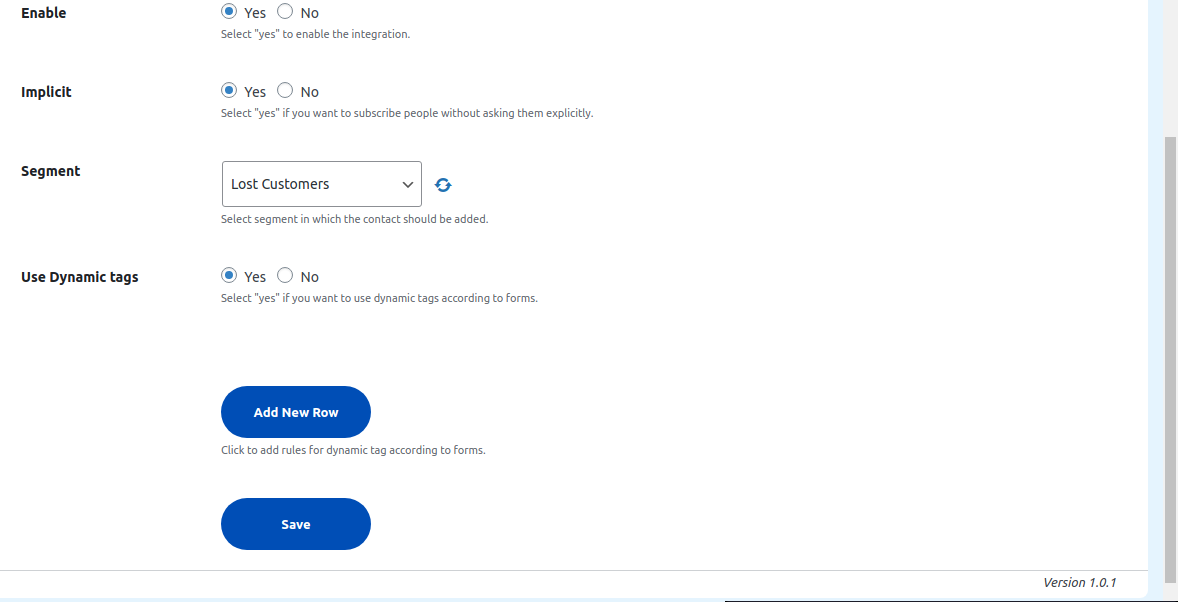
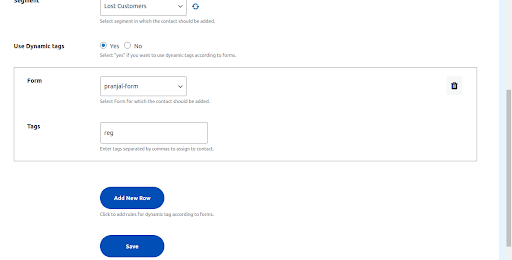
- Select No if you don’t wish to add separate tags for each form.
- Save your settings.
4.FAQs
2. I am not able to create the Oauth 2 API. What is the Redirect URL in Oauth 2 API in Mautic WordPress integration?
Start creating a new APP by filling invalid credentials. Select OAuth2 for an authorization protocol. Enter a new Name for the APP and Redirect URL. Your Redirection URL will be: https://your-site-url/wp-admin/
3. Is there any way to add the Mautic Forms in WordPress pages?
Yes in our Integration with Mautic for WP plugin there is a Setting Mautic Form. Your Form shortcode will list here you can copy this shortcode and add it to your existing post or pages.
4. Are there any possibilities to integrate the Registration Form (WordPress default registration form ) with your plugin Integration with Mautic for WP?
Yes, you can integrate the Registration Form (WordPress default registration form) to Mautic CRM, You only need to enable the Registration Form from the Integrations tab, You can also add the setting like tags and segment to sync the Registration Form data.
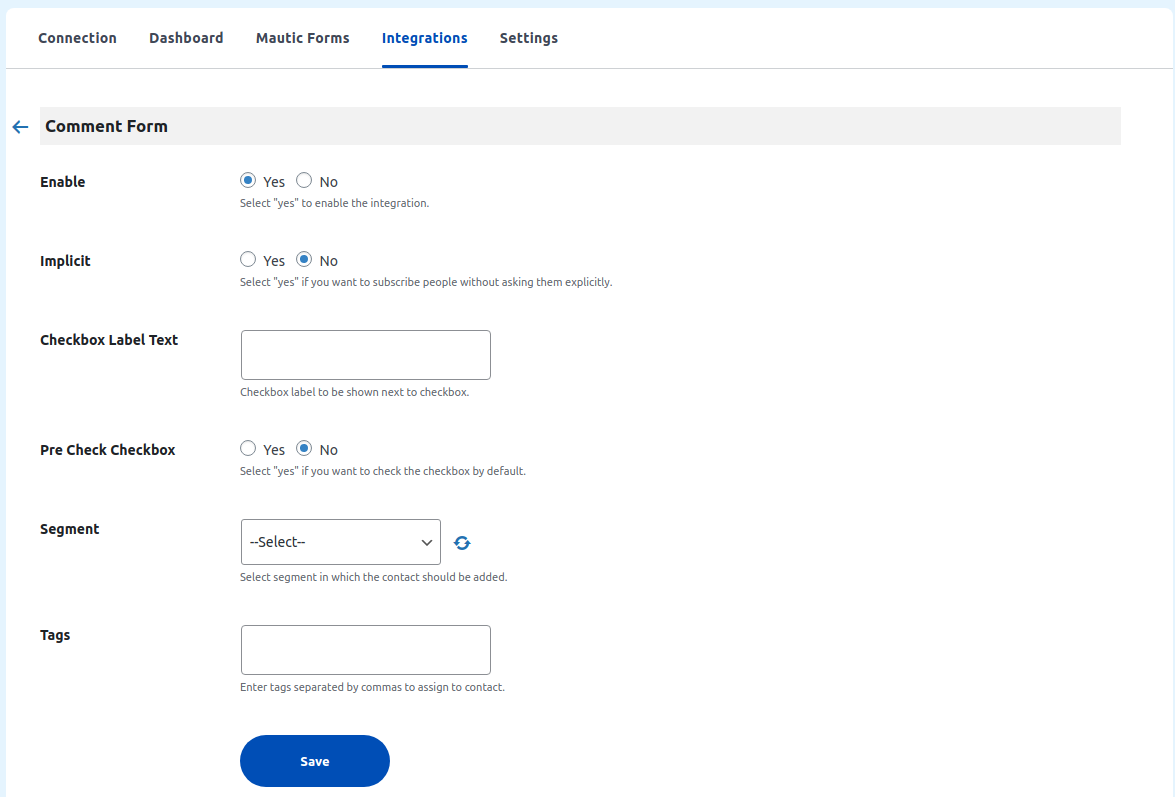
5. Are there any possibilities to integrate Comment Form (WordPress default Comment Forms) with your plugin Integration with Mautic for WP?
Yes, you can integrate the Comment Form (WordPress default Comment Forms) data to Mautic CRM, You only need to enable the Comment Form from the Integrations tab, You can also add the setting like tags and segment to sync the form data.