

1.Overview
2.Installation
1. Automatic Installation:
Automatic installation is the easiest option as WordPress handles the file transfers itself and you don’t need to leave your web browser.
The Steps are as follows:
- Log into your WordPress dashboard. Navigate to the Plugins menu and click Add New.
- Click on the Upload Plugin button.
- Click on the Browse button and navigate to the downloaded Integration with Mautic for WooCommerce Zip file and click OK.
- Most importantly, you can install it by simply clicking Install Now
2. Manual Installation:
The manual installation of the plugin is another option to install the extension to your WordPress environment. The manual installation method involves downloading our WordPress Extension and uploading it to your webserver via your favorite FTP application.
The Steps are as follows:
- Extract the downloaded Integration with Mautic for WooCommerce Zip file.
- Upload the Integration with Mautic for WooCommerce folder to the /wp-content/plugins/directory.
- Activate the Mautic integration plugin through the Plugins menu in WordPress.
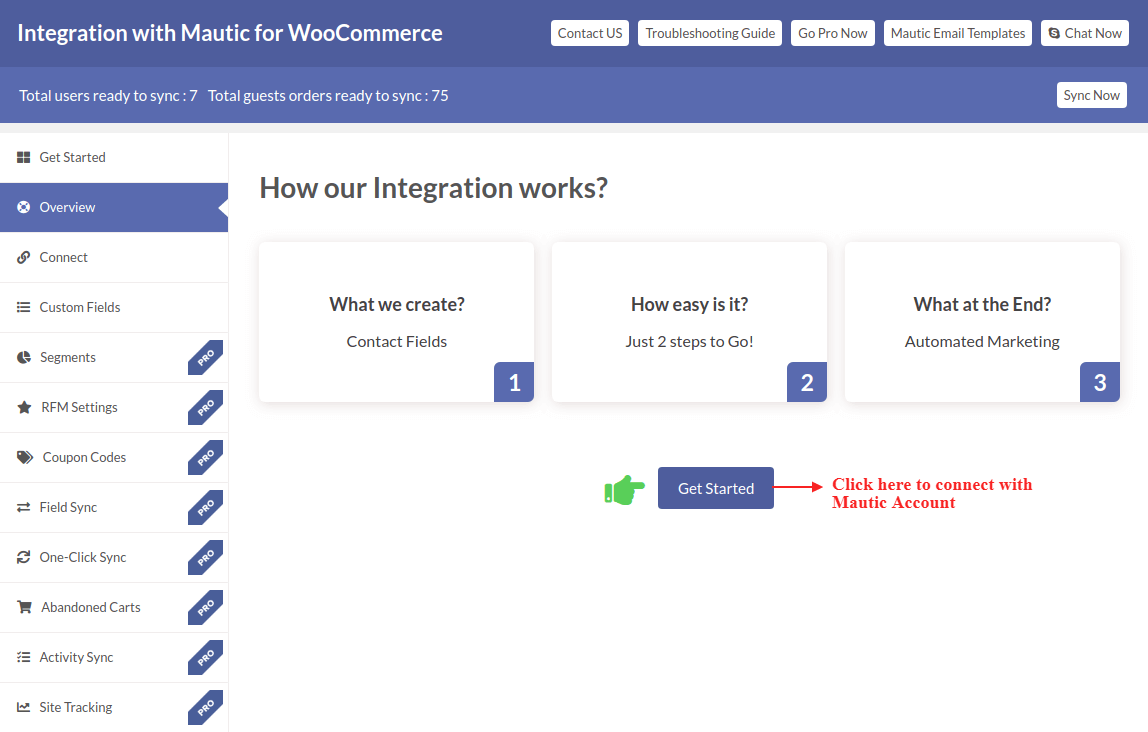
3.Workflow
After the successful installation and activation of the extension, the plugin’s overview section will appear to the administrator. This section explains how Mautic WooCommerce integration plugin works.
Click on the Get Started button to start setting up your Mautic Account.
3.1 Connection with Mautic Account
As soon as you click on the Get Started button, you’ll see the Connect tab that will ask you to fill Mautic Basic URL, Mautic Client ID, Mautic Secret ID.
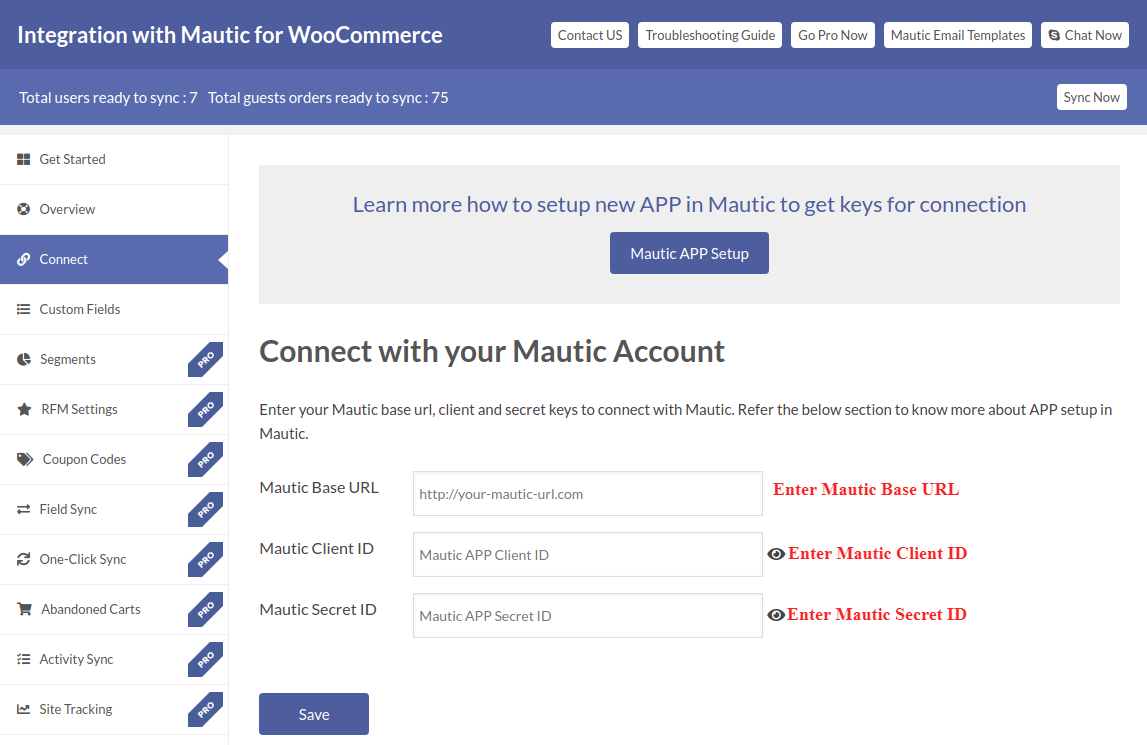
Note: Check this Setup Guide of the Mautic WooCommerce Integration App to know how to get these credentials.
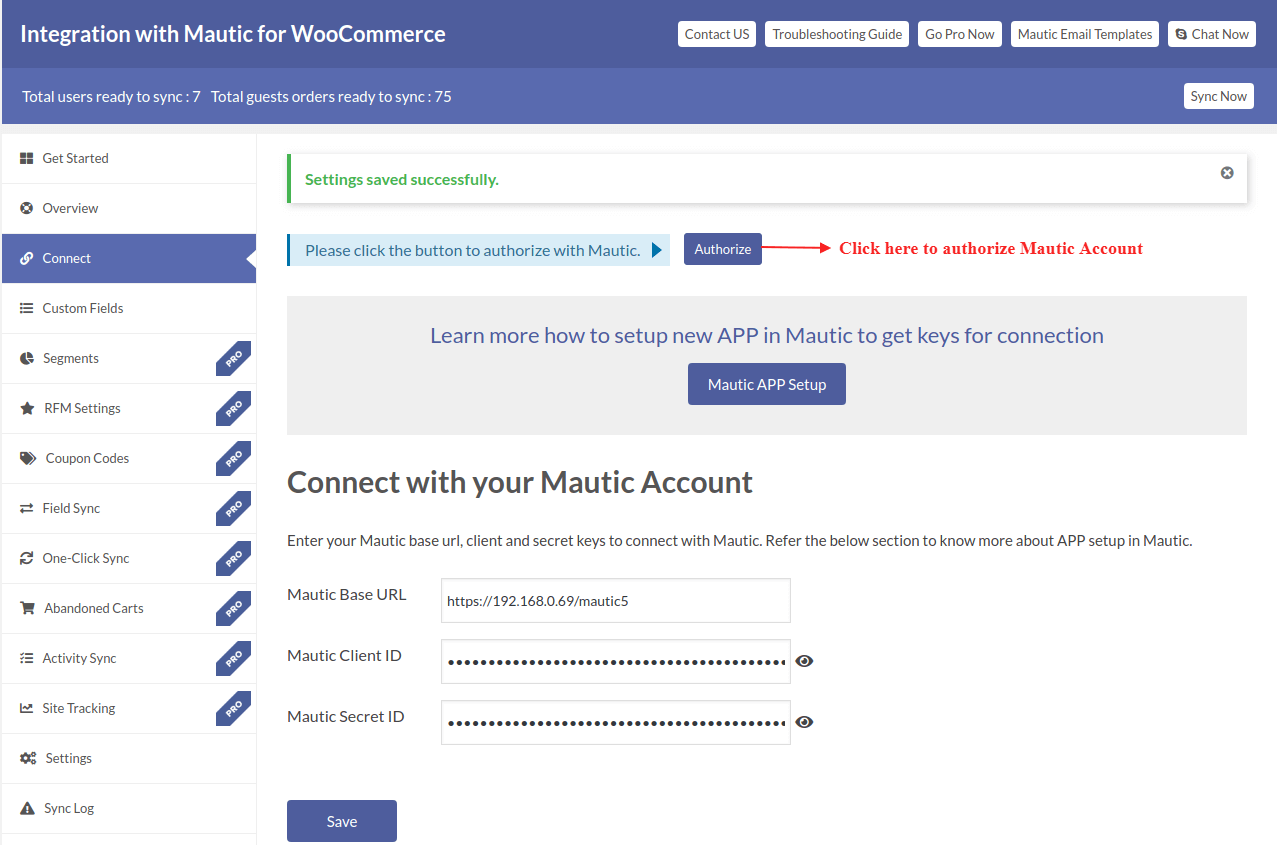
After validating the information filled by you, the Mautic integration plugin will ask you to authorize the Mautic account. Clicking on authorize button will take you to the Mautic login page. There you have to log in and provide access to Mautic App you created for connection.
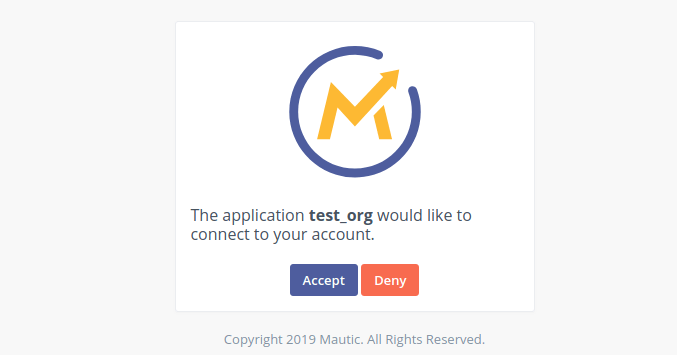
On the Mautic page, you have to allow access to Mautic APP to integrate your account with the extension.
3.2. Mautic Custom Fields
After successful verification and authorization, you will be taken back to the Mautic integration plugin page and here you can proceed to the next step.
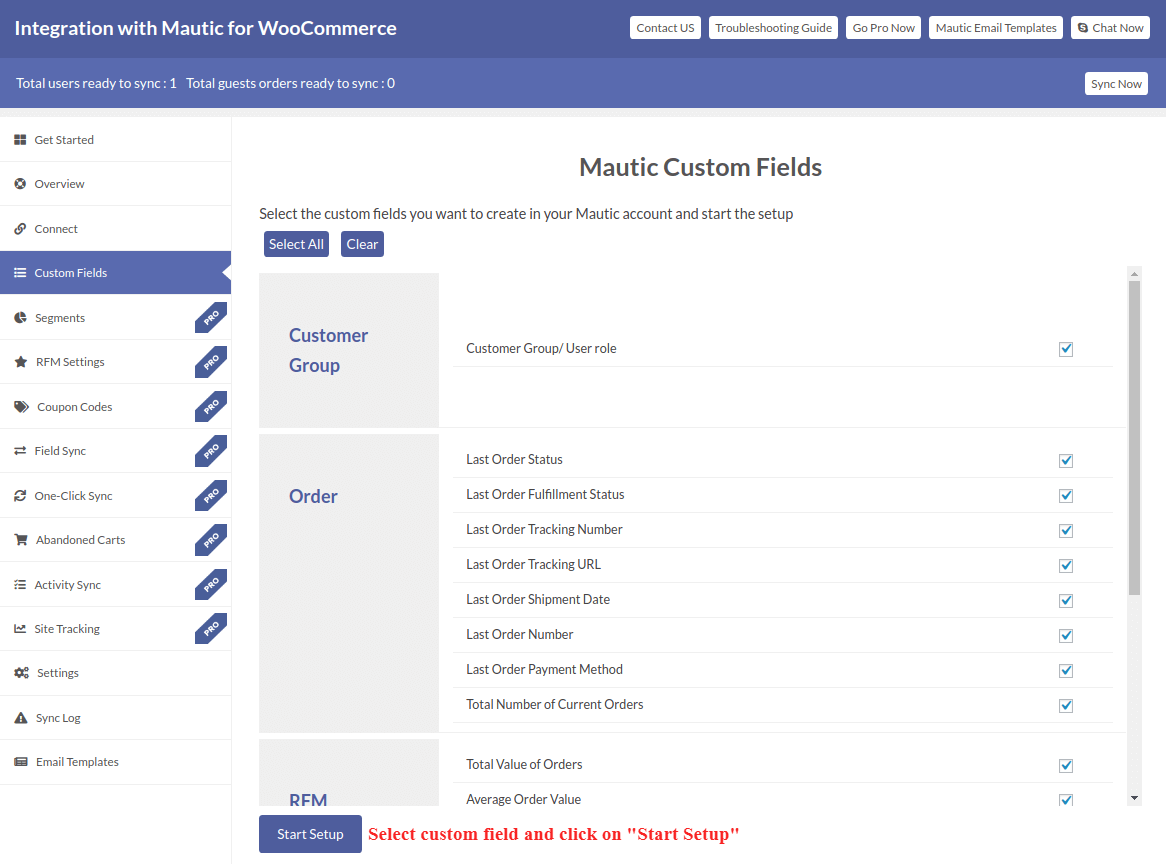
The next step will include creating Mautic custom fields for the contact’s data storage on Mautic. You will be asked for a confirmation before moving to the setup part. Integration with Mautic for WooCommerce plugin creates over 15 custom fields and you can choose either all of them by clicking on Select All or only the ones you need in your Mautic account by selecting them manually.
Once you choose the custom fields, click on Start Setup to proceed further.
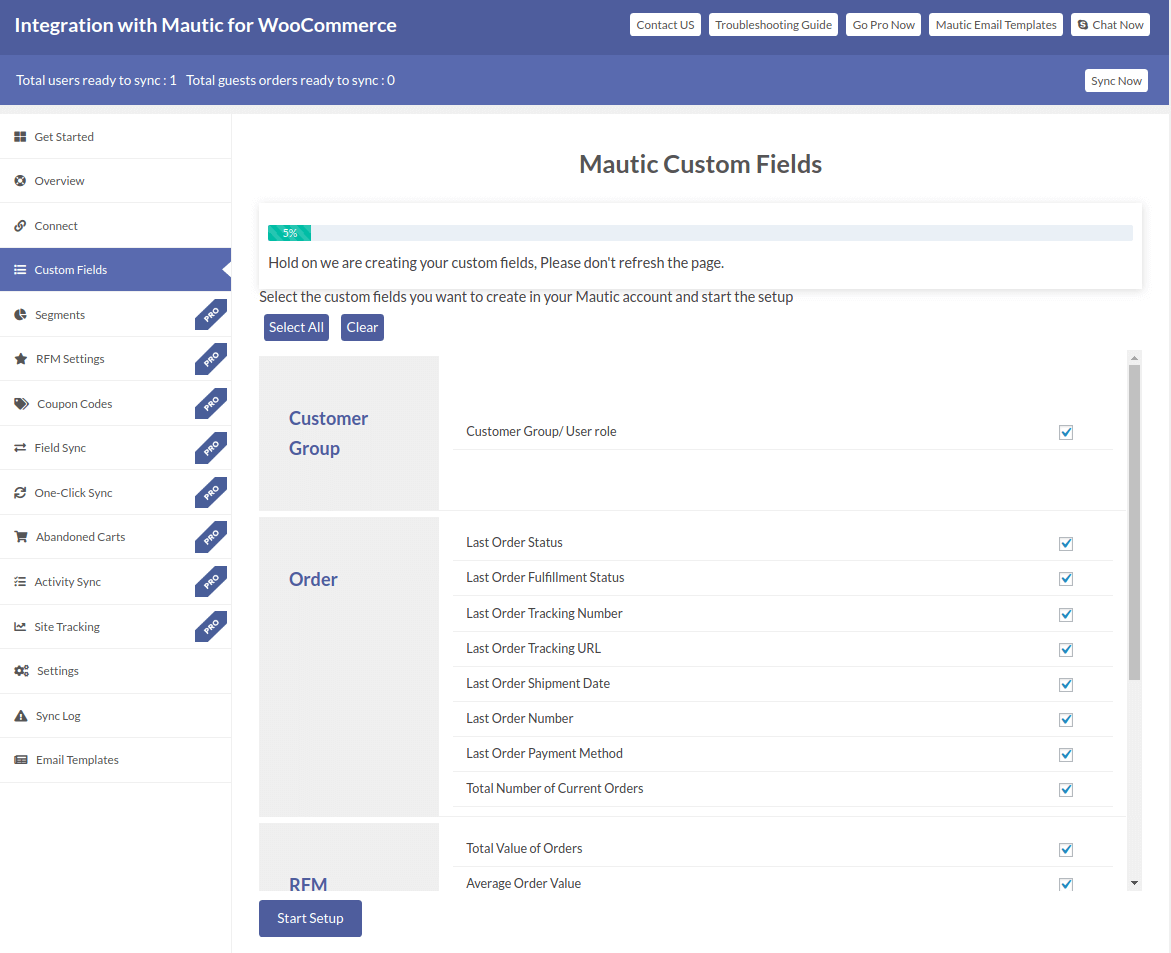
After clicking on the Start Setup button, the plugin will start creating the custom fields you chose. Mautic integration plugin will create all the fields one by one in your Mautic account.
The custom fields will appear like this in this Mautic WooCommerce Integration extension after getting created.
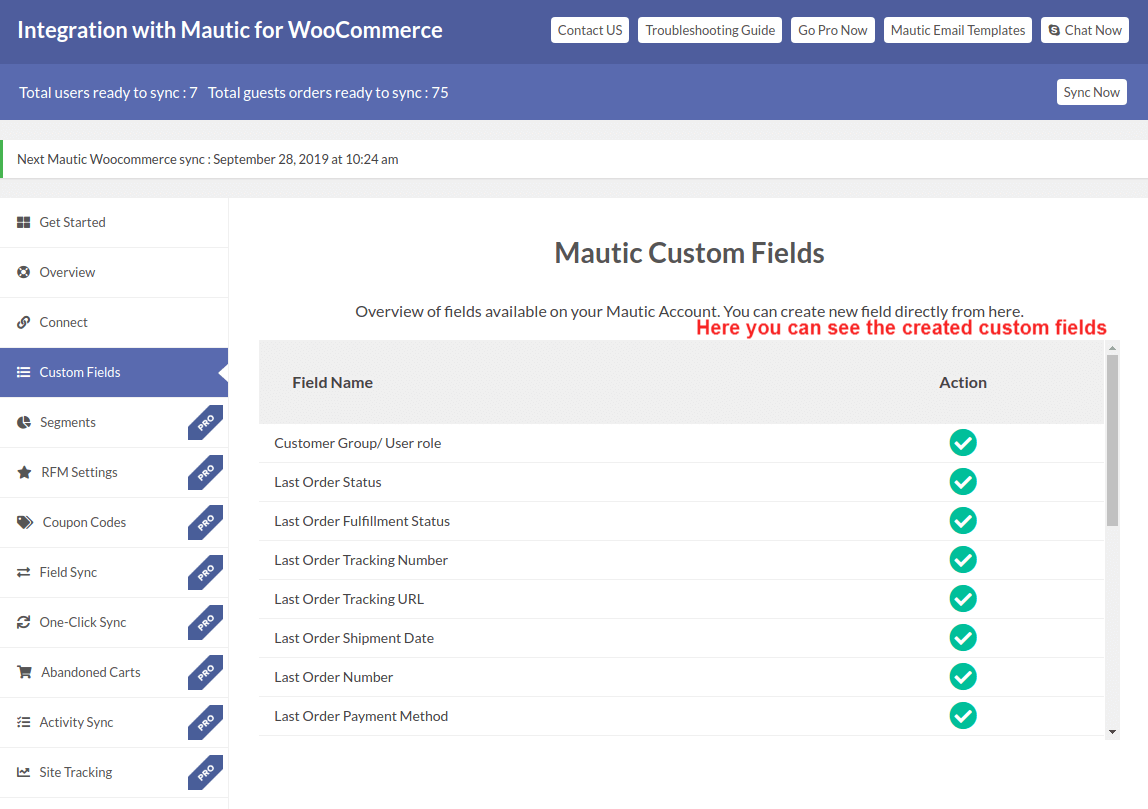
Here are the custom fields Integration with Mautic for WooCommerce plugin creates in Mautic:
1. Customer Group
-
- Customer Group/User role
2. Order
-
- Last Order Status
- Last Order Fulfillment Status
- Last Order Tracking Number
- Last Order Tracking URL
- Last Order Shipment Date
- Last Order Number
- Total Number of Current Orders
3. RFM Information
-
- Total Value of Orders
- Average Order Value
- Total Number of Orders
- First Order Value
- First Order Date
- Last Order Value
- Last Order Date
- Average Days Between Orders
- Account Creation Date
- Monetary Rating
- Order Frequency Rating
- Order Recency Rating
These custom fields will appear like this in your Mautic CRM. You can click on the toggle button to Enable/Disable the custom field. If you disable a custom field, no data will be sent in that custom field.
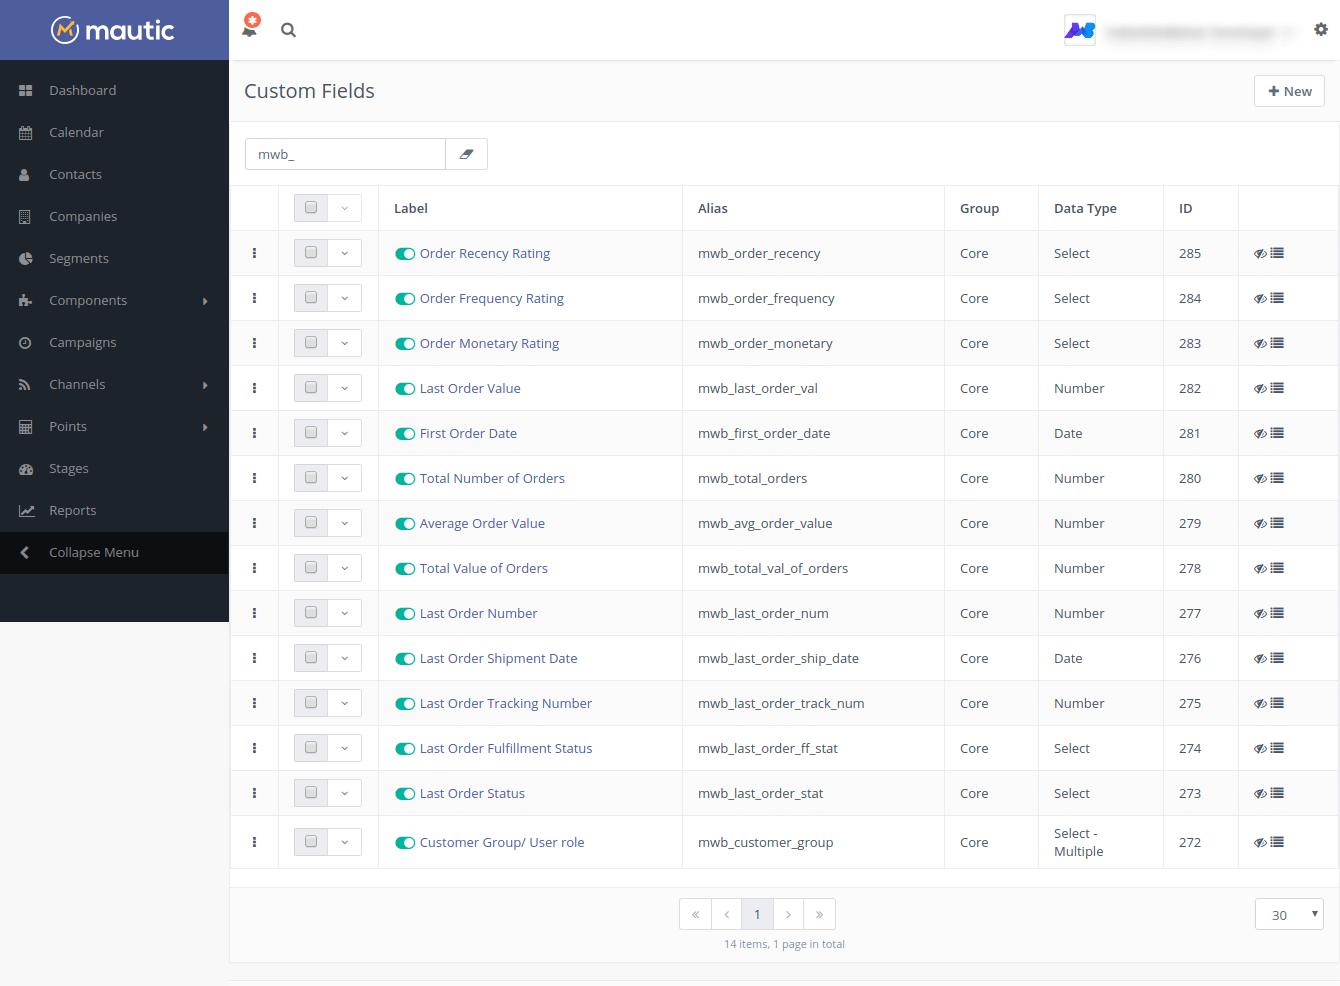
Through these fields, you can make your decision making task simple and effective as the fields will provide you with the real-time data of customers.
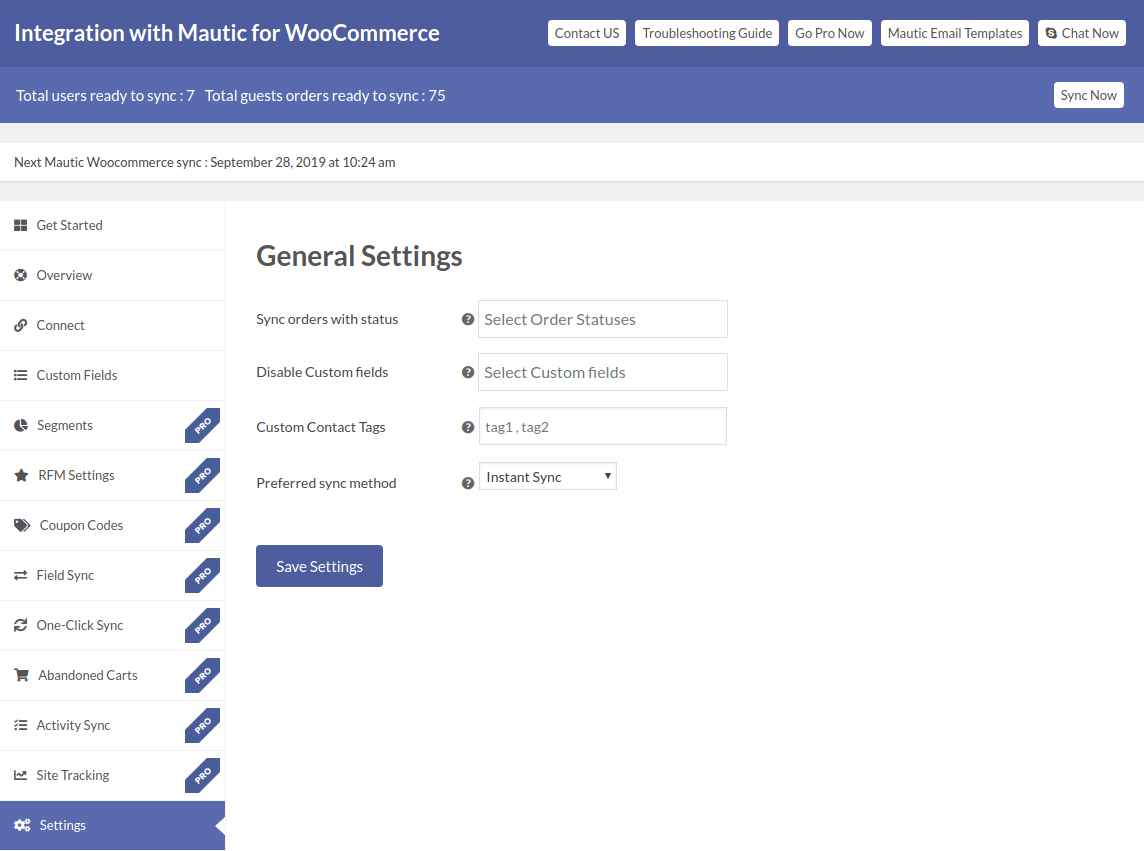
3.3. Settings
You can change the settings of the Mautic Integration plugin in this tab:
- Sync orders with statuses: The order with the selected order status only will be synced over Mautic CRM. If you don’t select any, all order status data will be synced.
- Disable Custom Fields: Select one and more fields you don’t want to be synced over Mautic.
- Custom Contact Tags: Enter one or more tags to assign each contact synced by the Mautic Integration plugin.
- Preferred Sync Method: Select a Sync method for your data. You can choose between Real-time Sync that will sync your data instantly or every 5 minutes that’ll sync your data every 5 minutes. However, your abandoned cart data will still be synced every 5 minutes.
3.4. Sync Log
You can see all Error logs easily detected by Mautic WooCommerce Integration extension here.

5.FAQs
What should I do? I can’t see the API Credentials section in Mautic.
If your Mautic doesn’t show up API Credentials section in side menu then please make sure that API is enabled in your mautic account. The same can be achieved from Settings > Configuration > API Settings. Please mark the API enabled checkbox to “YES” and your Mautic account will be enabled for API.
Why the plugin is not getting redirected back and showing some Mautic error?
Please make sure you are using correct Mautic base URL and connection keys for authorization. Make sure that the redirect URI set in Mautic APP is same as your wordpress URL( or you can copy the Redirect URI from the APP setup guide directly ).
Real time user data in not syncing properly. Why?
Please make sure you have completed the fields setup for the plugin. Go to the Settings section and select the sync method. You get two options here, Instant Sync that syncs data in real time and In Every 5 minutes that syncs data in every 5 minutes.
I am new to Mautic. How can I get Mautic to download?
Mautic is an open source crm and can be easily downloaded from Mautic.org
Custom fields are created but contacts are not syncing over mautic?
Please check your mautic version. The latest release of mautic i.e. Version 2.15.1 has some issues with custom multi-select fields. Please check for multi-select fields in mautic dashboard and turn them off also disable the same field from plugin settings. The contact syncing should work fine after that